TL;DR
- Unlock Dazzle Beach with 5000 Dreamlight before starting this questline
- Solve the three gem statue puzzle using Peridot, Aquamarine, and Garnet
- Complete crop growing challenge with strategic seed placement and timing
- Follow specific fishing and cooking steps to obtain the final Orb of Power
- Use our optimized checklist to complete the quest efficiently
This comprehensive walkthrough provides step-by-step solutions for every challenge in the “With Great Power…” questline, including advanced strategies to save time and avoid common mistakes.
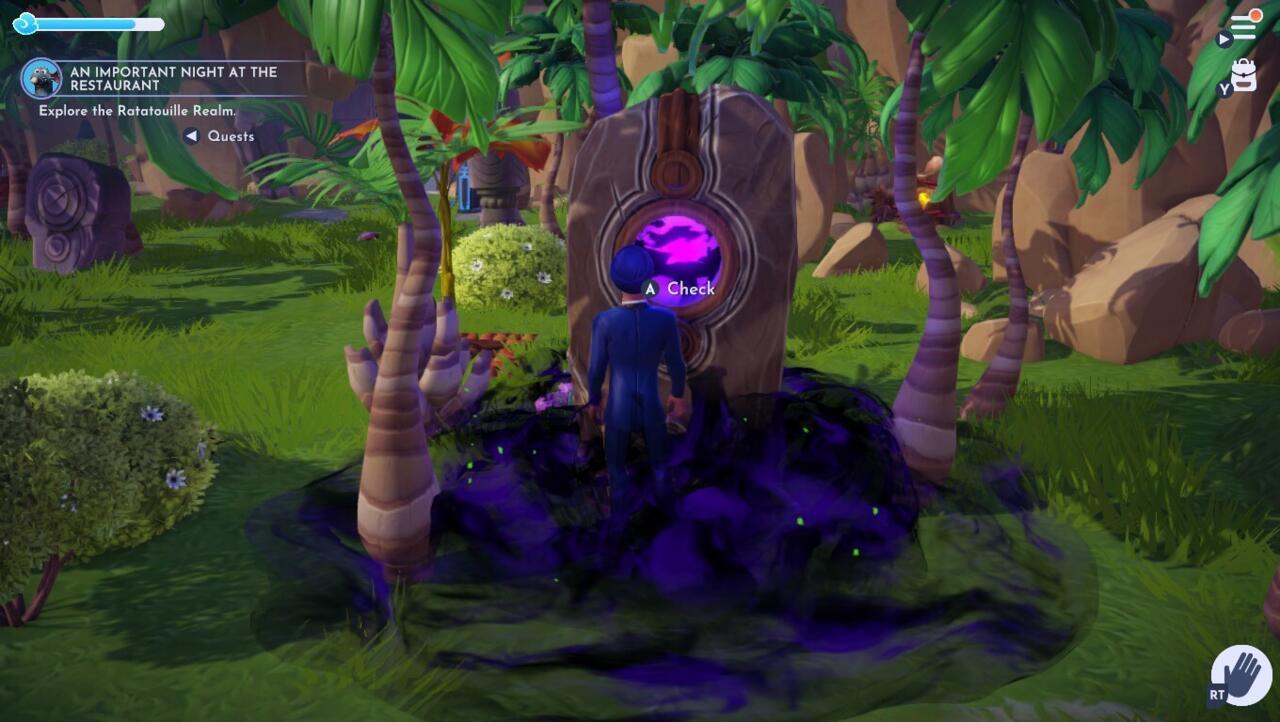
In Disney Dreamlight Valley, Merlin assigns this pivotal quest early in your adventure, presenting multiple objectives with clever riddles that test your problem-solving skills. You’ll undertake a series of trials to demonstrate your worthiness to rescue Dazzle Beach from The Forgotten’s influence and restore its magical Orb. Our guide ensures you navigate each phase efficiently from initiation to completion.
Before attempting this quest, ensure you’ve unlocked the Dazzle Beach biome, which requires 5000 Dreamlight. This coastal area is located in the southeastern region of your valley map. Once accessible, proceed to the northeastern section of Dazzle Beach and enter the cave emitting shadowy mist from its opening.
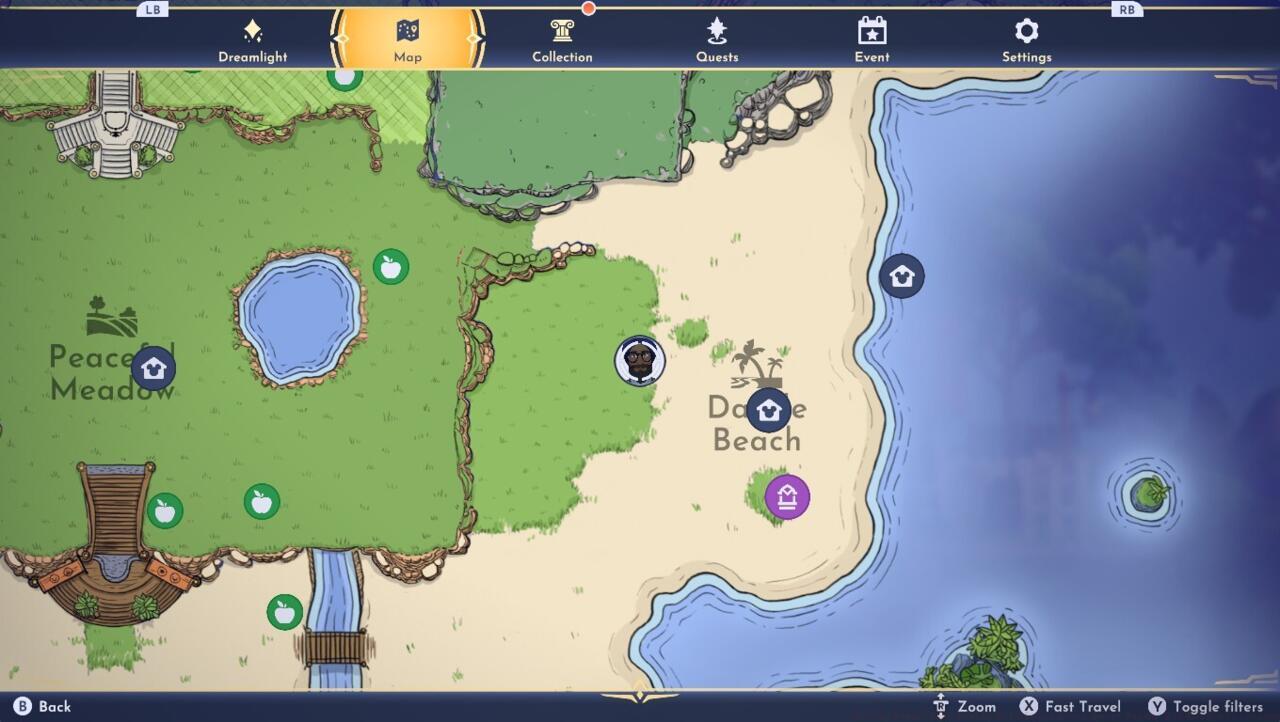
The exact location of where you need to place the Orb of Power for Dazzle Beach
Upon entering the misty cave, you’ll encounter Ursula, the Sea Witch, isolated in her confinement. Conversing with her reveals she’s trapped and requires assistance to escape. Ursula provides a Crystal Key to unlock a separate cave entrance on Dazzle Beach. Take this key and position it on the small pillar located northwest of the Dazzle Beach fast-travel Well.
Strategic placement tip: The pillar is easily missed as it blends with the environment. Look for a subtle glow near the coastline, approximately 50 paces from the well. Many players overlook this detail, causing unnecessary backtracking.
After successfully placing the Crystal Key, you can access the newly revealed entrance. Descending the staircase leads to your initial puzzle challenge, where three imposing statues await with outstretched hands.

After placing the three gems for each of their statues, and opening the doorway to the next puzzle.
Each statue corresponds to a specific gem color alignment: green positioned left, blue centered, and red positioned right. Your task involves placing the appropriate gemstone on each statue’s waiting hand.
The left green statue requires Peridot. The central blue statue needs Aquamarine. The right red statue demands Garnet. Consult our comprehensive Gem Guide for precise mining locations of these and all other valley gems.
Pro tip: Mine during rainstorms for increased gem yield rates. Additionally, equip mining-related companions to boost your chances of obtaining rare gems faster. After correctly positioning Peridot, Aquamarine, and Garnet, the magical barrier dissipates, granting access deeper into the cavern.
Common mistake alert: Players often confuse Emerald with Peridot. Remember that Peridot has a distinctive yellowish-green hue, while Emerald appears deeper green.
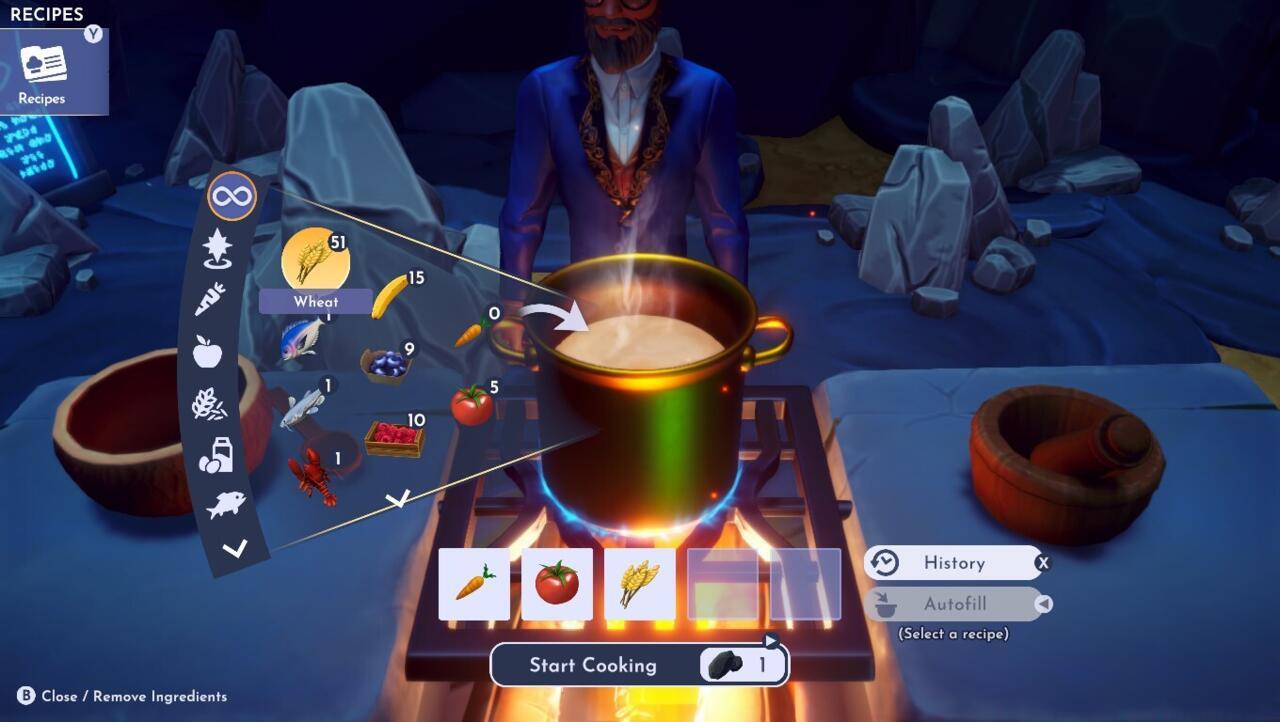
Using the cave’s kitchen to combine one carrot, one tomato, and one wheat for this next challenge.
The subsequent puzzle challenges your agricultural skills, requiring crop cultivation on any of the three soil patches before the statues. You’ll need Tomato Seeds, Carrot Seeds, and Wheat Seeds. After sowing one of each seed type and watering them, patiently await their maturation to harvesting readiness.
Reference our ingredients guide combined with Goofy Stall locations guide to understand exact growth durations for tomatoes, carrots, and wheat, plus where to acquire each seed variety. Crucially, refrain from harvesting individually—wait until all three crops reach complete maturity simultaneously.
Growth timing optimization: Tomatoes require 25 minutes, carrots need 15 minutes, and wheat grows in just 1 minute. Plant in reverse order: wheat first, then carrots, finally tomatoes to achieve synchronized readiness.
Advanced strategy: Use this waiting period to gather additional resources or complete other quest objectives. Set a timer to avoid forgetting your crops, as over-ripening doesn’t occur in Dreamlight Valley.
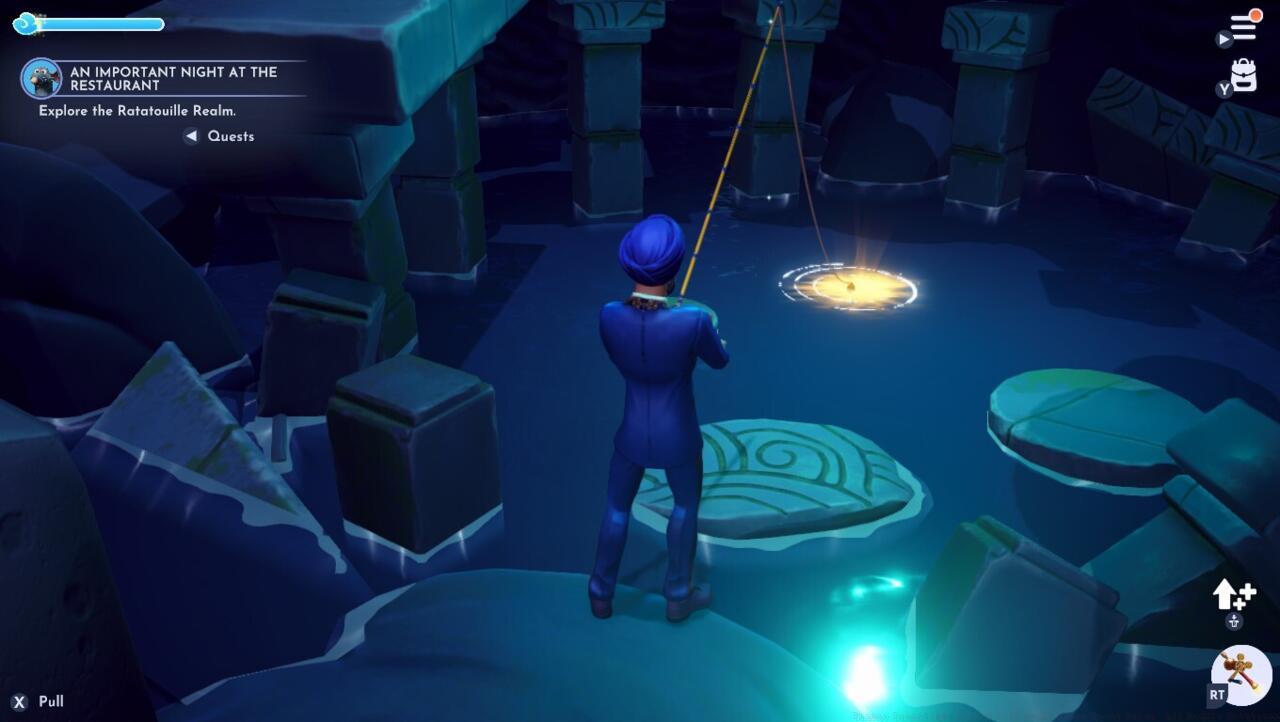
By fishing the sole golden ripple at the bottom of the cave, there will be a treasure to discover.
After successfully navigating the crop challenge, proceed to the cave’s cooking station. Combine one carrot, one tomato, and one wheat to create the required dish. This culinary creation serves as your ticket to the final phase.
Fishing technique: Look for the distinctive golden ripple at the cavern’s base. Cast precisely into this sparkling water to uncover hidden treasure essential for quest progression.
By interacting, and placing the newly found Orb of Power, you can quell The Forgotten on Dazzle Beach.
Through interaction and strategic placement of the newly acquired Orb of Power, you can pacify The Forgotten’s influence on Dazzle Beach, restoring balance and completing your heroic trial.
Quest completion rewards include significant friendship boosts with Merlin and Ursula, unique decorative items, and progression toward unlocking additional story content. The restored Orb of Power becomes a permanent fixture on Dazzle Beach, symbolizing your growing mastery over the valley’s magic.
Time-saving insight: Complete this quest during a single gaming session to maintain puzzle solutions in memory. Taking breaks between puzzles often leads to confusion and repeated attempts.
Action Checklist
- Verify Dazzle Beach unlocked with 5000 Dreamlight
- Locate misty cave on northeast Dazzle Beach
- Place Crystal Key on northwest pillar near fast-travel well
- Solve gem puzzle: Peridot (left), Aquamarine (center), Garnet (right)
- Plant crops in reverse order: wheat → carrots → tomatoes
- Cook combined dish and fish golden ripple for Orb
No reproduction without permission:SeeYouSoon Game Club » Disney Dreamlight Valley With Great Power Quest Guide: All Riddle Solutions Complete guide to solving all puzzles and challenges in Disney Dreamlight Valley's With Great Power quest