TL;DR
- Complete San Bakar’s Trial main quest to unlock Graphorn access
- Use only red spells and Ancient Magic to damage the creature effectively
- Choose between kneeling or attacking during the final interaction scene
- The Graphorn serves as the game’s exclusive ground mount with combat capabilities
- Additional Graphorns can be captured for your Vivarium after the initial encounter
Hogwarts Legacy offers players the opportunity to acquire both a Graphorn mount and companion creature, providing unique gameplay advantages. Unlike typical magical beasts that flee when approached, this formidable creature presents a significant combat challenge that requires strategic preparation.
The Graphorn stands apart from other Fantastic Beasts due to its aggressive nature and powerful combat abilities. While most creatures initiate capture minigames when spotted, this deadly beast demands a full boss-level encounter. Our comprehensive guide delivers essential strategies for securing this magnificent mount and locating additional specimens in the wilderness post-acquisition.
Before embarking on this challenging quest, we strongly recommend familiarizing yourself with Vivarium mechanics through our dedicated magical beasts guide. This knowledge proves crucial for understanding creature management and Room of Requirement functionality. Importantly, the Graphorn represents the solitary ground-based mount available in the game. Access remains locked until completing San Bakar’s Trial, which occurs during the final stages of the main storyline. Consequently, players must advance through the primary narrative until this quest appears in their journal.
Upon initiating San Bakar’s Trial, journey to Cragcroft Shore situated in the southern region of the world map. Clear the obstructive vines using Incendio or Confringo spells to uncover a hidden Graphorn carving. This discovery triggers your primary objective: capturing a live Graphorn specimen.
The creature’s lair resides in Clagmar Coast at the extreme southeastern corner of the map. Utilizing your broomstick or any flying mount significantly reduces travel time to this remote location.
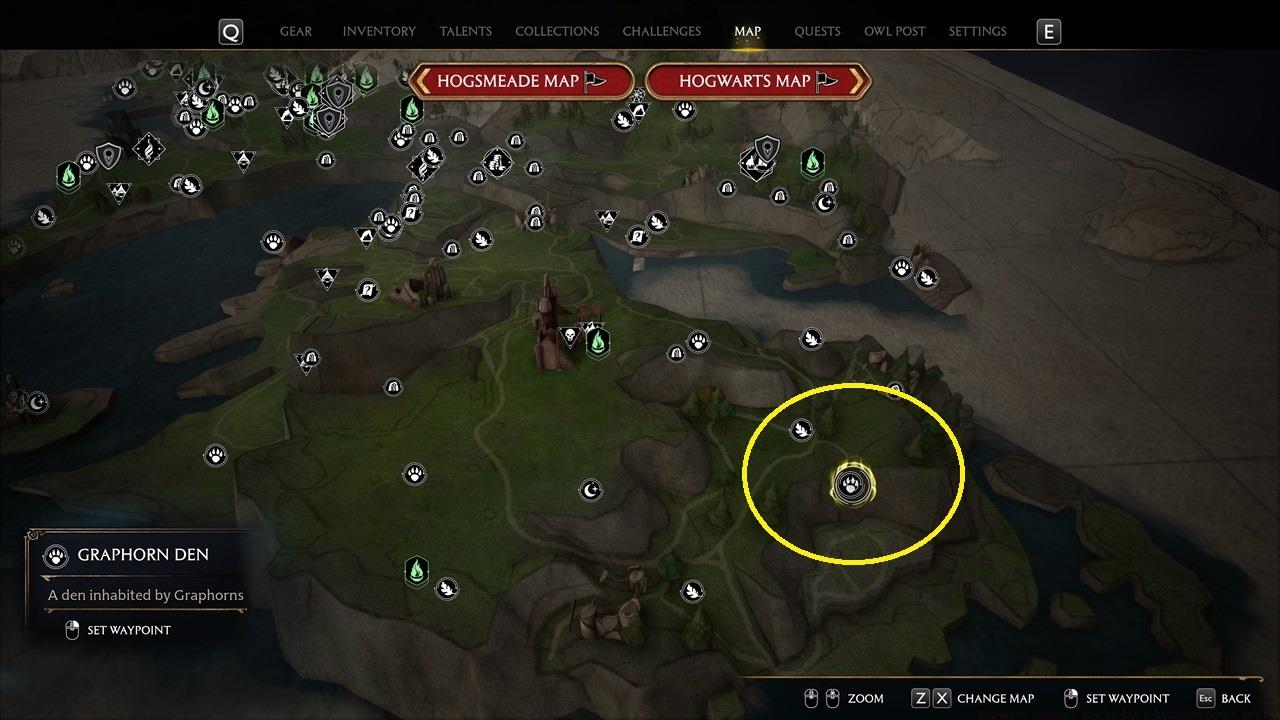
Most late-game quests take place in the southern half of the map. This particular creatures lair is found in the southeast.
Advanced players should note that most end-game content clusters in the southern territories. The Graphorn’s den represents one of the most remote locations, requiring thorough exploration of previously undiscovered map regions.
The Hogwarts Legacy Graphorn differs substantially from previously encountered Fantastic Beasts, functioning as a proper boss battle rather than a simple capture sequence. Its attack patterns remain relatively straightforward, consisting primarily of charging maneuvers and powerful ramming assaults. However, its exceptionally durable hide provides substantial damage resistance that demands specific spell selection.
Beyond your Ancient Magic and Ancient Magic Throw abilities, only offensive red spells prove effective against this creature. Focus on utilizing Expelliarmus, Incendio, Confringo, and Bombarda to systematically reduce its health pool during the engagement.
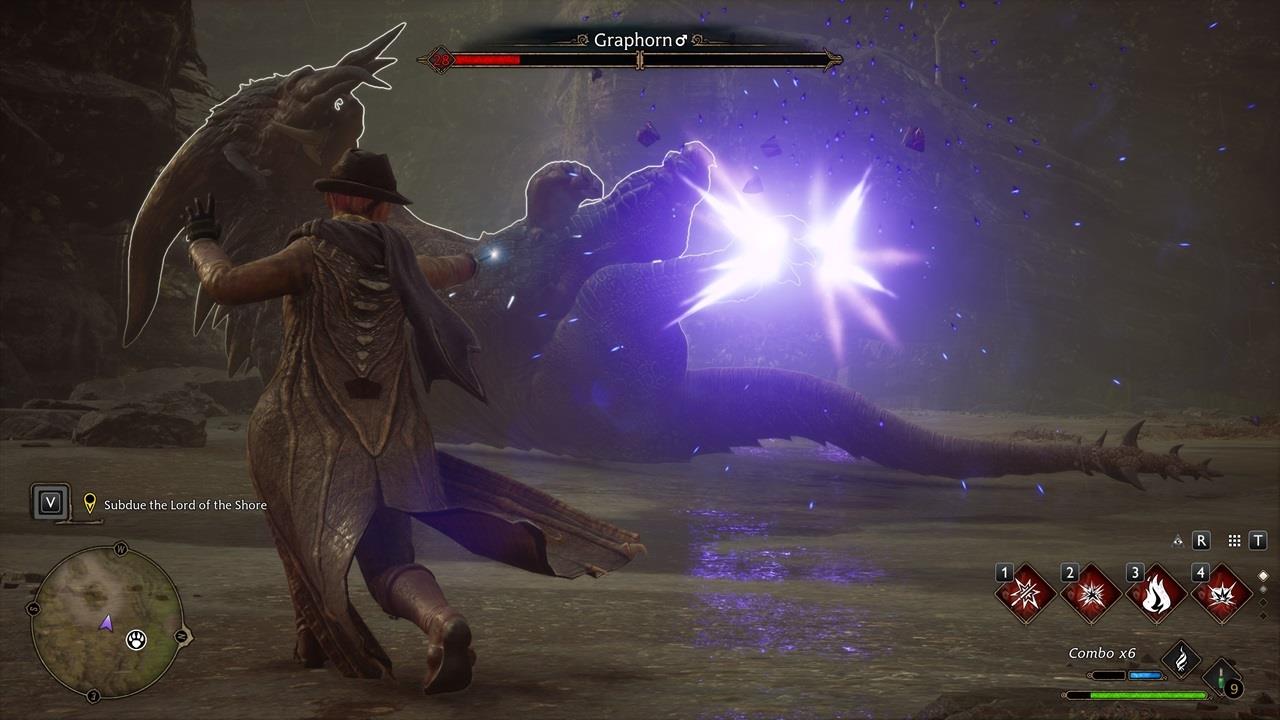
Only Ancient Magic, Ancient Magic Throw, and red spells deal damage to the creature.
Maintain constant focus during combat and employ timely dodge-rolls to evade incoming attacks. After successfully defeating the beast, a brief cinematic sequence plays, presenting a critical narrative decision point with two distinct options:
- Kneel – Demonstrate peaceful intentions and non-threatening behavior toward the creature
- Attack – Establish dominance through forceful subjugation of the beast
Strategic spell rotation proves essential for success. Begin with Confringo for initial damage, follow with Bombarda when available, and use Ancient Magic throws during cooldown periods. Avoid using basic casts or non-red spells as they inflict minimal damage against the Graphorn’s resilient hide.
Following your successful encounter, the Graphorn becomes available as both a mount and potential Vivarium resident. As the exclusive ground mount in the game, it provides unique traversal capabilities and offensive potential during exploration.
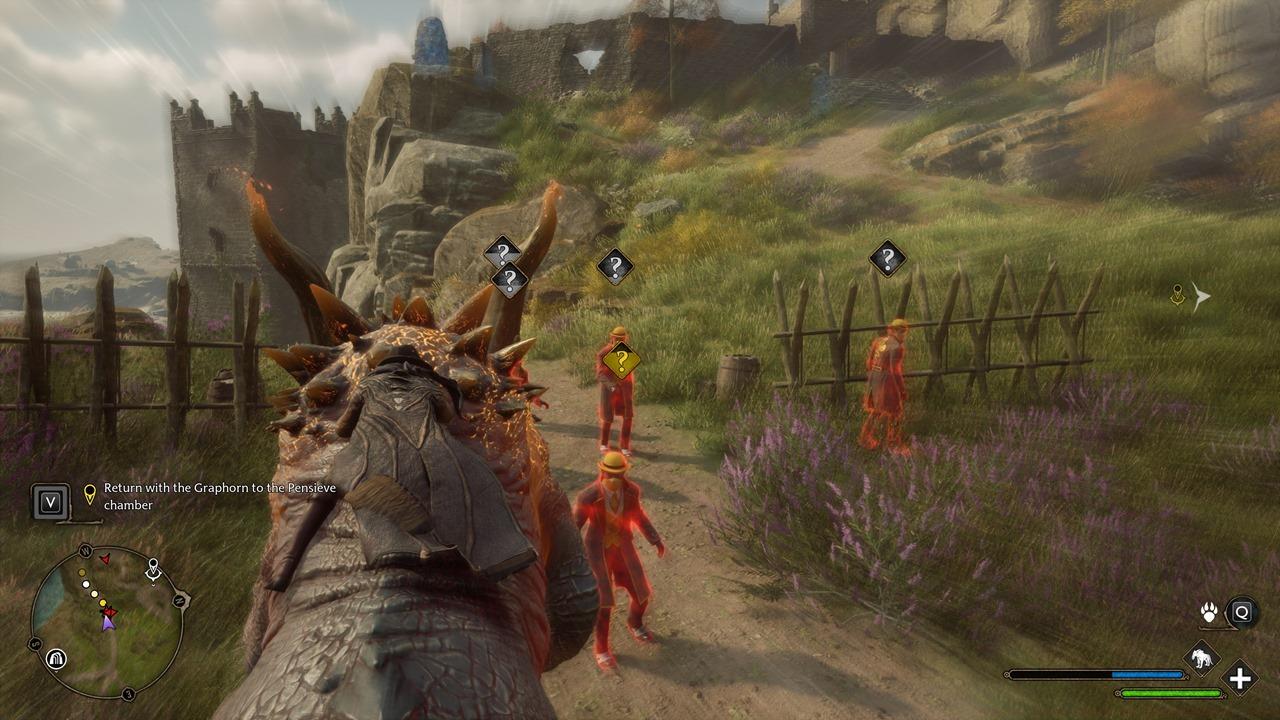
This is the only ground mount in the game, but it lets you bulldoze your foes.
The creature’s combat utility extends beyond mere transportation, allowing players to charge through enemy formations and disrupt combat encounters. This bulldozing capability provides tactical advantages during overworld exploration and enemy engagements.

You can have additional Graphorns in your Vivarium.
Post-quest, players can return to the Graphorn den to capture additional specimens for their Vivarium. These creatures can be bred for additional resources or simply kept as companions. For comprehensive gameplay strategies, consult our Complete Guide to maximize your overall experience.
Advanced players should consider optimizing their spell loadouts before attempting this encounter. Equip talent-enhanced red spells and ensure your dodging mechanics are well-practiced. Common mistakes include underestimating the Graphorn’s charge range and attempting to use ineffective spell types during the battle.
Action Checklist
- Progress through main story until San Bakar’s Trial unlocks
- Travel to Cragcroft Shore and reveal Graphorn carving with fire spells
- Navigate to Clagmar Coast Graphorn den using broomstick for faster travel
- Engage in combat using only red spells and Ancient Magic
- Choose between kneeling or attacking during the final interaction
- Return to den later to capture additional Graphorns for Vivarium
No reproduction without permission:SeeYouSoon Game Club » Hogwarts Legacy – How To Get A Graphorn Mount And Pet Complete guide to obtaining the powerful Graphorn mount through San Bakar's Trial in Hogwarts Legacy