TL;DR
- Moth Mirrors require Lumos casting and moth retrieval from nearby locations
- Symbol Doors involve solving mathematical equations using animal-number conversions
- Merlin Trials expand gear capacity and require varied spell applications
- Disillusionment is essential for approaching Eyeball Chests undetected
- Nighttime collection is mandatory for obtaining Demiguise Statues
Hogwarts Legacy immerses players in a world brimming with magical conundrums that appear throughout the castle grounds and surrounding territories. While many of these repeating challenges follow straightforward patterns, several can prove perplexing without understanding the specific incantations required. Certain puzzles remain inaccessible until advancing through key story missions, meaning you may encounter obstacles you cannot immediately resolve. This comprehensive guide details every category of recurring puzzle in Hogwarts Legacy and provides proven methods for conquering them.
Understanding puzzle mechanics early provides significant advantages, as many challenges reward valuable collectibles, gear upgrades, and character progression enhancements. The game’s design encourages exploration and experimentation with different magical abilities.
Mastering Moth Mirror challenges requires strategic spellcasting and navigation.
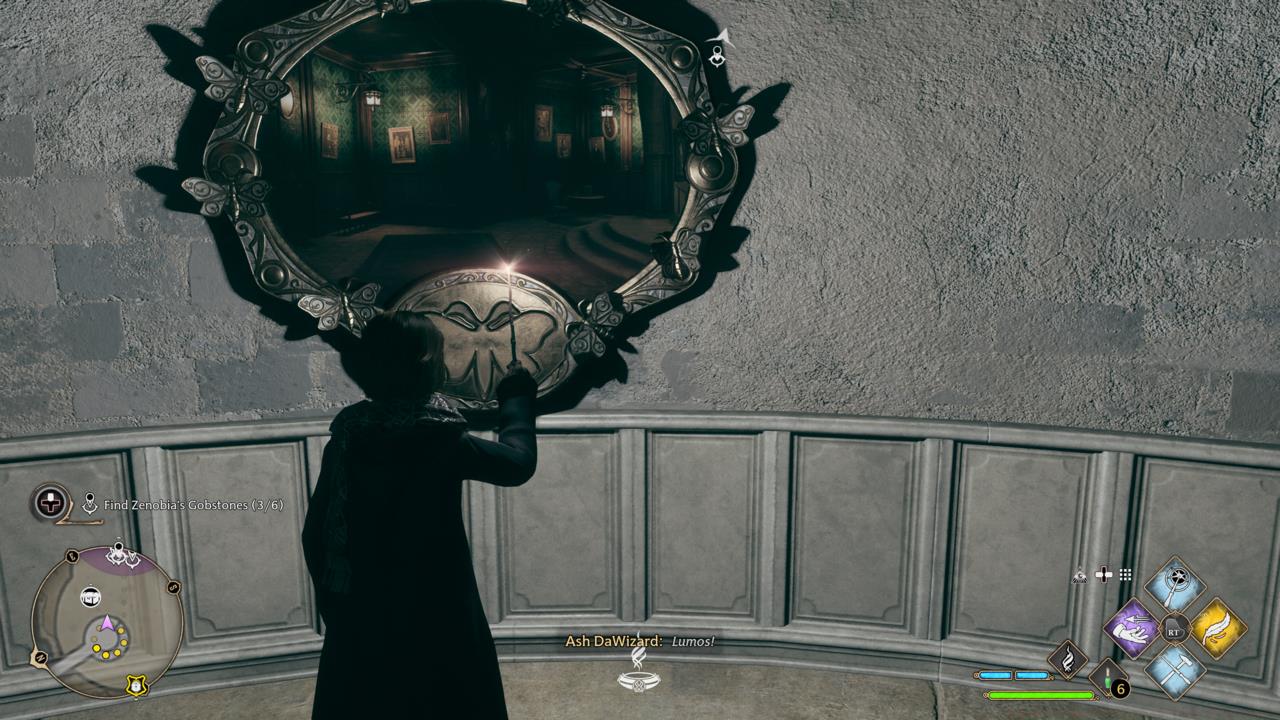
Moth Mirrors present as ornate metallic surfaces adorned with moth-shaped carvings along their borders. To initiate these puzzles, cast the Lumos spell directly upon the mirror’s surface, which will then display a vision of a distant location housing the absent moth. Typically, this revealed spot lies within close proximity, often in adjacent rooms or nearby outdoor areas.
When you locate the moth while maintaining Lumos, the insect will automatically attach to your wand’s light. Carefully guide it back to its original mirror location while avoiding canceling the spell prematurely. Upon reaching the mirror, dismiss Lumos to allow the moth to rejoin its frame, successfully concluding the puzzle. These challenges frequently reward players with Field Guide pages, which contribute to completion percentage and lore discovery.
Pro Tip: Use Revelio frequently near Moth Mirrors to highlight interactive elements and potential moth hiding spots that might otherwise escape notice.
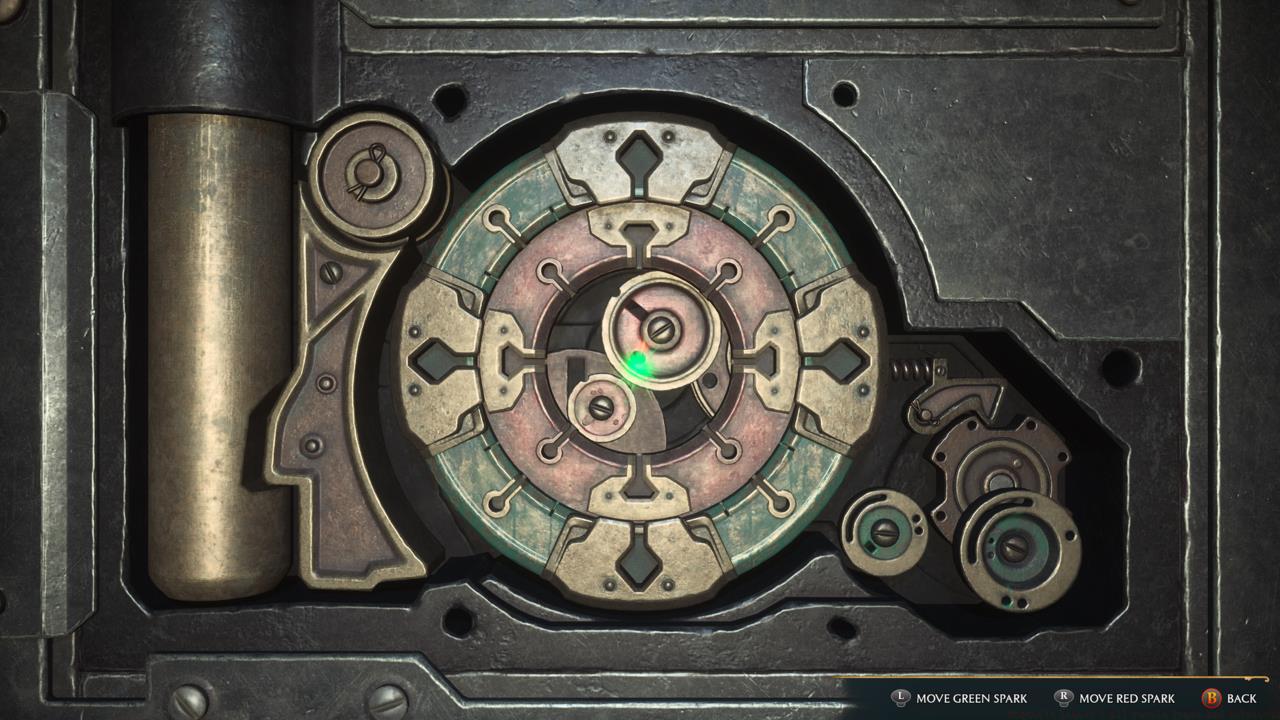
Symbol Doors present unique arithmetic challenges throughout Hogwarts.
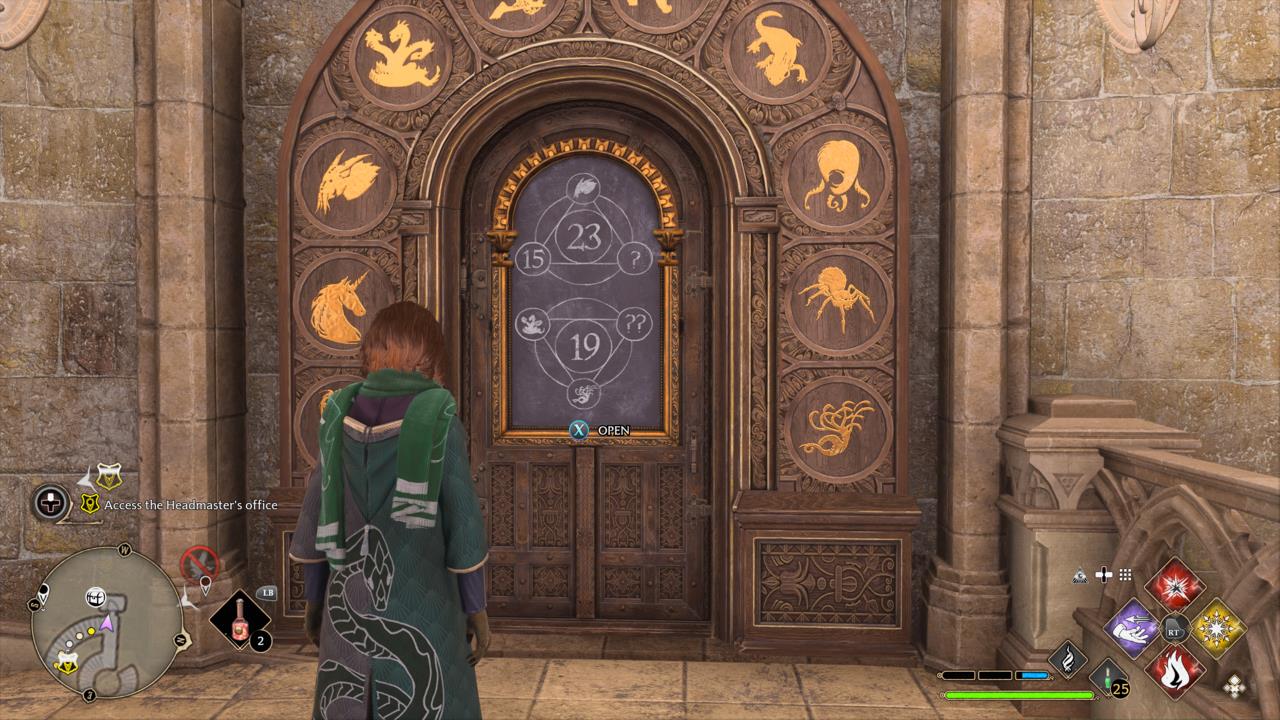
Symbol Doors feature intricate animal imagery encircling their frames alongside two distinct mathematical equations displayed on the door surface when interacted with. Solving these puzzles demands locating two rotating question mark dials in the immediate vicinity and adjusting them to display the correct creature symbols that satisfy both equations.
The mathematical system operates on a straightforward principle: each animal represents a specific numerical value, with the triangle and circle symbols indicating addition and subtraction operations respectively. The number at the center represents the solution you must achieve through proper symbol selection.
Common Mistake: Players often forget that the creature symbols correspond to numbers 0-9, starting from the leftmost position around the door frame. For comprehensive decoding strategies, consult our specialized mathematical puzzle decoding guide for step-by-step solutions.

Statue puzzles offer quick rewards for minimal effort.
The statue holding a ball represents one of the most straightforward puzzle types scattered throughout Hogwarts Castle. Resolution simply requires casting Wingardium Leviosa on the statue to make the ball levitate, which triggers the appearance of a Field Guide page. Upon collection, the statue vanishes, indicating successful completion.
These puzzles serve as excellent introductory challenges for players learning spell mechanics while providing consistent rewards. The statues typically appear in corridors, classrooms, and outdoor courtyards, making them easily accessible during normal exploration.
Merlin Trials provide essential inventory expansion through varied magical tests.
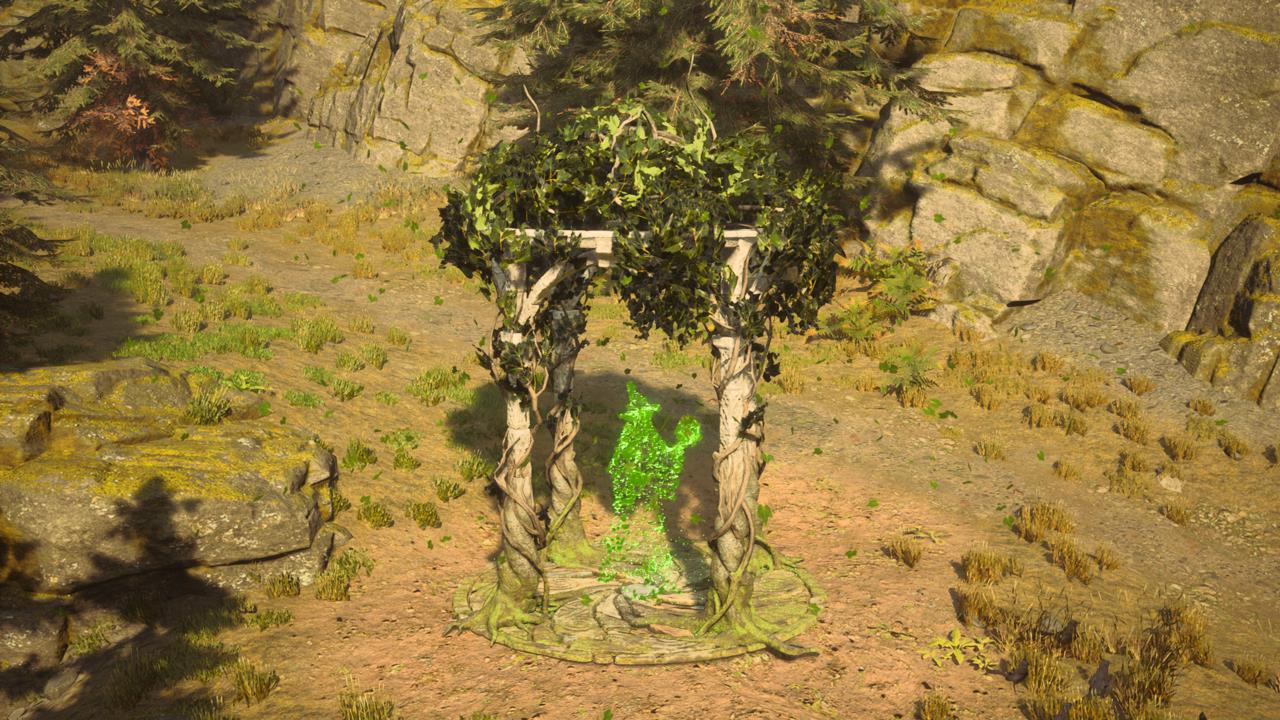
Merlin Trials constitute a special category of environmental puzzles, identifiable by distinctive swirling stone formations on the ground. Activation requires consuming Mallowsweet Leaves from your inventory, which initiates the challenge sequence. Once begun, search the surrounding area for specific stone pillars or magical structures that require interaction.
The required actions and quantity of elements vary significantly between trials. Your initial encounter (through main story progression) demands casting Incendio on three separate pillars. Subsequent variations might involve shattering bowls atop approximately ten pillars using basic attacks, or employing Accio to retrieve and position magical orbs into designated stone circles.
Successfully completing multiple Merlin Trials progressively increases your gear carrying capacity, which proves crucially limited during early gameplay stages. Plan your trial completion strategically to maximize inventory space when most needed.
Optimization Tip: Complete Merlin Trials in clusters to minimize travel time between activations and efficiently boost storage limits.

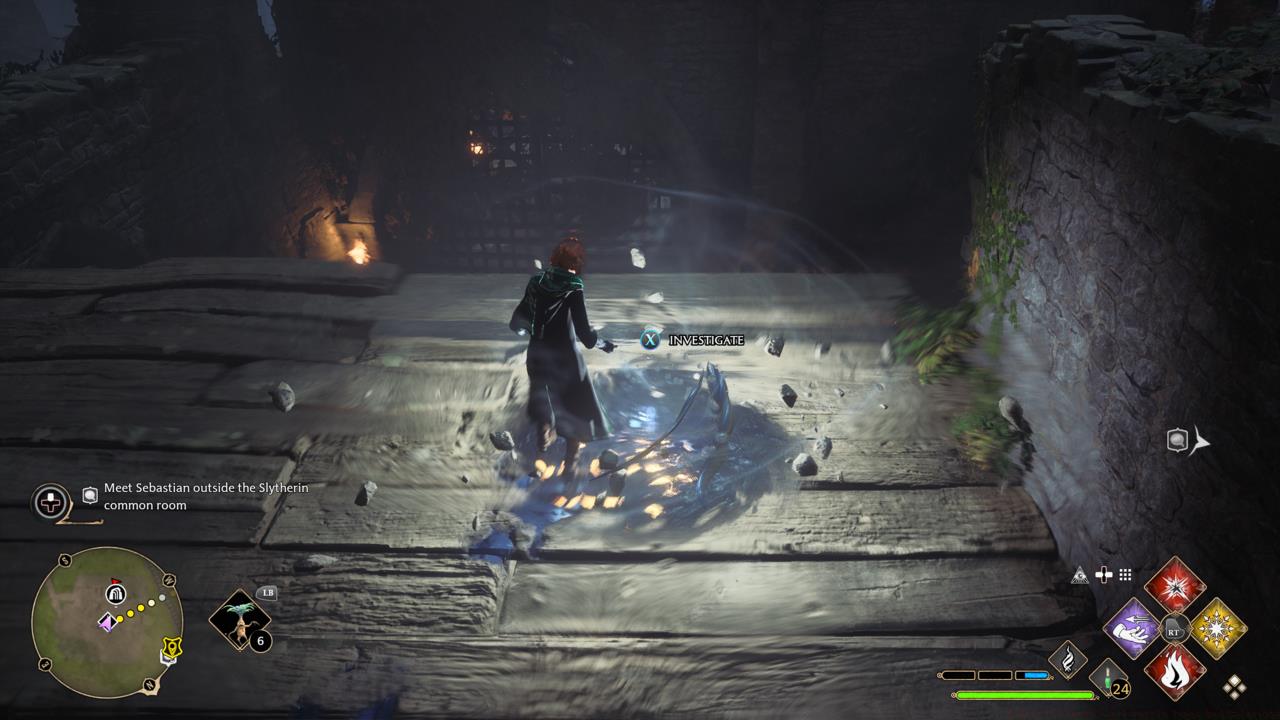
Unlit Pyres demand fire-based spellcasting in various locations.
Unlit Pyres present throughout the game world require ignition using fire spells like Incendio or Confringo. These challenges often appear in sequences where multiple pyres must be lit within time constraints or in specific patterns.
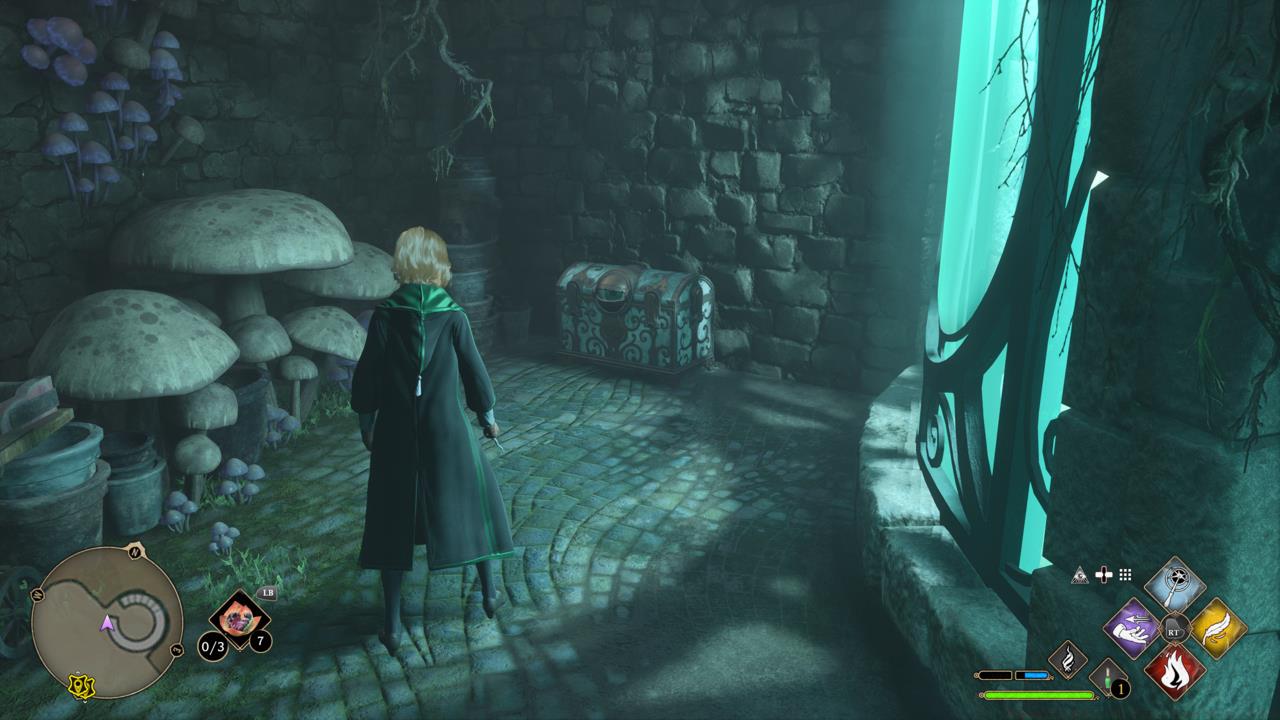
Eyeball Chests necessitate stealthy approach techniques.
Eyeball Chests feature distinctive ocular appendages that detect player movement. Approaching these chests without adequate concealment causes them to seal shut. The Disillusionment spell provides necessary camouflage, allowing undetected approach and access to their valuable contents.
Lock mechanisms introduce timing-based mini-games requiring precise interaction.
Standard locks employ a rotating mechanism where players must align floating pins with stationary counterparts through careful timing. Success grants access to restricted areas and additional loot.
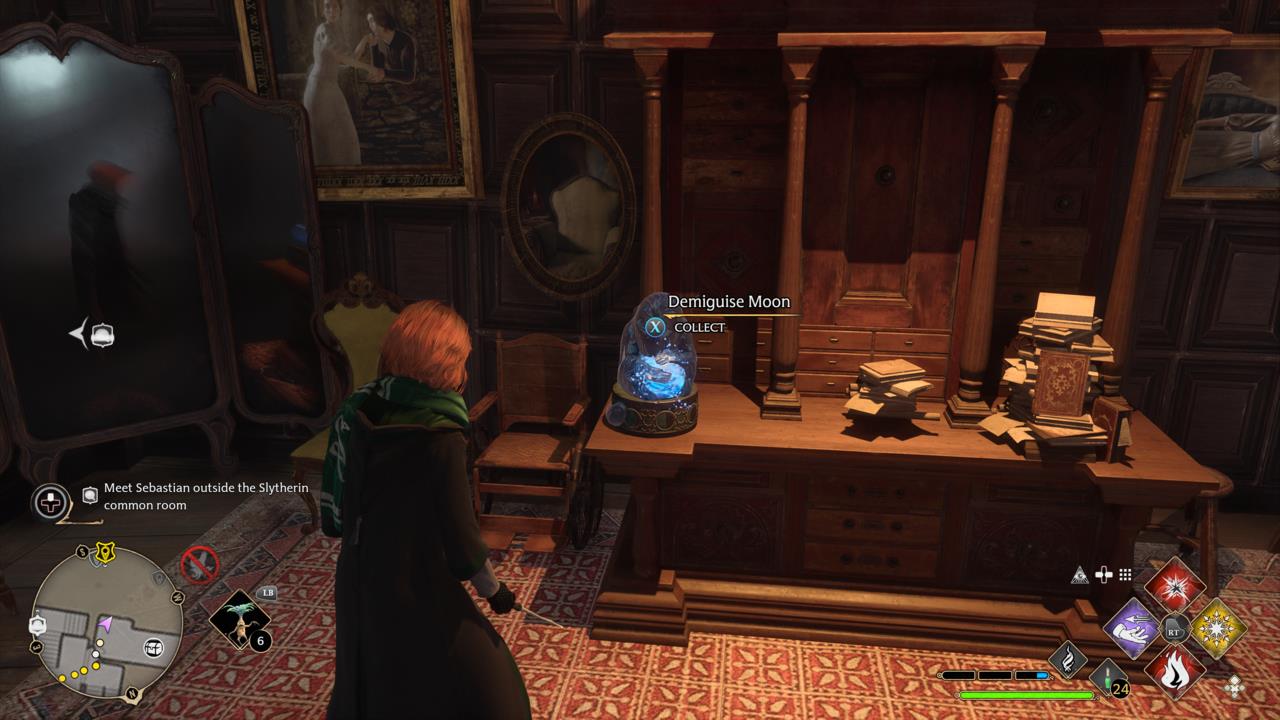
Demiguise Statues impose specific temporal requirements for collection.
These elusive statues only become collectible during nighttime hours. Utilize the game’s time-changing mechanics by resting until nightfall when you encounter these puzzles during daylight hours.
Ancient Magic Traces require specific story progression to access.
Ancient Magic hotspots become available after reaching certain narrative milestones and investigating initial areas thoroughly. These locations allow players to harness powerful ancient magical energies for both combat and exploration advantages. For comprehensive gameplay strategies, reference our complete magical mechanics guide covering all advanced systems.
Action Checklist
- Cast Revelio frequently to identify all nearby puzzle elements and interactive objects
- Solve 3-5 Merlin Trials early to expand limited gear capacity
- Complete Moth Mirror puzzles using Lumos and careful moth navigation
- Approach Eyeball Chests exclusively with Disillusionment active
- Collect Demiguise Statues only during nighttime by adjusting game clock
- Consult our class specialization guide to optimize puzzle-solving abilities
No reproduction without permission:SeeYouSoon Game Club » Hogwarts Legacy – All Puzzle Types And Solutions Master Hogwarts Legacy's recurring puzzles with expert strategies and practical solutions