TL;DR
- Flare Gun temporarily unavailable due to spawn issues but expected to return soon
- Locate through ground loot, chests, or supply drops once fixed
- Primary function is enemy marking through walls within large radius
- Essential for Hide ‘N Seek quest completion and end-game recon
- Advanced tactics include environmental fires and squad coordination
Fortnite’s dynamic gameplay environment continues to evolve with the ongoing Most Wanted event, introducing numerous weapon unvaultings and fresh additions to the arsenal. Amidst this weaponry overhaul, the Flare Gun has made its return to the battlefield, though players should note its current technical limitations. The Hide ‘N Seek weekly challenges specifically require utilizing this tool to successfully mark opponents, making its acquisition crucial for quest progression.
Critical Update: The Flare Gun currently experiences inconsistent spawning patterns across all game modes. Epic Games development teams are actively addressing this technical issue, with resolution expected in upcoming patches. This guide’s operational details become fully applicable once the weapon’s spawn mechanics return to normal functionality.
The Flare Gun serves as an exceptionally valuable reconnaissance asset when properly utilized.
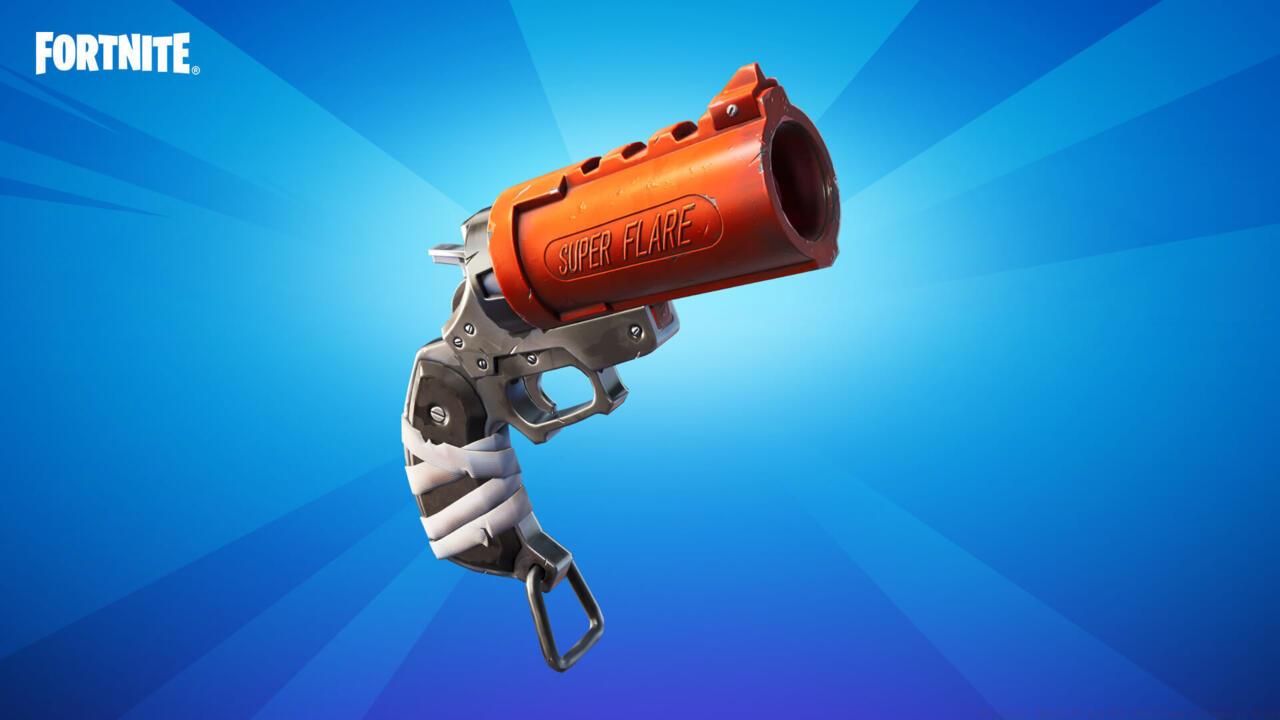
Once the Flare Gun’s technical issues resolve, players can acquire it through three primary methods: scattered ground loot, various chest types, and supply drop reinforcements. This distinctive firearm operates more as an intelligence-gathering instrument than conventional weaponry, though it maintains secondary combustion capabilities when discharged against flammable surfaces. The device enables tactical marking of enemy positions across substantial operational radii, providing temporary wall-penetrating visibility on designated targets.
For optimal ground loot acquisition, focus your search around high-traffic landing zones and recently contested areas where loot density typically increases. Chest spawn optimization involves systematically clearing named locations with concentrated chest clusters, particularly those less frequently visited by opposing squads. Supply drop tactics require strategic positioning near drop zones during mid-to-late game phases when the Flare Gun’s utility becomes most impactful.
The Flare Gun’s reconnaissance functionality represents its primary combat value, delivering critical intelligence that can determine engagement outcomes. When activated, the marking system reveals enemy combatants through structural obstructions for approximately 15-20 seconds, depending on trajectory accuracy and environmental conditions. The secondary incendiary effect proves particularly effective against wooden constructions and natural foliage, creating area denial opportunities and forcing opponent repositioning.
Squad coordination benefits multiply when multiple team members employ Flare Guns strategically. Staggered deployments create nearly continuous enemy visibility, while coordinated assaults using marked targets significantly increase elimination efficiency. The tactical advantage becomes especially pronounced during final circle confrontations where positional awareness dictates victory.
When preparing to designate hostile targets, equip the Flare Gun and launch projectiles at high arc trajectories toward suspected enemy locations. Upon firing, observe the flare’s ballistic path as it ascends and descends toward adversary positions, after which successful marking occurs within moments. This action completes the designated weekly quest objective, though strategic players should maintain Flare Gun inventory beyond immediate mission requirements.
Advanced implementation involves calculating parabolic trajectories for maximum marking coverage, typically requiring 45-60 degree launch angles. Common tactical errors include firing from enclosed spaces where flares impact ceilings, or discharging too close to targets, reducing marking effectiveness. Optimal usage windows occur during rotation phases and final circle contractions where intelligence gaps prove most costly.
The Flare Gun’s strategic value escalates dramatically during concluding match phases, frequently determining squad survival in top-tier competitive scenarios. For comprehensive Most Wanted event mastery, consult our detailed Heat Level mechanics breakdown within our Complete Guide to maximize your tactical advantage.
Action Checklist
- Monitor patch notes for Flare Gun spawn fix confirmation
- Systematically loot high-density chest areas and supply drops
- Practice high-arc flare trajectories in safe zones
- Execute enemy marking during rotation phases for maximum intelligence gain
- Coordinate staggered flare deployments with squad members
No reproduction without permission:SeeYouSoon Game Club » Fortnite: Where To Get The Flare Gun And How It Works Master the Flare Gun in Fortnite: Location strategies, tactical uses, and advanced recon techniques