The secret door puzzle solution changes every match, requiring you to find four glowing rocks with symbols
Shuffled Shrines becomes a high-traffic drop zone when challenges are active, so prioritize survival first
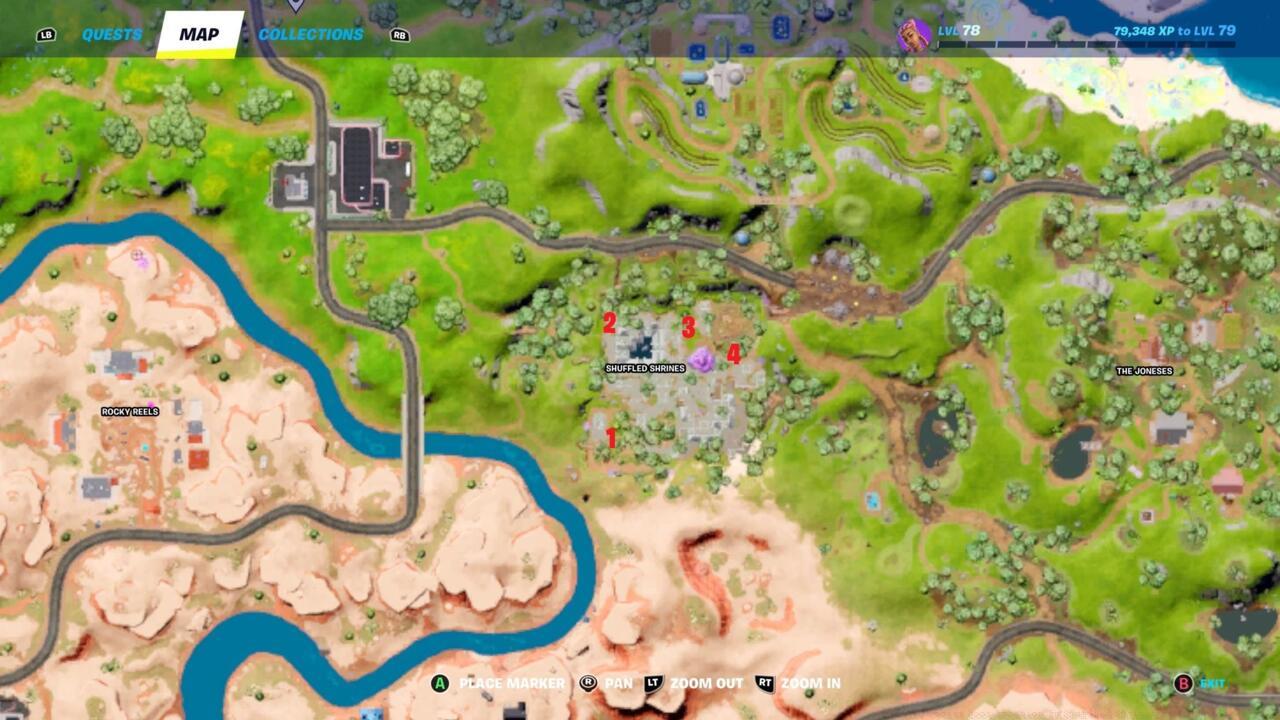
Each rock location has distinct landmarks: underground southwest, ground northwest, tent northeast, platform central-east
Success requires memorizing symbols from glowing rocks and inputting them correctly at the central stone door
Complete the puzzle to progress through Indiana Jones quests and unlock exclusive cosmetic rewards
Fortnite’s latest limited-time event introduces an intricate environmental puzzle inspired by Indiana Jones adventures, challenging players to uncover a hidden passage within the newly added Shuffled Shrines location. This complex challenge forms part of the broader Indiana Jones quest series, offering battle pass holders the opportunity to earn exclusive cosmetic items across 11 distinct missions. The primary objective requires locating and accessing the concealed doorway situated beyond the main chamber area.
Successfully navigating this puzzle demands both strategic planning and quick thinking, as the area typically experiences intense player traffic during the initial challenge period. Understanding the fundamental mechanics before attempting the solution significantly increases your chances of completion amidst the competitive landscape.
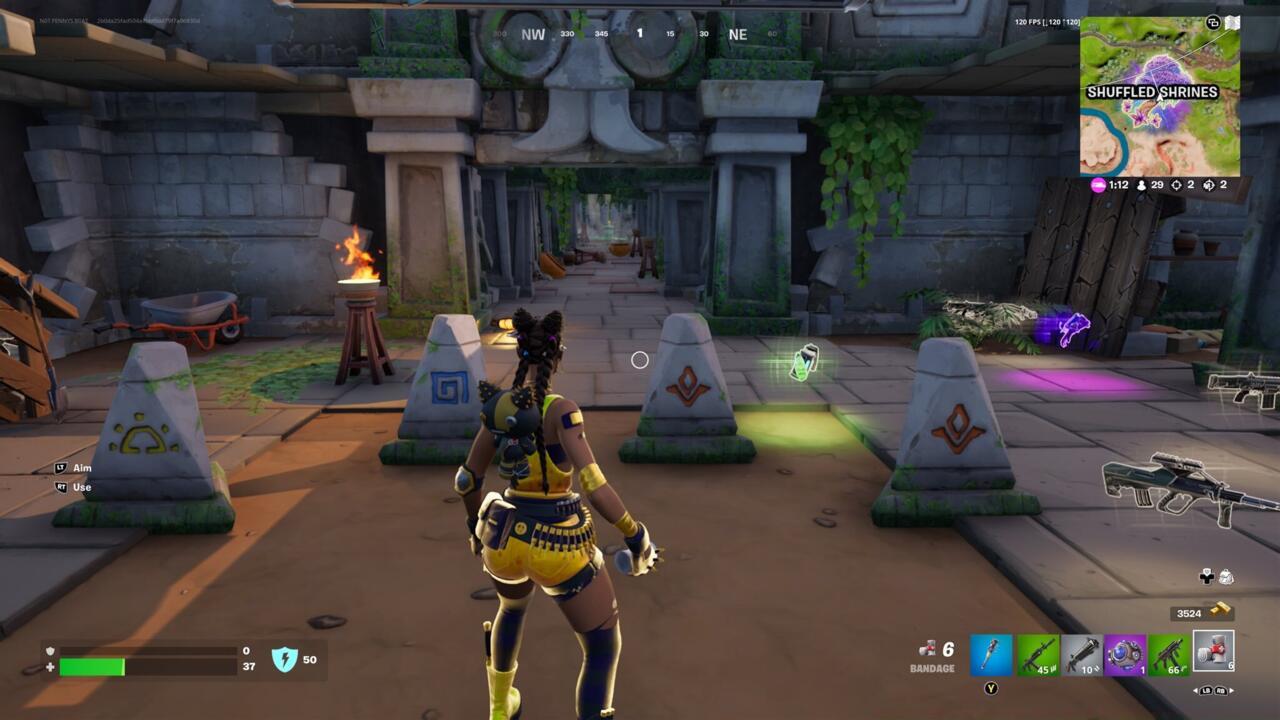
Upon reaching the central area of Shuffled Shrines after the initial combat subsides, you’ll encounter a sealed stone doorway flanked by four interactive stone pillars. Each pillar features multiple sides displaying unique mystical symbols and can be rotated to reveal different markings. The core mechanic involves aligning each stone to show the correct symbol orientation facing away from the door structure.
Crucial puzzle insight: The correct symbol combination undergoes complete randomization at the start of each match, ensuring no single solution works universally across different gaming sessions. This dynamic design prevents players from simply memorizing one pattern and encourages exploration of the surrounding environment for clues.
Example solution from one match – your symbols will differ requiring independent discovery.
The randomized solution for each match becomes available through four distinctive glowing rock formations scattered throughout Shuffled Shrines. Each rock emits both visible white light beams and audible humming sounds when approached, serving as clear environmental indicators. You must locate each glowing stone and document the visible symbols through memorization or external recording methods.
Essential navigation strategy: Document the symbols in the exact order you discover them, as sequence matters for the final input. The four critical rock locations include:
Subterranean chamber in the southwestern sector
Surface-level placement in the northwestern area
Sheltered position beneath a crimson makeshift tent in the northeast
Elevated platform placement in the central-eastern zone
Visual reference showing symbol input sequence at the central puzzle interface.
After gathering all four symbols, return to the central stone door and input the sequence by rotating each pillar to match your documented pattern. Proper execution triggers the door mechanism and grants access to the concealed chamber beyond.
Mastering this environmental puzzle requires more than just understanding the basic mechanics. Experienced players recommend landing at adjacent locations first to gather essential weapons and healing items before approaching Shuffled Shrines. This preparation phase allows you to enter the area equipped to handle both the puzzle and potential hostile encounters.
Critical survival technique: Consider collaborating with other players temporarily to solve the puzzle cooperatively, as the challenge design accommodates teamwork approaches. Early attempts often face intense competition, so waiting several hours after challenge release can significantly reduce opponent density.
Gallery
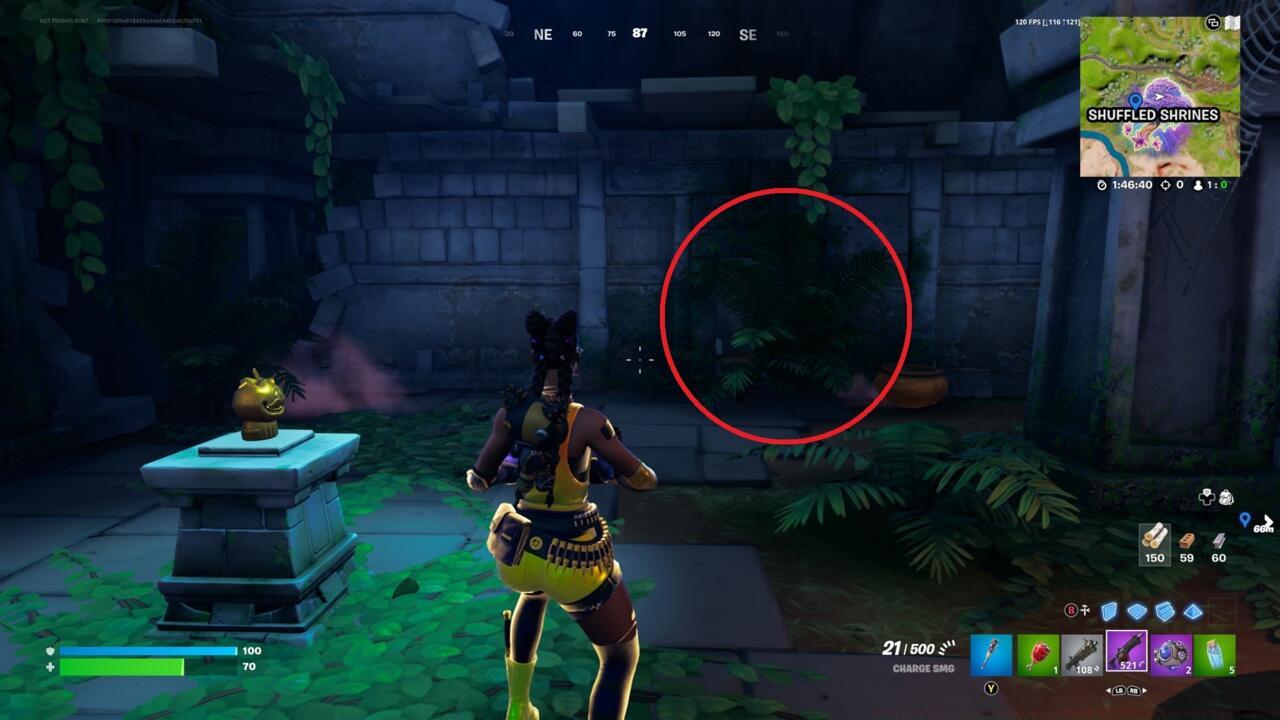
Upon successful puzzle completion and entry into the secret chamber, you’ll discover the ancient artifact. Removing this item triggers environmental changes that reveal additional hidden passages and crumbling walls, ultimately granting access to the final reward area.
Post-puzzle progression showing the hidden chamber access points and environmental transformations.
Action Checklist
Land at nearby locations to gather weapons and healing items before approaching Shuffled Shrines
Navigate to Shuffled Shrines and survive initial player encounters
Locate all four glowing rocks while documenting their symbols
Input the correct symbol sequence at the central stone door
Retrieve the artifact and navigate through the revealed hidden passages