TL;DR
- Bestial Sanctum offers 1,000-1,300 runes per enemy but requires careful navigation
- Fort Faroth provides massive 80,000 rune one-time reward or 3,500 per dragon kill
- Agheel Lake Viking Camp delivers consistent 2,000 runes per efficient clear
- Seaside Ruins provides 577 runes per run with minimal risk for beginners
- Strategic weapon choices and approach methods significantly impact farming efficiency
Mastering rune acquisition is essential for character progression in Elden Ring, allowing you to enhance attributes, purchase equipment, and strengthen your capabilities against increasingly challenging foes. This comprehensive guide explores the most effective farming locations, each offering unique risk-reward balances suitable for different playstyles and progression stages.
Understanding the fundamental mechanics behind rune accumulation can dramatically improve your farming efficiency. Runes are the universal currency obtained from defeating enemies, opening chests, or using consumable items. Early game farming focuses on accessibility and safety, while late-game strategies prioritize maximum yield per time investment.

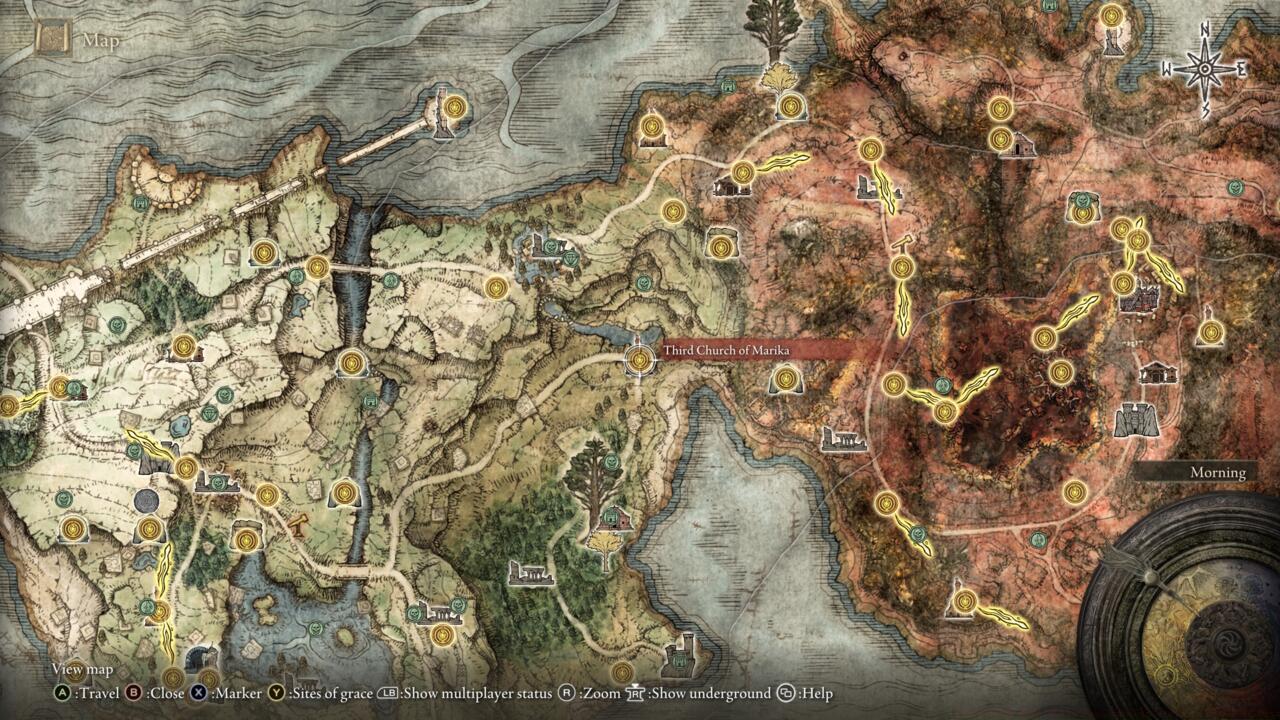
Begin your journey at the Third Church of Marika in East Limgrave, accessible by starting from the Gatefront Site of Grace and following the eastern road. After crossing the stone bridge, continue northward until you encounter the church structure, which lies just beyond your initial map fragment boundaries.
Upon reaching the Third Church of Marika, activate the Site of Grace inside and collect the invaluable Flask of Wondrous Physick. Proceed to the northern riverbank and follow it eastward until you discover a concealed warp gate nestled among the foliage, which will transport you directly to the Bestial Sanctum region.

After utilizing the warp gate, you’ll materialize facing a formidable boss entity that should be avoided until later gameplay stages. Fortunately, this towering opponent remains passive unless provoked or approached too closely.
Immediately turn around and enter the Sanctum to activate the local Site of Grace and encounter Gurranq, the Beast Clergyman, though interaction is unnecessary for farming purposes. Venture outside to locate the scattered black-hooded adversaries positioned throughout the surrounding terrain.
Approximately two dozen of these combatants are distributed across the designated areas, each presenting challenging opposition for underleveled characters but possessing manageable health pools. Their isolated positioning enables strategic stealth approaches for initiating combat with critical strikes.
Each defeated enemy yields between 1,000 and 1,300 runes based on their equipped weaponry, representing substantial early-game currency accumulation. The area’s design facilitates efficient rune recovery if defeated—simply mount Torrent, retrieve your lost resources, and retreat safely. The proximate Site of Grace allows rapid enemy respawning, though alternative locations exist if this proves excessively difficult.
Draconic adversaries congregate within the specified region, with smaller variants predominantly occupying the western sector. This location offers two distinct farming approaches: repeated engagements with individual dragons or a single massive reward from the sleeping dragon encounter.
The recurring dragon combat method provides approximately 3,500 runes per elimination, while the dormant dragon presents an exceptional one-time bounty of 80,000 runes for players who can successfully defeat it.
Strategic positioning is crucial for the sleeping dragon engagement—identify vulnerable areas and maintain consistent assault until the creature succumbs. Weapons with bleed effects prove particularly effective against draconic foes, accelerating the elimination process significantly.
For optimal efficiency against dragons, equip armaments that exploit their elemental weaknesses or apply status effects. Consider utilizing the BF6 Weapons Unlock Guide to identify ideal tools for this specific combat scenario. Time investment for the sleeping dragon typically ranges between 3-5 minutes with proper preparation and weapon selection.
The Nordic encampment situates within the marked circular area, with several mounted opponents positioned between your arrival point and the nearest Site of Grace.
This location delivers approximately 2,000 runes per completed clearing cycle, offering an excellent balance between risk exposure and reward accumulation. The camp’s layout enables systematic enemy engagement, allowing you to develop efficient routing patterns that minimize combat time while maximizing rune yield.
Common mistakes include underestimating the cavalry units’ aggression range and failing to utilize terrain advantages. Advanced players can optimize clears by implementing specific attack sequences and leveraging area-specific tactical opportunities.
The combined force of armored knights and goblin adversaries positions itself eastward within the designated zone. This location provides approximately 577 runes per clearing iteration, making it ideal for players seeking minimal-risk farming opportunities while developing combat proficiency.
Beginner-friendly strategies involve isolating individual enemies and utilizing ranged attacks when possible. As your skills advance, you can implement more aggressive clearing methods that significantly reduce completion time while maintaining safety margins.
Understanding proper Class Guide principles helps optimize your approach based on your character’s specific capabilities and attribute distribution.
Action Checklist
- Access Bestial Sanctum via Third Church of Marika warp gate
- Practice stealth approaches on black-hooded enemies for critical strikes
- Engage Fort Faroth dragons with bleed weapons for maximum efficiency
- Clear Agheel Lake Viking Camp using systematic routing patterns
- Master Seaside Ruins clearing for consistent low-risk rune accumulation
No reproduction without permission:SeeYouSoon Game Club » Elden Ring Best Early Rune Farming Areas To Level Up Fast Master Elden Ring rune farming with optimal routes, strategic approaches, and efficiency-maximizing techniques
