TL;DR
- Fort Condor returns as a strategic tower defense minigame tied to Junon’s Protorelic questline
- Unlock challenges after completing main objectives in Under Junon during Chapter 4
- Master the rock-paper-scissors unit system: Vanguard > Ranged > Defense > Vanguard
- Use the Entrench setup with Cloud and Barret heroes for optimal defensive play
- Advanced tactics include lane control, hero timing, and adaptive unit deployment
Experience strategic tower defense warfare in the revitalized Fort Condor minigame within Final Fantasy 7 Rebirth. This beloved gameplay element makes a triumphant return, offering far more depth than its original incarnation.
As a comprehensive reimagining, Final Fantasy 7 Rebirth incorporates numerous nostalgic elements that will delight series veterans. Among these is the tactical challenge where you must repel an advancing enemy army through careful unit deployment and resource management. Our comprehensive guide provides expert strategies to conquer Fort Condor and complete the Junon Protorelic objectives efficiently.
Access to the Final Fantasy 7 Rebirth Junon Protorelic challenge becomes available after you’ve made significant progress through the main storyline missions in Under Junon. We’ve organized the locations in a logical progression sequence to maximize your efficiency:
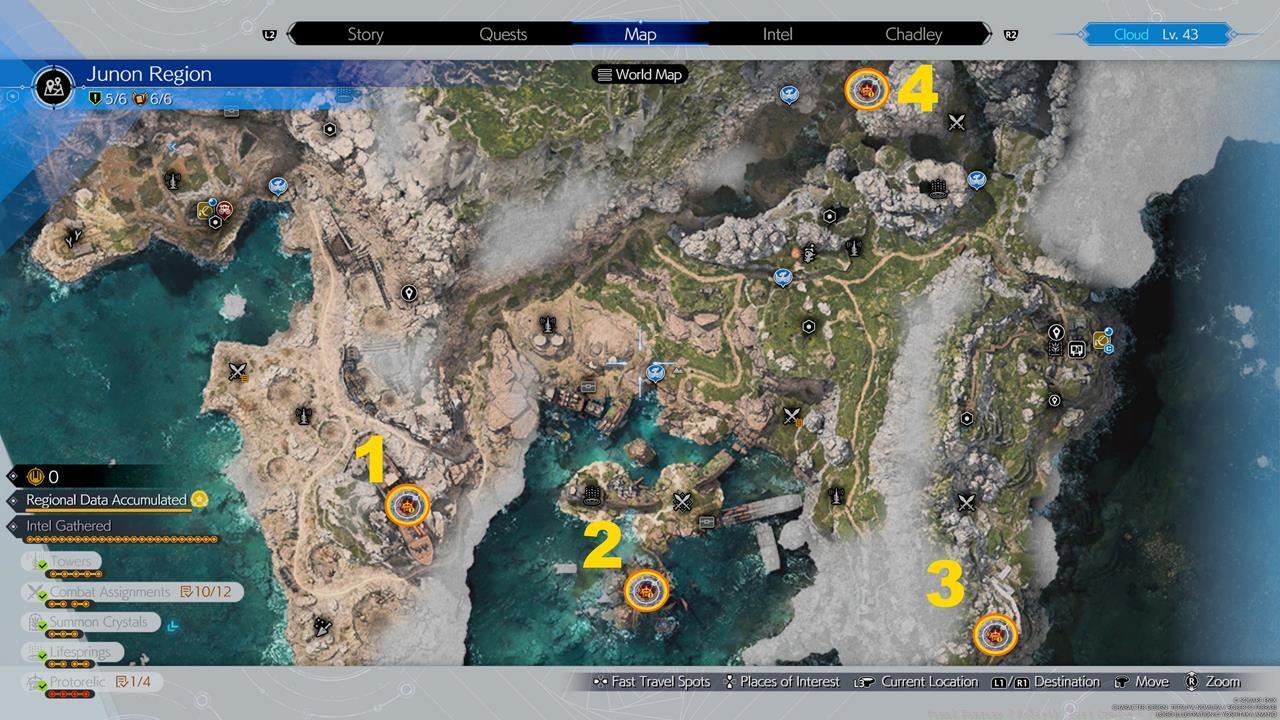
A map showing the locations of all four Fort Condor challenge areas.
Pro Tip: Complete these challenges as soon as they become available, as the rewards significantly enhance your party’s capabilities for upcoming story segments.
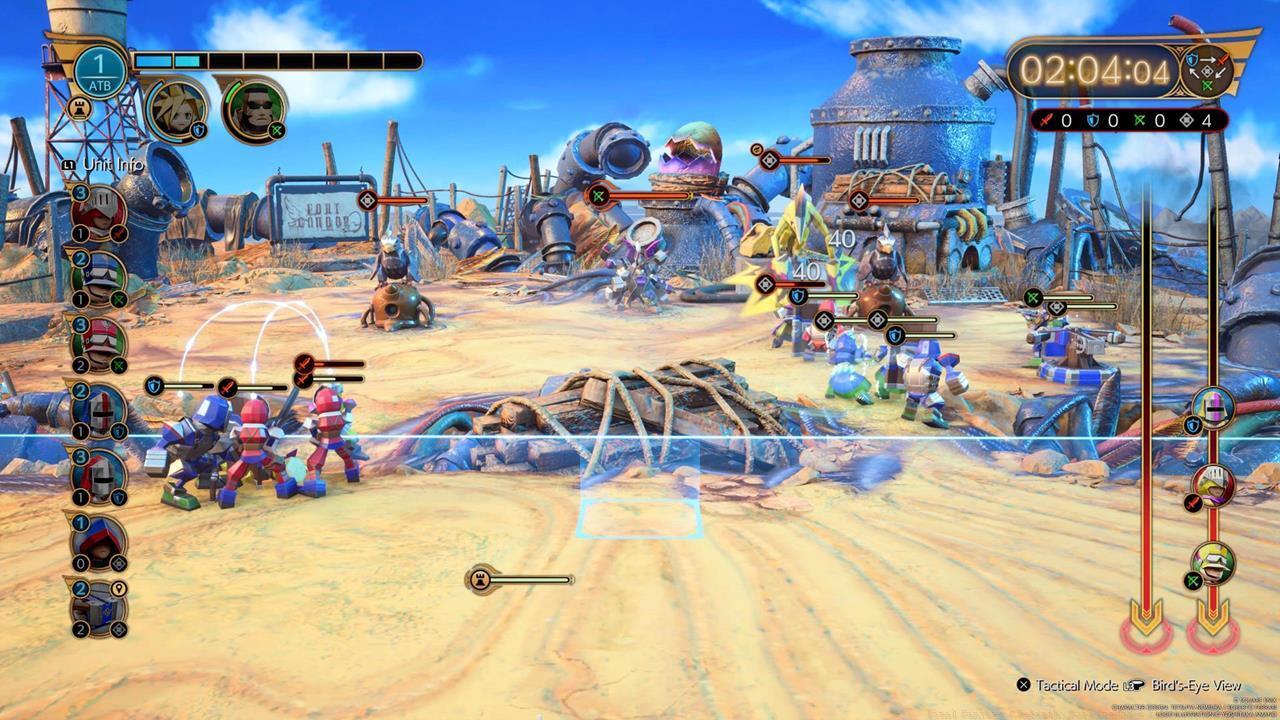
Fort Condor operates as a sophisticated hybrid of MOBA mechanics and tower defense strategy:
- Both players maintain headquarters structures—victory is achieved by being the first to destroy the opponent’s main base.
- Combat unfolds across dual lanes (left and right corridors). The enemy spawn queue is displayed in a preview meter on the screen’s right side.
- Your ATB gauge, positioned in the upper-left interface, governs when you can deploy your own combat units. All troops automatically advance and engage enemies without manual targeting.
- Unit classifications follow a sophisticated rock-paper-scissors dynamic:
- Vanguard units (red icons) excel in close-quarters combat and easily overwhelm ranged specialists.
- Ranged units (green markers) attack from distance and effectively counter defense-oriented troops.
- Defense units (blue symbols) possess exceptional durability and efficiently neutralize vanguard attackers.
- Hero summons become available after deploying sufficient units of specific types: Cloud (defense alignment), Barret (ranged specialty), and Tifa (vanguard focus). These hero characters possess area-of-effect abilities that can dramatically shift battle momentum.
- Support units provide healing capabilities, while forward artillery placements offer strategic positioning advantages.
- As your units advance successfully, you gain the ability to spawn reinforcements closer to enemy territory. However, if hostile forces push forward uncontested, your deployment zones become increasingly restricted.
Punch through a lane so you can destroy your opponent’s structures.
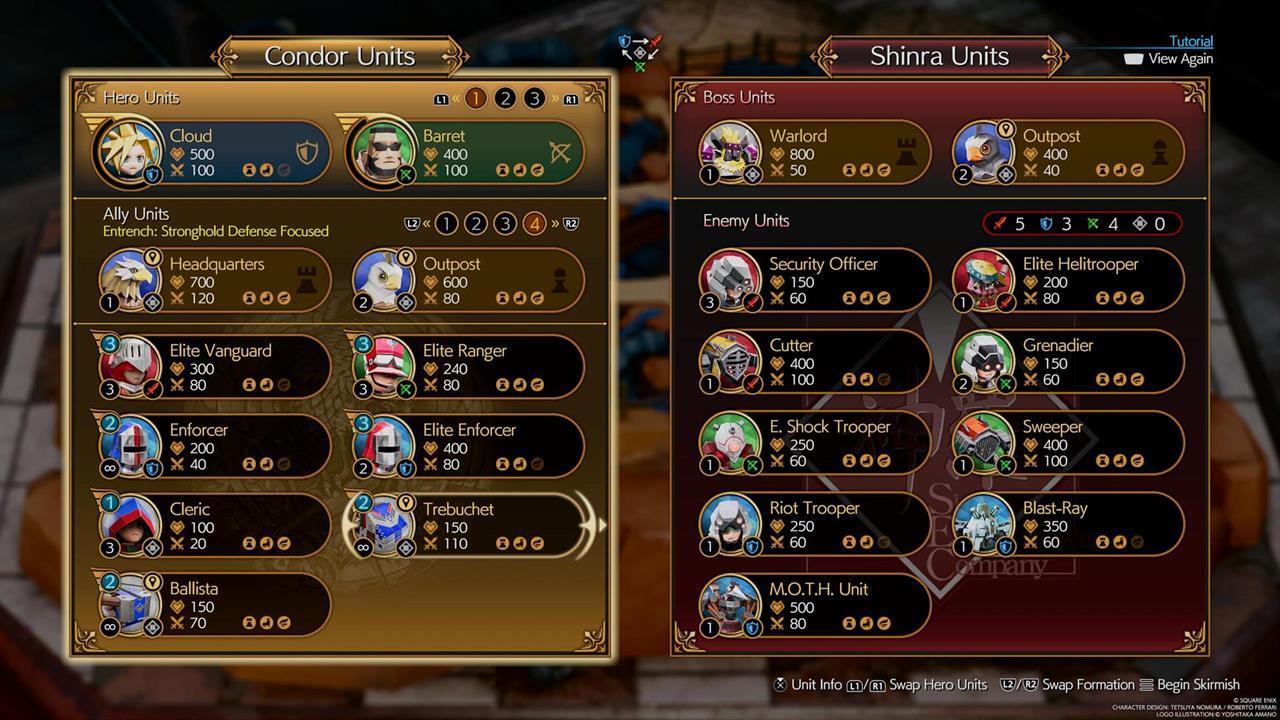
For optimal performance in Final Fantasy 7 Rebirth Fort Condor engagements, we strongly recommend this configuration:
- Strategic Selection: Option #4: Entrench – Stronghold Defense Focus
- Hero Composition: Cloud and Barret for balanced defensive and ranged capabilities
This approach delivers exceptional results for multiple strategic reasons. The Elite Enforcer/Enforcer combined with triple Cleric support creates an nearly impregnable defensive line due to exceptional durability and sustained healing. We concentrated our primary forces along the right corridor, while maintaining vigilant oversight of potential left-lane incursions. As we established forward positions, we deployed Elite Rangers, Ballistae, and Trebuchets to inflict damage from safe distances.
Since our deployment emphasized defense units supplemented by ranged specialists, we frequently accumulated sufficient resources to summon both Cloud and Barret. We strategically timed their deployment when enemy clusters formed near our defensive lines to maximize their area-effect damage potential.
Here’s our detailed battle execution methodology:
- Opening Move: Deploy 1x Elite Enforcer along the right corridor to establish an immediate frontline presence.
- Support Deployment: Position 2x Clerics slightly behind your Elite Enforcer, followed by 1x Elite Ranger. This formation ensures healing coverage and damage output while minimizing vulnerability.
- Artillery Placement: Once you breach the initial chokepoint, establish 1x Trebuchet just right of the bottleneck. This positioning enables area damage against grouped adversaries.
- Adaptive Response: Adjust your strategy based on battle developments. For example, if enemies advance through the left passage, deploy Elite Vanguards to intercept them. Consider adding additional Elite Enforcers, Enforcers, or Clerics as reinforcements along your primary advance corridor.
- Artillery Utility: Trebuchets and Ballistae can occasionally obstruct advancing enemy units, though pathfinding behavior can be unpredictable.
- Hero Activation: Once you’ve deployed sufficient defense or ranged units, and enemy forces cluster together, summon Cloud or Barret. These heroes will eliminate multiple opponents and then assist your assault on the enemy headquarters.
Having a more defensive-oriented approach, while also using Cloud and Barret, helped us win many matches.
Advanced Resource Management: Monitor your ATB gauge constantly and avoid overspending on expensive units early. The Elite Enforcer provides excellent value for its cost, making it a cornerstone of successful strategies.
Critical Mistakes to Avoid: Don’t neglect lane balance—focusing too heavily on one corridor invites flanking maneuvers. Also, avoid summoning heroes prematurely; wait for optimal enemy clustering to maximize their impact.
Time Investment: Each Fort Condor match typically requires 5-8 minutes, while completing all four challenges will take approximately 30-45 minutes depending on your skill level.
This concludes our comprehensive Final Fantasy 7 Rebirth Junon Protorelic and Fort Condor guide. Remember that hard mode unlocks after finishing this quest chain. In this enhanced difficulty, enemy forces become more powerful while your units face slight stat reductions. Additionally, you’ll witness an additional narrative sequence featuring the Eccentric Swordsman. For comprehensive coverage of all World Intel activities, consult our Protorelics guide.
An epic journey awaits in Final Fantasy 7 Rebirth. We provide extensive guidance and advanced strategies in our FF7 Rebirth guides hub.
Action Checklist
- Progress through Under Junon main story until Protorelic challenges unlock
- Select Entrench strategy with Cloud and Barret heroes
- Execute right-lane focused strategy with Elite Enforcer and Cleric support
- Complete all four Fort Condor challenges in sequence
- Adapt strategy based on enemy composition and lane pressure
No reproduction without permission:SeeYouSoon Game Club » Final Fantasy 7 Rebirth: Fort Condor – Junon Protorelics Guide Master Fort Condor's strategic minigame and complete Junon's Protorelic challenges with advanced tactics