TL;DR
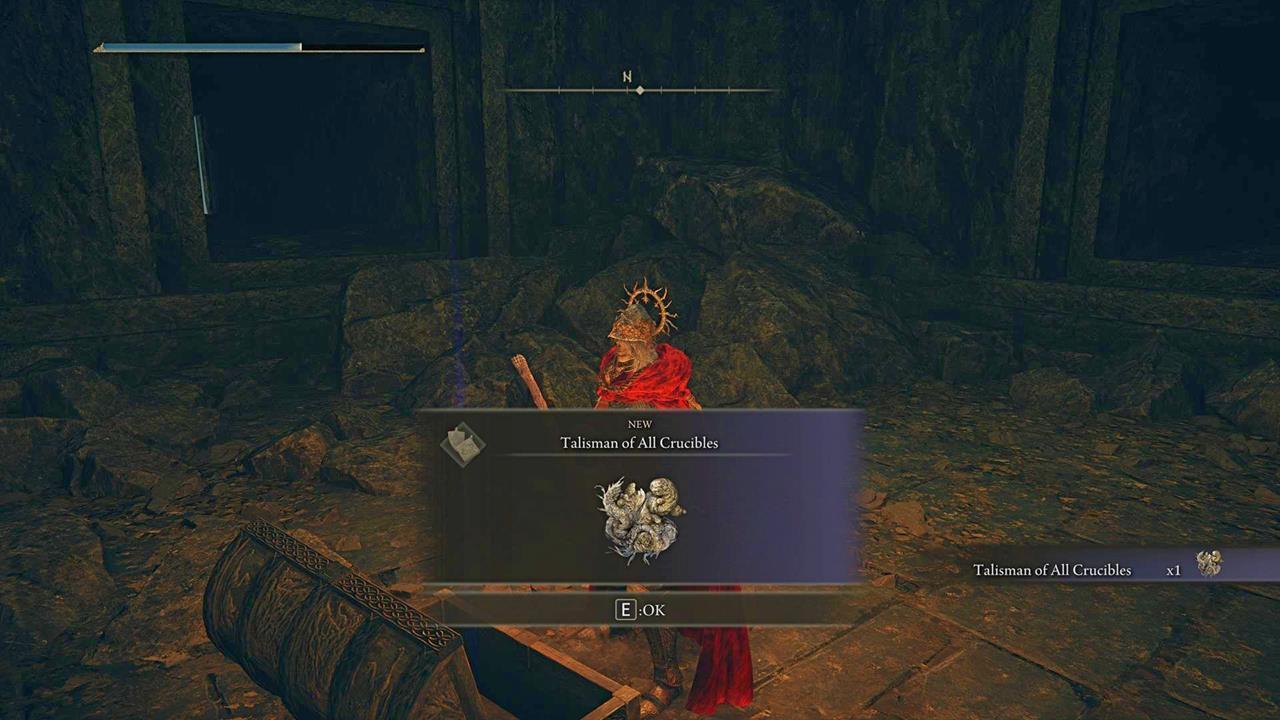
- The Talisman of All Crucibles combines multiple combat buffs into one powerful accessory slot
- Navigate through Ancient Ruins of Rauh’s northwest temple complexes using precise platforming routes
- Master Furnace Golem flame blast timing and specter fireball patterns for safe passage
- Utilize Torrent’s double-jump ability with careful movement controls on narrow ledges
- Integrate this talisman with complementary gear for maximum combat effectiveness
GameSpot may receive revenue from affiliate and advertising partnerships for sharing this content and from purchases through links.
Elden Ring: Shadow of the Erdtree introduces numerous powerful accessories that significantly enhance your character’s combat capabilities. Among these, the Talisman of All Crucibles stands out as a remarkably versatile item, consolidating multiple beneficial effects into a single equipment slot. This comprehensive guide details the precise navigation required to secure this exceptional talisman while providing strategic insights for optimal utilization.
What makes this accessory particularly valuable is its ability to provide multiple combat enhancements simultaneously, effectively serving as an all-in-one solution for players who appreciate stacked buffs. The talisman’s multi-effect nature makes it ideal for various character builds, from aggressive melee fighters to tactical spellcasters seeking additional protection.
To acquire the Elden Ring: Shadow of the Erdtree Talisman of All Crucibles, you must venture into the treacherous northwest region of the map, specifically the Ancient Ruins of Rauh. This area presents one of the DLC’s most challenging navigation sequences, requiring careful movement and enemy awareness.
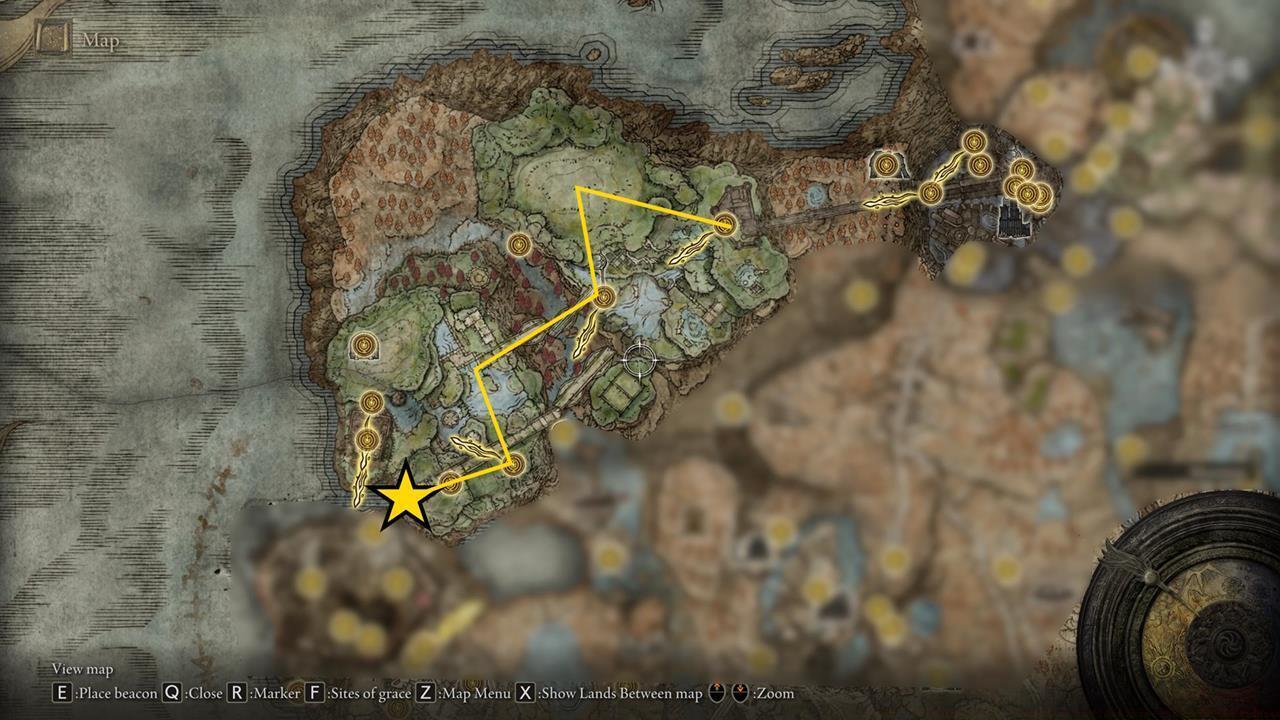
Begin your journey at the Viaduct Minor Tower, which serves as the primary starting point for this region. Progress deeper into the initial temple complex until you encounter the distinctive Miquella Cross landmark. This serves as your first major navigation checkpoint.
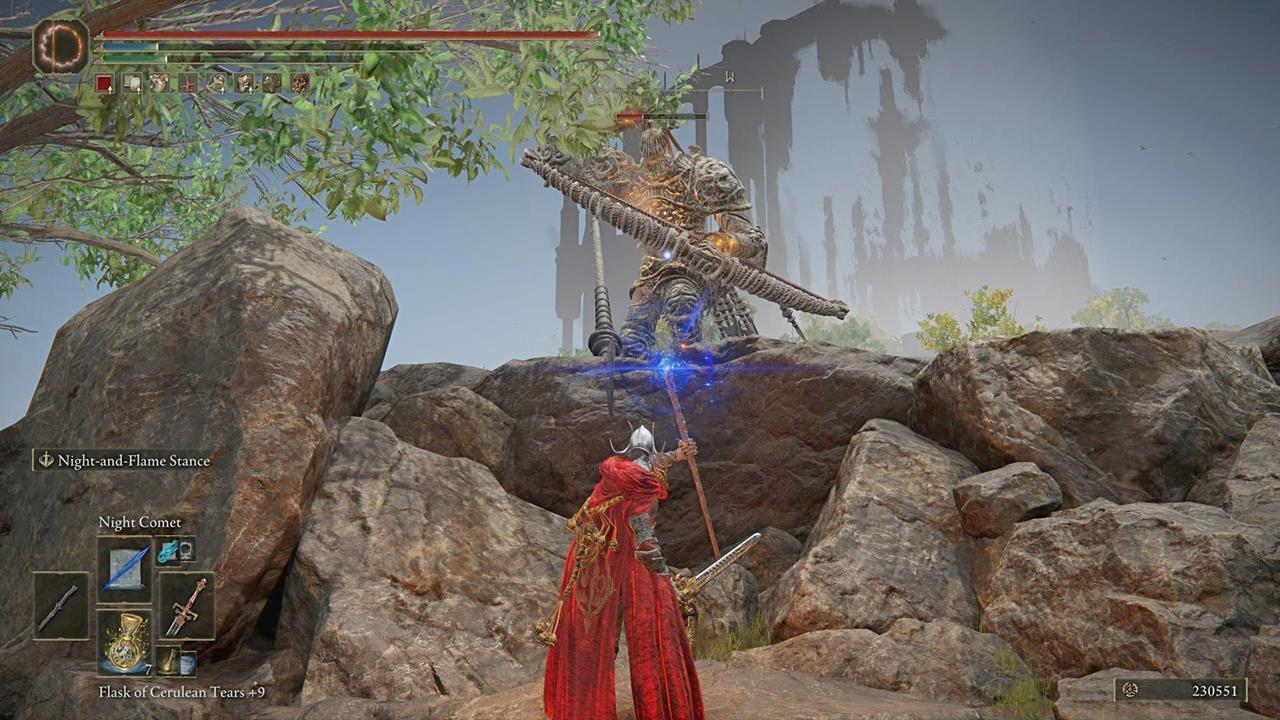
Continue directly across the bridge while maintaining constant awareness of the Furnace Golem’s positioning. Its devastating flame attack can eliminate your character instantly, so timing your movement between its attack cycles is crucial. After successfully crossing, veer southward to reach the Rauh Ancient Ruins – West waypoint, which provides a safe respite point.
The subsequent phase requires navigating the southwest temple complex, where spectral enemies relentlessly launch bouncing fireballs. These projectiles follow unpredictable trajectories, making evasion challenging in tight spaces. The left-side corridor contains an elevator mechanism that transports you to the second plateau level, marking significant progress toward your objective.
Upon exiting the elevator, immediately survey your surroundings. Look carefully to your left where the cliff face meets the lift structure, and you’ll identify several narrow ledges formed by ancient pillars. These precarious pathways require meticulous traversal.

You have the option to mount Torrent for enhanced mobility through double-jump capabilities. However, exercise extreme caution as the platforming controls can feel unpredictable on narrow surfaces. Many players underestimate the precision required and plummet to their demise, losing progress and runes.
Critical Mistake to Avoid: Attempting to rush through the ledge sections without proper positioning often results in fatal falls. The optimal approach involves dismounting Torrent for the tightest sections to maintain better control.
The Furnace Golem presents the most significant immediate threat with its one-hit-kill flame blast. Study its attack pattern: it typically telegraphs this move with a distinct charging animation and audio cue. Use this warning to position yourself behind cover or completely out of the attack vector.
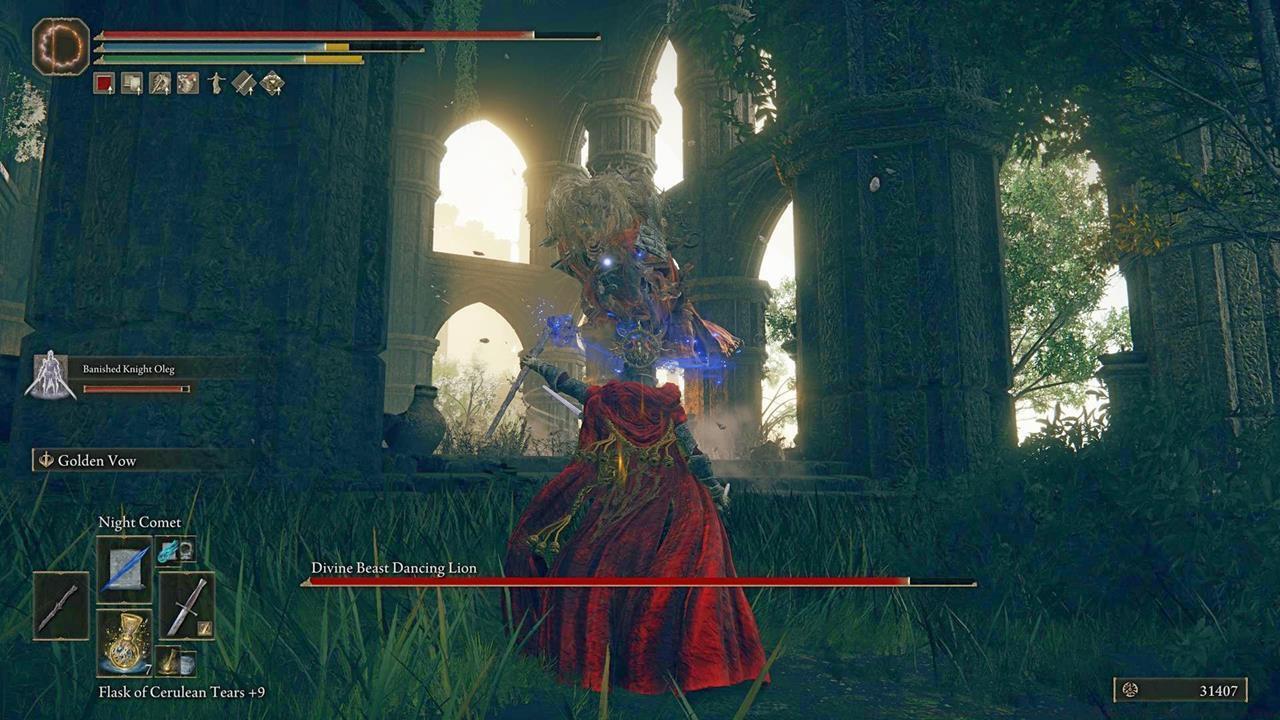
Specter enemies in the temple complexes employ bouncing fireball attacks that ricochet off surfaces. These projectiles are particularly dangerous in confined spaces where evasion options are limited. Time your dodges to coincide with the fireballs’ impact points rather than their initial trajectories.
Once successfully navigated, the Talisman of All Crucibles provides exceptional combat versatility. This accessory consolidates effects that would normally require multiple talisman slots, making it invaluable for builds that benefit from stacked defensive and utility bonuses.
Strategic Integration Tips: Combine this talisman with complementary gear that enhances its specific effects. For strength builds, pair it with damage-boosting talismans; for spellcasters, complement with FP conservation items.
The talisman’s multi-effect nature makes it particularly effective for hybrid builds that balance melee and magical capabilities. Its consolidated benefits free up additional talisman slots for more specialized enhancements.
Advanced players can leverage the talisman’s combined effects to create specialized combat approaches. The stacked bonuses provide both offensive and defensive advantages that can significantly alter encounter dynamics against challenging DLC bosses.

For players struggling with the platforming sections, consider temporarily respeccing to increase endurance and equip load for better movement control. Heavier armor can provide additional protection against incidental damage during navigation.
Action Checklist
- Travel to Viaduct Minor Tower in northwest Ancient Ruins of Rauh
- Navigate to Miquella Cross landmark through initial temple complex
- Cross bridge while timing movement between Furnace Golem attack cycles
- Reach Rauh Ancient Ruins – West waypoint and proceed to southwest temple
- Take left corridor elevator to second plateau level
- Carefully traverse pillar ledges using precise Torrent controls
No reproduction without permission:SeeYouSoon Game Club » How To Get Talisman Of All Crucibles In Elden Ring: Shadow Of The Erdtree Master the challenging path to acquire Elden Ring's ultimate all-in-one talisman with expert navigation tips