TL;DR
- Elden Ring features numerous boss encounters that prioritize frustration over fair challenge
- Camera issues and environmental limitations frequently undermine otherwise interesting fights
- Many bosses employ mechanics that drain resources or require specific counter-strategies
- Understanding attack patterns and environmental advantages is crucial for success
- Several optional bosses can be skipped without impacting main story progression
GameSpot may receive revenue from affiliate and advertising partnerships for sharing this content and from purchases through links.
Elden Ring represents From Software’s most ambitious project to date, featuring an unprecedented number of boss encounters scattered throughout its vast open world. The game’s staggering scale means players consistently face formidable adversaries with massive health pools, creating constant tests of skill and patience.
While many of these confrontations deliver satisfying combat experiences, certain bosses have emerged as community-wide sources of frustration. These problematic encounters range from technically impressive fights marred by questionable mechanics to outright unbalanced opponents that disrupt the game’s pacing.
This analysis examines ten particularly aggravating bosses identified through player consensus. Some represent mandatory progression gates, while others serve as optional challenges primarily targeting completionists seeking to conquer every aspect of the Lands Between.
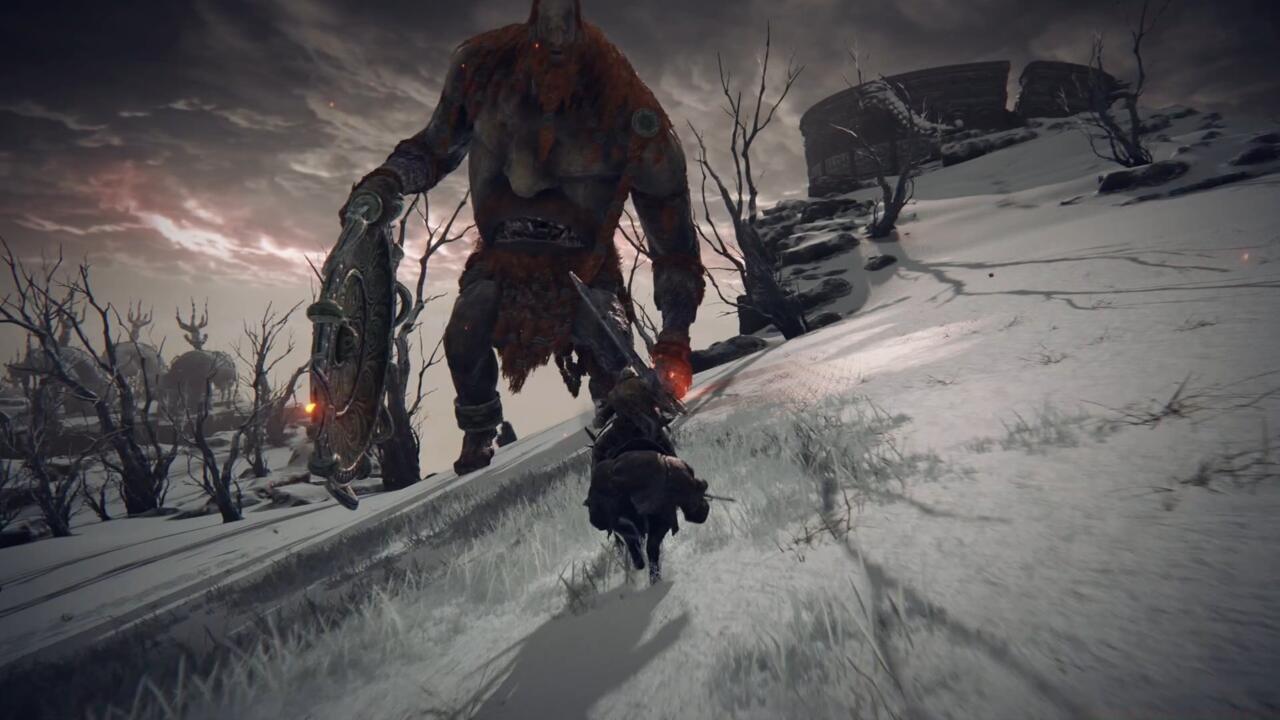
The Fire Giant presents a classic case where visual spectacle clashes with practical gameplay. His enormous stature creates significant camera control issues, particularly for melee-focused builds that must remain close to deal damage.
During the battle’s second phase, his rolling maneuvers transform the encounter into a tedious chase sequence. This mobility pattern forces players to spend excessive time repositioning rather than engaging in meaningful combat.
Strategic approach: Target his injured leg during phase one, then focus on his hands and face in phase two. Using Torrent for mobility can mitigate the chasing aspect, while ranged attacks provide consistent damage opportunities without camera struggles.
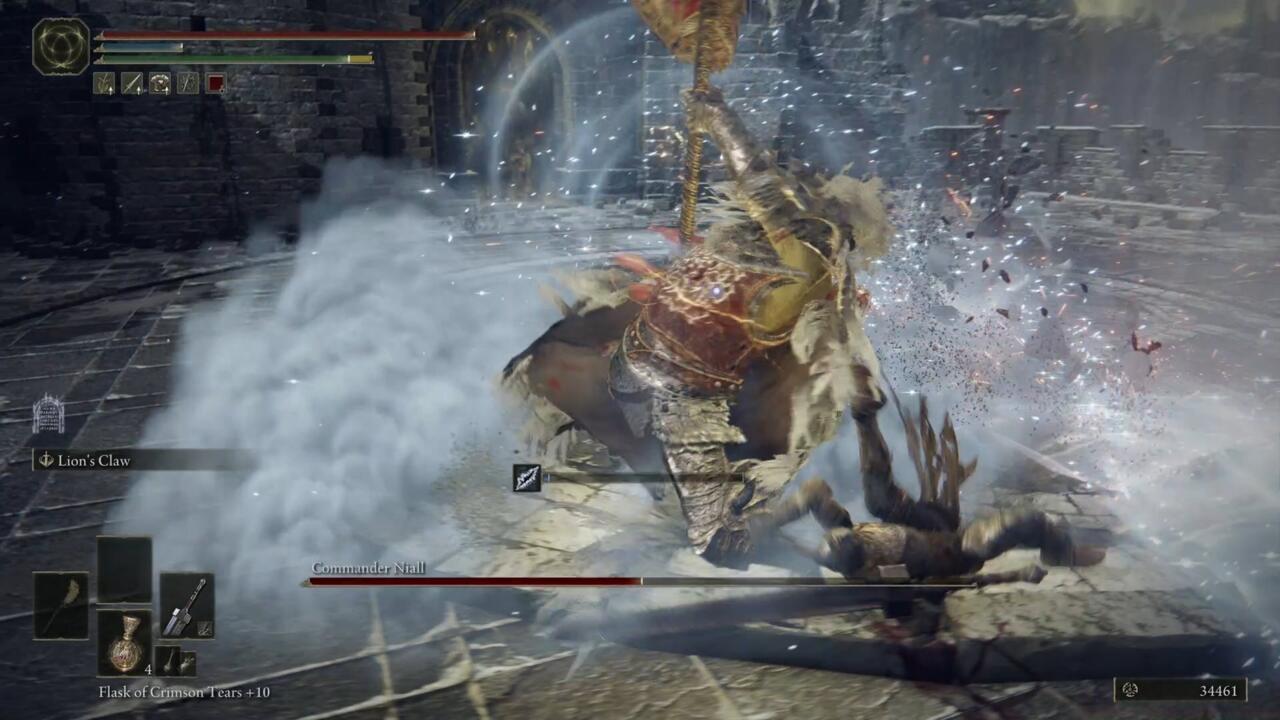
Commander Niall’s encounter suffers from severe spatial constraints compounded by his immediate summoning of two additional combatants. The cramped battlefield limits evasion options while managing multiple aggressive enemies.
Eliminating his spectral knights requires precise positioning and timing, as Niall continues his assault throughout the process. His high-damage attacks can eliminate unprepared players in just one or two strikes.
Effective strategy: Use bewitching branch on the summoned knights to turn them against Niall. Focus on eliminating the dual-wielding knight first, as he poses the most immediate threat. Maintaining distance and using pillars for cover becomes essential for survival.
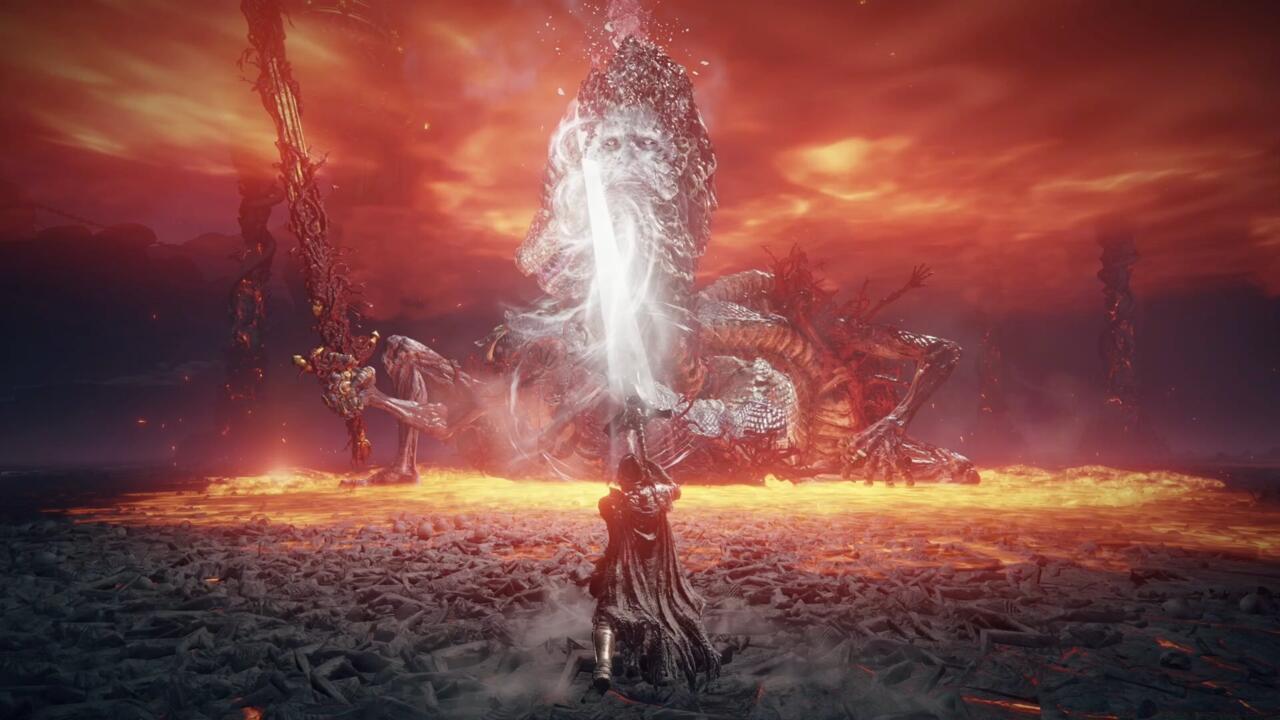
Rykard’s battle exemplifies the pitfalls of gimmick-based boss design. While thematically impressive, the mandatory use of the Serpent-Hunter weapon creates artificial constraints while inconsistent hitboxes introduce unnecessary randomness.
The encounter’s visual chaos frequently obscures attack telegraphs, making avoidance more about luck than skill. Camera angles become particularly problematic during his arena-wide area attacks.
Optimization tips: Upgrade the Serpent-Hunter weapon fully before the fight. Time your attacks during his recovery animations and use the weapon skill for consistent posture damage. Positioning near his torso provides better visibility of incoming attacks.
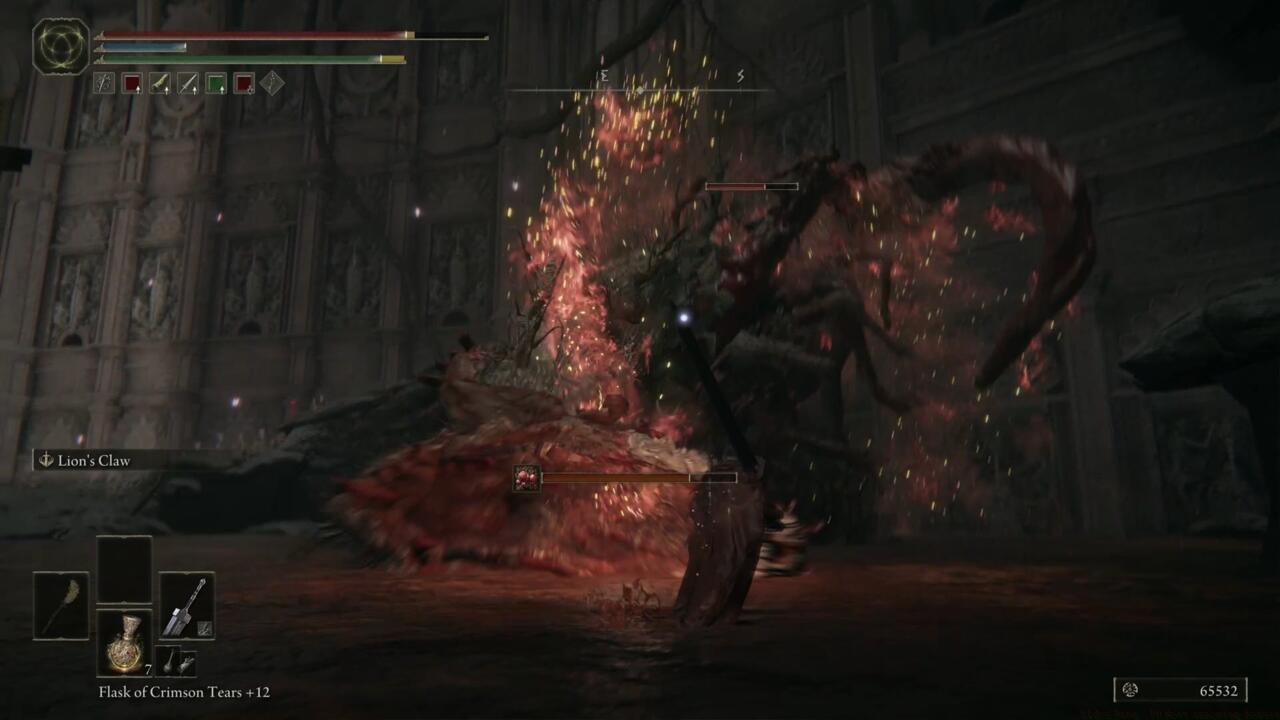
Mohg delivers one of Elden Ring’s most atmospheric encounters, yet his mechanics push beyond reasonable challenge levels. The blood curse that activates before his second phase systematically drains health while consuming precious healing resources.
This mandatory damage mechanic forces players to enter phase two with diminished supplies, creating artificial difficulty. His wide-reaching attacks and persistent area effects compound the resource management challenges.
Counter strategies: Acquire the Purifying Crystal Tear to neutralize his curse. Time your healing during his lengthy phase transition animation. Fire resistance gear and spells significantly reduce incoming damage from his bloodflame attacks.
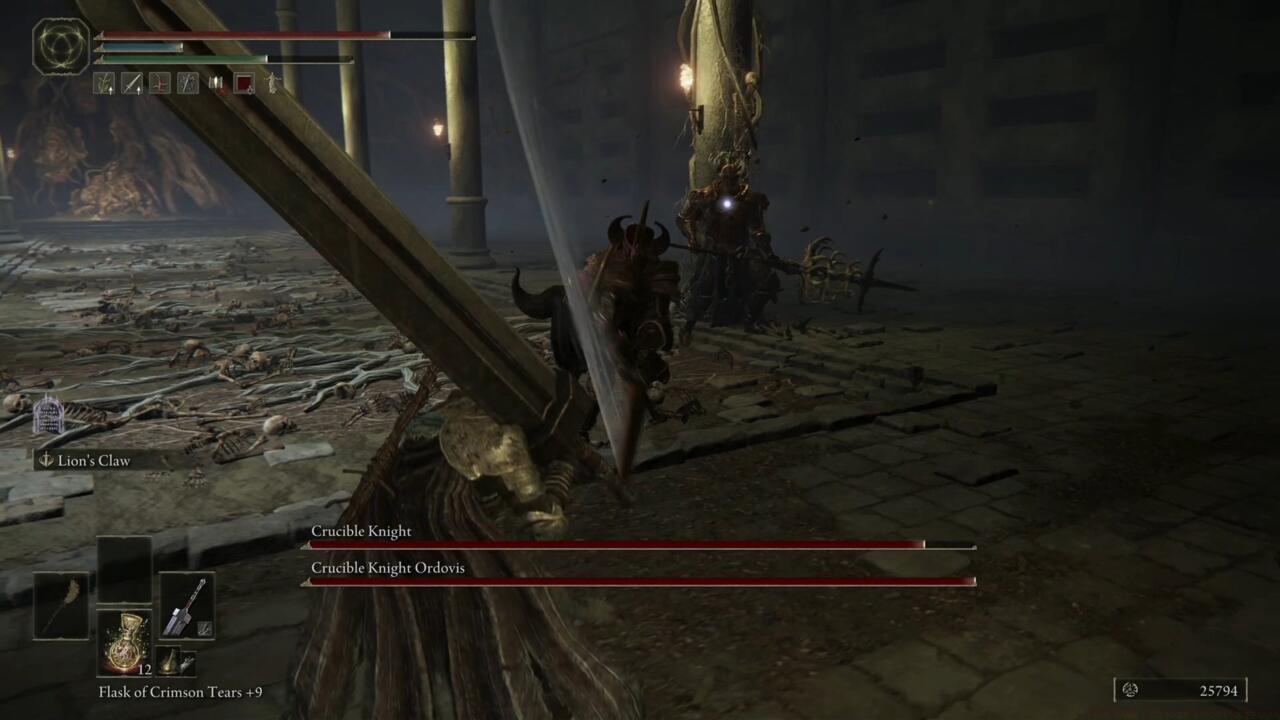
Facing two Crucible Knights simultaneously represents one of Elden Ring’s most endurance-testing encounters. Each knight possesses relentless aggression patterns and high poise, making separation and individual engagement nearly impossible without specific strategies.
The battle becomes a war of attrition where mistakes compound rapidly. Their coordinated attacks create few safe windows for healing or counter-attacks.
Successful approach: Use sleep pots to incapacitate one knight temporarily. Focus on breaking posture through guard counters and jump attacks. Summoning spirits that can draw aggro from one knight creates crucial breathing space.
Ulcerated Tree Spirits reappear throughout Elden Ring, with later encounters frequently placing them in absurdly confined spaces. These tight quarters exacerbate the already problematic camera behavior, making proper orientation during combat virtually impossible.
Their erratic movement patterns and large hitboxes create situations where damage feels unavoidable rather than earned through skill deficiency.
Defensive solutions: Shield usage provides reliable protection against their rapid flailing attacks. Positioning near their midsection reduces camera issues while providing consistent damage opportunities. Fire damage proves particularly effective against their wooden composition.
Mastering Elden Ring’s most frustrating bosses requires understanding core mechanical principles beyond simple pattern recognition. Weapon selection should prioritize movesets that create safe engagement distances while maximizing damage during limited windows.
Stat optimization varies significantly by encounter type. For agile bosses like Malenia, endurance and vigor take priority, while tankier opponents benefit from strength and weapon upgrade levels.
Timing and positioning form the foundation of successful boss encounters. Learning to read telegraphs through visual and audio cues rather than relying on muscle memory alone.
Common mistakes include over-committing to attack chains and misjudging recovery frames. Advanced players should focus on creating their own attack opportunities through careful spacing and timing.
For comprehensive guidance on character building and progression, consult our Complete Guide to ensure your build can handle these challenging encounters.
Action Checklist
- Upgrade Serpent-Hunter weapon to +9 before Rykard fight
- Acquire Purifying Crystal Tear from Yura’s questline for Mohg
- Practice Crucible Knight patterns in earlier encounters before attempting duo
- Optimize weapon selection based on boss mobility and size
- Master camera control techniques for large enemies in confined spaces
No reproduction without permission:SeeYouSoon Game Club » Elden Ring: 10 Most Annoying Bosses Mastering Elden Ring's most frustrating boss encounters with proven strategies and avoidance techniques