TL;DR
- Target padlocks strategically based on their specific weaknesses and debuff rotation patterns
- Manage stress levels proactively since healing abilities get locked during specific denial phases
- Position heroes to circumvent denial effects by anticipating the left-to-right rotation sequence
- Bring versatile heroes who can adapt when their primary abilities become temporarily unavailable
- Focus on survival during denial phases and maximize damage during vulnerable windows
Confronting the Denial Brain represents your first major obstacle in Darkest Dungeon 2, presenting significant difficulty through its extensive arsenal of debilitating abilities. Success requires precise targeting and disciplined execution rather than brute force approaches.
The struggle against cosmic horrors in Darkest Dungeon II functions as both external combat and internal psychological warfare. Your heroes must withstand grotesque monstrosities while simultaneously preventing their own minds from fracturing under overwhelming terror. This thematic battle against inner demons manifests literally through Act 1’s title—Denial—and culminates in facing a massive cerebral organ physically restrained by metallic chains.
Overcoming this adversary—specifically the four enchanted restraints securing it—proves challenging due to specialized capabilities each lock employs against your party. Substantial health reserves make gradual attrition tactics inefficient. Strategic prioritization of targets combined with appropriate attack selections creates significant advantages, alongside vigilant management of your team’s Stress to maintain combat readiness.
This comprehensive guide provides essential knowledge for defeating the Cerebral Guardian and completing Act 1’s narrative arc. For broader survival strategies, consult our essential Darkest Dungeon II beginner primer.
Strategic hero selection becomes critical as each restraining mechanism possesses distinct vulnerabilities requiring specialized countermeasures.
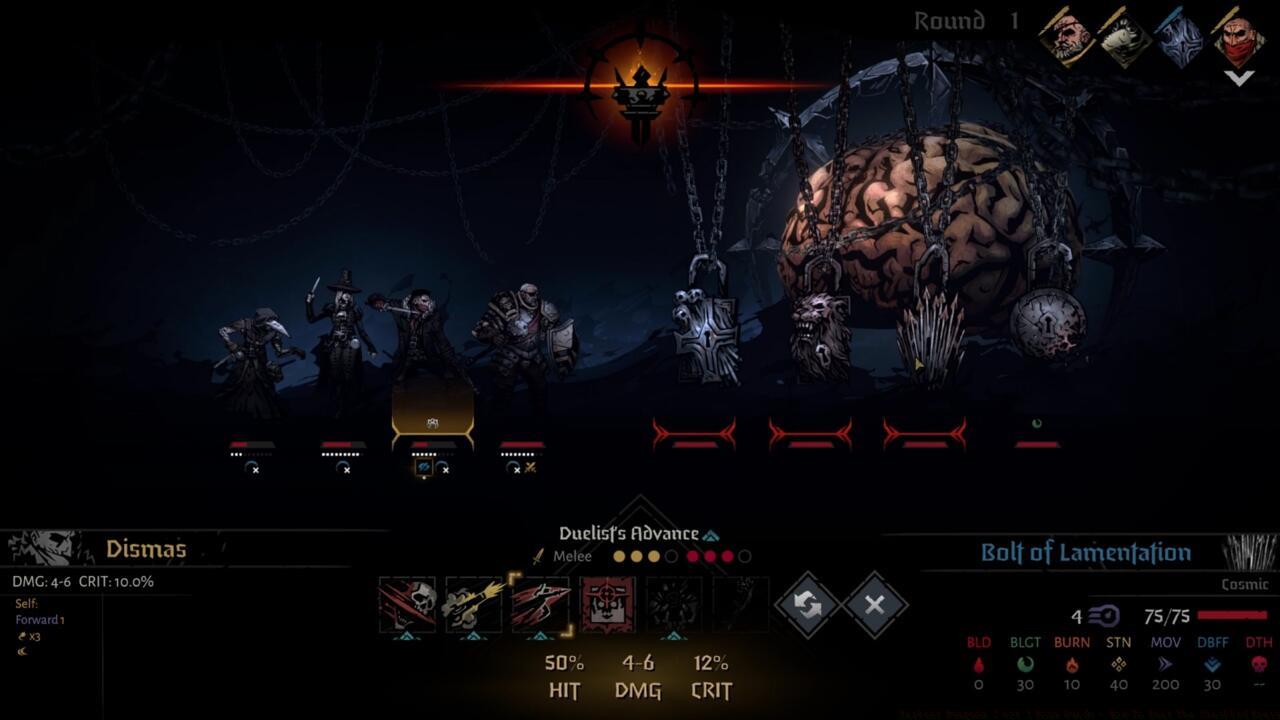
The climactic confrontation of Act 1 involves subduing a neural entity bound by four mystical fasteners. Every lock functions as an autonomous combatant assaulting your formation, though their most dangerous aspect involves unique impairment capabilities. Each combat cycle, one restraint inflicts a “Denial” status effect, prohibiting specific skill categories entirely. These denials sequentially disable stress recovery, ranged offensive capabilities, melee assaults, and healing capacities.
Denial assaults follow a predictable sequence originating from the formation’s right flank progressing leftward, enabling preemptive tactical adjustments through character repositioning:
- Round 1: Denial of Reason (Shackle of Despair)
- Completely blocks stress mitigation skills and consumables
- Target this lock with heroes possessing strong direct damage abilities
- Round 2: Denial of Reach (Bolt of Lamentation)
- Prevents all projectile-based attack execution
- Utilize melee specialists or magic-users during this phase
- Round 3: Denial of Force (Chain of Violence)
- Disables close-quarters combat techniques
- Position archers and spellcasters to maintain offensive pressure
- Round 4: Denial of Relief (Lock of Suffering)
- Blocks all healing and regeneration abilities
- Focus on prevention rather than recovery during this cycle
Pro Tip: The rotation pattern resets after completing four rounds, allowing experienced players to anticipate which abilities will become unavailable and plan their skill usage accordingly.
Building an effective team requires balancing damage output, survivability, and adaptability. The Plague Doctor excels here with her battlefield medicine and blight attacks that bypass some denial restrictions. The Man-at-Arms provides crucial protection with his guard ability, while the Hellion delivers consistent melee damage that remains effective during most denial phases.
Optimal Hero Combinations:
- Versatility Core: Plague Doctor + Highwayman (covers multiple damage types)
- Defensive Anchor: Man-at-Arms + Vestal (survival-focused composition)
- Aggressive Approach: Hellion + Grave Robber (high damage, riskier)
Stress management demands particular attention since the Denial of Reason phase temporarily eliminates your primary recovery methods. Before engaging, ensure your team’s stress levels remain below 50% to avoid afflictions during locked phases. Utilize stress-reducing opportunities in preceding regions and conserve stress-healing items for post-battle recovery rather than mid-combat emergencies.
Ability rotation planning proves essential—during Denial of Reach, reposition melee heroes forward; when Denial of Force activates, shift ranged attackers to the front. This positional flexibility often determines victory versus defeat.
Combat Rhythm: The battle follows a predictable four-turn pattern: survive the denial effect, then exploit the following three turns for maximum damage output before the next restriction activates.
Avoid These Critical Errors:
- Arriving with high-stress heroes vulnerable to denial-triggered afflictions
- Over-specializing in one damage type vulnerable to specific denials
- Wasting powerful abilities right before they become restricted
- Neglecting to reposition characters anticipating coming denial effects
Advanced Optimization:
- Time your strongest damage-dealing cooldowns to align with vulnerability windows between denial phases
- Bring consumables that provide multiple functions—antidotes that also heal, or food that reduces stress
- Memorize the denial rotation to preemptively adjust your formation each round
Time Management: Expect the encounter to last 12-16 rounds for well-prepared teams, or 20+ rounds for suboptimal compositions. Allocate approximately 25-35 minutes for this boss fight including preparation phases.
Mechanics Deep Dive: The denial effects utilize a hidden priority system—if multiple heroes could trigger different denials, the game follows the predetermined rotation order regardless of activation timing.
Action Checklist
- Verify all heroes have stress below 50% before engagement
- Position team anticipating first denial effect (right-to-left rotation)
- Focus fire on currently active denial lock while surviving its effect
- Reposition characters between rounds based on upcoming denial type
- Use vulnerability windows between denials for maximum damage output
- Conserve stress healing for after combat rather than during denial phases
No reproduction without permission:SeeYouSoon Game Club » Darkest Dungeon 2 Act 1 Boss Guide – How To Beat The Shackled Brain Master the Denial Brain boss fight with strategic targeting, debuff management, and stress control tactics