TL;DR
- Team coordination is non-negotiable – lone wolves guarantee mission failure
- Munitions crates and killstreaks provide critical tactical advantages when deployed strategically
- Specialized roles create force multipliers when players leverage unique abilities effectively
- Environmental awareness and crate scavenging significantly extend your resource sustainability
- Proactive revives and riot shield utilization dramatically improve squad survivability
GameSpot may receive revenue from affiliate and advertising partnerships for sharing this content and from purchases through links.
Call of Duty: Modern Warfare diverges from recent franchise entries by excluding Zombies mode, instead revitalizing the cooperative Special Ops experience. Infinity Ward’s revival extends campaign narratives through missions supporting up to four-player squads. Both Classic Spec Ops and PlayStation-exclusive Survival modes present unique challenges distinct from competitive multiplayer or solo campaigns, demanding comprehensive mastery of Call of Duty mechanics.
Spec Ops presents significant learning curve challenges with minimal upfront guidance. Mission briefings provide basic objectives, but optimal weapon selection, enemy composition awareness, and role effectiveness require experiential learning through repeated attempts. Numerous underlying mechanics exist to facilitate mission completion, yet remain obscure without dedicated investigation. Our comprehensive guide delivers actionable strategies to enhance Spec Ops performance and reduce frustrating failures. Here’s your essential foundation for mastering this demanding cooperative mode.
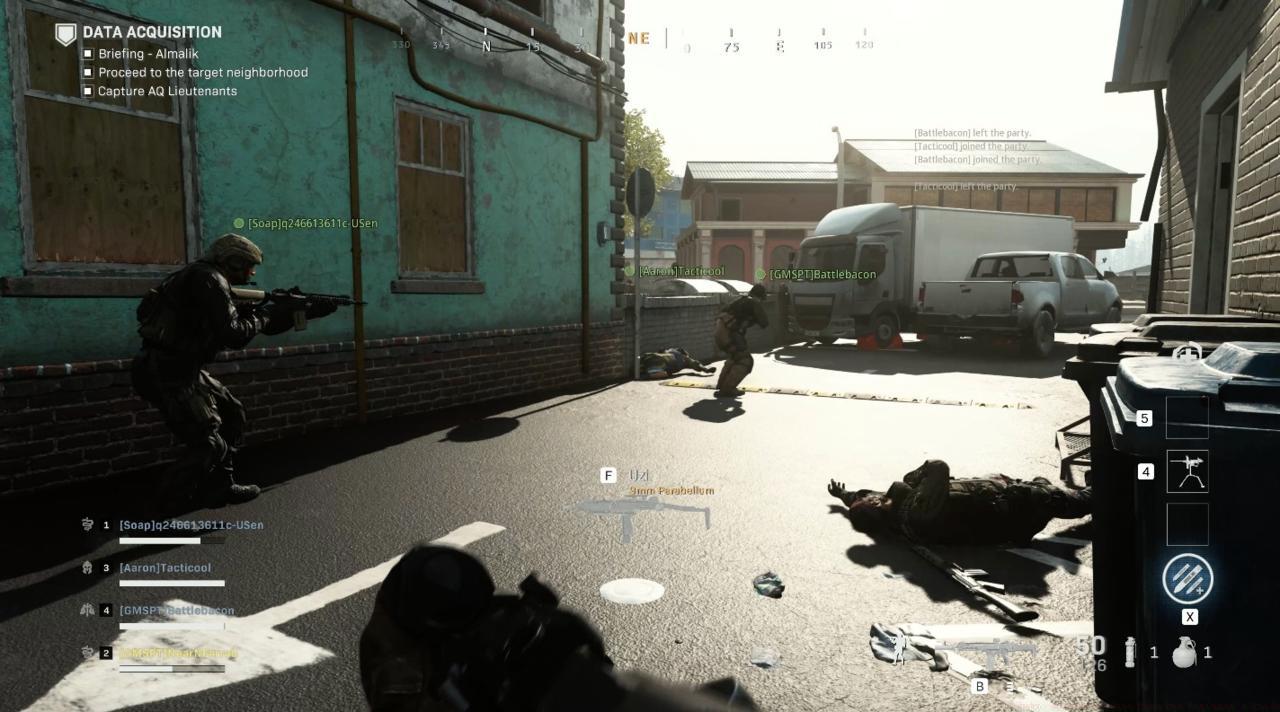
The paramount principle governing Spec Ops success is maintaining constant squad proximity. Isolation inevitably results in ambushes from unseen enemies or overwhelming engagements beyond individual capacity. This transforms you into a critical liability, depriving your team of firepower and abilities while forcing risky rescue operations or enduring full-minute respawn delays. Most Spec Ops failures originate from lone wolf mentalities where individuals pursue personal agendas. Consistent team positioning and mutual support dramatically improve operational progress across all mission types.
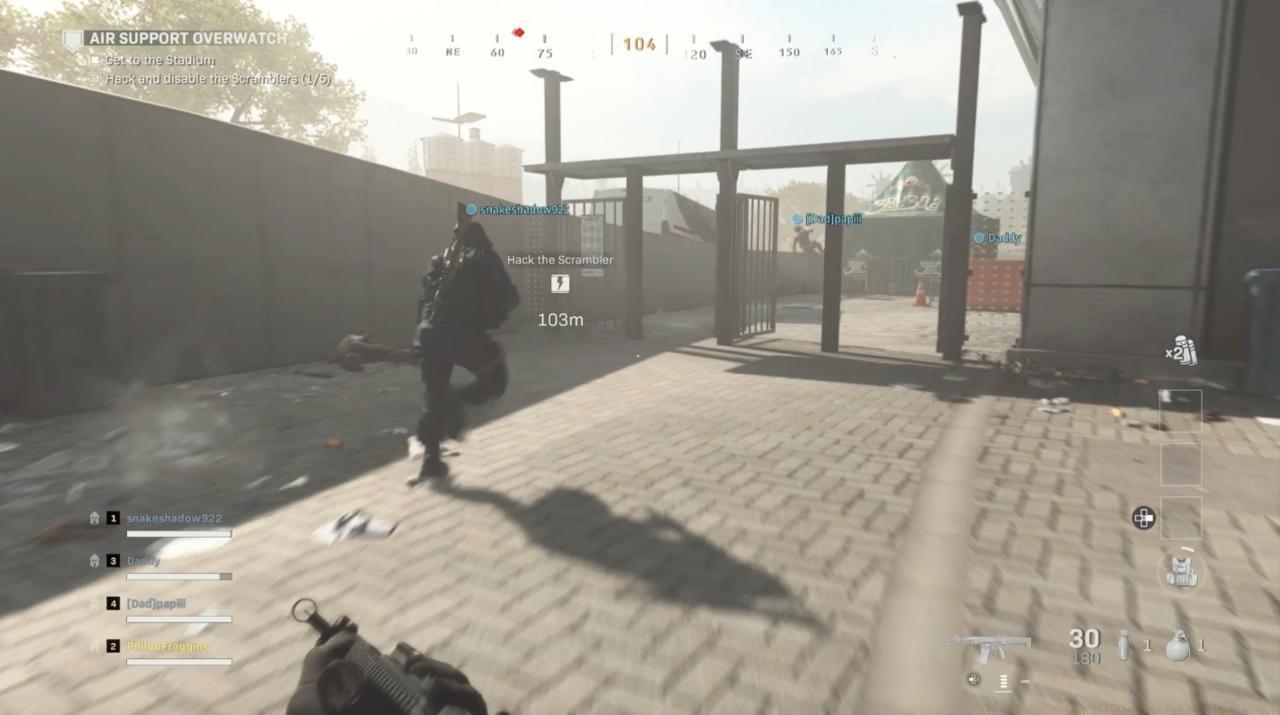
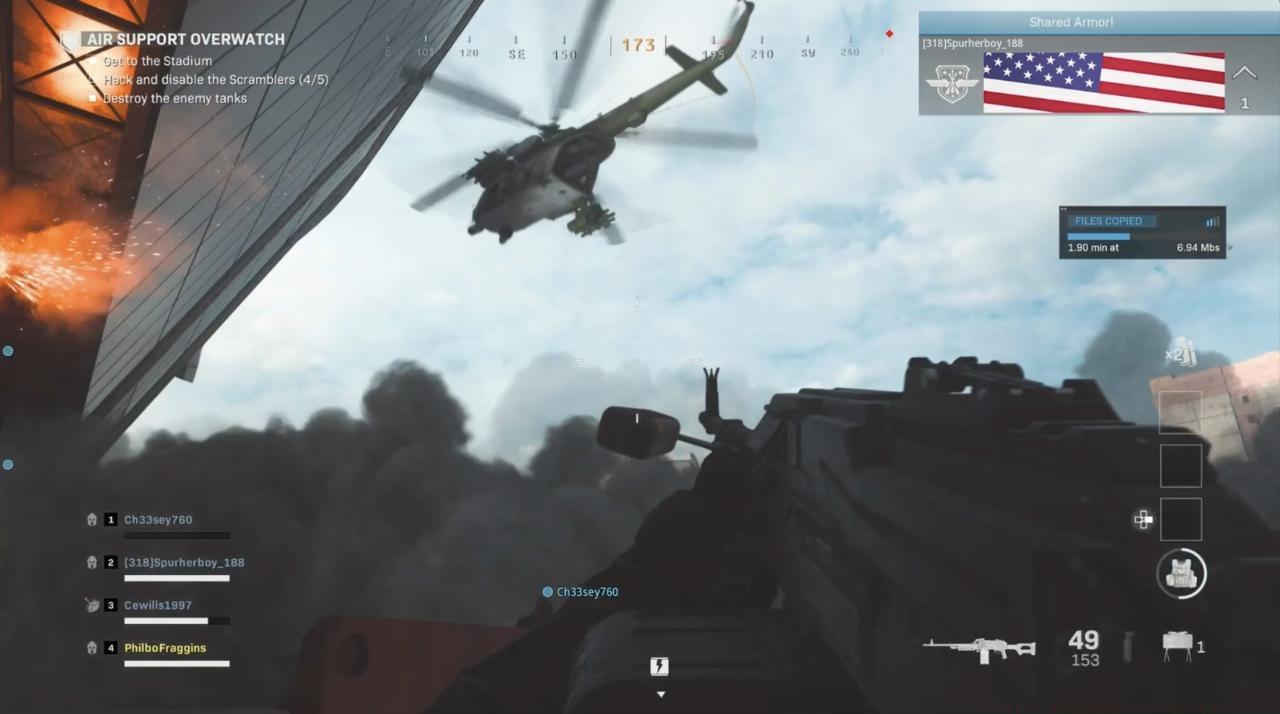
Radio communications deliver far more than objective updates and narrative context in Spec Ops missions. Tactical handlers provide continuous situational awareness by announcing incoming enemy surges and identifying specific threat types. When fresh combat waves deploy, your support team broadcasts critical intelligence, enabling strategic preparation for imminent engagements. This becomes particularly crucial during final mission phases when adversaries deploy armored vehicles and aerial threats. Handler notifications allow evasion or, more commonly, targeted elimination—but attentive listening is mandatory to prevent catastrophic surprises.
The Munitions interface on your loadout screen represents a strategic planning cornerstone. Here you expend mission-earned points to acquire ammunition reserves, armor packages, and tactical killstreaks. Appropriate killstreak deployment during pivotal moments can transform certain defeat into remarkable victory, but even without premium unlocks or sufficient funds, crate contributions remain invaluable. Standard operating procedure should mandate constant ammunition and armor crate accompaniment, as these resources fundamentally determine team endurance. Depleted weapons during intensive firefights virtually ensure Spec Ops failure, while enhanced protection during critical encounters provides the marginal advantage needed to eliminate Juggernauts or helicopters that would otherwise cause mission termination. Ensure perpetual crate availability, deploying them during demanding combat scenarios, defensive position holding, or mission lulls to ensure squad readiness for subsequent engagements.
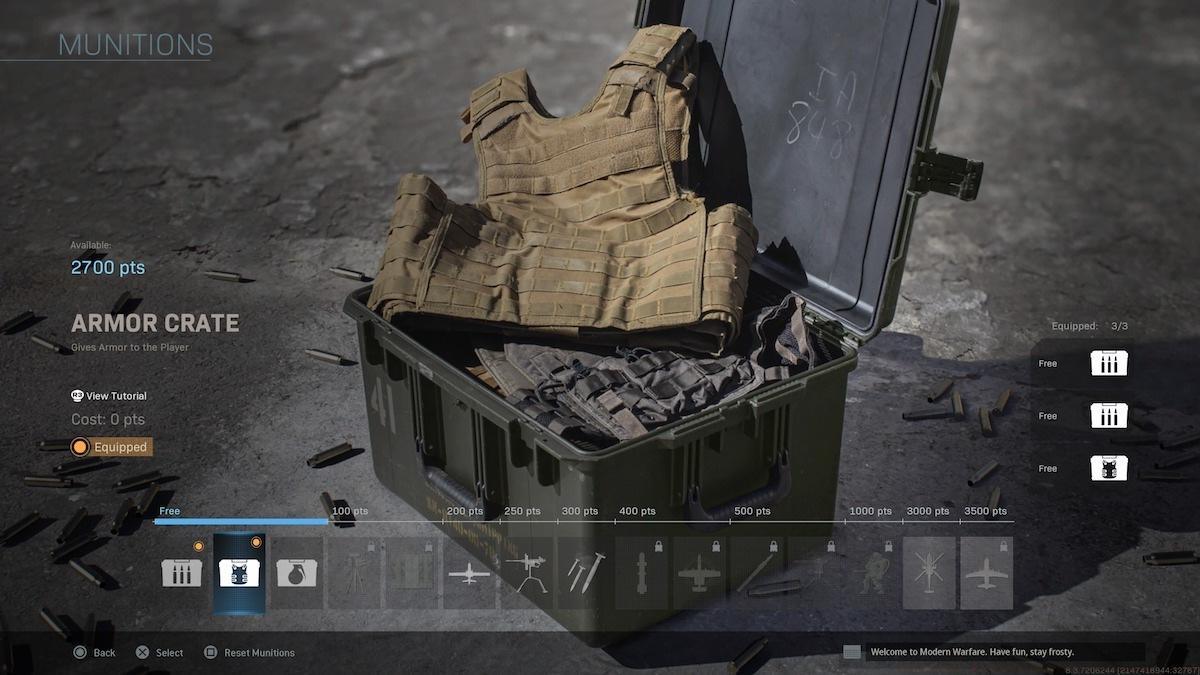
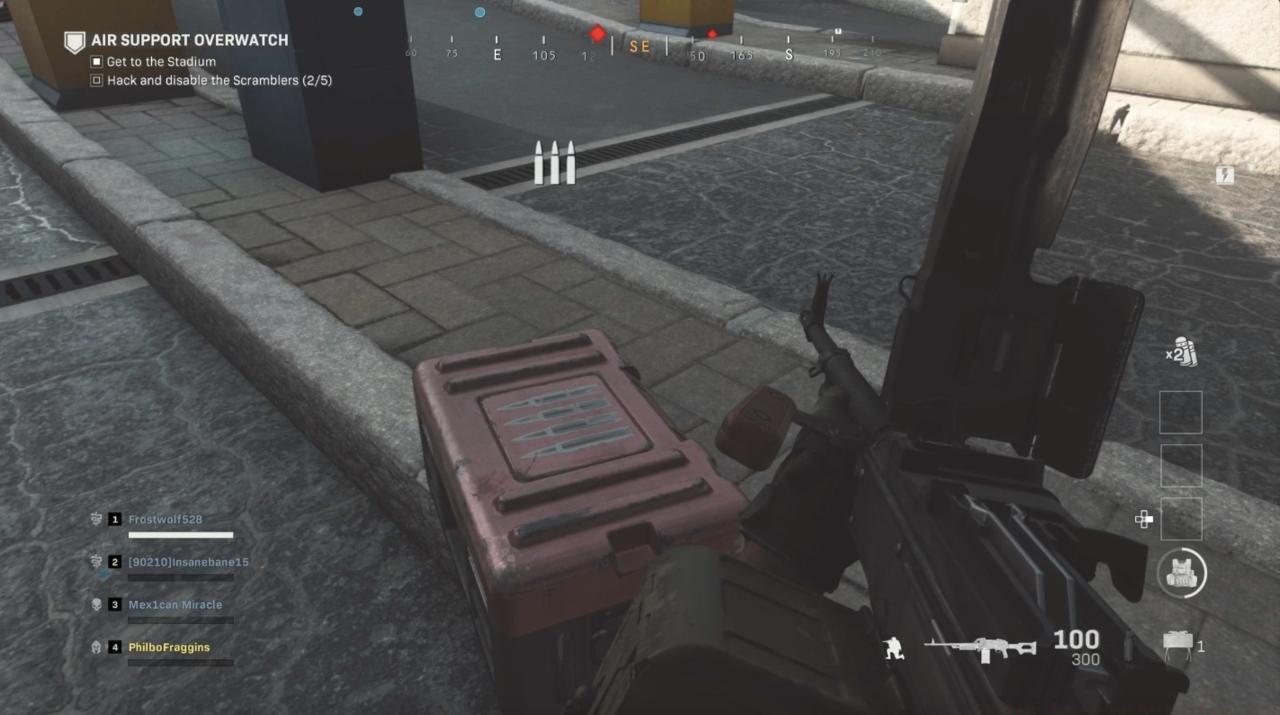
While the Munitions screen limits you to three crate deployments (reduced further with killstreak selections), environmental crate discovery remains possible throughout all Spec Ops missions. These resources typically occupy peripheral locations and interior spaces near objective markers. Investigate building interiors and alternate routes between primary engagement zones—crate discovery probability remains high. Acquiring field crates enables transportation for future team deployment, with occasional killstreak discoveries in uncontrolled areas. Never overlook critical resource opportunities in Spec Ops, as later mission phases will inevitably demand them.
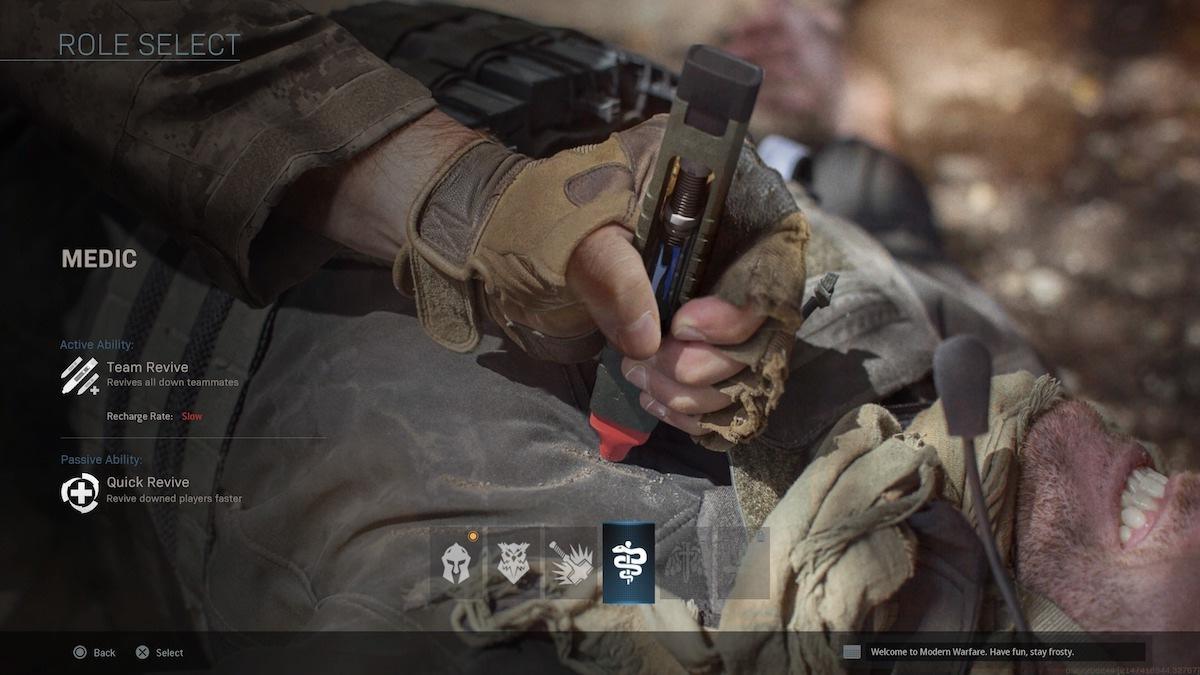
Spec Ops transcends standard infantry roles through dedicated specialization systems. Pre-mission Role selection determines your squad contribution parameters. Medics accelerate teammate revival speeds, Heavy troopers receive expanded launcher ammunition and anti-armor capabilities, while Recon operatives deploy target-marking drones. Six distinct roles offer unique tactical advantages, making diversified squad composition strategically optimal. Even without perfect team coordination, understanding your character’s capabilities and maximizing their potential significantly enhances Spec Ops performance. If functioning as medic, embrace the role—leverage accelerated revival timings to maintain team health, enabling squadmates to maintain offensive pressure while you preserve operational continuity. When squads achieve full specialization, they develop enhanced threat response capabilities and recovery resilience against situations that would typically cause mission failure.
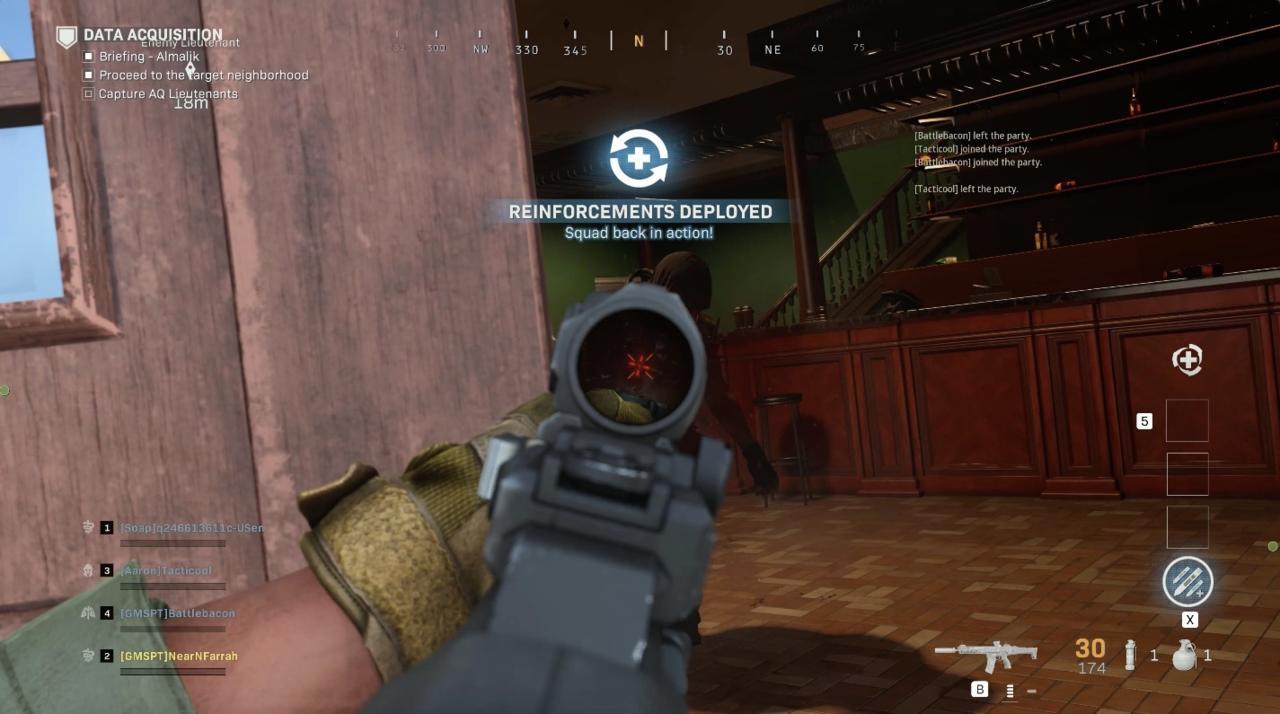
Complete squad incapacitation results in Spec Ops mission failure, forcing restart from previous major checkpoint. While failure creates substantial progression setbacks, any teammate can revive fallen comrades during combat. Without intervention, squad members will hemorrhage vitality briefly before requiring sixty-second redeployment intervals. Medical specialization isn’t mandatory for revival attempts, though standard revives proceed slower. Typically, revival completion remains feasible without fatal consequences, making rescue attempts consistently preferable to abandonment. Enhance revival effectiveness by incorporating riot shields into your loadout configuration, providing rear protection during teammate assistance operations.
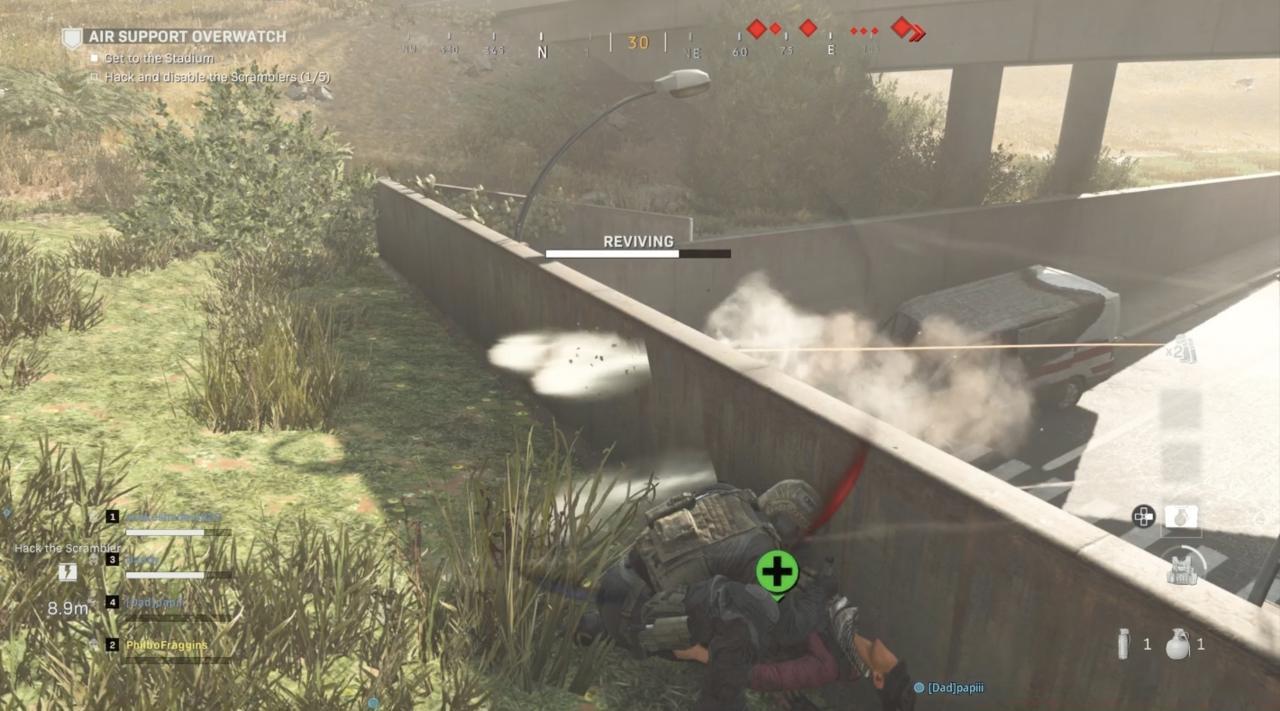
Strategic teams maintain close formation to simplify revival procedures, prioritizing teammate recovery to preserve maximum combat effectiveness. If incapacitated during engagement, facilitate team revival assistance by engaging proximate enemies with secondary weapons and seeking protective cover. Removing yourself from direct threat exposure simplifies accessibility, accelerating your return to active combat participation.

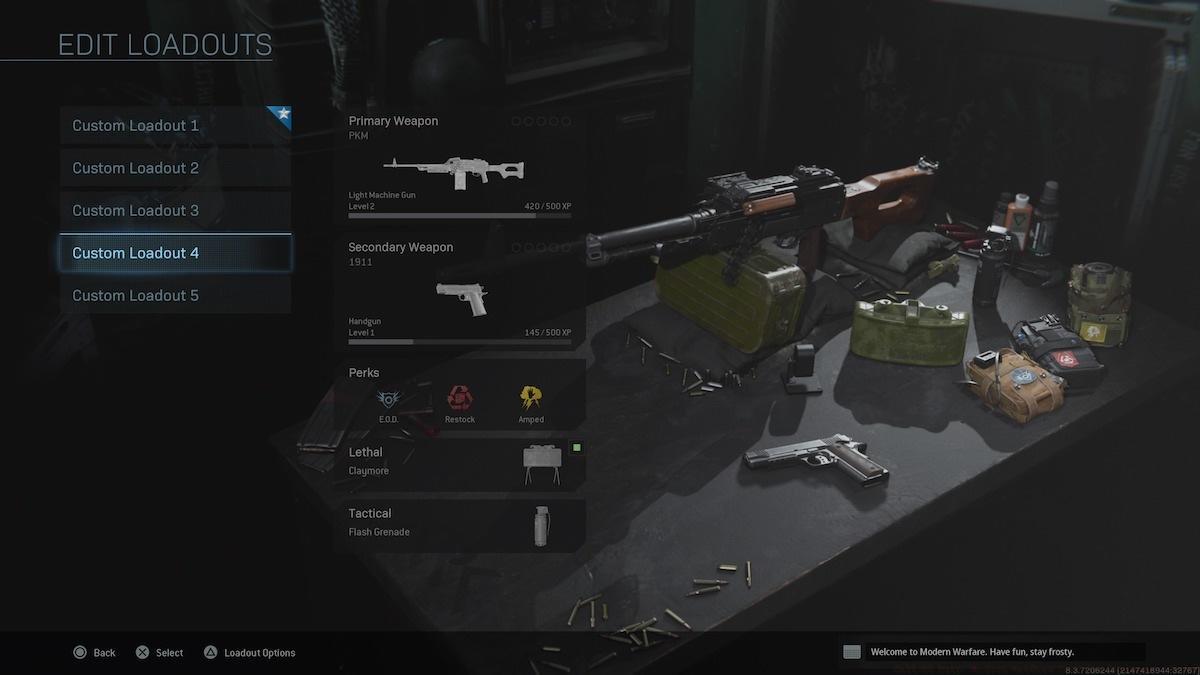
Advanced players should construct dedicated Spec Ops loadouts optimized for cooperative play. Unlike standard multiplayer configurations, these loadouts prioritize sustainability and team support capabilities. Consider including weapons with extended magazines, tactical equipment for area denial, and perks that enhance team utility rather than individual performance. For comprehensive weapon customization strategies, consult our BF6 Weapons Unlock Guide for weapon attachment optimization principles.
Stealth approaches provide significant advantages during specific Spec Ops mission types. While not universally applicable, covert movement and suppressed weapons can bypass significant enemy concentrations, preserving resources for mandatory engagements. Understanding when to employ stealth versus aggressive tactics represents a key skill differentiation between novice and expert players.
Each Spec Ops role features unique active abilities with cooldown mechanisms. These powerful tools can reverse desperate situations, but should be conserved for genuine emergencies rather than routine encounters. Strategic ability timing often determines mission success versus failure during critical phases.
Action Checklist
- Coordinate role selection with teammates to ensure balanced squad composition
- Purchase maximum ammunition and armor crates from Munitions menu
- Establish communication protocol for handler intelligence and threat warnings
- Maintain visual contact with all squad members throughout mission duration
- Systematically scavenge environmental crates during objective transitions
- Deploy resource crates during defensive phases or before major engagements
No reproduction without permission:SeeYouSoon Game Club » Call Of Duty: Modern Warfare Spec Ops Beginner’s Guide Master Call of Duty: Modern Warfare Spec Ops with essential team strategies and advanced tactics