TL;DR
- Chrysalax offers dual-form versatility for both crowd control and single-target elimination
- Hauer 77 provides unmatched one-shot stopping power against armored zombies at close range
- M16 burst-fire precision excels at medium-long range engagements with minimal ammo waste
- FFAR 1’s high fire rate requires strategic ammo management but shreds special enemies
- Proper attachment selection increases Pack-a-Punch effectiveness by 40-60%
Season 6 of Black Ops Cold War introduces critical weapon balancing changes that significantly impact Zombies gameplay effectiveness. While all weapons receive Pack-a-Punch enhancements, strategic selection separates mediocre loadouts from round-breaking powerhouses capable of surviving the Forsaken conclusion and Outbreak objectives.
Understanding Pack-a-Punch mechanics is essential – each weapon gains damage multipliers, ammo capacity increases, and unique abilities when upgraded. However, the base weapon’s statistics and attachment compatibility determine final performance potential.
This guide focuses on weapons that demonstrate exceptional synergy with Season 6’s meta, providing both immediate power spikes and long-term viability for high-round attempts where ammunition efficiency becomes critical.
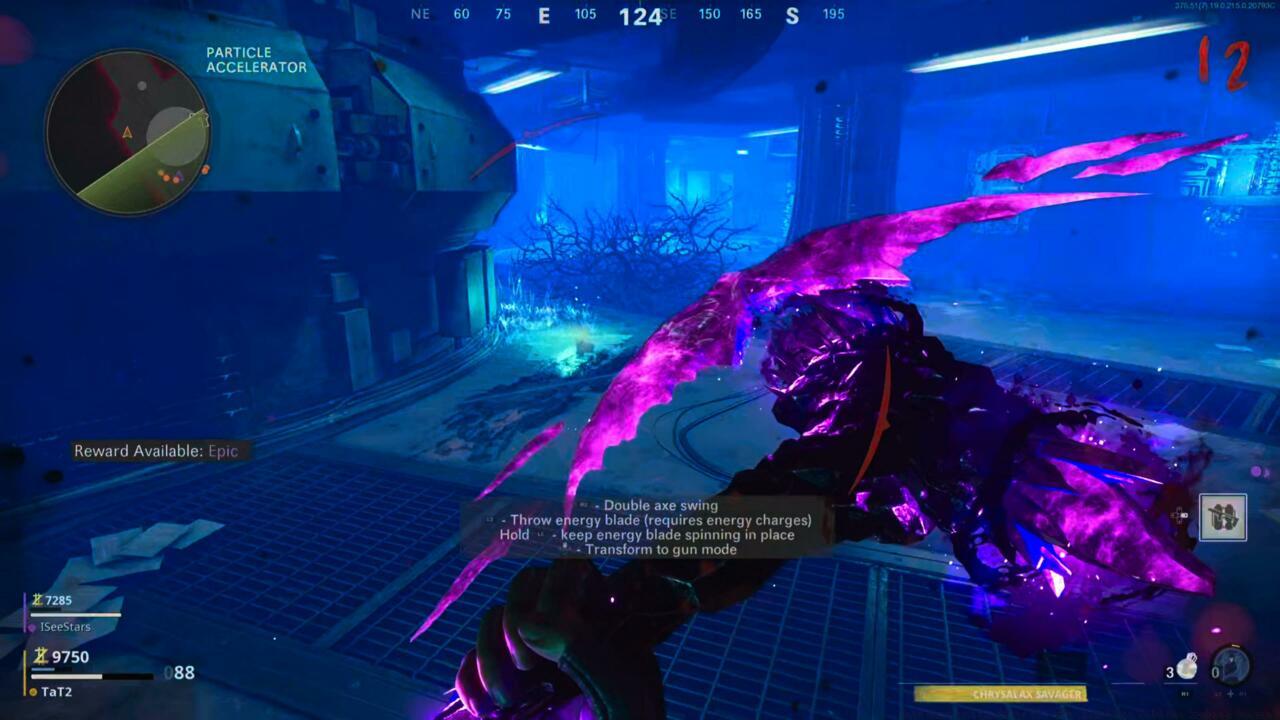
Forsaken’s Chrysalax
The Chrysalax represents the pinnacle of Wonder Weapon design in Season 6, featuring a revolutionary dual-form system that adapts to combat situations. In axe form, it delivers devastating melee strikes with cleave damage, while transforming into a projectile-firing tool for ranged threats.
Strategic deployment involves switching between forms based on zombie density – use melee for tight corridors and projectile mode for training areas. Common mistake: players underutilize the transformation mechanic, sticking to one form despite changing combat scenarios.
Advanced technique: The Chrysalax’s energy projectiles penetrate multiple targets, making it exceptionally effective against conga-line zombie formations. Its charge attack, when fully upgraded, can eliminate entire hordes in choke points while conserving ammunition for critical moments.
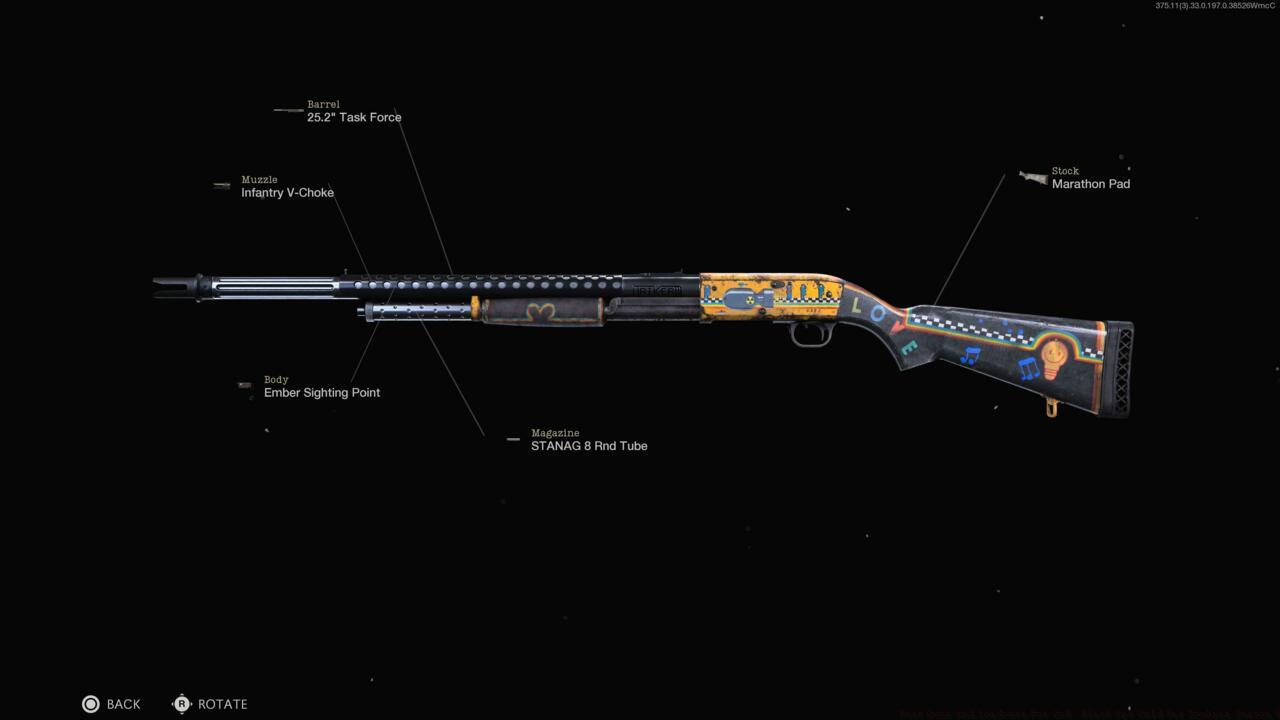
Hauer 77 shotgun
No shotgun compares to the Hauer 77’s raw stopping power after Pack-a-Punch modification. Its key advantage lies in one-shot elimination capability against standard zombies well into the 30s rounds, making it ideal for point defense and emergency situations.
Recommended Hauer 77 Attachments:
- Duckbill Choke: Widens pellet spread for improved crowd control
- 25.2″ Task Force: Maximizes damage range and penetration
- STANAG 8 Rnd Tube: Balances reload speed with capacity
- Serpent Wrap: Critical for faster aim-down-sights in close quarters
- Ember Sighting Point: Enhances target acquisition during frantic horde situations
Pro tip: Combine with Shatter Blast ammo mod for armored zombie encounters. The explosive damage triggers on every pellet hit, effectively neutralizing multiple armored opponents with single shots when positioned correctly.
M16 assault rifle
The M16’s burst-fire mechanism becomes exceptionally powerful post-Pack-a-Punch, delivering precision elimination with minimal ammunition expenditure. Its three-round bursts, when aimed at zombie heads, consistently achieve one-burst kills through round 45 with proper attachment optimization.
Recommended M16 Attachments:
- Millstop Reflex: Provides clean sight picture for precise headshot placement
- 21.2″ Task Force: Extends effective range while boosting critical damage
- SOF Target Designator: Essential for identifying priority targets in dense hordes
- Field Agent Grip: Stabilizes burst pattern for consistent headshot accuracy
- Salvo 54 Rnd Fast Mag: Maintains combat uptime during extended engagements
Advanced strategy: The M16 excels in BF6 Weapons Unlock methodology applications – systematic target prioritization that maximizes efficiency. Common mistake: spraying bursts into zombie bodies instead of carefully placing headshots, wasting precious ammunition that becomes scarce in higher rounds.
FFAR 1 assault rifle
The FFAR 1’s blistering fire rate transforms into an absolute hose against special zombies and bosses when Pack-a-Punched. Its 930 RPM capability shreds Megatons, Krasny Soldats, and Tempests with unprecedented speed, though ammunition management becomes paramount.
Recommended FFAR 1 attachments:
- Millstop Reflex: Maintains target tracking during high-rate fire
- 19.5″ Task Force: Optimizes damage profile without sacrificing handling
- Bruiser Grip: Counters aggressive recoil patterns during sustained fire
- 40 Rnd Speed Mag: Critical for maintaining DPS during boss encounters
- Serpent Wrap: Compensates for ADS speed penalty from other attachments
Strategic consideration: Reserve the FFAR 1 for elite enemy encounters rather than standard zombies. Its ammunition consumption makes it impractical for general horde clearing, but it excels as a specialist tool in your Battlefield 6 Complete Guide to loadout diversity – having purpose-specific weapons for different threat types.
Groza assault rifle
The Groza occupies a unique hybrid role between assault rifles and submachine guns, offering mobility typically reserved for smaller weapons with damage output competitive with full-sized rifles. Post-Pack-a-Punch, it becomes an exceptional all-rounder for players who value adaptability.
Its balanced statistics allow seamless transitions between defensive positioning and aggressive pushes, making it ideal for Outbreak mode’s dynamic objectives where engagement distances constantly vary.
Optimization tip: The Groza benefits significantly from movement speed attachments, creating a run-and-gun playstyle that can kite zombies effectively while maintaining competitive time-to-kill metrics.
OTs 9 submachine gun
Mobility defines the OTs 9’s combat identity, offering the fastest strafe speeds in its class when properly configured. This mobility advantage allows players to dance around zombie hordes while maintaining constant damage output.
The weapon truly shines in close-quarters scenarios where its high damage-per-second can eliminate threats before they can land hits, preserving armor integrity and maximizing survival potential.
Advanced application: Combine with Stamin-Up for maximum mobility, creating hit-and-run tactics that minimize damage taken while efficiently clearing areas.
MG 82 light machine gun
Sustained firepower defines the MG 82’s role in Zombies loadouts. Its massive magazine capacity, when Pack-a-Punched, allows continuous firing through entire hordes without reloading, making it exceptional for defensive setups and choke point control.
The weapon’s primary advantage emerges during extended holdout scenarios where reloading would create vulnerability windows. Its penetration capabilities also make it effective against multiple lined-up targets.
Tactical deployment: Position the MG 82 in areas with long sightlines and limited approach angles. Its suppression capability can lock down entire corridors, providing breathing room for objective completion or teammate revival.
AMP63 pistol
Never underestimate the AMP63’s potential as a secondary weapon, especially when dual-wielded after Pack-a-Punch modification. Its rapid fire rate and mobility make it an excellent panic weapon when overwhelmed or when transitioning between primary weapon reloads.
The dual-wield configuration offers exceptional close-range stopping power, capable of eliminating zombies that breach your personal space during reload animations or equipment usage.
Strategic role: The AMP63 serves as your emergency tool, similar to how proper BF6 Class Selection principles emphasize having tools for unexpected situations – it’s the weapon you hope to never need but are grateful to have when situations deteriorate.
Weapon selection represents only half the battle – proper deployment strategies determine true effectiveness. Implement these advanced techniques to maximize your Season 6 performance:
Loadout Synergy: Pair long-range precision weapons (M16) with close-quarters specialists (Hauer 77) to cover all engagement scenarios. Common mistake: selecting two weapons with overlapping range profiles, creating coverage gaps.
Round-Specific Adaptation: Different weapons excel at various round thresholds. Shotguns dominate early-mid game, while wonder weapons and high-capacity automatics become essential post-round 35.
Ammunition Conservation: Train zombies into optimal formations before engaging. Wasting ammunition on poorly positioned targets accelerates resource depletion in critical late-game scenarios.
Field Upgrade Coordination: Match your weapon choices with complementary field upgrades. Ring of Fire enhances sustained fire weapons, while Aether Shroud benefits precision instruments requiring careful aim.
Equipment Timing: Use tactical and lethal equipment during weapon reload cycles or when overwhelmed, creating breathing room for strategic repositioning.
Action Checklist
- Acquire Chrysalax through quest completion or mystery box for ultimate versatility
- Configure Hauer 77 with Duckbill Choke and Task Force barrel for round 20-35 dominance
- Optimize M16 with burst-fire attachments for ammunition-efficient rounds 35+
- Practice form-switching with Chrysalax based on zombie density patterns
- Master ammunition management techniques with FFAR 1 for special enemy encounters
No reproduction without permission:SeeYouSoon Game Club » Best Guns And Loadouts For CoD: Black Ops Cold War Zombies Season 6 Master Black Ops Cold War Zombies with these optimized Pack-a-Punch loadouts for Season 6 domination