TL;DR
- Legendary gear requires completing complex missions, exploring hidden zones, or defeating elite enemies
- Strategic planning saves 30-40% time compared to random exploration approaches
- Understanding faction-specific mechanics unlocks exclusive NATO and Pax Armata equipment
- Avoid common progression mistakes that delay high-tier weapon acquisition by hours
- Advanced optimization techniques maximize your gear collection efficiency in Conquest mode
Dominate the battlefield with superior firepower and protective gear that gives you the tactical edge. In Battlefield 6, mastering your arsenal is crucial for victory.
Acquiring legendary equipment in Battlefield 6 presents significant challenges for even experienced players. These premium items typically require completing multi-stage Assignments, discovering carefully concealed locations off the main combat paths, or emerging victorious against formidable boss encounters. Our comprehensive guide details Battlefield 6’s most powerful weapons and protective gear, along with proven methods to secure them all. Please note that this guide contains detailed mission spoilers that reveal key encounter strategies.
Battlefield 6’s legendary weapons fall into three primary acquisition categories, each requiring different strategic approaches and time investments.
Mission-Based Unlocks: Many top-tier weapons are rewards for completing elaborate mission chains that may span multiple gameplay sessions. These Assignments often involve specific achievement requirements rather than simple completion. Plan for 2-4 hours per weapon depending on mission complexity and your skill level.
Hidden Location Discoveries: Numerous powerful armaments are strategically placed in areas that most players will completely miss during standard Conquest matches. These require deliberate exploration of map peripheries, destructible environments, and hard-to-reach vantage points. Allocate 45-90 minutes for thorough area sweeps.
Boss Encounter Rewards: The most challenging method involves defeating specially designated elite enemies with unique mechanics and reinforced health pools. These encounters typically require coordinated team play and specific counter-strategies. Expect 3-5 attempts minimum for most players.
Protective gear in Battlefield 6 follows similar acquisition patterns but with faction-specific considerations that impact your collection approach.
NATO Gear Sets: NATO-aligned armor typically requires completing specific campaign missions or achieving high ranks in competitive modes. These sets often provide balanced protection suitable for various combat scenarios.
Pax Armata Equipment: The Pax Armata faction offers specialized defensive gear with unique bonuses. Acquisition usually involves faction reputation grinding or completing loyalty missions that may conflict with other progression paths.
Faction-Specific Armor: Understanding faction mechanics is crucial as some legendary armor pieces are exclusively available through faction-aligned questlines that lock out opposing gear sets.
Maximizing your gear acquisition efficiency requires strategic planning and awareness of common progression pitfalls that can waste valuable gameplay time.
Efficient Farming Routes: Plan your session around geographic proximity of objectives rather than following mission order. This approach can reduce travel time by 30-40% compared to linear progression. For detailed route planning, consult our Complete Guide for optimized paths.
Common Pitfalls to Avoid: Many players waste hours attempting boss fights without proper loadouts or exploring areas prematurely before unlocking necessary gear. Always verify prerequisites before investing significant time.
Advanced Player Tips: Veteran players should focus on weapon synergy when planning their Weapons Unlock sequence to maximize combat effectiveness early. Similarly, coordinate your Class Guide selections with intended legendary gear to avoid compatibility issues.
Baldur’s Gate 3 features an impressive arsenal of legendary weapons and armor that can dramatically enhance your party’s combat effectiveness. These exceptional items typically offer unique abilities, enhanced damage output, and special effects that set them apart from standard gear. Understanding when and how to obtain these powerful artifacts is crucial for optimizing your playthrough.
What makes legendary items truly special is their ability to synergize with specific character builds and playstyles. For instance, certain weapons provide bonuses that specifically benefit spellcasters, while others are designed for martial specialists. The strategic timing of acquisition is particularly important, as advancing too far in certain questlines can permanently lock you out of obtaining specific legendary gear.
Strategic planning around legendary item acquisition involves careful consideration of your party composition, planned character builds, and the narrative choices you intend to make throughout your adventure.
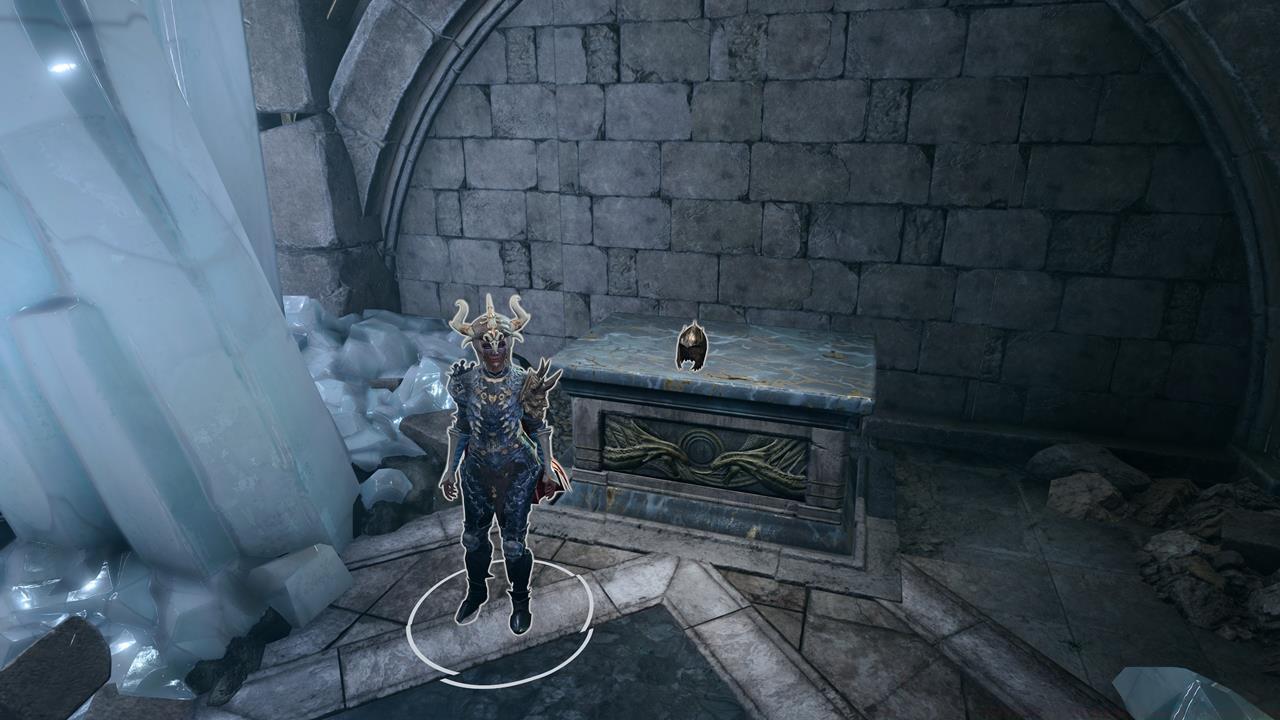
Shapeshifter’s Mask
- Location: Camp
- Type: Helmet
- Effects: Adds the Shapeshift spell to your action bar when equipped.
Available exclusively through the Deluxe Edition, this cosmetic-focused helmet appears automatically in your camp storage. The Shapeshift ability allows temporary racial transformation until your next long rest, providing unique roleplaying opportunities rather than combat advantages.
Devotee’s Mace
- Location: N/A (Cleric-only spell)
- Type: Mace
- Effects: Damage – 1d6+2 bludgeoning; +1d8 radiant
- +3 weapon enchantment
- Healing Increase Aura – Regenerate 1-4 HP at the start of your turn; lasts 10 turns; requires a long rest to be recast.
This legendary mace requires strategic consideration since it consumes your one-time Divine Intervention spell. Most experienced players recommend using a Cleric hireling rather than Shadowheart for this purpose, as she typically remains a core party member throughout the campaign.
Pro Tip: Divine Intervention offers three choices – Arm Thy Faithful (this weapon), Sunder the Heretical (area damage), or Opulent Revival (full party resurrection). The hireling strategy allows you to preserve Shadowheart’s crucial ability while still obtaining the mace for other characters.


Left: The Shapeshifter’s Mask lets you change your character’s appearance; Right: Level 10 Clerics can cast Divine Intervention to obtain the Devotee’s Mace. Still, it might be better to let a hireling do this.
Blood of Lathander
- Location: Act 1 – Rosymorn Monastery
- Type: Mace
- Effects: Damage – 1d6 +3 bludgeoning
- Lathander’s Blessing – One per long rest, if your HP reaches zero, you restore 2-12 HP; nearby allies also regain 1-6 HP.
- Lathander’s Light – Creates a holy light in a six-meter radius; fiends and undead within the radius are blinded unless they succeed in a Constitution saving throw.
- +3 weapon enchantment
- Spell: Sunbeam
- Related guide: How to Get the Blood of Lathander
Acquiring this weapon requires completing the Githyanki Creche questline before advancing too far into Act 2. The puzzle solution involves locating a secret chamber and properly utilizing the Dawnmaster’s Crest to avoid catastrophic consequences.
Common Mistake: Many players attempt to take the mace without the crest, triggering a defensive mechanism that makes the area inaccessible. Ensure you’ve explored the monastery thoroughly to obtain this crucial item.
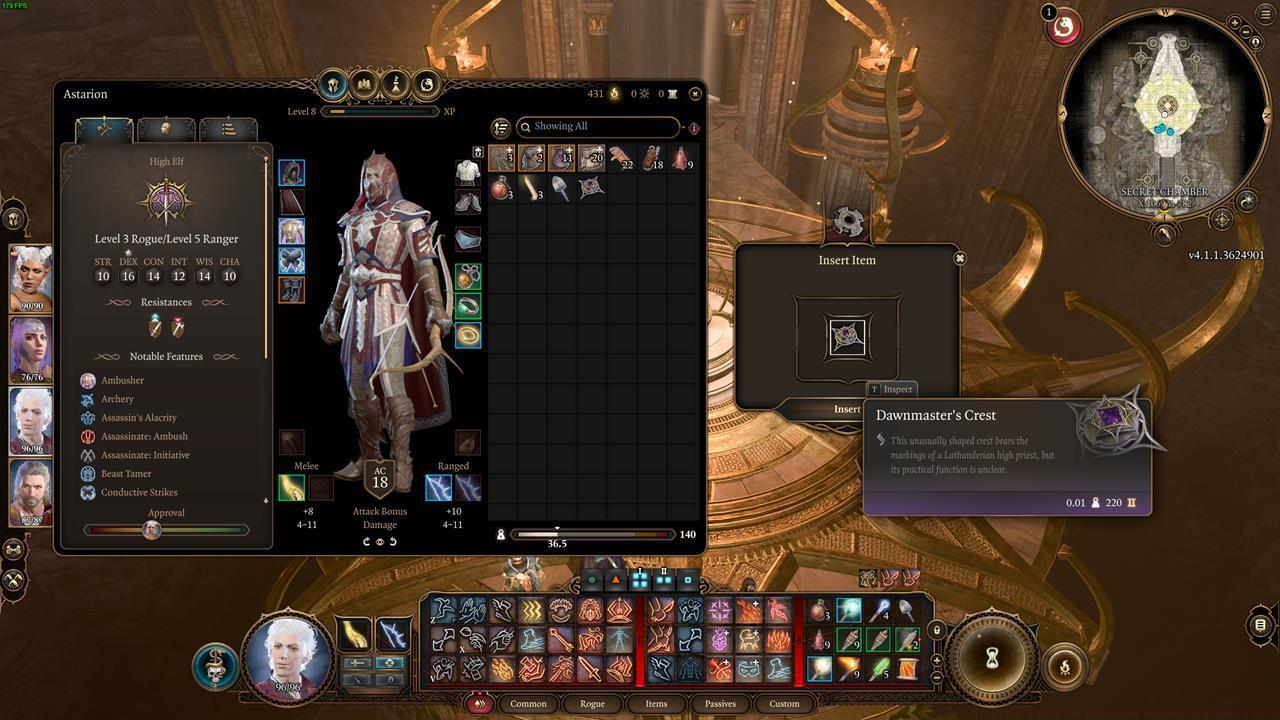
Insert the Dawnmaster’s Crest to grab the Blood of Lathander without issues.
Shar’s Spear of Evening
- Location: Act 2 – Nightsong’s Prison
- Type: Spear
- Effects: Damage – 1d8 + 4 piercing + 1d6 piercing
- Shar’s Blessing – Gain advantage on saving throws while lightly or heavily obscured. Deal additional 1d6 damage to creatures that are lightly or heavily obscured.
- Blind Immunity – The wielder cannot be blinded.
- +3 weapon enchantment
- Spell: Shar’s Darkness
- Related guides: Gauntlet of Shar, Silent Library, and Should You Spare or Kill Nightsong
This weapon represents a pivotal moment in Shadowheart’s character arc. To obtain it, you must defeat Balthazar and then persuade Shadowheart to kill Nightsong, immediately granting you this powerful spear.
Selune’s Spear of Night
- Location: Act 3 – Camp
- Type: Spear
- Effects: Damage – 1d8 (1d6) + 5 piercing
- Selune’s Blessing – Gain advantage on Wisdom saving throws and Perception checks.
- Darkvision – Can see in the dark up to 12 meters.
- +3 weapon enchantment
- Spells: Moonbeam and Moonmote
- Related guides: Gauntlet of Shar, Silent Library, Should You Spare or Kill Nightsong, and Ketheric Thorm boss fight
The alternative path involves passing challenging dialogue checks to convince Shadowheart to spare Nightsong. This decision delays your acquisition until Act 3 but provides different narrative outcomes and character development opportunities.
Strategic Insight: This branching decision significantly impacts Shadowheart’s personal journey and determines which legendary spear you ultimately possess.

This branching path–Shadowheart’s decision as it relates to Nightsong’s fate–will yield different rewards.
Viconia’s Walking Fortress
- Location: Act 3 – House of Grief
- Type: Shield
- Effects: Armor Class – +3
- Rebuke of the Mighty – When hit with a melee attack, use a reaction to deal 2-8 force damage to your foe, knocking them prone unless they succeed in a Dexterity saving throw.
- Spellguard – Gain advantage on saving throws against spells; spell attack rolls against you have disadvantage.
- Spells: Reflective Shell and Warding Bond.
- Related guide: Sharran Lookout and House of Grief
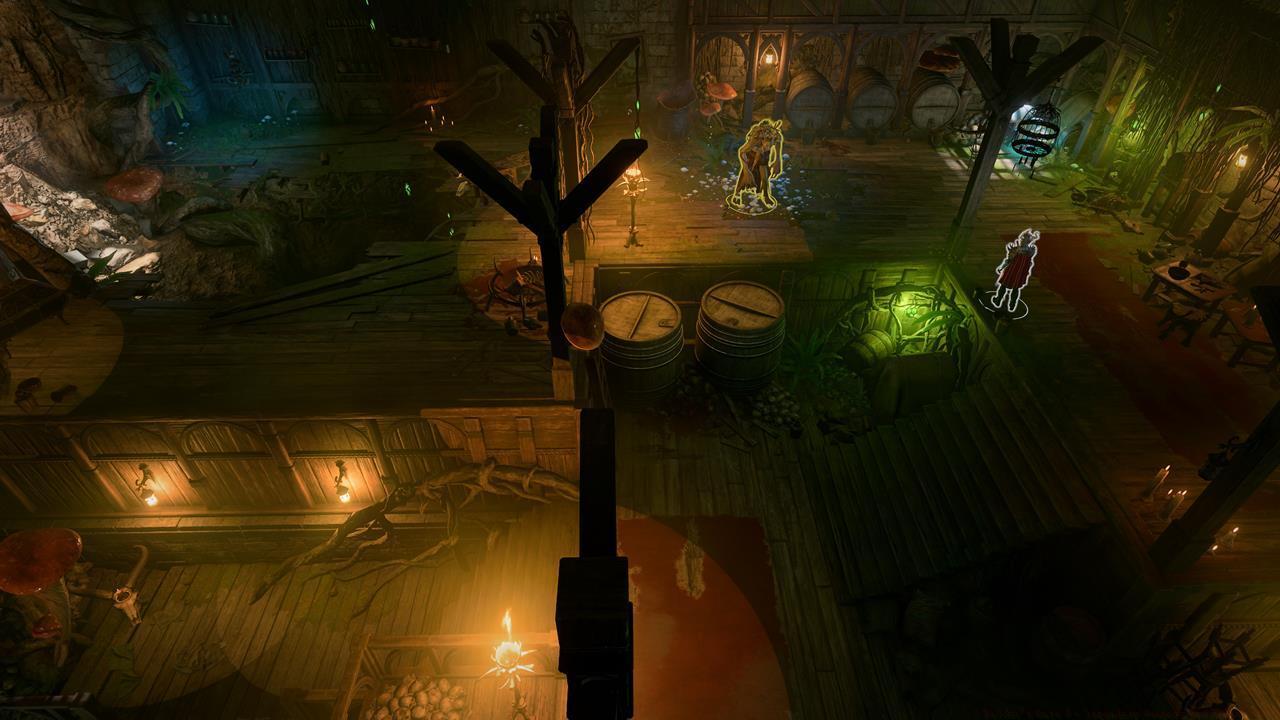
This powerful shield becomes available as you progress Shadowheart’s companion storyline. Defeating Viconia DeVir and choosing to eliminate her permanently grants access to this defensive masterpiece.
Warning: Allowing Viconia to depart peacefully results in permanent loss of this item. Our testing confirmed acquisition with a Selunite-aligned Shadowheart, though Sharran-aligned outcomes remain unverified.

Defeating Viconia and finishing her off lets you pick up her shield.
Nyrulna
- Location: Act 3 – Circus of the Last Days
- Type: Trident
- Effects: Damage – 1d8 (1d6) +3 piercing
- Zephyr Connection – The weapon returns to your hand when thrown; cannot be forced to drop this via disarming; when thrown, create an explosive blast that deals 3-12 thunder damage.
- Veil of the Wind – Gain a three-meter bonus to movement range and jump distance; makes you immune to fall damage.
- Nyrulna Glowing – Shines with a glowing light in a six-meter radius.
- +3 weapon enchantment
- Related guide: How to Win Akabi’s Jackpot
Successfully pickpocketing Akabi triggers a teleportation sequence to a dinosaur-filled area containing the legendary chest.
Bug Alert: This quest segment suffers from occasional scripting issues where Akabi fails to teleport players. If this occurs, reloading or progressing other quests sometimes resolves the problem.
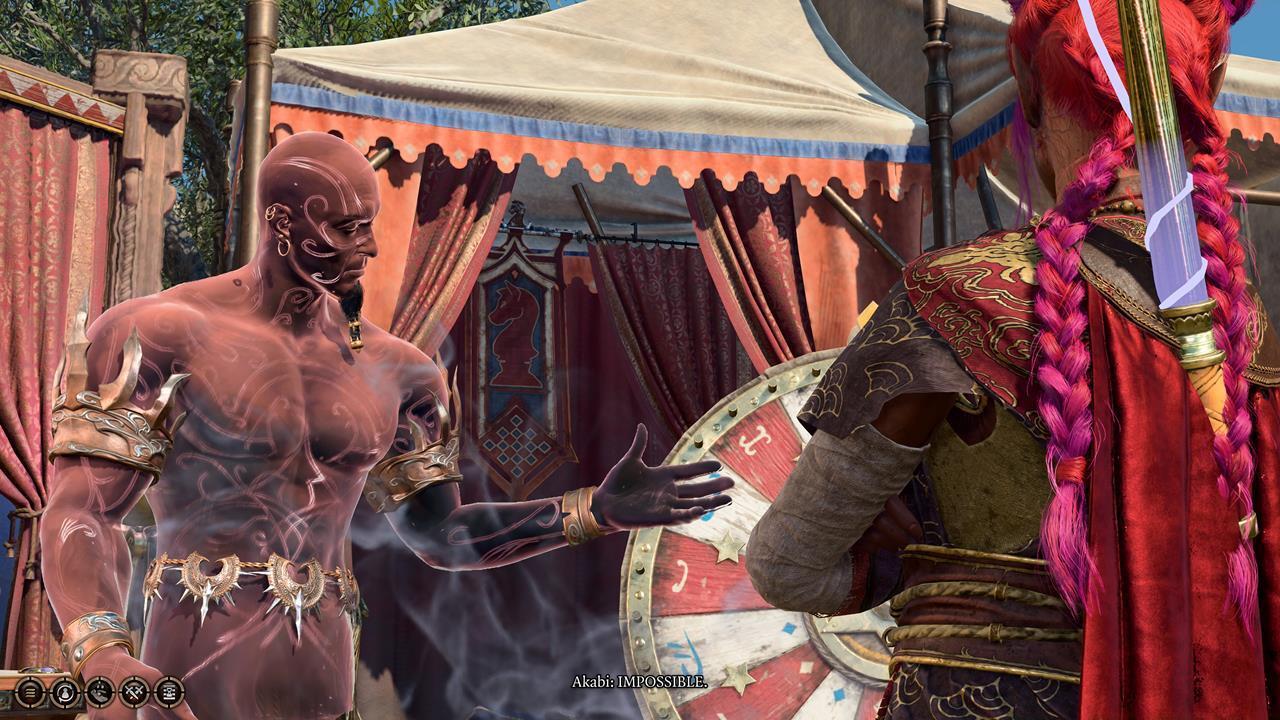
If you see through Akabi’s tricks, you just might win the jackpot.
Markoheshkir
- Location: Act 3 – Sorcerous Sundries/Ramazith’s Tower
- Type: Quarterstaff
- Effects: Damage – 1d8 (1d6) + 1 bludgeoning
- Arcane Enchantment – +1 bonus to spell save DC and spell attack rolls.
- Arcane Battery – The next spell you cast doesn’t cost a spell slot.
- +2 weapon enchantment
- Spells: Kereska’s Favor
- Related guide: Should You Side with Nightsong or Lorroakan
Continuing Nightsong’s narrative arc leads to Lorroakan’s tower, where accessing the lower balcony section and disabling arcane barriers yields this staff alongside rare robes.

Jump down from the Ramazith’s Tower balcony so you can disable these arcane barriers.
Duelist’s Prerogative
- Location: Act 3 – The Blushing Mermaid
- Type: Rapier
- Effects: Damage – 1d8+8 piercing, +2 piercing.
- Elegant Duelist – If you don’t have an off-hand item equipped, you score critical hits whenever you roll a 19; gain an additional reaction per turn.
- Withering Cut – On a hit with a melee weapon, use a reaction to deal additional necrotic damage.
- +3 weapon enchantment
- Spells: Challenge to Duel
- Weapon Action: Dueler’s Enthusiasm
- Related guide: Save Vanra
This weapon continues the narrative thread involving Mayrina and Auntie Ethel from earlier acts. Successfully rescuing Vanra through non-lethal means against the hag rewards you with this exceptional rapier.
Pro Strategy: The key to obtaining this weapon lies in locating Mayrina and brewing the specific potion required to force Ethel to release the child.
Take out Auntie Ethel without killing her so you can rescue Vanra.
Gontr Mael
- Location: Act 3 – Steel Watch Foundry
- Type: Bow
- Effects: Damage – 1d8+8 piercing
- Promised Victory – Chance to inflict Guiding Bolt on your target.
- Gontr Mael Glowing – Has a glowing light with a radius of six meters.
- +3 weapon enchantment
- Spell: Celestial Haste
- Related guide: Rescue Duke Ravengard and the Gondians and Defeat Lord Gortash
Strategic preparation before confronting Lord Gortash involves disabling the Steel Watch automatons. The Steel Watcher Titan must be defeated and looted before instructing NPCs to demolish the facility.
Critical Timing: This item has an extremely narrow acquisition window – failure to collect it before the facility’s destruction makes it permanently unavailable.
Demolish the Steel Watcher Titan and grab this loot.
Balduran’s Giantslayer
- Location: Act 3 – Wyrmway
- Type: Greatsword
- Effects: Damage – 2d6+3 slashing
- Giantslayer – On hit, double the damage from your Strength modifier; gain advantage on attack rolls against large, huge, or gargantuan creatures.
- +3 weapon enchantment
- Class Action: Giant Form
- Related guide: Rescue Duke Ravengard and the Gondians and Wyrmway Puzzles and Legend of Ansur
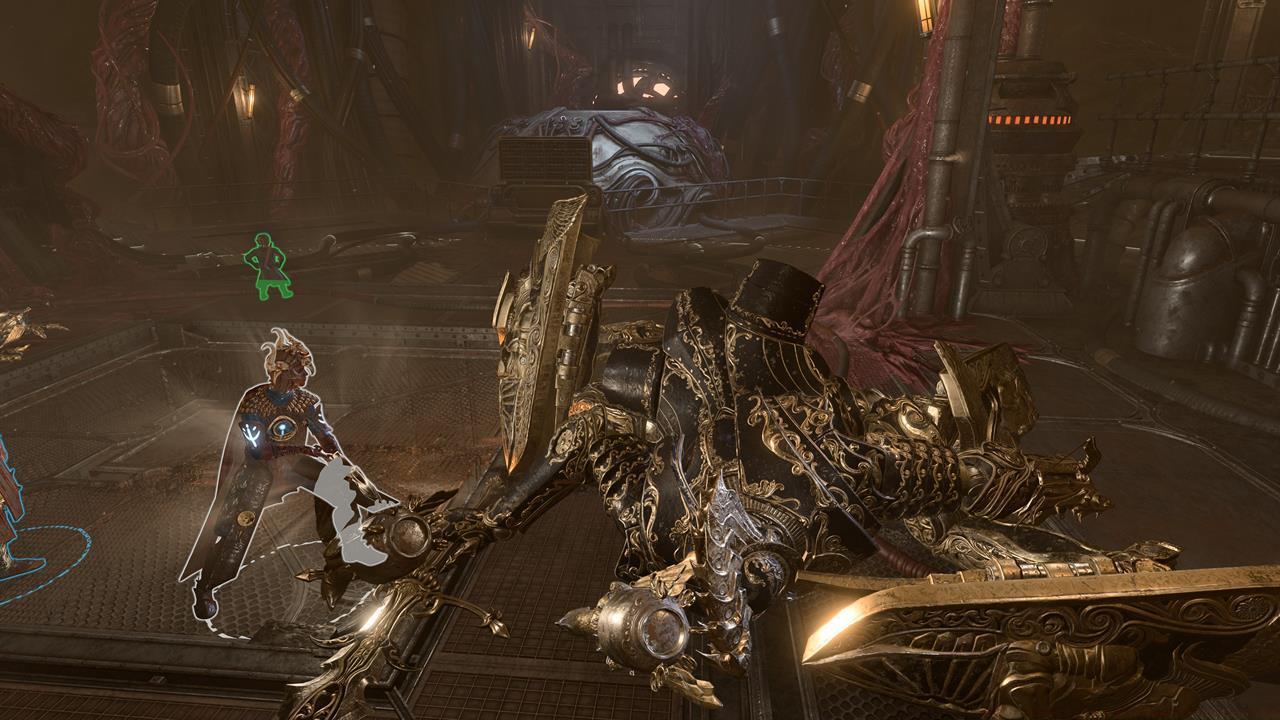
After completing Duke Ravengard’s rescue mission and the underwater prison escape, you’ll discover Ansur’s hidden lair beneath the city. Overcoming the dragon in combat grants this massive greatsword.
Helm of Balduran
- Location: Act 3 – Wyrmway
- Type: Helmet (medium armor)
- Effects:
- Balduran’s Vitality – Heals you for +2 HP at the beginning of your turn.
- Balduran’s Favor – +1 bonus to AC and saving throws.
- Stun Immunity – The wearer cannot be stunned.
- Attackers cannot land critical hits on the wearer.
- Related guide: Rescue Duke Ravengard and the Gondians and Wyrmway Puzzles and Legend of Ansur
Similar to the Giantslayer, this helmet requires defeating Ansur, after which it can be collected from the rear altar area.
The unfortunate Ansur must be slain once more so you can obtain more goodies.
Crimson Mischief
- Location: Act 3 – Temple of Bhaal
- Type: Shortsword
- Effects: Damage – 1d8+7 piercing, +1d4 necrotic, +1d4 piercing
- Prey Upon the Weak – Deals +1-4 piercing damage against targets with less than 50% HP.
- Redvein Savagery – As a main hand weapon, make an attack with advantage to inflict an additional 7 piercing damage against your target.
- Crimson Weapon – As an off-hand weapon, make an attack to add your ability modifier to the damage roll.
- +2 weapon enchantment
- Related guide: Murder Tribunal and Defeat Orin the Red
Navigating through the Lower City Sewers and Undercity Ruins eventually leads to Orin the Red in the Temple of Bhaal. Defeating her yields this gear piece.
Bloodthirst
- Location: Act 3 – Temple of Bhaal
- Type: Dagger
- Effects: Damage – 1d8+2 piercing
- Improved Critical – The number you need to roll to do a critical is reduced by 1; can stack with other similar effects.
- Exploit Weakness – As a main hand weapon, enemies hit with this receive vulnerability to piercing damage.
- True Strike Riposte – As an off-hand weapon, enemies that miss you with a melee strike allow you to counter to gain True Strike; gain +1 AC.
- +2 weapon enchantment
- Cantrip: True Strike
- Feature: Bound Weapon
- Related guide: Murder Tribunal and Defeat Orin the Red
This legendary dagger also drops from Orin the Red, completing her weapon set. Previously known as Netherstone-Pommeled Bloodthirst, the name was simplified in later updates.
Optimization for Advanced Players: Experienced players should plan their entire playthrough around legendary item acquisition, considering build synergies, party roles, and combat style preferences when prioritizing which items to pursue.
Baldur’s Gate 3 features approximately 15 legendary-tier items that represent the pinnacle of equipment power within the game. These exceptional artifacts are strategically distributed throughout the campaign, with acquisition timing being crucial for optimal character progression. Understanding when and how to obtain these items can significantly impact your gameplay experience and combat effectiveness.
Legendary equipment typically provides game-changing abilities and stat bonuses that can redefine your character’s combat role. However, advancing through critical story points may permanently lock you out of certain acquisition opportunities, making foresight and planning essential components of successful item collection.
- Shar’s Spear of Evening – This shadow-enchanted weapon excels in stealth-based combat scenarios, providing bonuses to attack rolls in dim light or darkness conditions.
- Selune’s Spear of Night – As a counterpart to Shar’s spear, this moon-blessed weapon offers radiant damage bonuses and enhanced performance during nighttime engagements.
- Viconia’s Walking Fortress – A defensive masterpiece that provides exceptional protection while maintaining mobility, perfect for frontline combatants who need to reposition frequently.
- Duelist’s Prerogative – Specialized for one-on-one combat, this weapon grants additional reaction attacks and improved critical hit chances against isolated targets.
- Balduran’s Giantslayer – Designed for dealing with large enemies, this massive weapon delivers increased damage against creatures of size large or greater.
- Gloves of Soul Catching – These mystical gloves enable wearers to harness spiritual energy, potentially converting damage dealt into temporary hit points or other combat advantages.
For players who purchased the Deluxe Edition, exclusive content becomes available through your camp storage. The Shapeshift spell helmet included in this edition primarily serves cosmetic purposes, allowing character race appearance alterations that persist until your next long rest or manual disguise removal. While this transformation doesn’t provide statistical combat benefits, it offers excellent roleplaying opportunities and social interaction advantages.
Strategic campaign progression planning is essential for acquiring all desired legendary items. Many powerful artifacts become unavailable after completing specific story arcs or making certain narrative choices, so consulting external guides before critical decisions is highly recommended. Branching narrative paths often determine which legendary rewards become accessible, making some playthroughs inherently better suited for particular character builds than others.
Common acquisition mistakes include advancing too quickly through act transitions without thoroughly exploring available areas, or making irreversible story decisions without understanding their equipment consequences. To optimize your item collection, consider creating multiple save points before major story junctions and thoroughly researching potential rewards associated with different decision paths.
Legendary items often synergize exceptionally well with specific class abilities and feat selections. For instance, the Duelist’s Prerogative becomes dramatically more powerful when combined with the Battle Master Fighter’s precision attack or the Rogue’s sneak attack capabilities. Understanding these interactions allows you to maximize your combat effectiveness and create truly specialized character builds.
When planning your class selection, consider how potential legendary items complement your chosen specialization. Some artifacts may fundamentally change your approach to character development, potentially making previously unattractive feats or ability score distributions suddenly viable or even optimal.
- Rebuke of the Mighty – When struck by close-quarters attacks, immediately retaliate using your reaction to inflict 2-8 force damage while potentially knocking opponents prone if they fail Dexterity saving throws.
- Spellguard – Receive significant advantage when resisting magical effects through saving throws; enemies casting targeted spells against you suffer from disadvantage on their attack rolls.
- Spells: Reflective Shell and Warding Bond provide additional protective layering for your defensive arsenal.
Progress systematically through Shadowheart’s personal narrative arc. You’ll eventually discover the House of Grief headquarters, the central gathering place for Shar worshippers located in Baldur’s Gate’s Lower City district. Upon reaching this location, engage Viconia DeVir in combat and select the lethal resolution option. The legendary shield then becomes lootable from her remains. Opting for mercy and allowing Viconia to escape permanently locks you out of obtaining this exceptional defensive item.
Important contextual note: Our testing involved Shadowheart transitioning to Selûne’s faith by sparing Nightsong and guiding her toward the Selunite spiritual path. We cannot verify whether the shield remains accessible if Shadowheart completely embraces her Sharran heritage through eliminating Nightsong and fully committing to Shar’s doctrine.
Successfully defeating Viconia in combat and confirming the fatal outcome enables you to collect her distinctive shield for your inventory.
- Zephyr Connection – This remarkable weapon automatically returns after being thrown, cannot be removed through disarming techniques, and generates a devastating explosive impact dealing 3-12 thunder damage upon hitting targets.
- Veil of the Wind – Provides a substantial three-meter enhancement to both movement capability and jumping distance while completely negating fall damage consequences.
- Nyrulna Glowing – Emits consistent illumination within a six-meter radius, eliminating darkness penalties in combat scenarios.
- +3 weapon enchantment – Significantly improves attack accuracy and damage penetration against well-defended enemies.
The Circus of the Last Days presents one of Act 3’s most engaging side content experiences. Nyrulna stands out as arguably the game’s most versatile throwing weapon, particularly valuable for characters specializing in ranged combat or mobility-focused builds. The thunder damage explosion doesn’t harm the wielder, making it exceptionally safe for close-quarters throwing situations.
Strategic application involves leveraging the movement bonuses for positioning advantages while using the returning weapon property to maintain consistent damage output. The fall damage immunity enables creative vertical combat strategies previously too risky to attempt.
Mastering these legendary items requires understanding their deeper combat synergies and optimization potential. Viconia’s shield excels on tank-focused characters who deliberately position themselves to absorb enemy attacks, triggering the rebuke effect frequently. Pair it with high-AC builds to create nearly untouchable defensive specialists.
Nyrulna transforms throwing weapon builds from niche options into primary combat strategies. Combine with abilities that enhance throwing damage or provide additional combat actions to maximize its explosive potential. The movement bonuses also create exceptional hit-and-run tactics for martial classes.
Avoid these common mistakes: Don’t waste the shield’s reaction on insignificant attacks; save it for dangerous enemies. Avoid using Nyrulna in tight spaces where the thunder explosion might collateral damage NPCs or quest objectives.
Optimal party composition places Viconia’s shield on your primary frontliner while Nyrulna works excellently on mobile damage dealers or support characters who benefit from both the damage and mobility enhancements.
To access the legendary treasures within the Wyrmway, you must first progress to Act 3 and complete the critical story mission involving Duke Ravengard’s liberation from the underwater prison. Successfully extracting the Duke and his allies reveals crucial intelligence about a concealed dragon lair situated deep beneath the city streets. This hidden chamber becomes accessible only after you’ve resolved the political turmoil surrounding the Flaming Fist leadership crisis.
The entrance manifests as a well-concealed passageway typically discovered through careful environmental exploration or dialogue options with specific NPCs who possess knowledge of Balduran’s legacy. Reaching this location demands navigating through multiple city districts and overcoming various faction-based obstacles.
- Giantslayer – On hit, double the damage from your Strength modifier; gain advantage on attack rolls against large, huge, or gargantuan creatures.
- +3 weapon enchantment
- Class Action: Giant Form
This exceptional two-handed sword represents one of the most powerful martial weapons available in the late game. The Giantslayer property fundamentally alters damage calculation by multiplying your Strength bonus, making it exceptionally potent for characters with 20+ Strength. Against massive foes like dragons, giants, and other oversized threats, the advantage on attack rolls dramatically increases your hit probability.
The +3 enchantment provides both enhanced accuracy and damage penetration against enemies with damage reduction. The Giant Form class action temporarily transforms your character, granting additional combat benefits that synergize with the weapon’s core mechanics. This transformation typically lasts multiple combat rounds and provides temporary hit points along with increased threat presence.
- Balduran’s Vitality – Heals you for +2 HP at the beginning of your turn.
- Balduran’s Favor – +1 bonus to AC and saving throws.
- Stun Immunity – The wearer cannot be stunned.
- Attackers cannot land critical hits on the wearer.
This legendary helmet offers unparalleled defensive utility for medium armor users. Balduran’s Vitality provides consistent out-of-combat healing and reliable sustain during extended encounters, effectively granting 10-20 additional HP per combat depending on round count.
The combination of Stun Immunity and critical hit protection makes your character exceptionally resilient against control effects and burst damage. This is particularly valuable against enemies with stun capabilities or those relying on critical strike mechanics. The +1 bonus to AC and saving throws from Balduran’s Favor compounds with other defensive bonuses, creating substantial damage mitigation over time.
Confronting Ansur represents one of the most challenging combat encounters in Act 3. The ancient dragon employs devastating area-of-effect attacks, breath weapons with elemental affinities, and powerful physical assaults that can decimate unprepared parties. Success demands specific preparations including lightning resistance potions, protective spells, and strategic positioning to minimize party exposure to his most dangerous abilities.
After navigating the Wyrmway’s intricate trials and solving its environmental puzzles, you’ll face the enraged spectral dragon in his inner sanctum. Victory requires understanding his attack patterns, elemental vulnerabilities, and phase transitions. Upon defeating Ansur, both Balduran’s Giantslayer and the legendary helmet can be looted from his remains, providing game-changing power for the final story segments.
- Soul Fist – Unarmed melee attacks deal +1-10 force damage.
- Soul Catching – Once per turn on an unarmed hit, restore 10 HP; you may also forego the healing to gain advantage on attack rolls and saving throws until the end of your turn.
- +2 Constitution (up to 20 cap).
These exceptional legendary gloves represent one of the most powerful unarmed combat items available in Baldur’s Gate 3. Located deep within the treacherous House of Hope during Act 3, they offer game-changing capabilities for martial characters. The combination of offensive enhancement, defensive utility, and attribute improvement makes them particularly valuable for monks, tavern brawlers, and any build focusing on fist-based combat.
The Soul Catching mechanic deserves special attention – choosing advantage essentially gives you a mini-bless effect for the remainder of your turn, significantly increasing your chance to land subsequent attacks and avoid debilitating status effects. Force damage from Soul Fist is particularly effective against enemies vulnerable to magical damage or those resistant to physical attacks.
Securing these gloves requires careful planning and preparation. This is yet another phenomenal legendary equipment piece from the House of Hope. The crucial element involves utilizing the Orphic Hammer to liberate Hope from her confinement, accessible through the hatch. From that position, work toward your escape while preparing to confront Raphael when he materializes.
If you opt to pilfer the gloves, Raphael will become intensely hostile toward you. Rescue his prisoner, Hope, and defeat him permanently to obtain additional legendary equipment. The confrontation with Raphael is among the most challenging encounters in Act 3, requiring party levels of 10-12 for consistent success.
For optimal performance with these gloves, consider pairing them with other unarmed combat enhancements like the Boots of Uninhibited Kushigo or the Amulet of Greater Health. Monks benefit tremendously from the combination of extra damage, healing flexibility, and constitution boost – essentially addressing multiple defensive and offensive needs simultaneously.
In any case, these represent the legendary items in Baldur’s Gate 3 that we’ve identified thus far. Additional discoveries may exist, prompting future guide updates as necessary.
Baldur’s Gate 3 overflows with engaging activities and hidden secrets. You’ll undoubtedly participate in an adventure demanding numerous hours for completion. For additional guidance, explore our Class Guide to optimize your character build.
The Soul Catching Gloves shine brightest on Way of the Open Hand monks who can utilize flurry of blows to maximize both damage output and healing potential. The constitution bonus also synergizes well with barbarian builds using the Tavern Brawler feat, creating incredibly durable unarmed combatants. If you cannot obtain these gloves, consider the Gloves of the Balanced Hands as a viable alternative for dual-wielding builds.
Action Checklist
- Research mission prerequisites before attempting legendary weapon Assignments
- Systematically explore map peripheries and destructible environments for hidden gear
- Prepare specific counter-loadouts for boss encounters based on enemy type
- Coordinate faction alignment decisions with desired armor sets to avoid conflicts
- Optimize farming routes by geographic proximity rather than mission order
- Complete Githyanki Creche and obtain Blood of Lathander before Act 2 advancement
- Make strategic saves before pivotal Shadowheart decisions regarding Nightsong
- Utilize Cleric hireling for Devotee’s Mace acquisition
- Defeat major bosses like Raphael, Ansur, and Orin with prepared strategies
- Collect time-sensitive items before location destruction
- Explore all act-specific locations thoroughly before advancing main story
- Research legendary item locations before advancing to new act transitions
- Create save points before major story decisions that might lock item access
- Check camp storage for Deluxe Edition items if applicable
- Plan character build around available legendary items for your chosen path
- Thoroughly explore each region before progressing to avoid missing hidden artifacts
- Complete Shadowheart’s companion questline with Selunite alignment to access Viconia’s shield
- Defeat Viconia DeVir at House of Grief and choose lethal resolution
- Visit Circus of the Last Days in Act 3 to acquire Nyrulna
- Test item synergies with your party composition and combat style
- Practice reaction timing with shield counterattacks and throwing weapon positioning
- Complete Duke Ravengard rescue mission and learn about Wyrmway location
- Solve all four elemental trials within the Wyrmway chambers
- Prepare lightning resistance and protective buffs before Ansur battle
- Defeat Ansur using positioning tactics and elemental countermeasures
- Loot both legendary items from Ansur’s remains after victory
- Reach Act 3 and locate the House of Hope entrance
- Ensure you have the Orphic Hammer before entering
- Navigate to Hope’s prison via the hatch and free her
- Prepare for Raphael confrontation with level 10-12 party
- Defeat Raphael and claim your legendary rewards
No reproduction without permission:SeeYouSoon Game Club » Baldur’s Gate 3 – Legendary Weapons And Armors Guide