TL;DR
- Connect charged and uncharged metal balls using Ultrahand to conduct electricity through the shrine
- Master the swinging technique for short-chain sections to activate wall platforms
- Use Recall on the large cog to access the hidden optional treasure chest
- Position metal rods strategically between poles to power the final shrine door
- Complete all three electrical puzzles efficiently with proper timing and positioning
Discover comprehensive guidance for conquering the “Hidden Metal” electrical challenge within Turakamik Shrine in The Legend of Zelda: Tears of the Kingdom. This guide provides detailed strategies for navigating the shrine’s conductive puzzles efficiently.
The Legend of Zelda: Tears of the Kingdom presents players with numerous intricate puzzles and mechanical systems. Among these challenges, the Turakamik Shrine stands out as an electrical conduction test, situated adjacent to Gerudo Canyon Stable in southwestern Hyrule. This particular shrine focuses on the “Hidden Metal” puzzle type, requiring strategic connection of metallic objects to establish electrical pathways.
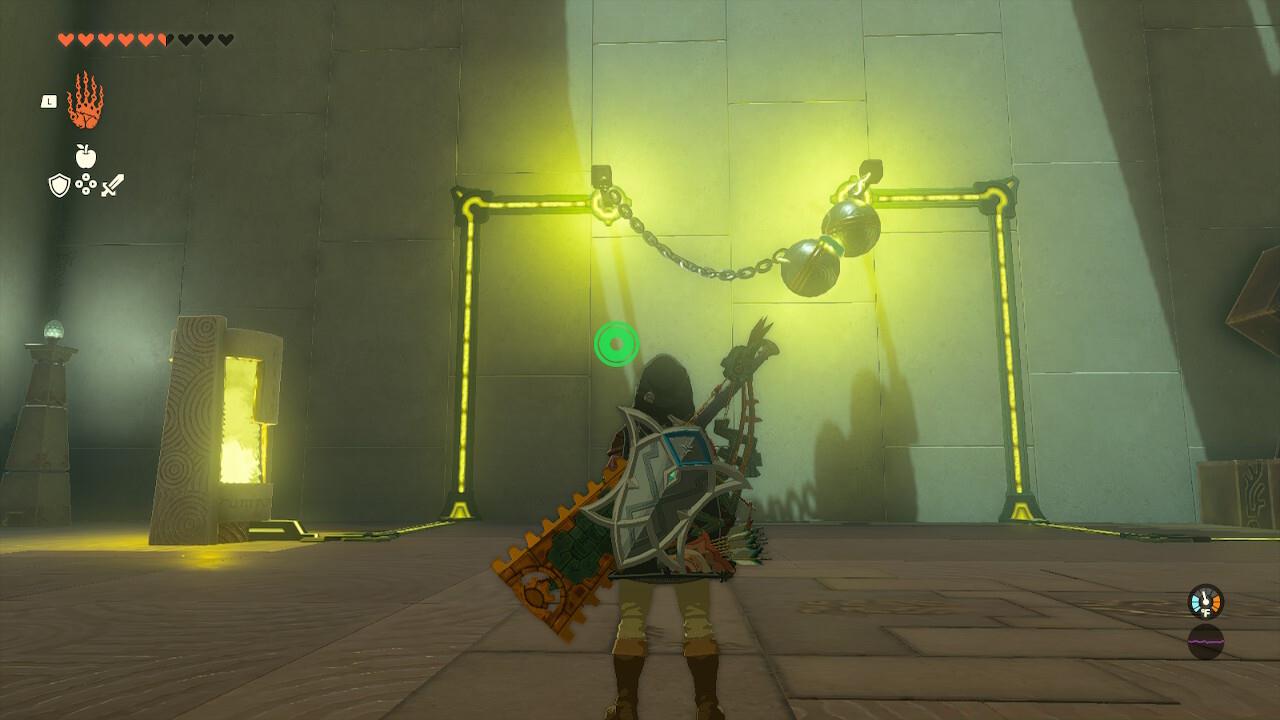
Strategic metal ball connection initiates electrical flow to activate the primary cog mechanism.
Upon entering the initial chamber, you’ll encounter a battery apparatus connected to a suspended metallic sphere, positioned near a second uncharged metal ball. This configuration links to an oversized cogwheel that must be activated to progress further into the shrine complex.
Employ the Ultrahand ability to physically join the two metallic spheres, establishing an electrical conduit that transmits power to the large cog mechanism. This fundamental principle forms the basis for all subsequent electrical puzzles within the shrine.
Execute the Ultrahand technique by seizing the electrified metal sphere and merging it with the neutral ball. This fusion triggers electrical transmission that energizes the primary cog, successfully resolving the opening puzzle. Above the activated cog platform, you’ll discover an additional pair of metal balls—one charged, one dormant—setting the stage for the next challenge.
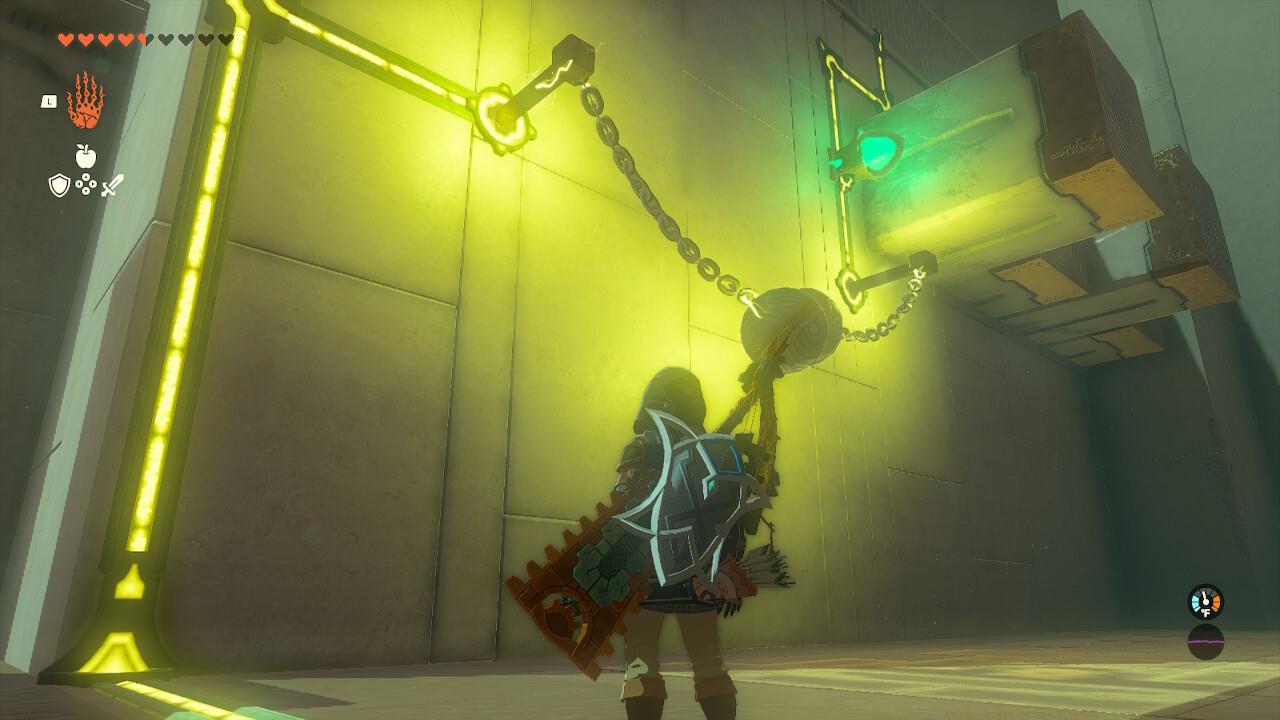
Advanced swinging technique required for connecting metallic spheres with restricted chain lengths.
While the fundamental solution mirrors the previous section’s approach, this segment introduces the additional complexity of pendulum mechanics. The restricted chain lengths necessitate calculated swinging motions to achieve successful electrical connection between the metallic components.
Implement the established methodology: utilize Ultrahand to connect the spheres and fuse them to establish power transmission. The constrained chains in this area demand strategic manipulation—employ Ultrahand to initiate a swinging motion with one sphere before transitioning to the other to complete the connection. Successful execution triggers the emergence of platforms from the wall above, which you can navigate using the Ascend ability. This transportation method delivers you to the concluding section, where a final electrified sphere awaits beside two metallic poles connected to the exit door.
Pro Tip: Before proceeding to the final puzzle, locate the optional treasure chest positioned above the large cog wheel to your left. Access this hidden reward by activating the Recall ability on the cog mechanism to ascend to its upper platform.
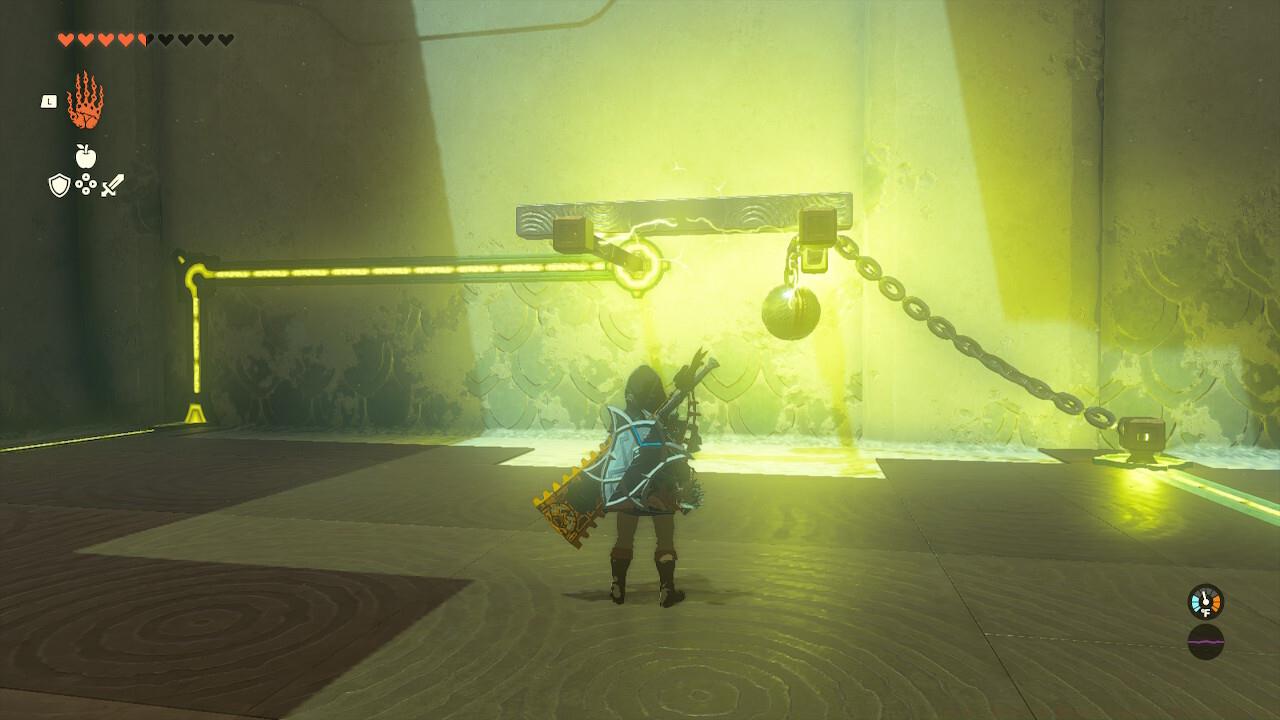
Electrical current naturally conducts through metallic surfaces, enabling strategic puzzle solutions.
Electrical conduction in Tears of the Kingdom automatically transfers to any metallic surface, including the various rods and poles encountered throughout the shrine.
Following the treasure retrieval, secure the metallic sphere and carefully wind it around the nearest metal pole to establish electrical charge. Proceed to the large cog assembly and extract the metal bar situated between the two smaller cogs. Position this metallic rod across the two metal poles to complete the circuit, thereby powering the shrine’s final exit door.
Common Mistake Alert: Many players struggle with proper rod positioning. Ensure the metal bar makes solid contact with both poles simultaneously—partial connections will fail to transmit sufficient electricity to activate the door mechanism.
For comprehensive gaming guidance, explore our extensive Tears of the Kingdom resources hub, featuring complete shrine location mapping and numerous individual shrine puzzle walkthroughs. If you’re preparing for other challenges, our Complete Guide to upcoming titles provides valuable strategic insights.
Optimization Strategy: Complete the entire shrine in approximately 8-12 minutes by mastering the swinging technique early. Advanced players can reduce completion time to under 6 minutes with precise Ultrahand movements and optimal pathing.
Advanced Technique: When dealing with the swinging chains, initiate momentum with the charged ball first, as its weight distribution provides more predictable pendulum motion. The uncharged ball typically responds better to secondary manipulation.
Equipment Preparation: While this shrine doesn’t require specific gear, understanding electrical mechanics will help with similar challenges. For weapon-specific strategies, consult our Weapons Unlock guide for complementary gaming insights.
Timing Considerations: The wall platforms remain extended for approximately 15 seconds after activation. Plan your Ascend usage accordingly to avoid falling and repeating the section.
Class Selection Insight: The problem-solving approaches developed here translate well to other gaming scenarios. Explore our Class Guide to understand how different playstyles approach complex puzzles.
Action Checklist
- Connect charged and uncharged metal balls using Ultrahand in the first room
- Master the swinging technique for short-chain sections to activate platforms
- Use Recall on the large cog to access and open the optional treasure chest
- Position metal rods strategically between poles to power the final door
- Execute Ascend through activated platforms to reach the final section
No reproduction without permission:SeeYouSoon Game Club » Zelda: Tears Of The Kingdom – Turakamik Shrine Puzzle Guide Master the Turakamik Shrine's electrical puzzles with expert strategies and hidden chest locations