TL;DR
- Complete the Encore Exotic mission in Echoes Act 3 to unlock Choir of One crafting
- Progressively unlock catalysts through multiple weekly mission completions
- Find secret chests and Temporal Anomalies for enhanced weapon customization
- Current weapon bugs provide temporary advantage before Episode 2 fixes
- Optimize god rolls separately for PvE and PvP combat scenarios
Destiny 2’s Echoes Act 3 introduces an exciting new Exotic mission called Encore, featuring the highly sought-after Choir of One Void auto rifle. This weapon represents one of the most significant additions to the game’s arsenal, offering unique gameplay mechanics and extensive customization options through its crafting system.
The Choir of One stands out as a precision-frame Void auto rifle with exceptional stability and range characteristics. Its exotic perk, Harmonic Resonance, creates cascading damage effects when landing precision hits on multiple targets rapidly. Understanding this weapon’s current state is crucial, as it currently benefits from several unintended advantages that significantly enhance its performance.
Bungie has officially acknowledged that Choir of One currently operates with enhanced capabilities beyond design intentions. The weapon maintains approximately 40% more reserve ammunition than planned, and when combined with the Divinity exotic trace rifle, its hip-fire projectiles deliver roughly 25% additional damage output. These temporary advantages will be normalized when Episode 2 launches in October, creating a limited-time opportunity for players to experience the weapon at its most powerful state.
Acquiring the Choir of One requires completing the Encore Exotic mission, which becomes available after progressing through the main storyline of Echoes Act 3. The mission itself presents moderate to high difficulty, requiring careful loadout planning and familiarity with Vex combat mechanics.
The unlock process follows a structured progression: First, complete the Specimen NES009 questline to access the Echoes: Epilogue mission chain. This typically takes 2-3 hours for average players. Then, navigate the Encore mission’s complex mechanics, which include platforming sections, combat encounters with Wyverns and Hydras, and puzzle-solving elements. Successful completion grants the blueprint for Choir of One, enabling weapon crafting at the Enclave on Mars.
For optimal mission preparation, we recommend bringing weapons effective against Vex shields and maintaining high mobility for traversal sections. The complete mission run generally takes 25-45 minutes depending on player skill level and familiarity with the mechanics. Multiple completions are necessary to fully unlock the weapon’s potential, so mastering the mission flow becomes increasingly important.
The Choir of One features multiple Exotic catalysts that enhance its capabilities, each requiring specific completion conditions within the Encore mission. The catalyst progression system follows a weekly unlock pattern, meaning players must return to the mission across several weekly resets to collect all available enhancements.
Week 1 introduces the Resonance Amplifier catalyst, which increases magazine capacity by 30% and improves reload speed. Week 2 adds Harmonic Convergence, granting the weapon the ability to create Void explosions on precision kills. The newly available Week 3 catalyst, Temporal Synchronization, provides significant handling bonuses and reduces flinch when aiming down sights.
Each catalyst requires finding specific hidden items or completing bonus objectives during mission runs. For example, the Week 3 catalyst demands locating three Temporal Anomalies scattered throughout the mission area. These anomalies only appear after completing the initial Specimen NES009 quest, so planning your catalyst farming route efficiently can save substantial time across multiple playthroughs.
Choir of One’s weapon frames represent one of its most compelling features, allowing extensive customization of the weapon’s core performance characteristics. Unlocking additional frames requires locating secret chests hidden throughout the Encore mission, each containing specific frame components.
The standard Precision Frame provides balanced stats for general combat, while the Aggressive Frame (unlocked from the first secret chest) increases impact at the cost of stability. The Adaptive Frame (second secret chest) offers improved handling and aim assistance, making it ideal for PvP scenarios. The Rapid-Fire Frame (third secret chest) maximizes rate of fire for close-quarters engagements.
Each frame dramatically alters the weapon’s feel and performance, so experimenting with different configurations is essential for finding your preferred playstyle. The frame system works alongside the standard perk customization, creating numerous combination possibilities for optimizing the weapon to specific activities and personal preferences.
Optimizing Choir of One requires different approaches for PvE and PvP activities, as the optimal perk combinations vary significantly between these game modes. Understanding these differences ensures you maximize the weapon’s effectiveness in each scenario.
For PvE content, prioritize perks that enhance add-clear capabilities and sustained damage. The ideal combination includes Hammer-Forged Rifling for range, Tactical Mag for stability and reload, with Dynamic Sway Reduction and Kill Clip. This setup provides excellent crowd control while maintaining strong boss damage potential.
In PvP scenarios, focus on consistency and dueling capabilities. The recommended god roll features Smallbore for balanced stats, Accurized Rounds for additional range, with Perpetual Motion and Tap the Trigger. This combination ensures reliable performance in Crucible engagements where landing consecutive precision hits determines success.
Advanced players should consider creating multiple crafted versions tailored to specific activities. The frame selection should complement your chosen perks – Aggressive Frame for PvE burst damage, Adaptive Frame for PvP consistency. This strategic approach to weapon customization separates average performance from exceptional results in endgame content.
Mastering the Encore mission requires understanding its hidden mechanics and optimization strategies. The mission contains three secret chests that provide essential components for weapon frame unlocks, each requiring specific actions or puzzle solutions to access.
Temporal Anomalies represent another crucial collectible system, appearing as shimmering energy formations that only become visible after completing the Epilogue quest. These anomalies are essential for unlocking the Week 3 catalyst and provide additional lore insights into the Vex narrative.
Vex Countermands serve as the mission’s primary currency, obtained by defeating specific high-value targets and completing bonus objectives. These countermands are used to purchase additional customization options and upgrade materials from the mission vendor.
For efficient farming, develop a consistent route that incorporates all collectibles while minimizing backtracking. The initial learning phase may require 3-4 completions, but once mastered, subsequent runs can be completed in under 20 minutes while collecting all available rewards. This efficiency becomes particularly valuable when pursuing multiple catalysts across weekly resets.
How To Get Choir Of One
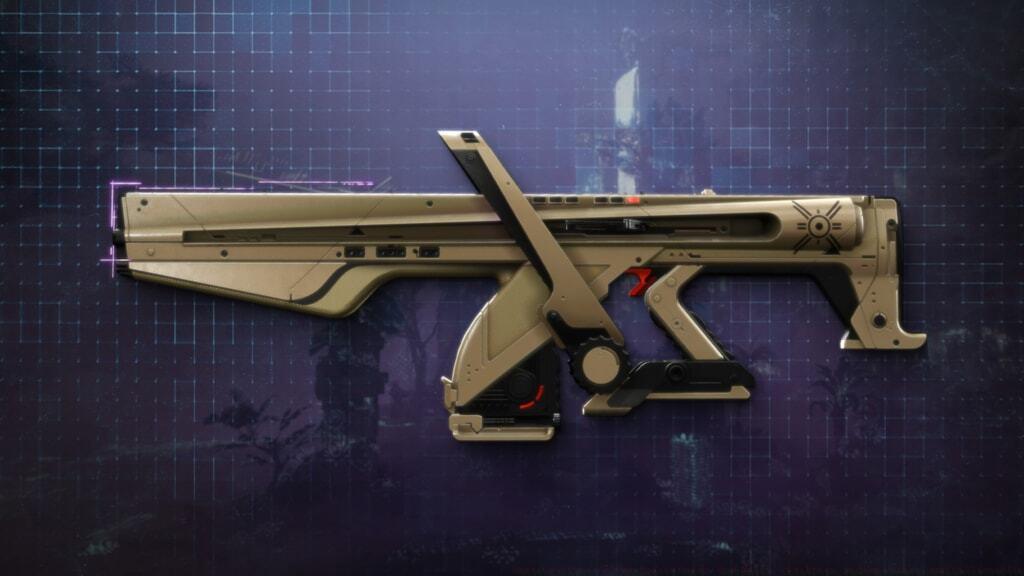
Choir of One
Fortunately, unlocking the Encore mission requires no hidden prerequisites or complex unlock conditions. As long as you’re current with the Echoes storyline progression, Act 3 becomes immediately accessible. The narrative continues with a revealing cutscene that explores antagonist Maya Sundaresh’s deeper motivations. Once the cinematic concludes, proceed directly to the HELM and engage with Failsafe to initiate the next phase.
Your objectives remain consistent with previous acts–halt Maya’s ambitious scheme to dominate the solar system. Your initial objective in Act 3’s campaign involves tackling the Exotic mission. You can access Encore: Overture directly from the Director interface within the HELM section.
Successfully completing the mission rewards you with both the Choir of One weapon and its crafting blueprint. Similar to other craftable Exotics, you must subsequently acquire its three distinct Exotic Catalysts and gain the capability to modify barrel, magazine, and stock configurations. Encore evolves weekly, introducing fresh secrets: The inaugural week featured Encore: Overture,
How To Unlock Choir Of One’s Exotic Catalysts
Following the pattern of other craftable Exotics, obtaining the weapon’s various Exotic Catalysts demands completion of the Exotic mission on Master difficulty, coupled with discovering concealed chests scattered throughout the mission area. While seven total chests exist within the mission environment, current availability appears limited to specific ones. Anticipate all concealed items, and consequently all Catalysts, becoming accessible within Encore: Overture as Act 3’s narrative unfolds over subsequent weeks.
Choir of One gains substantial capability enhancements through three major perk additions via its supplementary catalysts:
- Subsistence
- Destabilizing Rounds
- Onslaught
Every catalyst connects to an Exotic quest, obtainable from Banshee-44 within the Tower hub. The initial quest, Choir: Eternal, is currently accessible. To finish the quest and secure the Catalyst, locate the initial secret chest within the mission, open it successfully, then complete the entire mission on Expert difficulty setting. We’ve thoroughly documented the locations of all secret chests in the mission section below.
However, quest instructions clarify that you don’t need to discover the secret chest during your Expert difficulty attempt–locating the chest in a prior normal difficulty run will satisfy quest requirements. This strategic approach enables you to locate all secret chests as they become accessible, then execute a single Expert run after all chests are incorporated into Encore to acquire all three Catalysts simultaneously.
How To Unlock Choir Of One’s Weapon Frames
Additionally connected to the concealed chests are three supplementary weapon frames for Choir of One, with each frame enabling customization of barrel, magazine, and stock components. You can currently obtain the first of these frames on either normal or Expert difficulty settings for Encore. Presently, only Command Frame II is obtainable, with Command Frame III and Command Frame IV becoming accessible in later weeks.
To acquire these frames, hunt down the hidden chests within Encore, which only manifest following your initial mission completion. After finishing the mission, you can return to discover multiple new Vex confluxes, those distinctive white columns, that become activatable at specific locations to reveal puzzles leading to hidden chests. We provide comprehensive details regarding the hidden chests in the subsequent sections.
How To Start The Encore Exotic Mission
Once inside Encore, navigation can present challenges initially. Search for an ascending pathway situated on the right flank of the initial combat arena that will guide you upward along the area’s right perimeter.
Look for this pathway up on the right side of the first area.
Upon reaching the ramp’s summit, when further ascent becomes impossible, glance downward toward the terrain beneath. You should observe a substantial white spherical rock formation featuring an aperture. This constitutes your route. Traverse through it, then leap across the fissure to proceed through an extensive platforming sequence.
Jump down into this hole to continue forward.
How To Find Encore Hidden Chests
The concealed chests within Encore won’t materialize during your initial mission attempt. However, you must also locate a crucial quest artifact while progressing through the mission to conclude the initial segment of Echoes Act 3’s narrative. Discovering that essential item activates the Nessus Specimen 007 quest with Failsafe, which must be completed to enable new elements within Encore: Overture for discovering hidden chests.
Encore Hidden Chests – Week 1 (Encore: Overture)
Where To Find Specimen 007
Check out this Exo corpse in the lab to find Specimen 007.
While advancing through Encore: Overture, you’ll ultimately arrive at Maya Sundaresh’s laboratory, identifiable by the presence of Exo remains and a massive Exo cranium upon entry. When arriving, monitor your display for a Proximity Sensor indicator–the detection system Failsafe employs to assist in locating specimens during Nessus exploration. Search for a cadaver positioned on the ground surface along the left corridor wall near the entrance to locate the Specimen artifact you’re seeking. Recognition occurs when initiating an audio recording from Maya Sundaresh chronicling one of her experimental procedures.
Complete Specimen NES007
Return to Failsafe after finishing Encore: Overture and proceed with Act 3’s storyline until receiving the Specimen NES007 quest. Completion isn’t exceptionally challenging, though it may prove somewhat time-intensive. The initial phase necessitates eliminating 100 Vex adversaries utilizing Solar damage, achievable rapidly within either Echoes activities, such as Breach Executable, or Nessus Lost Sectors including The Orrery, situated within The Artifact region.
Following acquisition of your Vex elimination tally, assignments will involve gathering Vex data and vanquishing Vex commanders. These dual objectives are accomplishable relatively swiftly during Breach Executable occurrences; you’ll likely fulfill both within a singular event, and certainly within two occurrences.
Subsequently, you’ll need to execute rapid successive eliminations on Vex opponents. Again, Breach Executable presents a reasonably straightforward method to achieve this, given the substantial Vex adversary concentration available for engagement throughout the event duration. We satisfied this prerequisite within one Breach Executable event. The Orrery offers another viable alternative to locate substantial Vex groupings for efficient elimination.
With all those stages accomplished, revisit Failsafe to conclude the Specimen 007 quest, which will grant you a new episode enhancement, enabling a fresh “hub” area within Encore: Overture. This access becomes necessary to locate the initial set of concealed chests within the Exotic quest.
Hidden Chest 1: Ancillary Transit Hub
Advance through Encore: Overture until reaching the location where you ride the two hammer-shaped platforms descending from above, transporting you into confined passageways within the structural walls. The forward trajectory illuminates with purple hues, and upon descent, a notification appears indicating MSund12 establishing connection with your network. From this point forward, you’ll receive communications from Maya Sundaresh remarking on your mission advancement.
After dropping down the hole lit in purple, look for an opening on the left to reach the Ancillary Transit Hub.
The primary route forward illuminates with blue lighting, but if examining the left side, you’ll notice a more compact aperture in the wall, indicated by a pulsating illumination source. If proceeding through that left passageway, you’ll enter a circular chamber containing multiple inactive Vex portals and a white Vex conflux centrally positioned. Activating the conflux initiates the Ancillary Transit Hub and presents a puzzle for resolution, though it’s relatively straightforward.
Monitor for four Vex cubic formations to materialize in the chamber’s center. You must discharge and demolish these in a particular sequence, though identification proves simple–merely observe for a more compact, intensified cubic formation to manifest underneath the cube requiring targeting. After successfully eliminating all four cubes sequentially, four additional cubes will manifest around the room’s perimeter, one positioned before each Vex portal (incorporating one behind your position). Again, the brighter cubic formations will manifest adjacent to the cube necessitating targeting, determining the sequence. Eliminate all four of these cubic formations and a chest will materialize centrally within the chamber.
Hidden Chest 2: Back Outside
Continue progression through the level. Ahead you’ll encounter the initial puzzle where you utilize Vex Modules to manipulate the environment. The first puzzle ultimately enables traversing a substantial chasm. Maintain advancement until encountering Vex combating Shadow Legion adversaries within an expansive, open-area chamber, immediately following the room containing the substantial columns that contain platforms vegetation-covered.
Clear this chamber and eliminate adversaries, and you’ll ultimately acquire a yellow Partition module, yielded by a Minotaur. When inserting it at the chamber’s rear section, the wall will dematerialize to permit forward progression. Immediately beyond that, you’ll access a chamber containing a Planetary Piston mechanism, utilizable for Radiolite acquisition. There will additionally be another Vex conflux centrally positioned within the chamber. Activating it activates the portal to your right.
The conflux is hard to miss, appearing right in the middle of the path as you make your way past the second Partition module wall.
Proceed through the portal and you’ll return to the Ancillary Transit Hub, where another portal will be activated and awaiting utilization. Traverse through it and you’ll find yourself returned to the level’s commencement point, within the exterior region where you needed to ascend the ramp to leap into that substantial white spherical rock formation. Proceed toward the precipice ahead and locate a Vex conflux. When activating it, a brief countdown will manifest on your display. You must locate multiple Vex plates concealed upon walls and discharge them before timer expiration.
Look for white lines splintering off from the conflux once you activate it, which will lead you to the plates.
The plates aren’t excessively challenging to locate, though you must demonstrate agility navigating this extensive, open terrain region to achieve success. When positioned adjacent to the conflux, monitor for indistinct white linear formations radiating outward in various orientations. These constitute energy linkages to the plates and you can pursue them to locate the objects necessitating targeting. Note that the energy linear formation that appears directed toward that independent column centrally positioned within the region actually extends past it, with the plate you’re seeking positioned upon the accumulation of cubic rock formations behind.
Shoot all five bronze plates and the secret chest will appear.
With all plates cleared, a chest will materialize where the conflux was positioned, which will grant you Command Frame II for Choir of One.
Hidden Chest 3: Aberrant Code Containment
The final conflux manifests within Maya’s laboratory, immediately before accessing the boss chamber. Again, it’s situated directly within the path’s center, so identification proves impossible to miss. Utilize it to activate a Vex portal and return to Ancillary Transit, then enter another portal that’ll transport you to Aberrant Code Containment.
Here, you’ll discover five inactive Vex portals and two blue Access Vex modules, utilizable for portal activation. If inserting one, you’ll observe that the portal generates a white energy linear formation directed toward one of the orange diamond configurations above the other portals. This linear formation indicates the portal’s destination, as there’s an upper level to this chamber above that’s partitioned into five sections.
You can see where each portal will take you based on the node it connects to.
If proceeding through the Vex portal, you’ll observe what challenges await. Upon the upper level, each portal discharges into one of the five compartments above, and within each compartment resides a pink Data pod, as you’ll have encountered within Breach Executable and Enigma Protocol activities. You must access each of the five compartments and demolish each Data pod to complete the puzzle. However, complications exist: Initially, there’s an energy linear formation extending between the Data pods, and certain ones remain shielded. You must demolish the Data pods in a specific sequence to deactivate shields, commencing with the two positioned at either linear extremity and progressing inward.
Following acquisition of all concealed chests, concluding Encore: Coda, and experiencing the Episode Echoes narrative conclusion, one task remains: Specimen NES009. You should have collected it when unlocking Hidden Chest 7, and returning to Failsafe will provide the remaining Specimen mission components for completion.
Once finished with NES009, a new quest activates, titled Echoes: Epilogue. This constitutes a narrative-focused quest providing deeper insight into Maya Sundaresh’s psyche and her relationship with Chioma, though it mandates returning into Encore one final instance to locate eight additional collectible items.
Interact with this temporal anomaly at Braytech Exoscience to advance the Epilogue quest. There are eight more of these to find in Encore.
Initially, pursue the quest as it directs you toward Braytech Exoscience on Europa. There, you’ll locate a luminous purple spherical formation; when activating it, you’ll receive an audio transmission from Sundaresh. The subsequent phase redirects you back into Encore to locate eight additional luminous purple spherical formations concealed throughout the mission environment.
Important! While progressing through Encore, ensure you pause and activate Ancillary Transit–the substantial Vex portal network transporting you to the concealed chests. Only one of the Temporal Anomalies is accessible through Ancillary Transit, though it’s the ultimate one, and consequently the most frustrating instance conceivable if neglecting to activate the portals and necessitating complete mission repetition.
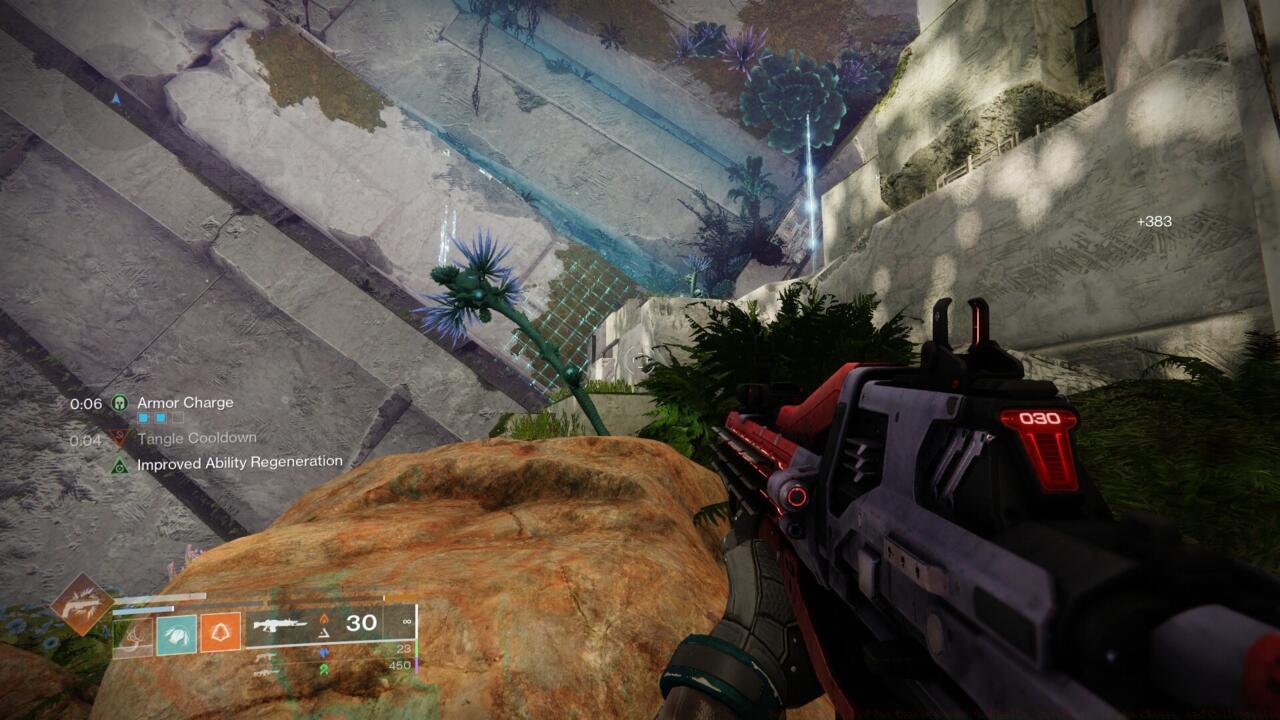
Temporal Anomaly 1: Outside On The Cliff
The initial anomaly is positioned directly at the mission’s commencement. Clear the vicinity, then, with your orientation toward the starting position, proceed to the precipice’s edge ahead and follow it leftward.
Head to the left side of the cliff at the start of Encore to find a place where you can climb down and reach the anomaly.
Approaching the far left perimeter you should observe a location where descent becomes possible onto certain platforms and right-angled projections extending from the wall. The anomaly is nestled among them.
Advance through Encore until reaching the initial chamber where you locate the Vex modules. Upon entering the chamber, you’ll acquire a module and the flooring behind your position dematerializes. Proceed around the corner toward the left chamber side; upon your left is the Vex conflux behind a forcefield barrier, and upon your right is the console interface.
Look for this anomaly in the corner of the room near the conflux to the left where you initially enter.
Maintain progression toward the wall ahead and turn left. You should be oriented toward the forcefield wall containing the conflux behind it, though now examining a compact passageway immediately to the right of the conflux. The anomaly is concealed here, at its termination.
Temporal Anomaly 3: In The Room Where Vex Fight Shadow Legion
Following traversing the substantial chasm subsequent to the initial module puzzle, you’ll proceed through the substantial chamber containing the columns that each feature a compact vegetation area upon them, then continue upward to a chamber where a substantial confrontation occurs between Shadow Legion and Vex forces.
Just look around the left side of the room where you have a big battle with Vex and Shadow Legion to find this anomaly.
You must clear this chamber to generate a Minotaur that subsequently yields a yellow Partition module. With your orientation toward the entry portal, proceed around the circular chamber toward the left, where the anomaly is situated just beyond visibility.
Temporal Anomaly 4: Just Before The First Boss Fight
Immediately following the chamber where you located the previous anomaly, you’ll utilize a Vex elevator upward and access a chamber to a chamber containing a puzzle utilizing Vex portals. The concept involves acquiring two blue Access modules and a Connection module to enable forward progression toward the confrontation with the Subjugator and Tormentor.
After completing the puzzle that takes you to the first boss fight, right before the final Vex gate, turn around and face the gate you just passed through and you’ll spot the anomaly.
Execute your progression through the puzzle until reaching the ultimate section, where you traverse through a Vex portal and insert a Connection module to establish a pathway toward the last portal. When arriving, refrain from activating the final portal; instead, reorient and face the one you just traversed. The anomaly is positioned immediately to its right.
Temporal Anomaly 5: In The Jungle
Immediately following vanquishing the Subjugator and Tormentor commanders, the Vex portal permitting arena egress transports you to another jungle sector.
The anomaly in the jungle is almost out in the open, obscured by plant life on the path forward.
You have substantial traversal along the pathway here, though maintain observation of the left wall surface, behind the vegetation, to identify the subsequent anomaly. If encountering the location where descent becomes necessary, you’ve exceeded the required distance.
Temporal Anomaly 6: In The Big Cave With The Ishtar Dome
Subsequently appears a substantial cavern chamber containing the initial Ishtar dome structures manifesting within the mission, alongside formidable Vex adversaries, incorporating two Wyverns, three Independent Variable Minotaurs, and a Hydra, accompanied by multiple Harpies. You must eliminate them to continue forward progression.
This anomaly is just to your left as you enter the big room full of tough Vex and the first Ishtar buildings you come across.
Upon entering the chamber, if turning left, you’ll observe the Vex Harpy hovering above a compact ravine formation. The anomaly is positioned down there, at the chamber’s minimal elevation point.
Temporal Anomaly 7: At The Second Set Of Ishtar Buildings
Progressing outward from the cavern containing the initial Ishtar structures, you’ll navigate around a corner to an exterior region where additional buildings are positioned. To your right is a Vex Hydra airborne, centrally positioned within the region should now be a Compelled Cabal Colossus, and a few Harpies complete the adversary composition. Eliminate them but refrain from advancing through the Vex portal yet.
This anomaly is tucked just to the right of the path you follow as you enter the outdoor area with more Ishtar buildings.
Instead, search for the anomaly immediately adjacent to where you access this region. It’s positioned against a wall surface immediately to the right of the Vex marble architecture upon the pathway here. If oriented toward the Vex portal (or where the Hydra was positioned), turn right and you’ll identify it easily.
Temporal Anomaly 8: In The Networked Simulation Archive Hidden Chest Puzzle Cave
The ultimate temporal anomaly is actually concealed within one of the Hidden Chest puzzles accessible through Ancillary Transit. This constitutes the puzzle for Hidden Chest 5 above, the one that requires utilization of multiple Deletion modules to activate various forcefields to locate concealed Vex Countermand objects. Utilize the conflux
You have to solve the entire puzzle to reach Hidden Chest 5 to get the final Temporal Anomaly.
Utilize the Hidden Chest 5 section above to navigate through the puzzle, as the anomaly is positioned entirely at the termination point. The fundamentals here involve necessitating activation of each of the red forcefields utilizing Deletion modules to acquire the four Vex Countermand objects the Proximity Sensor will guide you toward. Collecting each one activates portions of the puzzle progressing forward, so you cannot bypass to the conclusion.
In addition to a bunch of story tidbits, finding all eight Temporal Anomalies gets you the Before Aurora emblem.
When reaching the ultimate chamber, the anomaly is exposed immediately to the right of the last Countermand. Acquiring it grants you the concluding segment of Echoes: Epilogue narrative and the Before Aurora emblem.
Getting started with the Encore mission requires minimal preparation, making it accessible for most players. The only requirement is completing the previous Echoes storyline content, which ensures you’re properly positioned in the narrative arc. Once you’ve reached this point in the campaign, the third act begins automatically with an introductory cinematic that deepens your understanding of antagonist Maya Sundaresh’s complex motivations and ultimate objectives.
After the opening cutscene concludes, your next destination is the HELM where you’ll consult with Failsafe for updated mission parameters. Despite the evolving narrative context, your core directive remains consistent: prevent Maya from executing her ambitious scheme to dominate our solar system. The exotic mission component launches directly from your Director interface when selecting the HELM location.
- Temporal Anomaly 1: Cliffside Exterior – Located on the rocky outcrop overlooking the initial landing zone, this anomaly appears as a shimmering distortion in reality that’s easily spotted during your approach to the first objective marker.
- Temporal Anomaly 2: Module Puzzle Chamber – Found within the first puzzle room where you manipulate energy conduits, typically positioned near the central console area before solving the sequence.
- Temporal Anomaly 3: Vex Combat Arena – Situated in the chamber where Vex forces engage Shadow Legion troops, often tucked into alcoves or elevated platforms away from direct firefights.
- Temporal Anomaly 4: Pre-Boss Preparation Zone – Positioned in the transitional area immediately preceding your first major boss encounter, requiring careful exploration before advancing.
- Temporal Anomaly 5: Jungle Environment – Hidden among dense foliage in the lush jungle section, these anomalies blend with environmental effects and require thorough scanning of vegetation.
- Temporal Anomaly 6: Ishtar Dome Cavern – Located within the expansive cave system featuring the prominent Ishtar structure, often found along peripheral pathways rather than the main route.
- Temporal Anomaly 7: Secondary Ishtar Complex – Positioned around the second cluster of Ishtar architectural elements, typically on ledges or behind structural components.
- Temporal Anomaly 8: Simulation Archive Puzzle Cave – The most challenging to locate, concealed within the Networked Simulation Archive area where you solve hidden chest puzzles in intricate cave networks.
Successfully locating all temporal anomalies demands strategic exploration rather than rushed progression. These reality distortions emit subtle audio cues and visual flickering that become more noticeable when you slow your pace and systematically scan each area. Veteran players recommend clearing enemy threats before attempting collection, as the activation animation leaves you vulnerable to attacks.
Common mistakes include overlooking elevated positions and rushing through transitional zones. Many anomalies occupy peripheral sightlines rather than main pathways, requiring deliberate deviation from objective markers. The jungle and cave anomalies prove particularly elusive due to environmental camouflage and complex terrain navigation.
For time optimization, plan your route to collect anomalies during natural progression rather than backtracking. Most can be acquired during standard mission advancement if you maintain awareness of your surroundings. The entire collection process typically adds 10-15 minutes to your mission completion time when executed efficiently.
When you first enter the Encore mission area, orientation can initially prove challenging. Your primary objective involves locating an ascending ramp positioned on the arena’s right flank, which provides elevated access along that side of the combat zone.
Identify this upward-sloping passage situated on the right perimeter of the initial combat space.
Upon reaching the ramp’s summit where further vertical progress becomes impossible, carefully survey the terrain below. You’ll notice a distinctive white spherical rock formation featuring a central aperture. This opening serves as your progression route. Traverse through this passageway and execute a precision jump across the adjacent gap to advance into the subsequent platforming sequence.
Descend into this opening to maintain forward momentum through the mission.
The concealed treasure containers within Encore remain inaccessible during your initial mission completion. Additionally, you must secure a crucial quest artifact while progressing through the assignment to conclude the opening segment of Echoes Act 3’s narrative. Acquiring this essential item initiates the Nessus Specimen 007 investigation with Failsafe, a prerequisite for activating additional mission elements within Encore: Overture that reveal the hidden chest locations.
Examine this Exo remains within the laboratory environment to discover Specimen 007.
While advancing through Encore: Overture, you’ll ultimately arrive at Maya Sundaresh’s research facility, identifiable by the presence of multiple Exo cadavers and a massive Exo cranium near the entrance. Upon arrival, monitor your display for the Proximity Sensor indicator—Failsafe’s specialized tracking mechanism that assists with specimen detection during Nessus exploration. Search for a prone form resting on the flooring along the corridor’s left boundary adjacent to the entry point to locate the Specimen artifact. Successful acquisition triggers an audio recording from Maya Sundaresh chronicling one of her research endeavors.
Return to Failsafe’s location after finishing Encore: Overture and proceed with the Act 3 storyline until receiving the Specimen NES007 assignment. While not exceptionally demanding, this quest can consume considerable time investment. The initial phase mandates eliminating 100 Vex combatants using Solar-based damage, achievable rapidly through either Echoes engagements like Breach Executable, or within Nessus concealed zones such as The Orrery, positioned in The Artifact region.
Following successful Vex eradication, your objectives shift to gathering Vex intelligence data and neutralizing Vex command units. Both requirements can be accomplished efficiently during Breach Executable operations; you’ll likely fulfill both during a single engagement, and certainly within two consecutive events.
Subsequently, you must achieve consecutive eliminations against Vex adversaries. Once more, Breach Executable presents an optimal approach for completion, given the substantial Vex concentrations available for combat throughout the activity. Our testing accomplished this prerequisite within one Breach Executable session. The Orrery offers another viable option to encounter numerous Vex clustered together for swift and efficient disposal.
Loadout Optimization: Equip Solar-damage weapons like Sunshot or Ticuu’s Divination for maximum Vex elimination efficiency. Consider pairing with armor mods that enhance Solar ability regeneration for faster clear times.
Time Management: Allocate approximately 45-60 minutes for the complete Specimen NES007 quest chain. Breach Executable events typically require 15-20 minutes each, while Lost Sector clears average 5-7 minutes per run.
Common Pitfalls: Avoid wasting time in low-density Vex areas. Many players mistakenly attempt completion in public events rather than focused activities. The Proximity Sensor sometimes fails to activate immediately—ensure you’re in the correct laboratory section before assuming a bug.
Advanced Strategy: For rapid kill requirements, utilize area-of-effect Solar abilities like Dawnblade super or Solar grenades in tightly packed Vex formations during Breach Executable final stages.
The concluding Vex conflux materializes within Maya’s laboratory space, positioned immediately preceding the final boss encounter area. This energy nexus occupies the central thoroughfare, making it impossible to overlook during your progression. Engage with it to initiate a Vex teleportation gateway that transports you back to Ancillary Transit, then proceed through a secondary portal leading directly to Aberrant Code Containment.
Pro Tip: Before activating the conflux, ensure your super ability is fully charged and your heavy ammo reserves are stocked, as you’ll face immediate combat challenges upon arrival.
Upon reaching the containment area, you’ll discover five dormant Vex portals accompanied by two blue Access Vex interface modules for portal activation. When you insert a module, observe how the activated portal generates a luminous energy conduit connecting to one of the orange marker crystals above adjacent portals. This visible connection system precisely indicates each portal’s destination, as the chamber features an elevated second level partitioned into five distinct sectors.
Advanced Insight: The energy lines follow specific Vex computational patterns – shorter lines typically lead to closer chambers, while longer arcs indicate more distant destinations requiring quicker traversal.
Each portal’s endpoint becomes clearly identifiable based on its connection node alignment with the overhead marker network.
Transitioning through any activated Vex portal reveals the challenge awaiting you. The upper level features five separate chambers, each containing a distinctive pink Data storage pod similar to those encountered in Breach Executable and Enigma Protocol activities. Your objective involves accessing all five chambers and eliminating each Data pod to solve the environmental puzzle. However, complications arise: First, an energy network interconnects the Data pods, with certain units protected by energy shielding. You must demolish the pods following a precise sequence, beginning with the two pods positioned at the terminal points of the energy line before progressing inward toward the central units.
Critical Timing: Execute rapid pod destruction since delayed elimination triggers mutual repair mechanisms, potentially nullifying your previous efforts and forcing puzzle resets.
Additionally, destroying any Data pod initiates countdown timers on interconnected pods. Failure to eliminate subsequent pods in the sequence before timer expiration reactivates the regeneration process, reversing your progress.
While the puzzle mechanics remain relatively straightforward, successful completion demands both speed and meticulous attention to portal destination verification before engagement. Following the elimination of all five data storage units, the reward chest materializes at the chamber’s central platform.
Optimization Strategy: Assign specific team members to designated portals based on their mobility capabilities – Hunters with high mobility excel at distant chamber reaches, while Titans can better handle shielded pod destruction.
Common Pitfall: Many players waste precious seconds by entering incorrect portals – always double-check the energy line connection before committing to a portal jump.
The second cluster of concealed chests remains accessible through identical locations as the initial week’s discoveries, but before acquisition, consult with Failsafe to obtain the Specimen NES008 investigative mission—completion of certain weekly Echoes narrative content may be prerequisite. Specimen 008 resides at one of this week’s hidden chest locations, making simultaneous completion of both objectives highly efficient. You can additionally visit the Tower and interact with Banshee-44 to acquire the questline for unlocking weapon catalysts for the Choir of One exotic.
Efficiency Note: This week’s hidden chests become accessible using the same Vex conflux activation methods as the previous week, involving various energy nexuses that activate Vex portals returning to Ancillary Transit. Previous chest groups remain obtainable, allowing you to collect them during transit for supplementary rewards.
To initiate this concealed chest series, advance through the mission until reaching the Ancillary Transit central hub and activate the encountered conflux. Repeat the Vex cube targeting sequence around the chamber following their illumination pattern by smaller white indicator cubes. Consult our Complete Guide for comprehensive mechanical explanations if needed.
Your primary navigation tool for locating Vex Countermand items is the Unknown Proximity Signal meter positioned in the bottom-left corner of your display. This intuitive interface element becomes active when you’re within detection range of collectible objects, providing directional feedback that intensifies as you approach your target. The meter’s sensitivity allows for precise triangulation, eliminating guesswork from your exploration process.
The Unknown Proximity Signal system operates on a graduated intensity scale—pay close attention to the visual and audio cues that indicate proximity. As you move closer to a Countermand, the meter will display increased activity with more frequent pulses and brighter indicators. This mechanic significantly reduces search time compared to blind exploration, especially in the complex cave environments where these items are hidden.
After obtaining your initial Deletion module, navigate back toward the starting area near the Vex gate that transported you to this location. Insert the module into the first console adjacent to the red barrier you initially encountered. This action will deactivate the energy field, granting access to a chamber containing a Vex Minotaur guardian. Defeat this enemy to claim a second Deletion module from its remains.
Immediately upon securing the additional module, pivot left to discover another red energy barrier positioned conveniently nearby. Utilize your newly acquired module to disable this second obstruction, revealing the pathway to your second Countermand acquisition. This strategic positioning minimizes travel time between objectives.
Pro Tip: Defeat the Minotaur quickly using precision weapons to its critical spot, as prolonged engagements may trigger additional Vex reinforcements. The second Deletion module acquisition is essential for progressing to more complex puzzle sections ahead.
With both Deletion modules now in your possession, you can tackle the secondary Deletion barrier located in the central cavern expanse. After inserting one module to disable the initial door, remember to retrieve it before proceeding—these limited resources require careful management throughout the puzzle sequence. Exit toward the Vex gate orientation, then follow the illuminated path to the subsequent Deletion barrier.
This phase demands strategic module rotation: use your first module to open the initial barrier, then retrieve it to activate the secondary obstruction just beyond. Inside this newly accessible area, you’ll discover the third Countermand artifact awaiting collection.
Common Mistake: Many players forget to reclaim modules after use, creating unnecessary backtracking. Always retrieve modules immediately after they’ve served their purpose to maintain progression momentum.
Gather both Deletion modules and return to the primary Deletion barrier situated near the Vex gate. Proceed through the now-accessible passage until you encounter a secondary Deletion wall, which you can disable using your remaining module. Immediately beyond this barrier, execute a sharp right turn to identify a concealed pathway winding around a corner formation.
Here, a patient Vex Minotaur awaits engagement—eliminate this guardian to obtain the crucial Access module required for final progression. This enemy typically remains stationary until provoked, allowing for strategic positioning before engagement.
Return along the corridor to locate the previously hidden Vex gate activation point. Insert your Access module into the interface, then traverse the newly formed portal to confront the ultimate Vex Minotaur guardian. Vanquish this final adversary to secure a Partition module, then advance to claim the last Vex Countermand ocular device.
Claiming the final Countermand rewards you with both a concealed treasure cache and an additional audio recording. Utilize the Partition module for area extraction. This specific chest connection to the secondary Choir of One catalyst means you’re positioned to acquire that enhancement when it releases as a component of the Exotic mission sequence.
The concluding pair of hidden chests become accessible via Ancillary Transit, consistent with previous weeks’ mechanics. Similar to prior iterations, visit Failsafe and acquire the Specimen NES009 assignment through the vendor interface, as the biological sample resides at the ultimate hidden chest location.
Critical Preparation: Before initiating the mission, ensure you’ve completed the narrative assignment that first directs you to Neomuna for Chioma Esi intelligence data preceding your Encore initiation. Failure to complete this story quest segment will result in loading an incorrect Encore variant—you’ll receive last week’s Concerto mission instead of the current Coda iteration.
For optimal loadout preparation, consult our comprehensive BF6 Weapons Unlock Guide to ensure you’re equipped with the right tools for Vex combat encounters.
When activating Connection modules at cube consoles, you’ll observe the creation of multiple environmental objects including external angled metallic surfaces and internal components with circular conduits. This puzzle mechanic draws inspiration from Breach Executable mission design philosophy, requiring precise laser trajectory management. The core objective involves projecting energy beams from Vex activation plates through sequential ring alignments, where the laser must ricochet off reflective surfaces to engage all internal mechanisms.
The Connection module system establishes temporary energy conduits that manifest physical structures for laser redirection. Understanding the bounce physics is crucial – angles of incidence equal angles of reflection, similar to real-world optics principles. Each successful alignment triggers partition destabilization, progressively dismantling the cube’s defensive systems.
Strategic positioning becomes essential as even minor misalignments can disrupt the entire energy chain. Veteran players recommend studying the initial object spawn patterns to anticipate optimal firing positions before committing to plate activation.
Begin your puzzle progression by focusing on the Connection consoles positioned at the chamber’s forward and rear sections, specifically to the right of each Vex plate cluster. This systematic approach ensures methodical partition dismantling while minimizing enemy engagement complexity.
Insert the Connection module into the terminal directly facing the Vex gateway structure. Orient yourself toward the cube formation, then navigate to the corner plate on your left flank. From this platform, direct your aim toward the gateway and discharge the laser at the slanted metallic surface. Minor positional adjustments are often necessary to establish complete energy linkage, but upon successful connection, you’ll witness a brilliant energy flash accompanied by ‘Partition Weakened’ status confirmation.
Retrieve the Connection module and proceed to the room’s opposite extremity to replicate the procedure. Engage the console on the cube’s posterior face (directly opposing the gateway) and initiate the laser sequence from the left-positioned plate. This methodology will successfully neutralize the secondary partition barrier.
Common positioning errors include standing too close to plate edges or failing to account for character height variations. For consistent results, position your reticle slightly above the metallic surface center and make micro-adjustments while maintaining fire continuity.
The final two partitions demand simultaneous Connection module deployment, but fortunately, a Vex energy barrier at the room’s rear dissipates following the second partition’s collapse, revealing an additional module. Eliminate the Vex Goblin units that materialize near this newly accessible equipment. Proceed leftward around the cube’s perimeter and install this module into the adjacent console. Maintain the existing module’s position on the cube’s rear interface.
For partitions three and four, utilize both Connection modules positioned on either flank of the activation plate, directing your laser discharge leftward. Assume position on the plate while facing the left aperture instead of the previous rightward orientation. This trajectory will propel the laser through dual metallic reflector arrays, clearing all energy conduits and disabling the tertiary partition.
Execute this identical procedure at the chamber’s opposite sector where the Vex gateway resides. Install Connection modules into both the gateway console and its left-adjacent terminal, then position yourself on the corner Vex plate and discharge leftward. Fine-tuning your alignment may be required, but this should eliminate the final partition. Should Vex Cranium ammunition depletion occur, return to the room’s rear where Minotaur units respawn, enabling ammunition replenishment.
Advanced players can optimize this phase by pre-positioning before module activation and using environmental markers for consistent angle replication. The dual-module sequence typically completes within 3-5 minutes with proper execution.
Ensure collection of the remaining specimens designated for Failsafe’s research catalog. These biological samples are crucial for completing your mission objectives and unlocking subsequent narrative content.
The cube structure will dematerialize, granting access to the cavern’s central chamber and reward cache. Specimen NES009 awaits retrieval on a proximate examination table – secure this item promptly as it’s mandatory for advancing the Echoes storyline narrative.
Post-completion, experienced players recommend scanning the area for additional hidden collectibles that may appear only after cube dissolution. The specimen collection phase typically requires 1-2 minutes, but rushing this process may cause players to overlook secondary rewards or lore elements.
For players struggling with consistent laser alignment, consider consulting our Complete Guide for fundamental gameplay mechanics that translate well to puzzle-solving scenarios.
When you first encounter the damaged Ishtar structures, search for the initial Countermand positioned behind the central cave’s dome structure. This first collectible sets the pattern for the remaining items you’ll need to locate.
Progressing further, before engaging the final boss encounter, you’ll emerge into an expansive outdoor zone featuring additional Ishtar architecture and several Vex combatants. Scan the area for a stone pillar at the very center of this combat space – the second Countermand rests atop this prominent landmark. Crucially, secure this item before utilizing the Vex portal that transports you to Maya’s Exo laboratory and the concluding boss battle sequence.
Immediately prior to passing through the Vex gateway that concludes the mission, ascend the stone column situated between the Ishtar constructions to claim the final Countermand. Missing this opportunity forces a complete mission replay.
After securing all concealed chests, completing Encore: Coda, and witnessing the Episode Echoes narrative conclusion, your next objective involves Specimen NES009. This item should have been acquired during your Hidden Chest 7 unlock process. Returning to Failsafe initiates the remaining Specimen mission objectives for finalization.
Upon finishing NES009 requirements, a fresh quest titled Echoes: Epilogue becomes available. This narrative-focused assignment provides deeper psychological insights into Maya Sundaresh’s consciousness and her dynamic with Chioma, though it mandates one final Encore infiltration to locate eight additional collectible objects.
Begin by following quest directives to Braytech Exoscience on Europa. There, you’ll discover a luminous purple sphere; activating this object triggers an audio transmission from Sundaresh. Subsequent instructions return you to Encore to find eight more of these radiant purple orbs concealed throughout the mission environment.
Critical Reminder! While navigating through Encore, ensure you pause to activate Ancillary Transit–the extensive Vex gateway system providing access to hidden chest locations. Though only one Temporal Anomaly connects through Ancillary Transit pathways, it happens to be the ultimate one in sequence, creating significant frustration if you overlook gate activation and require a full mission repetition.
The initial anomaly manifests immediately at mission commencement. After clearing the engagement zone, position yourself facing away from your spawn point, then proceed to the precipice ahead and track leftward along its boundary.
For optimal efficiency, establish a systematic collection route: begin with mission-start anomalies, progress through main path objects, then utilize Ancillary Transit for the concluding anomaly. Advanced players can complete all eight collectibles in approximately 25-35 minutes with proper route planning and combat optimization.
Begin your search for the initial temporal anomaly immediately upon entering the designated area. Rather than exploring distant locations, focus your attention on the immediate vicinity of your entry point. The anomaly is cleverly concealed against a wall structure positioned directly adjacent to the distinctive Vex marble architecture that lines the primary pathway.
For precise orientation, position yourself facing the Vex gateway structure or the location where the Hydra enemy previously appeared. Execute a sharp right turn from this vantage point, and you’ll immediately spot the anomaly positioned within clear view. This strategic placement ensures players won’t need to venture far from the main route, making it accessible even during combat-heavy situations.
Pro Tip: Many players overlook this location because they assume anomalies are hidden in remote corners. The developers intentionally placed it near the entrance to reward observant players who check their surroundings thoroughly before advancing.
The ultimate temporal anomaly is strategically hidden within the complex Hidden Chest 5 puzzle, accessible exclusively through the Ancillary Transit system. This particular puzzle represents one of the most challenging environmental tests in the game, requiring mastery of multiple game mechanics simultaneously.
Success hinges on your ability to effectively utilize Deletion modules, specialized equipment designed to dismantle the crimson forcefields blocking your progression. These energy barriers protect crucial Vex Countermand artifacts that must be collected to advance through the puzzle sequence. The conflux integration system plays a vital role in coordinating these modules for optimal performance.
Common Mistake: Players often attempt to rush through this section without properly understanding the Deletion module mechanics, resulting in repeated failures and wasted time. Each forcefield requires specific positioning and timing to deactivate successfully.
To successfully reach Hidden Chest 5 and claim the final temporal anomaly, you must commit to solving the complete puzzle sequence from beginning to end. The game designers have implemented a progressive unlocking system that prevents players from skipping directly to the endpoint.
The core mechanics involve systematically opening each scarlet forcefield using your acquired Deletion modules. Your Proximity Sensor will guide you toward four essential Vex Countermand objects scattered throughout the puzzle environment. Collecting each artifact sequentially unlocks additional sections of the challenge, creating an interconnected web of progression gates.
Optimization Strategy: Advanced players can complete this puzzle in approximately 15-20 minutes by memorizing the optimal route and pre-planning their module usage. The linear design ensures that thorough exploration and methodical problem-solving are rewarded over speed-running attempts.
Upon successfully navigating to the ultimate chamber, you’ll discover the temporal anomaly positioned conspicuously in an open area immediately to the right of the final Countermand object. Its prominent placement serves as both a reward for your puzzle-solving efforts and a clear indicator that you’ve reached the conclusion of this challenging sequence.
Securing this final anomaly completes your collection of all eight temporal anomalies, granting you access to the concluding narrative segment of Echoes: Epilogue and permanently unlocking the exclusive Before Aurora emblem for your character.
Reward Analysis: Beyond the emblem, collecting all anomalies provides significant lore development and story resolution that enhances your understanding of the game’s overarching narrative. This completionist achievement typically requires 2-3 hours of dedicated exploration across multiple gaming sessions.
Action Checklist
- Complete Specimen NES009 questline to unlock Encore mission
- Run Encore mission to obtain initial weapon blueprint
- Locate three secret chests during mission for frame unlocks
- Complete weekly catalyst objectives across multiple resets
- Find Temporal Anomalies for Week 3 catalyst after Epilogue completion
- Craft optimized god rolls for both PvE and PvP activities
- Complete Encore: Overture mission to obtain Choir of One Exotic weapon
- Find Specimen 007 in Maya’s lab during first mission run
- Complete Specimen NES007 quest requirements
- Locate all 7 hidden chests across three weekly missions
- Complete Master difficulty runs for catalyst acquisition
- Find all 8 temporal anomalies for Epilogue completion
- Complete Echoes storyline to unlock mission access
- Watch opening cutscene and consult Failsafe at HELM
- Launch Encore: Overture from Director map
- Systematically explore each area for visual distortions
- Clear combat zones before anomaly collection to avoid interruptions
- Navigate initial arena via right-side ramp and descend through spherical rock formation
- Locate Specimen 007 in Maya Sundaresh’s lab (left corridor near entrance)
- Complete Encore: Overture and return to Failsafe
- Eliminate 100 Vex with Solar damage in Breach Executable or The Orrery
- Collect Vex data and defeat Vex bosses in Breach Executable
- Achieve rapid Vex kills using optimized Solar loadouts
- Activate final conflux in Maya’s lab and proceed through Vex portals to Aberrant Code Containment
- Use blue Access modules to activate portals and note energy line connections
- Destroy outer Data pods first, then move inward following energy connections
- Complete pod destruction within 30-second timers to prevent regeneration
- Collect Specimen NES008 and hidden chests simultaneously for maximum efficiency
- Monitor Unknown Proximity Signal meter for directional guidance
- Collect initial Deletion module and activate first red barrier
- Defeat Minotaur for second module and access first Countermand
- Execute dual module strategy for second and third Countermand acquisition
- Secure Access module and activate final Vex gate
- Complete story prerequisites to ensure correct mission version loading
- Activate front console Connection module and solve first partition from left plate
- Retrieve module and repeat process at back console for second partition
- Defeat Goblins, acquire second module from dropped forcefield
- Use dual modules for side partitions with leftward laser alignment
- Collect specimens and NES009 after cube disappearance
- Collect all seven Countermands during initial mission run
- Activate Ancillary Transit gates during main progression
- Complete Specimen NES009 after Hidden Chest 7 acquisition
- Find eight Temporal Anomalies using optimized collection route
- Return to Failsafe and complete Echoes: Epilogue quest
- Locate initial anomaly near Vex marble entrance area
- Access Ancillary Transit to begin Hidden Chest 5 puzzle
- Master Deletion module mechanics for forcefield navigation
- Collect all four Vex Countermand objects in sequence
- Claim final anomaly and Before Aurora emblem in end chamber
No reproduction without permission:SeeYouSoon Game Club » Destiny 2 Choir Of One Exotic Guide: God Rolls, Catalysts, Hidden Chests, And Collectibles