TL;DR
- Serutabomac Shrine requires advanced Ascend ability mastery and strategic plate positioning
- Each chamber introduces progressively complex geometric designs: square, L-shape, C-shape, and J-shape
- The third chamber contains a valuable Magic Rod chest requiring precise C-shape construction
- Final completion demands dual Ascend sequences through properly positioned J-shaped structures
- Average completion time ranges from 8-15 minutes depending on player skill level
This shrine presents a focused challenge centered entirely around Link’s Ascend ability, requiring strategic thinking and precise execution. Understanding the mechanics beforehand significantly improves completion efficiency.
Positioned at high altitude adjacent to Hyrule Castle in the sky, the Serutabomac Shrine presents greater accessibility challenges compared to many ground-level shrines. Just as reaching this elevated location demands cloud-level navigation, successfully navigating its interior requires advanced proficiency with the Ascend technique. Proper preparation involves ensuring your Ascend ability is readily accessible and understanding that each room introduces progressively complex spatial puzzles that test your mastery of vertical movement mechanics.
Strategic Ascend positioning is crucial for shrine progression.
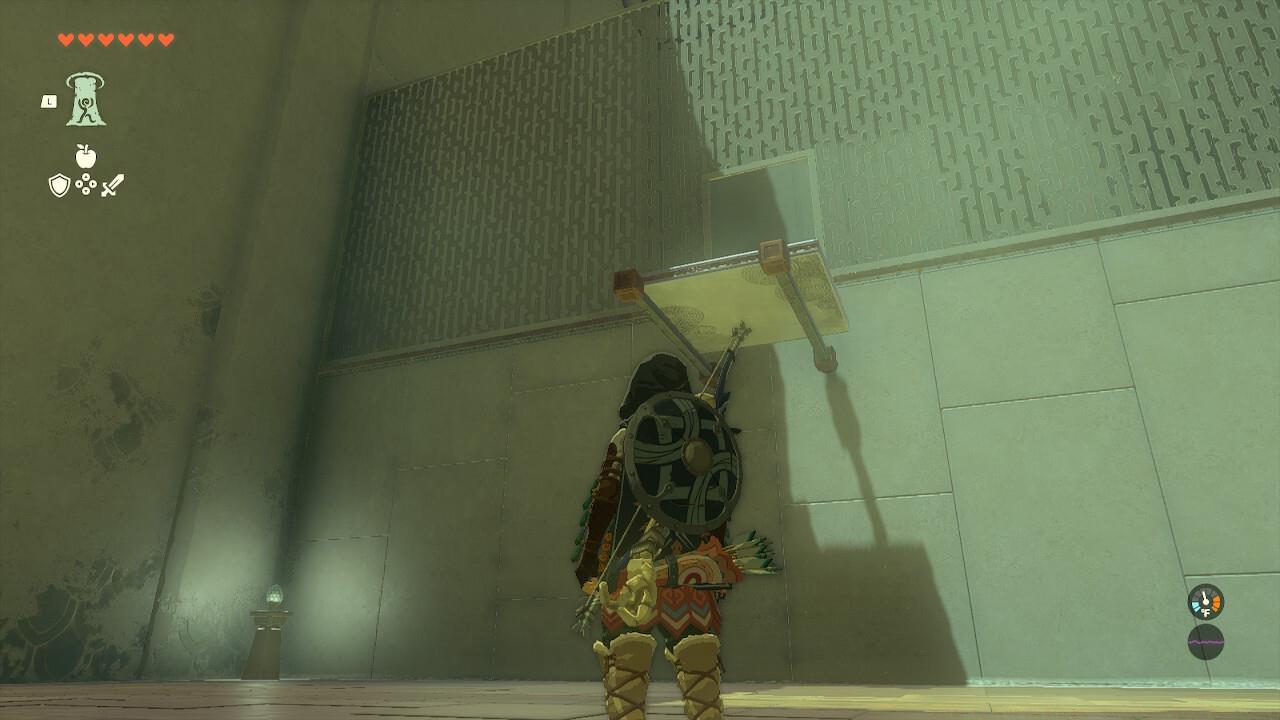
Upon entering the Serutabomac Shrine’s initial chamber, immediately deploy your Ultrahand ability to lift the small square platform. Position this plate strategically on the vertical support beams directly beneath the elevated doorway. This foundational setup enables you to utilize Ascend, passing vertically through the platform from below to access the doorway above. Many players rush this step, but taking extra time to ensure perfect alignment prevents frustrating failures later.
Ascend through the properly positioned plate.
Common mistakes include placing the plate too far from the beams or attempting Ascend from incorrect angles. For optimal results, position yourself directly centered beneath the plate before activating Ascend. This chamber typically takes 1-2 minutes to complete once you understand the basic mechanics.
The subsequent chamber introduces increased complexity with multiple plates requiring geometric assembly. Combine the available plates to construct a precise L-shaped configuration, then carefully invert this structure and lean it securely against the beam supporting the overhead door. Execute Ascend through the smaller plate component to progress to the next area. The stability of your construction significantly impacts success—ensure all connection points are secure before attempting ascent.
Create an inverted L-shaped structure, then utilize Ascend through this configuration as well.

Proper L-shape construction requires precise angular alignment.
Advanced players can optimize this step by creating a reinforced L-shape with overlapping plates for enhanced stability. This approach reduces the risk of structural collapse during Ascend activation, especially valuable for players still mastering the ability’s timing.
The third chamber presents a dual-objective challenge: primary progression and valuable treasure collection. A chest containing a powerful Magic Rod awaits on one side, while two beams occupy the opposite area. To access this reward, assemble a substantial C-shaped configuration using available plates, position it securely on the spike protrusions, step onto the lower small plate component, then execute Ascend upward through the upper plate section.
This C-shaped design facilitates straightforward chest access when constructed properly.
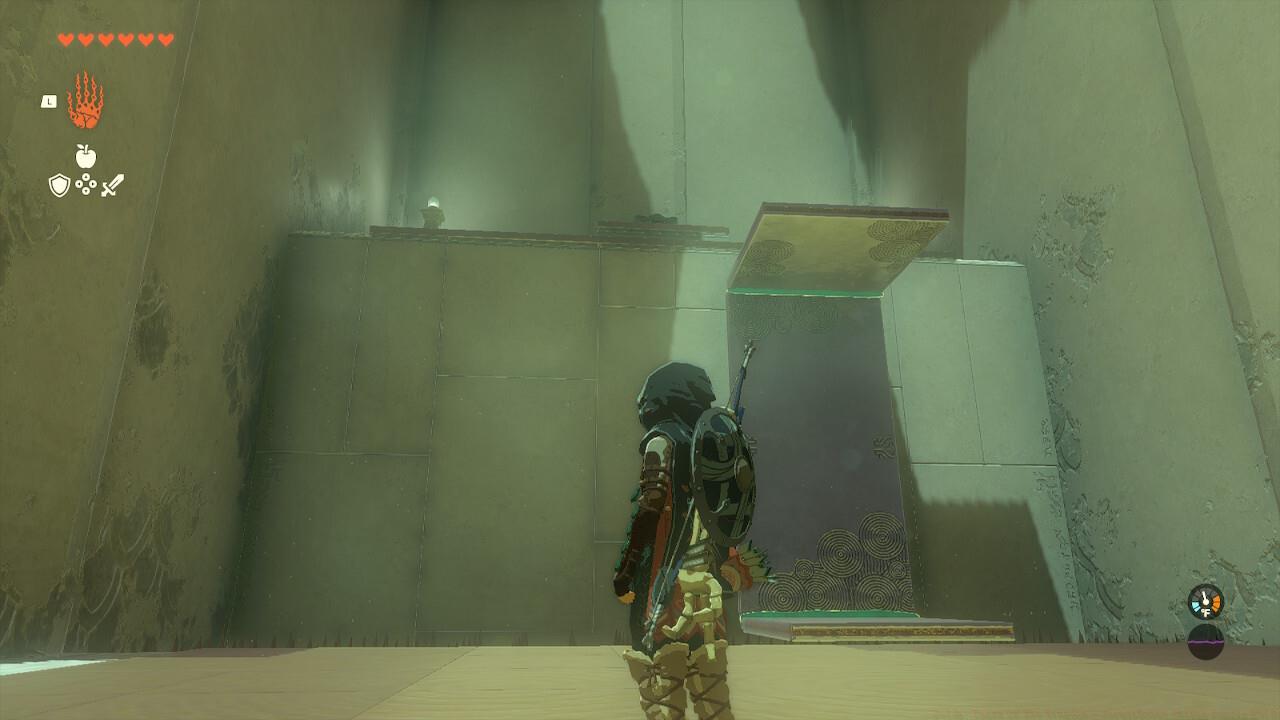
The C-shape design must balance stability with reach for optimal chest access.
The Magic Rod represents one of the shrine’s most valuable rewards, making this optional challenge worthwhile for most players. Construction precision is paramount—imperfect C-shapes may not provide sufficient elevation or stability for successful Ascend execution. Allocate 3-4 minutes for this chamber if pursuing the chest reward.
The concluding chamber demands mastery of complex geometric construction with a J-shaped design. Assemble this configuration, then position it horizontally across the two supporting beams. Execute Ascend through the larger plate component, followed immediately by a second Ascend sequence through the smaller plate. Passing through the subsequent doorway completes the shrine and grants your well-earned reward.
Navigate through this J-shaped configuration to finalize the shrine challenge.
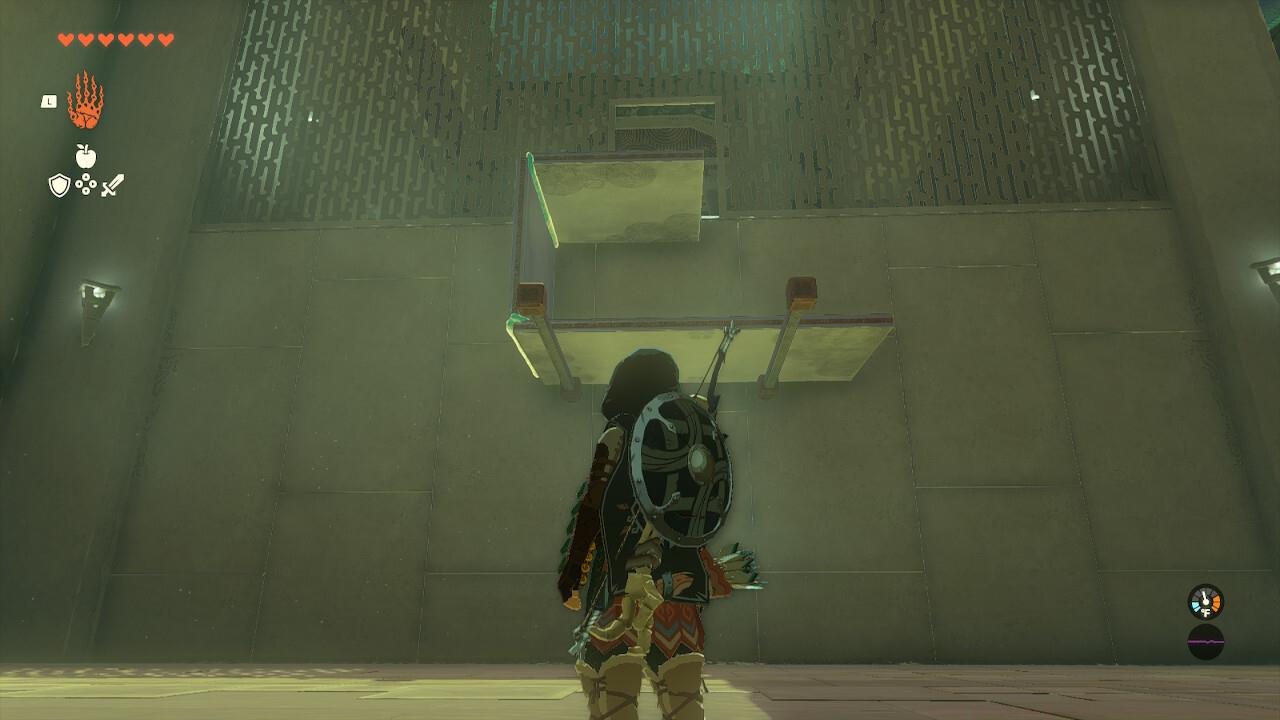
Proper J-shape orientation is critical for the dual Ascend sequence.
This final sequence typically requires 2-3 minutes for most players. The dual Ascend maneuver represents the shrine’s most technically demanding requirement, so practice the timing if you encounter difficulties. Successfully completing Serutabomac Shrine provides valuable experience that enhances your strategic abilities for future challenges.
Action Checklist
- Position square plate on beams and Ascend through to first door
- Construct inverted L-shape, secure against beam, and Ascend through
- Build stable C-shape on spikes, step on bottom plate, Ascend to chest
- Create J-shape across beams, execute dual Ascend sequence
No reproduction without permission:SeeYouSoon Game Club » Zelda: Tears Of The Kingdom – Serutabomac Shrine Puzzle Guide Master the Serutabomac Shrine with advanced Ascend techniques and strategic plate positioning in Zelda: Tears of the Kingdom