TL;DR
- Avoid activating Sage abilities during the fight to prevent unnecessary damage
- Use shield fusions like Spring or Time Bomb for aerial advantage and slow-time bow shots
- Position yourself on upper ledges to manipulate enemy AI behavior and create safe zones
- Master Flurry Rush timing to burst down individual specters quickly
- Prepare Gloom-resistant gear and healing items before engaging the boss
Successfully navigating the Phantom Ganon confrontation in The Legend of Zelda: Tears of the Kingdom requires understanding this challenging late-game battle’s unique mechanics. Link faces his corrupted nemesis in a multi-phase encounter that tests both combat skills and strategic thinking.
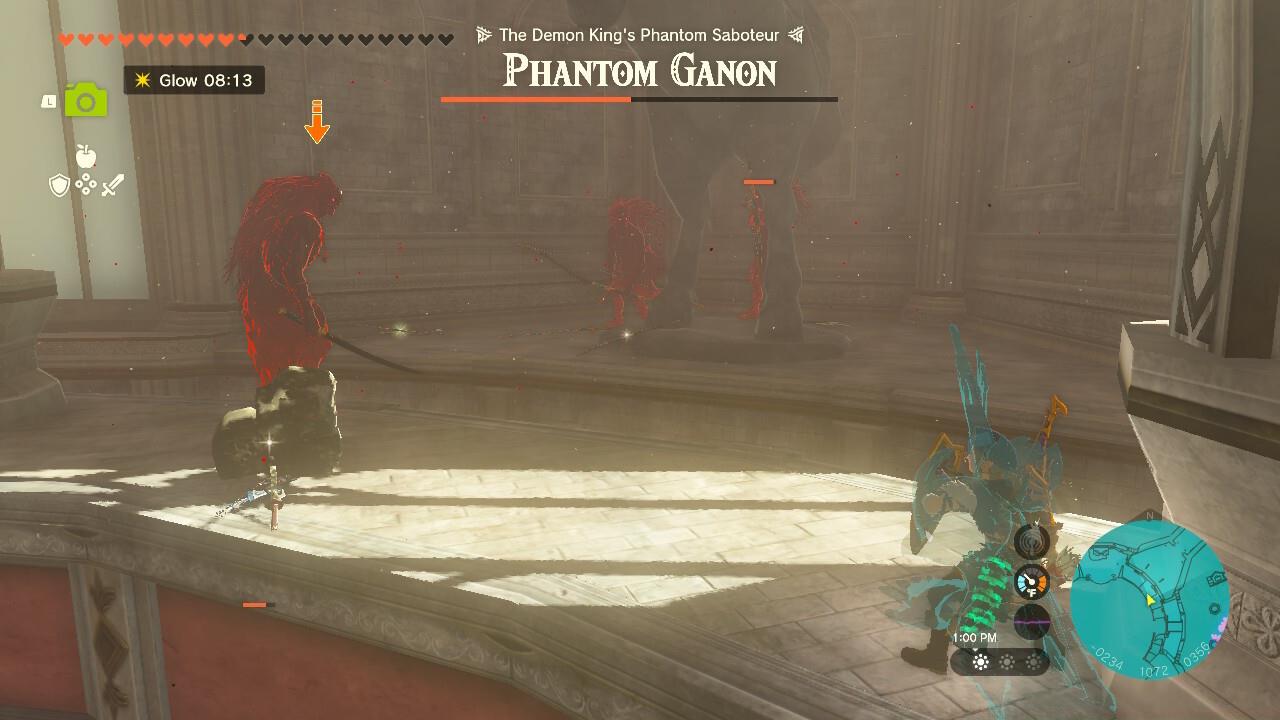
The specific Phantom Ganon engagement detailed in this guide occurs within Hyrule Castle’s sanctum, presenting a significantly more difficult scenario than the earlier Deku Tree Chasm version. While the initial encounter features a single opponent, the Hyrule Castle battle pits you against five spectral manifestations simultaneously, dramatically increasing the encounter’s complexity and danger level.
This confrontation becomes particularly challenging due to multiple factors working against you. Your AI companions struggle with effective threat management, often failing to draw enemy attention consistently. Attempting to activate their special abilities frequently forces you into dangerous close-quarters combat, exposing you to devastating attacks. The Gloom corruption affecting Phantom Ganon introduces an additional layer of difficulty – every hit you sustain applies the debilitating Gloom effect, permanently reducing your maximum health by disabling heart containers until you cleanse the status.

Avoid triggering Sage abilities during intense combat as the animation lock and positioning requirements often leave you vulnerable to Phantom Ganon’s powerful strikes.
Despite the apparent difficulty, properly executed tactics can make this encounter manageable for skilled players. Strategic weapon fusion provides significant advantages – attaching Spring or Time Bomb materials to your shield creates instant elevation opportunities, enabling aerial positioning for devastating slow-motion bow attacks. This approach allows you to target spectral weak points while maintaining safe distance from melee threats.
Mastering evasion timing remains crucial for success. Successfully dodging an individual specter’s attack initiates Flurry Rush, providing a window for multiple uninterrupted strikes. When combined with high-damage weapons, a single Flurry Rush sequence can eliminate one specter entirely, progressively reducing the number of active threats you face.
Advanced players should practice perfect dodge timing against similar enemy types before attempting this encounter. The margin for error narrows significantly when facing multiple opponents, making precise timing essential for survival. Consider reviewing our Weapons Unlock guide for principles on optimizing your damage output through proper gear selection and upgrade paths.
For players struggling with conventional tactics, strategic positioning offers an effective alternative approach. The ledge cheese method involves ascending to the sanctum’s highest level and positioning yourself on the steps’ adjacent ledge. This tactical placement manipulates enemy behavior patterns to your advantage.
When executed correctly, this positioning triggers predictable AI responses:
- Pursuing specters frequently position themselves on the opposite ledge, limiting their attack options to easily avoidable arrow volleys
- Some enemies may teleport directly to your position, but their initial attack can be blocked before you disengage and reposition
Maintaining elevated ledge positioning often causes teleporting shades to appear across the chamber, restricting them to ranged attacks only. Enemies that manage to close distance might execute charge attacks that can be parried, or they may become stuck in indecisive movement patterns, effectively neutralizing their threat.
Strategic ledge positioning creates artificial choke points and forces enemy AI into predictable behavior patterns that are easier to counter.
This method proves particularly effective for players who haven’t mastered multi-target combat or those attempting the encounter with suboptimal gear. For comprehensive strategic approaches to challenging game content, explore our Complete Guide covering advanced tactical principles applicable across different gaming scenarios.
Proper preparation significantly increases your chances of success against Phantom Ganon’s spectral army. Prioritize equipment that enhances mobility and defensive capabilities, as survival often depends on positioning and evasion rather than pure offensive power.
Essential pre-fight preparations include:
- Multiple shields with Spring/Time Bomb fusions for vertical mobility
- High-damage single-handed weapons optimized for Flurry Rush sequences
- Substantial healing items and Gloom-clearing remedies
- Armor with defensive bonuses or Gloom resistance properties
Understanding your Class Guide equivalents in Zelda’s equipment system helps optimize your loadout for specific combat roles and playstyles.
Advanced players should consider mastering the timing between enemy attacks to create consecutive Flurry Rush opportunities. The encounter’s difficulty curve sharply decreases once you eliminate the first two specters, as the reduced enemy count makes threat management significantly more manageable.
Action Checklist
- Acquire and upgrade Spring/Time Bomb fused shields for aerial positioning
- Practice Flurry Rush timing against lesser enemies to build muscle memory
- Stockpile healing items and Gloom-clearing consumables
- Position on upper sanctum ledges to manipulate enemy AI behavior
- Focus on eliminating individual specters using Flurry Rush sequences
No reproduction without permission:SeeYouSoon Game Club » Zelda: Tears Of The Kingdom – Phantom Ganon Boss Guide Master the Phantom Ganon encounter with advanced strategies, gear recommendations, and tactical positioning techniques