TL;DR
- Use precise timing when bouncing on moving ship sails to reach hidden chests
- Conserve arrows by utilizing the Ascend ability from strategic positions
- Master the circular platform rhythm for optimal treasure collection
- Combine gliding with bouncing for maximum movement efficiency
The Legend of Zelda: Tears of the Kingdom presents players with numerous inventive shrine challenges, each requiring unique problem-solving approaches. Mayaumekis Shrine stands out by incorporating nostalgic trampoline-like mechanics that transform navigation into an engaging bouncing experience across suspended ship sails. This shrine cleverly recreates the childhood joy of bouncing while testing your timing and spatial awareness skills.
Upon entering Mayaumekis Shrine, your first objective involves activating the entrance mechanism. Carefully observe the gate structure and locate the activation switch positioned to the right of the sealed doorway. A well-aimed arrow shot will trigger the switch and grant access to the main chamber.
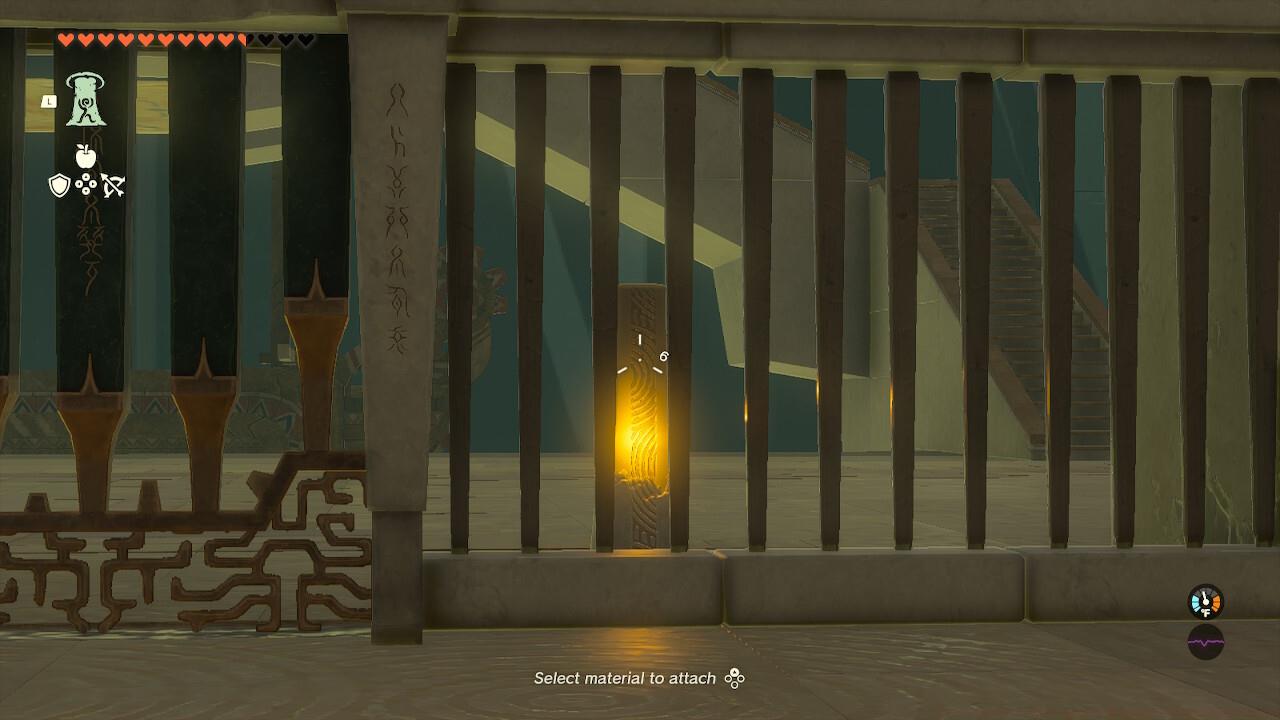
Precision targeting of the activation switch unlocks the shrine’s primary challenge area.
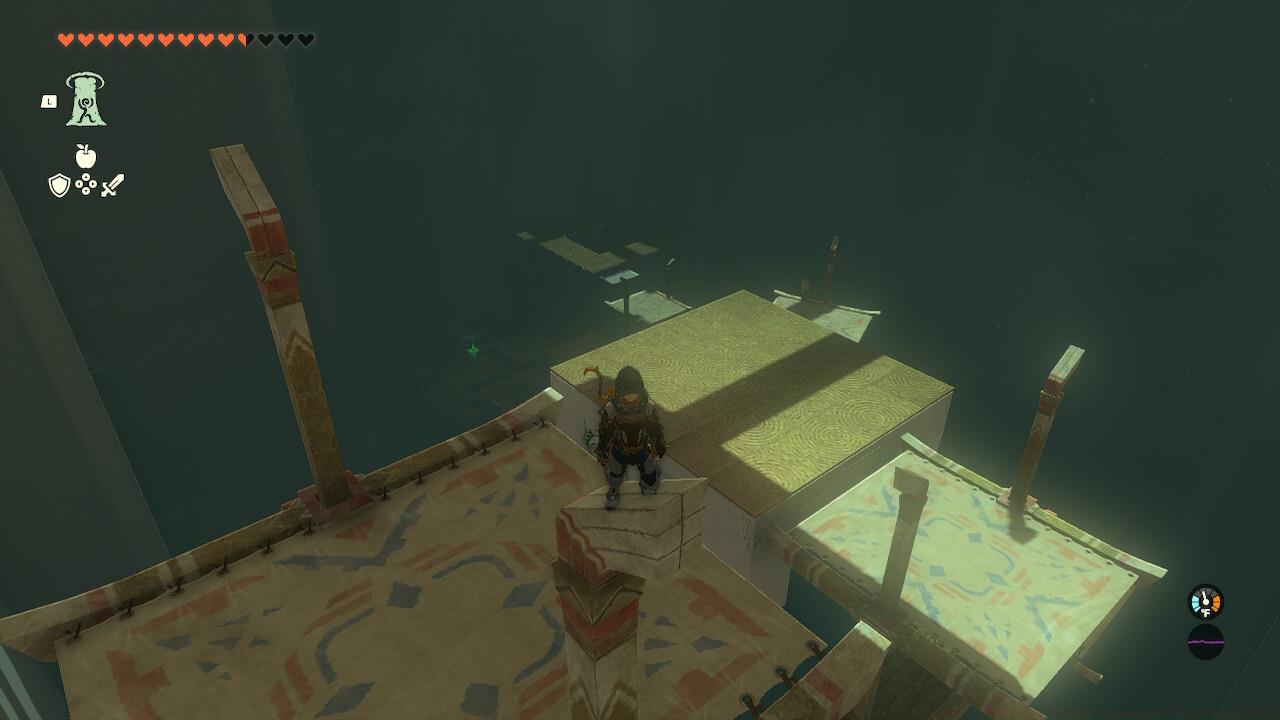
Navigate the initial bouncing sequence by ascending the right-side staircase and progressing across several stationary ship platforms. The critical challenge emerges when you encounter the rotating ship section – this circular motion platform requires careful timing and observation to successfully access the hidden treasure.
Scan the upper left corner area to identify the protruding platform housing the shrine’s valuable chest. The key to successful retrieval involves monitoring the rotating ship’s movement pattern and executing your bounce at the precise moment when the platform aligns closest to the treasure ledge. Immediately after bouncing, deploy your paraglider to smoothly transition to the chest platform and claim your arrow reward.
Strategic positioning on the rotating platform enables optimal chest access while minimizing fall risk.
Many players struggle with the timing element here – practice observing two full rotation cycles before attempting your bounce to internalize the movement pattern. The chest consistently contains 5-10 arrows, making this detour worthwhile for resource conservation.
Progressing beyond the chest area presents two distinct pathway options with significant resource implications. The conventional method involves shooting the switch visible behind the subsequent gate, but this consumes precious arrows that become increasingly valuable in later game stages.
The advanced technique requires landing precisely on the wooden pillar positioned on the ship directly beneath the target room. From this strategic vantage point, activate the Ascend ability to phase through the ceiling structure directly into the completion chamber, preserving your arrow inventory for critical combat situations.
The wooden pillar serves as the optimal Ascend activation point for arrow-free progression.
This resource-conscious approach becomes particularly valuable when considering the broader weapon and ammunition management strategies that apply across your entire Tears of the Kingdom adventure. Mastering these efficiency techniques early pays dividends throughout your gameplay experience.
Regardless of your chosen entry method, the shrine’s conclusion awaits in the elevated chamber. Claim your well-earned Light of Blessing reward before continuing your Hyrule exploration journey.
Common mistakes include attempting the chest retrieval without full stamina wheels (risking fatal falls), misjudging the rotating platform’s rhythm, and wasting arrows on unnecessary switch activations. Always prioritize the Ascend method when available to conserve resources for more demanding challenges ahead.
For players seeking comprehensive shrine mastery, our complete guide collection offers detailed strategies for every puzzle type. Additionally, understanding character ability optimization significantly enhances your problem-solving capabilities across all shrine varieties.
We maintain extensive guidance resources within our Tears of the Kingdom guides hub, featuring complete shrine location mapping and specialized puzzle solutions for even the most complex challenges.
Action Checklist
- Activate entrance switch with precision arrow shot
- Navigate bouncing sequence to rotating platform
- Time your bounce with platform rotation for chest access
- Use Ascend ability from wooden pillar to conserve arrows
- Claim Light of Blessing reward in final chamber
No reproduction without permission:SeeYouSoon Game Club » Zelda: Tears Of The Kingdom – Mayaumekis Shrine Puzzle Guide Master the Mayaumekis Shrine with advanced bouncing techniques and resource-saving strategies