TL;DR
- Locate Mayak Shrine in northern Eldin region near the skeletal Eldin Beast remains
- First puzzle requires precise Ultrahand placement and bow timing with Recall as backup
- Second puzzle demands rapid descent techniques and optimal weapon selection
- Use Recall timing strategy for additional preparation time in challenging sections
- Complete both puzzles to unlock the hidden chest containing valuable equipment
Successfully navigating the Mayak Shrine begins with precise location identification in the expansive Eldin region. This shrine presents unique timing-based challenges that test your mastery of Link’s core abilities.
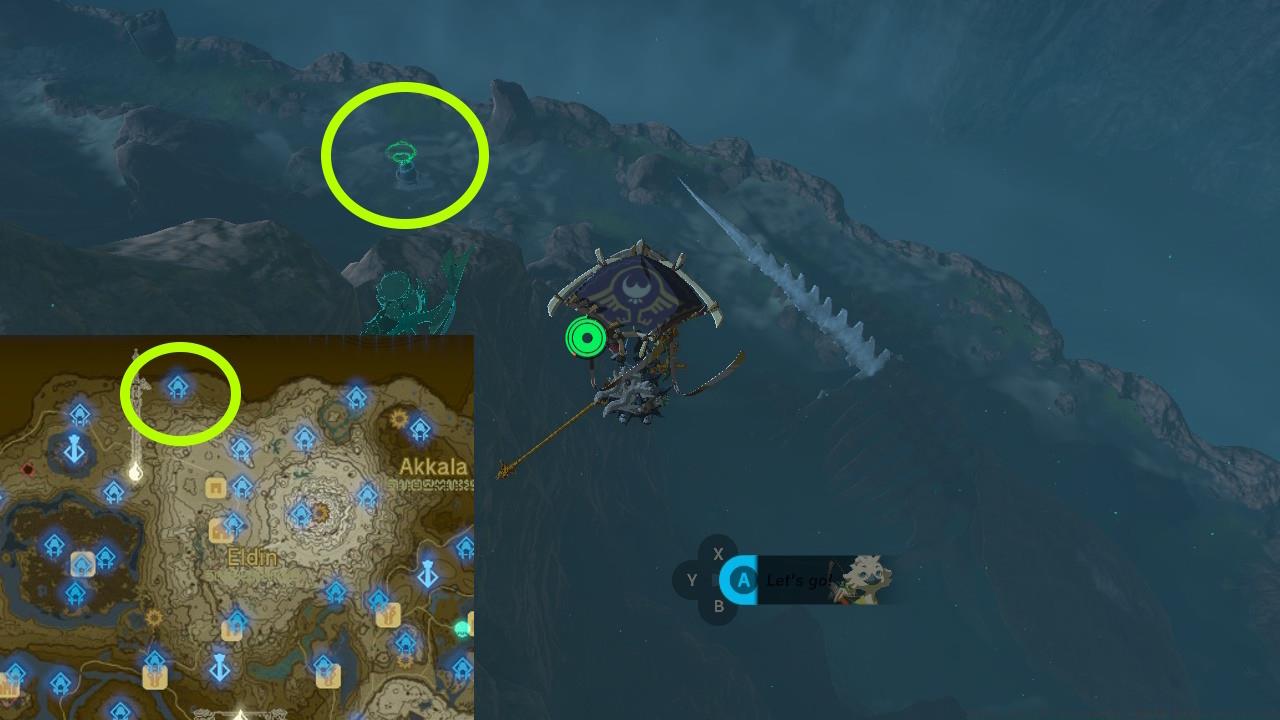
Mayak Shrine location – Note the distinct skeletal remains landmark for orientation
The primary access route involves gliding from the northern Eldin territory toward the map’s edge boundary. You’ll recognize the area by the massive skeletal remains of an ancient Eldin Beast, a prominent landmark visible from considerable distance. From this vantage point, scan westward to identify the shrine entrance.
For players preferring aerial approaches, activate the Typhlo Ruins Skyview Tower for optimal positioning. Launch north-northeast, navigating past the distinctive Sword Geoglyph formation. This method provides superior elevation but requires careful glide path management to avoid overshooting the target.
Upon entering the initial chamber, conduct a comprehensive environmental assessment. The puzzle mechanism centers on a floor-level activation switch directly ahead of your entry position. When struck with any projectile or weapon, this trigger deploys the bullseye target platform.
Puzzle #1 solution – Demonstrating optimal Ultrahand placement for consistent trajectory
Utilize the Ascend ability to reach the elevated platform where the massive spherical object awaits. Critical positioning insight: place the orb using Ultrahand to ensure it begins rolling immediately upon release, minimizing timing variables. The ideal starting position creates momentum without requiring additional force application.
Execution sequence: activate Ultrahand to position the sphere, initiate its descent, then rapidly target the floor switch with your bow. The spherical object must impact the target within the brief activation window. Common error: premature switch activation before the orb gains sufficient momentum. If timing proves inaccurate, immediately deploy Recall to reset the orb position without repeating the entire setup process.
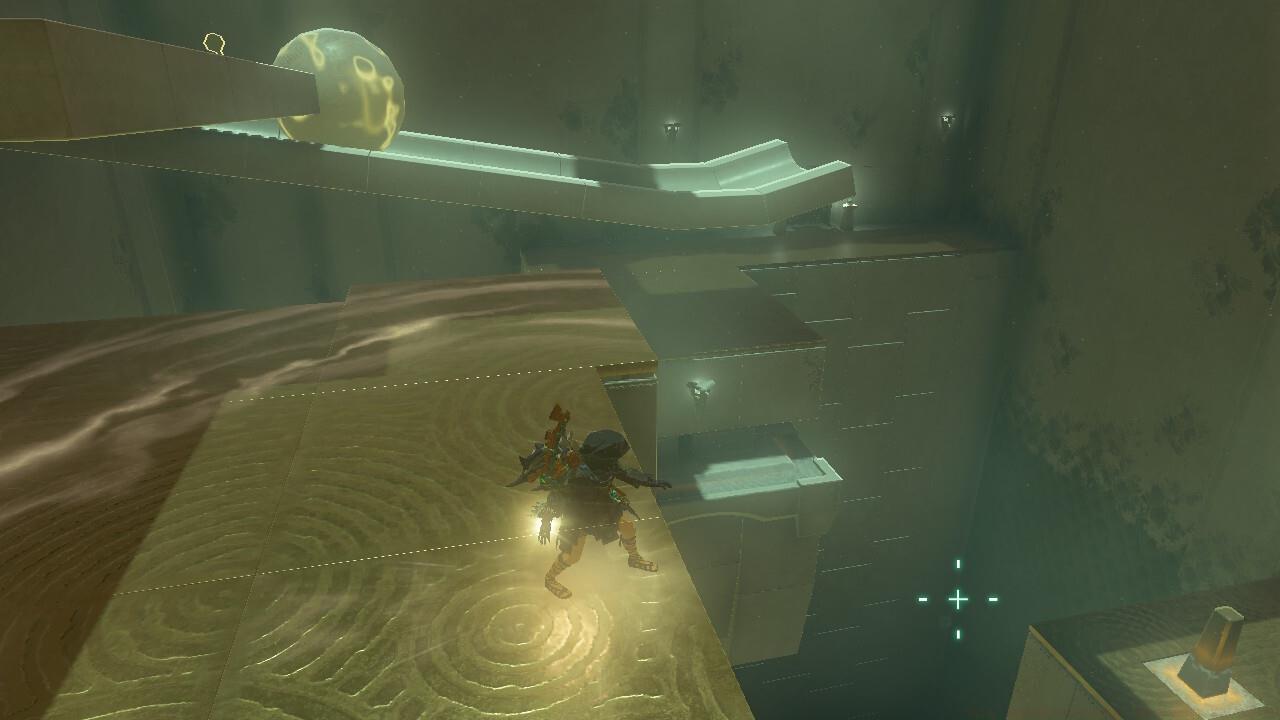
The subsequent chamber introduces heightened complexity with significantly tighter timing constraints. The activation mechanism remains at ground level near the entrance, while the puzzle elements require rapid vertical traversal.


Left: Puzzle #2 giant sphere positioning; Right: Puzzle #2 solution execution timing
Employ the strategically placed push blocks for accelerated vertical ascent. These spring-loaded platforms provide substantial elevation gain when approached with running momentum. Upon reaching the summit, locate the second oversized orb and initiate its descent using Ultrahand.
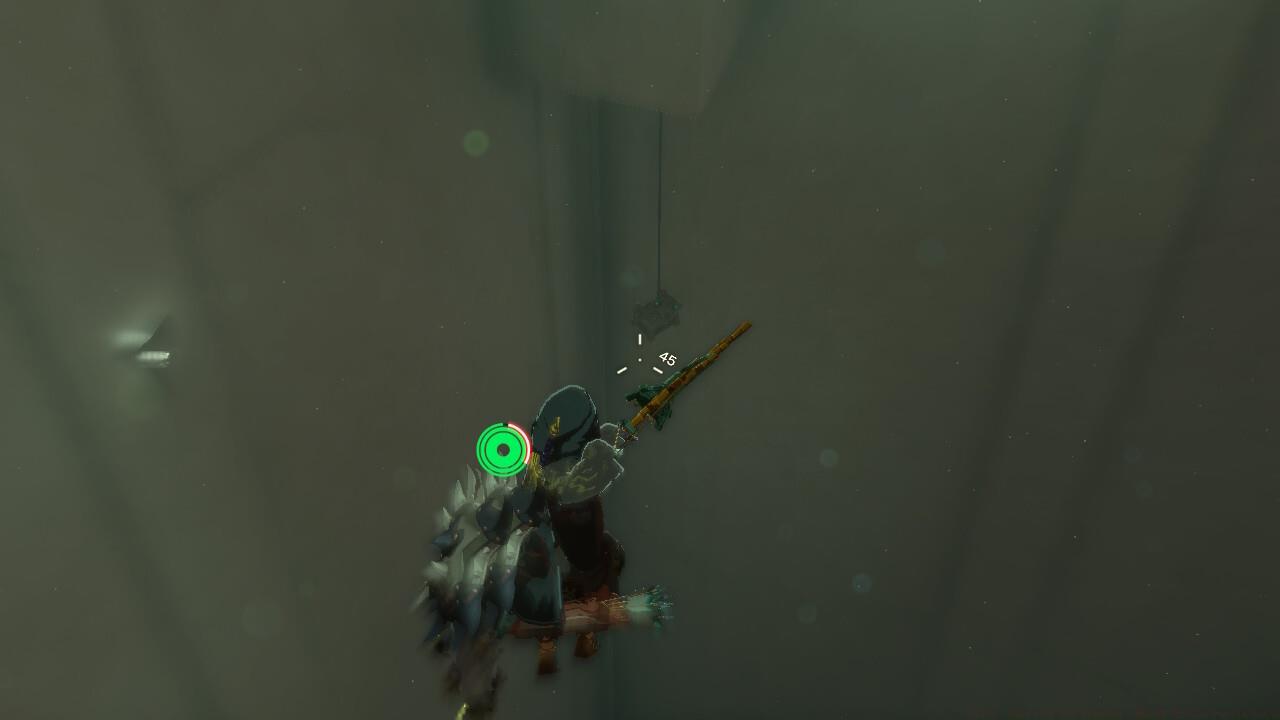
Critical descent methodology: immediately after activating the orb’s movement, sprint toward the platform edge and execute a controlled skydive descent. Maintain awareness of landing impact – excessive velocity upon ground contact will result in fatal damage to Link. Weapon selection proves crucial: equip your fastest swinging weapon (preferably one-handed) before initiating the sequence for rapid switch activation.
Advanced strategy: commence the orb’s rolling motion, then immediately cast Recall on the sphere before descending. This technique effectively pauses the orb’s progress, granting approximately 3-5 additional seconds for positioning and preparation at ground level. This method significantly reduces timing pressure for players struggling with the standard approach.
Successfully completing both timing challenges unlocks access to the shrine’s concealed treasure container. This reward chest contains equipment that enhances your capabilities for future challenges throughout Hyrule.
Chest location – Positioned strategically after completing both puzzle sequences
The chest positioning follows the completion of both primary challenges, requiring no additional puzzle solving beyond the main objectives. The contained item provides practical utility for both combat and exploration scenarios, making the effort invested in mastering the shrine’s mechanics well justified.
Action Checklist
- Navigate to northern Eldin region and locate shrine near skeletal Eldin Beast remains
- Position first orb with Ultrahand for immediate rolling momentum
- Activate floor switch with bow as orb gains velocity toward target
- Use push blocks for rapid ascent to second puzzle platform
- Initiate second orb descent then execute controlled skydive to ground level
- Strike ground switch with fastest available weapon immediately upon landing
- Collect reward chest containing valuable equipment after puzzle completion
No reproduction without permission:SeeYouSoon Game Club » Zelda: Tears Of The Kingdom – Mayak Shrine Puzzle Guide Master the Mayak Shrine's timing challenges with expert strategies and alternative solutions