TL;DR
- Navigate treacherous Gerudo terrain using Lightning Temple updrafts to reach the shrine entrance
- Master the three-phase brazier lighting sequence using Ultrahand and precise positioning
- Utilize Recall ability strategically to capture moving flame paths at optimal moments
- Position the candle correctly on white tiles to activate the floor-lowering mechanism
- Discover the hidden chest by exploring the chamber’s upper platforms after puzzle completion
Successfully navigating to the Karahatag Shrine requires careful planning through the Gerudo region’s hazardous environment. The shrine sits in the southern portion of this desert landscape, surrounded by sweltering heat, dangerous quicksand pits, and formidable enemies that can quickly overwhelm unprepared adventurers.
For optimal access, leverage your previous progress through the Lightning Temple. Return to the Lightning Temple Puzzle area and utilize the natural updrafts to gain elevation. Continue using Ascend ability strategically, including on the ceiling above the altar and boss arena, to reach the pyramid’s summit. From this vantage point, glide eastward where you’ll spot Irasak Shrine in the near distance and Karahatag Shrine positioned further along your flight path.
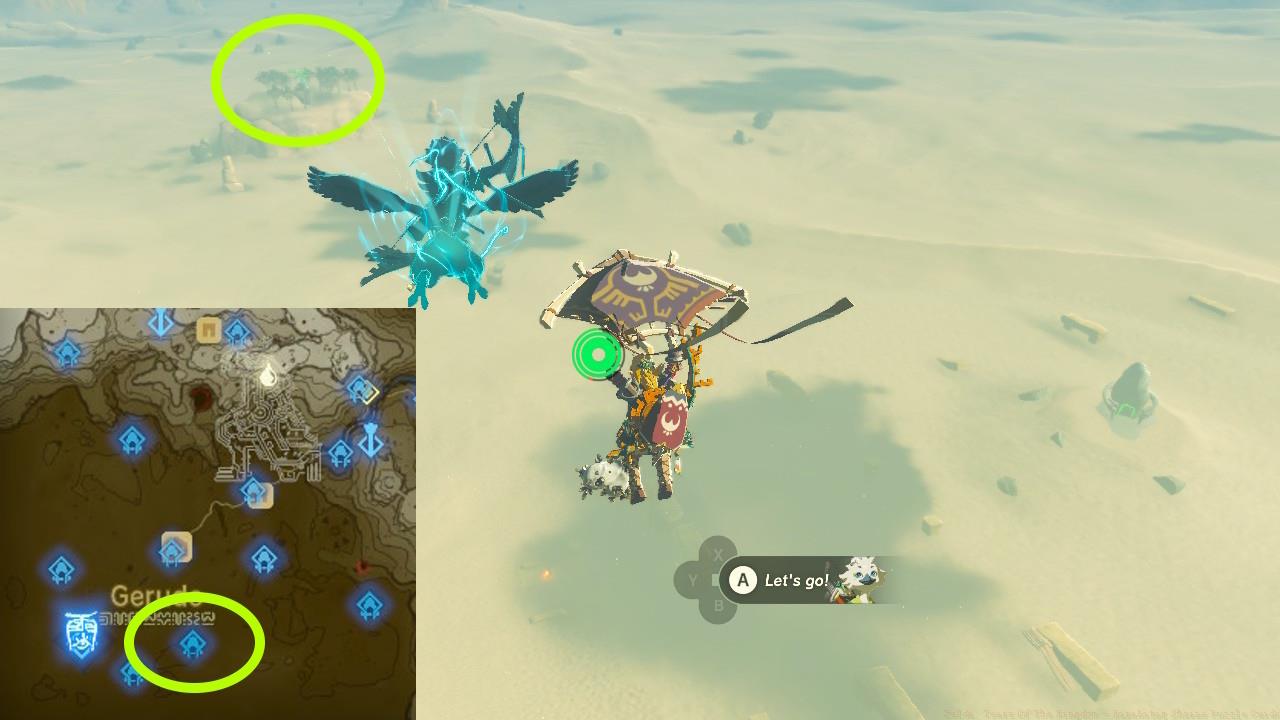
Karahatag Shrine location
Pro Tip: Equip heat-resistant armor or consume cooling elixirs before attempting this journey. The Gerudo desert’s extreme temperatures will rapidly deplete your health without proper protection, making the shrine approach significantly more challenging.
The Drifting Flame puzzle begins with a straightforward but crucial ignition sequence. Upon entering, immediately locate and pick up the torch positioned near the entrance. Carefully light it from the stationary brazier, then employ Ultrahand to manipulate and elevate the flaming torch to ignite the second brazier positioned overhead.
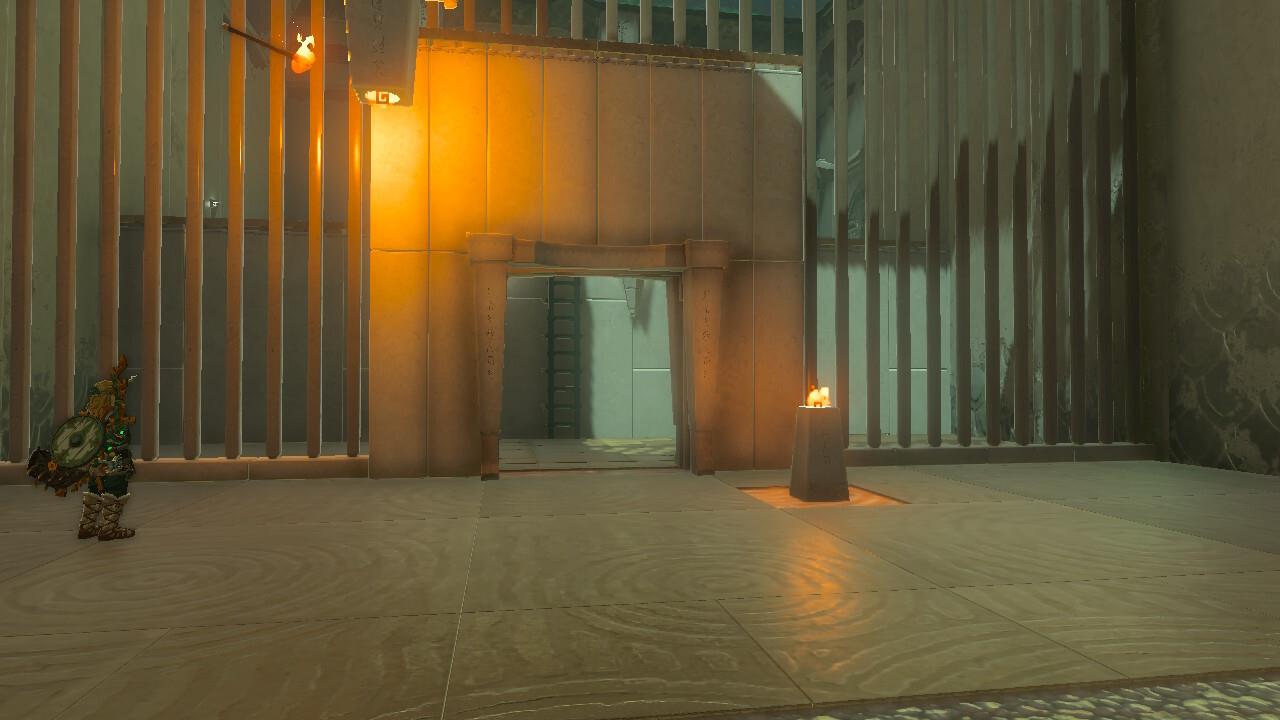
Puzzle #1 solution
This initial phase teaches the core mechanic of flame transfer that becomes essential in the main chamber. Successfully igniting both braziers triggers the door mechanism, granting access to the primary puzzle area where the real challenge awaits.
Common Mistake: Many players attempt to carry the torch manually between braziers, but the elevated position requires precise Ultrahand manipulation for reliable ignition.
The central chamber presents a significantly more complex challenge featuring three inverted pillars and moving braziers. Stepping on the pressure plates connected to these pillars activates the floor-lowering mechanism while simultaneously revealing the braziers that must be ignited to progress.
Your systematic approach should follow this optimized sequence:
- Retrieve the candle from its starting position and carefully place it upright on any of the three designated white floor tiles
- Activate the pressure plate to initiate the floor descent sequence
- Observe the brazier movement patterns to identify optimal Recall timing windows
- Use Ultrahand to position the candle within flame transfer range of moving braziers
- Execute Recall at the precise moment when flame paths align for efficient ignition
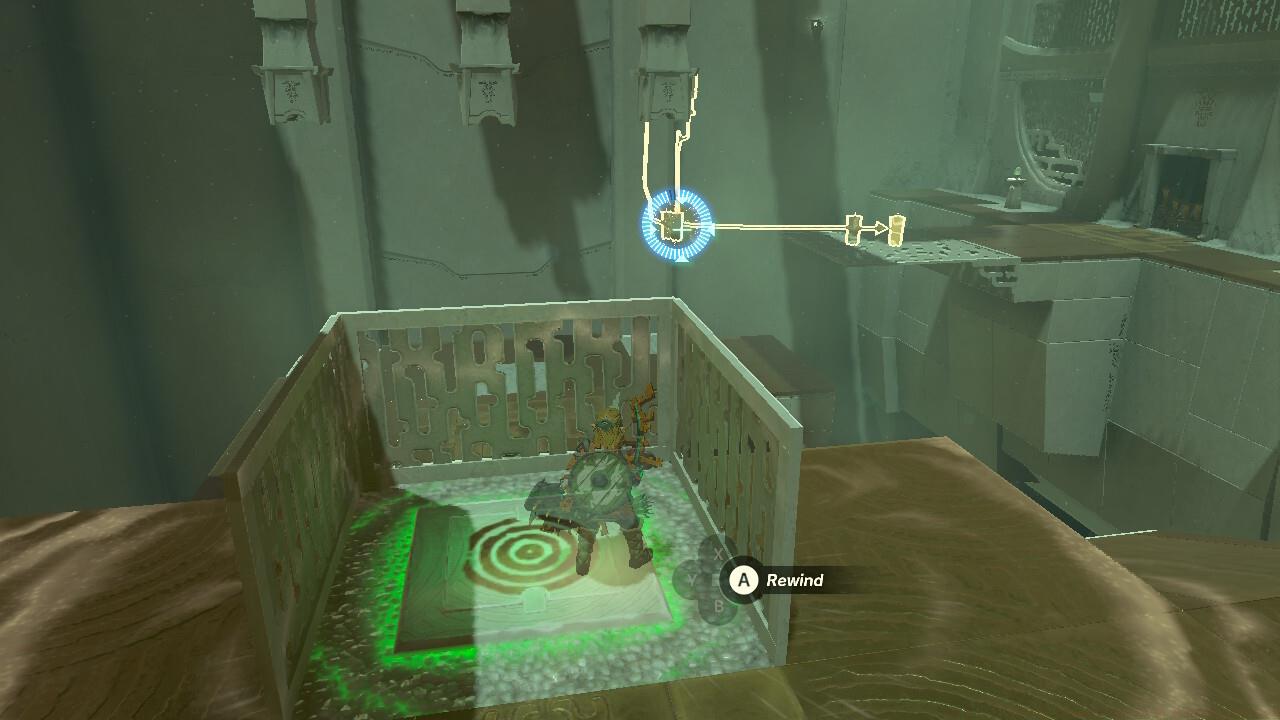
Puzzle #2 solution
Advanced Technique: Position yourself near the central white tile for maximum visibility of all moving elements. The Recall ability has a limited activation window, so timing your button press when the brazier’s flame path is at its closest point to your candle position dramatically increases success rates.
Understanding the pillar mechanics is crucial – each inverted pillar corresponds to specific brazier movement patterns. Mastering these relationships allows for predictive positioning rather than reactive attempts, significantly reducing completion time.
Once you’ve mastered the basic sequence, several optimization strategies can streamline your puzzle-solving experience. Position the candle on the white tile closest to the chamber’s center for optimal coverage of all moving braziers. This positioning minimizes the distance flames need to travel during Recall sequences.
After successfully completing the brazier ignition sequence, thoroughly explore the chamber’s newly accessible areas. The reward chest containing valuable equipment is cleverly concealed on an upper platform that becomes reachable after the main puzzle is solved.
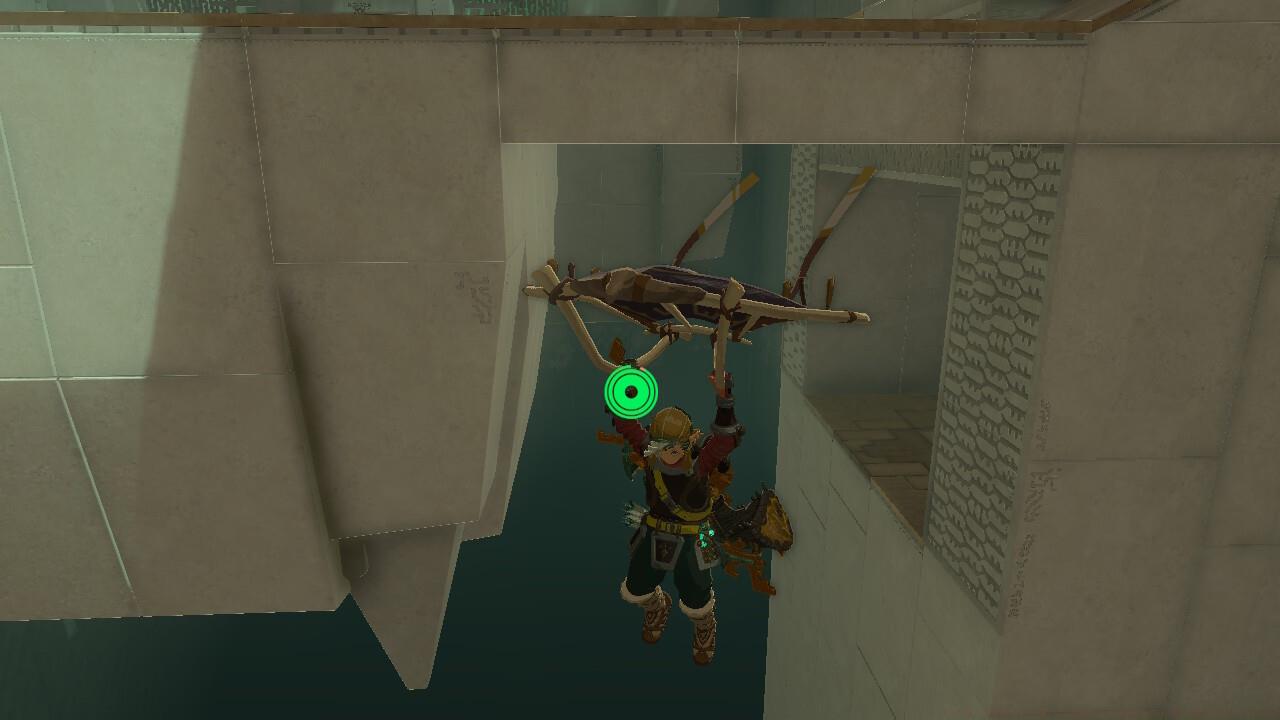
Chest location
Time-Saving Strategy: Experienced players can complete the entire sequence in under 5 minutes by pre-positioning the candle during the floor-lowering animation. This advanced technique shaves valuable seconds off completion time while maintaining perfect execution.
Avoid the common pitfall of rushing the Recall activation. The moving braziers follow predictable paths, and patience in observing one full cycle before attempting the sequence dramatically improves first-attempt success rates. The puzzle mechanics share similarities with strategic thinking required in our Complete Guide to battlefield navigation and objective completion.
These shrine-solving skills directly translate to improved performance in other game areas, much like mastering class selection in our comprehensive Class Guide enhances overall gameplay effectiveness across different scenarios and challenges.
Action Checklist
- Equip heat-resistant gear and navigate to shrine via Lightning Temple updrafts
- Complete initial chamber torch ignition using Ultrahand positioning
- Position candle on central white tile and activate pressure plate
- Observe brazier movement patterns and execute Recall at optimal moments
- Locate and claim hidden chest reward on upper platforms
No reproduction without permission:SeeYouSoon Game Club » Zelda: Tears Of The Kingdom – Karahatag Shrine Puzzle Guide Master the Karahatag Shrine's Drifting Flame puzzle with advanced Recall techniques and strategic positioning