TL;DR
- Access the Great Plateau south of Hyrule Field Skyview Tower by destroying boulders to drain water
- Collect four eyes using different methods: water retrieval, rock destruction, rotation, and fire melting
- Navigate the Depths using Zonaite Devices and Lightroots to reach the Central Mine
- Avoid common bugs by following eyes immediately after dropping them into chasms
- Choose between heart container or stamina vessel as your final reward
Embark on the mystical ‘A Call From the Depths’ side adventure in The Legend of Zelda: Tears of the Kingdom, where you’ll assist an ancient Goddess Statue by recovering its stolen ocular artifacts. This comprehensive walkthrough provides expert strategies for efficiently completing every phase of this challenging quest.
Your journey begins at the legendary Great Plateau, positioned directly south of the Hyrule Field Skyview Tower. Approach the massive cliff face and demolish the obstructive boulders using bombs or heavy weapons, which will cause the accumulated water to recede and grant you entry to the sacred grounds.
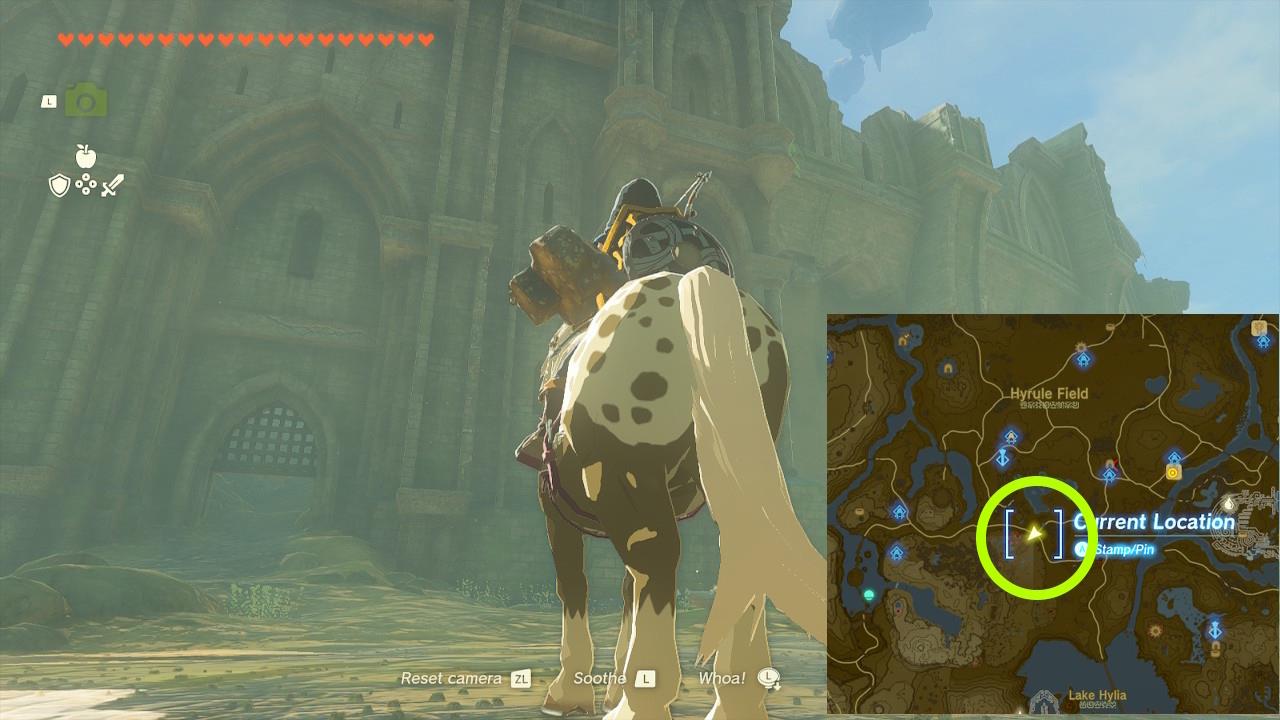
Strategic entry point to the Great Plateau requiring environmental manipulation.
After breaching the entrance, a mysterious ethereal voice will guide you toward the distant Temple of Time ruins. Inside this hallowed structure, the damaged Goddess Statue will communicate its plight – four precious eyes have been scattered across the landscape, requiring your assistance for recovery and restoration.
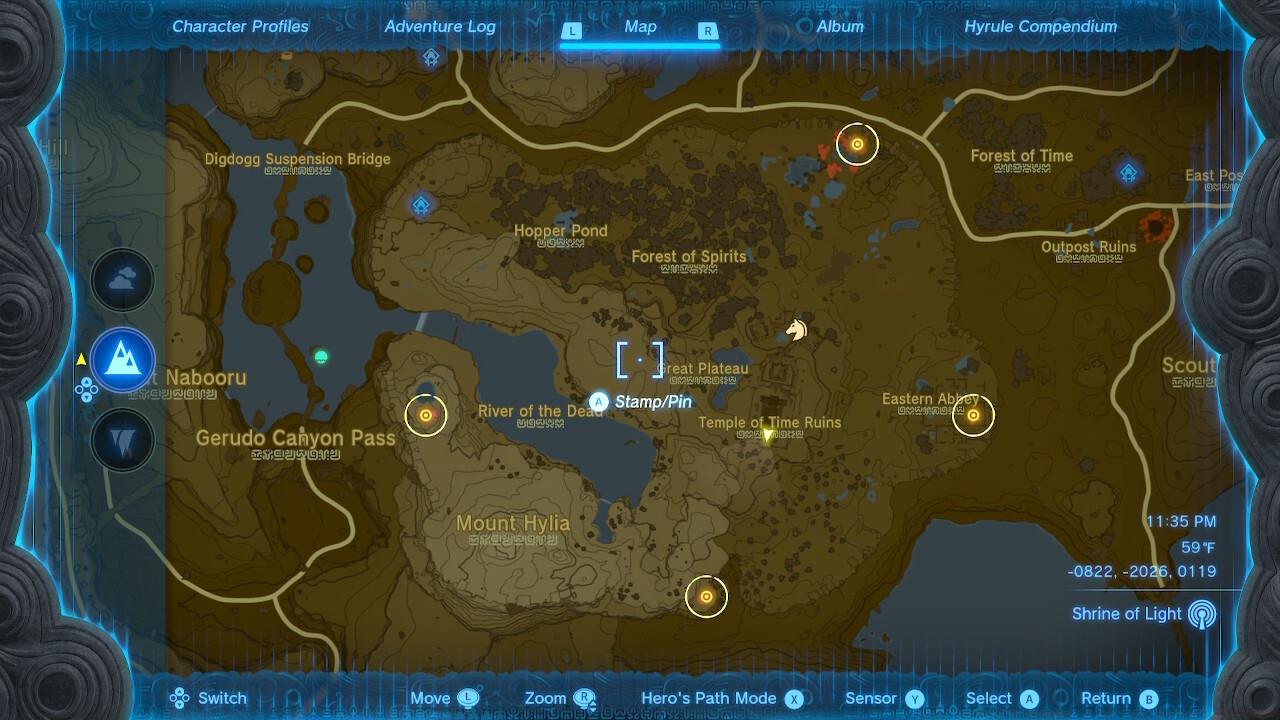
Visual reference showing the precise geographical distribution of all four ocular artifacts.
Your primary mission involves locating all four dispersed eyes, then carefully depositing them into the designated Chasm openings. Each artifact must subsequently be transported through the treacherous Depths to the Great Abandoned Central Mine, the identical location where players previously acquired the revolutionary Autobuild system capability.
Fortunately, every Chasm entrance provides access to various Zonaite construction components, eliminating concerns about transportation resources. However, remain vigilant for potential technical complications we’ll address subsequently. You may approach these recoveries in any sequence, though our tested route progresses clockwise from the northernmost point.
Northern Eye Retrieval Strategy
- Surface Level: Deploy the Ultrahand ability to extract the eye from its submerged aquatic environment.
- Underground Transport: A conveniently positioned Lightroot illuminates the area, with the eye resting behind it adjacent to Zonaite construction materials. Assemble an all-terrain vehicle for efficient navigation through the cavernous terrain.


Comparative visualization: Surface water retrieval versus Depths transportation setup.
Eastern Eye Acquisition Method
- Surface Procedure: Eliminate the surrounding rock formations using explosive or blunt force methods.
- Subterranean Journey: This location proved sufficiently proximate to the previous site that we simply continued our vehicular journey to collect it en route.


Visual documentation: Rock obstruction removal and subsequent Depths collection process.
Southern Eye Recovery Technique
- Surface Operation: Employ Ultrahand to elevate and strategically rotate the substantial rock formation, revealing the concealed ocular artifact.
- Underground Mobility: Construct a provisional aerial vehicle using available Zonaite components for traversing the expansive underground chambers.


Illustrative guide: Rock manipulation mechanics and aerial transport construction.
Western Eye Extraction Process
- Surface Solution: Ignite a substantial fire source to liquefy the frozen stalagmite encasing the final eye.
- Cavern Transit: Fabricate a rail-compatible cart apparatus utilizing the extensive track network throughout the underground realm.

Step-by-step demonstration: Thermal ice melting procedure and rail system utilization.
Mastering the subterranean transportation system proves crucial for successful quest completion. Each recovered eye must be deliberately dropped into its corresponding Chasm aperture, then pursued downward to ensure it reaches the destination zone. The underground network features strategically placed Lightroots that not only illuminate your path but also serve as crucial navigation waypoints throughout your expedition.
The Depths present unique environmental challenges that require creative problem-solving. Zonaite construction components scattered throughout each Chasm entrance enable you to build customized vehicles tailored to specific terrain challenges – from rocky passages requiring sturdy ATVs to expansive chambers necessitating aerial transport solutions.
During our comprehensive testing of the Zelda: Tears of the Kingdom ‘A Call From the Depths’ side quest, we identified a significant technical issue when attempting consolidated eye collection. Specifically, the southern ocular artifact failed to materialize in the Depths after being dropped, eventually resetting to its original surface position without notification.
Based on this experience, we strongly advise adopting a sequential completion approach: drop each individual eye, immediately descend to track its trajectory, then utilize available Zonaite mechanisms for secure delivery to the Central Mine facility.
An alternative advanced strategy involves collecting all four eyes simultaneously while remaining in the Surface realm. You would then affix the complete set to a stable platform and transport the entire collection downward through the Depths, ideally via the northern access point as it provides the most direct route to the destination mine.
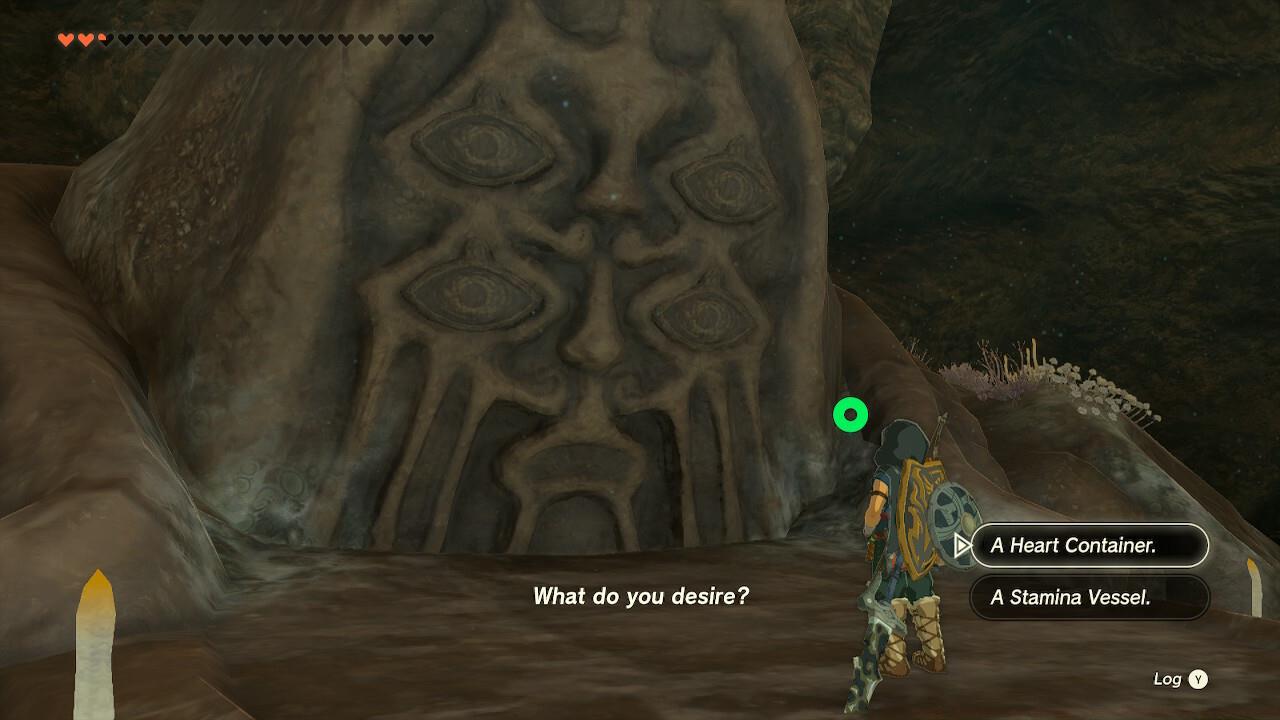
Reward selection interface at the awakened Bargainer Statue.
Central Mine and Bargainer Statue Final Phase
Every successfully delivered eye must be carefully inserted into the corresponding sockets of the colossal Bargainer Statue located within the Great Abandoned Central Mine. Upon installing the fourth and final artifact, the ancient statue will animate, presenting you with a meaningful choice between two valuable upgrades for your character’s capabilities.
Additionally, similar to other Bargainer Statues scattered throughout the Depths territory, this awakened entity will offer an extensive inventory of rare items available for acquisition using collected Poe currency. This concludes your successful completion of the Zelda: Tears of the Kingdom ‘A Call From the Depths’ side adventure.
The Legend of Zelda: Tears of the Kingdom features countless intricate game systems and exploration opportunities. For additional guidance, consult our comprehensive Complete Guide to master all aspects of your Hyrule adventure.
Action Checklist
- Travel south from Hyrule Field Skyview Tower to Great Plateau and destroy boulders to access area
- Follow ethereal guidance to Temple of Time and receive quest objectives
- Retrieve northern eye from water pool using Ultrahand ability
- Collect eastern eye by demolishing surrounding rock formations
- Recover southern eye by rotating large rock formation
- Extract western eye by melting frozen stalagmite with fire
- Construct appropriate Zonaite vehicles for each Depths transportation segment
- Deliver all eyes to Bargainer Statue in Great Abandoned Central Mine
No reproduction without permission:SeeYouSoon Game Club » Zelda: Tears Of The Kingdom – A Call From The Depths Quest Guide Complete guide to finding all Goddess Statue eyes and navigating the Depths in Zelda: Tears of the Kingdom