TL;DR
- Manage fall damage and stamina carefully – both can be deadly if ignored
- Prioritize single threats over multiple engagements to increase survival odds
- Specialize in specific faction progression to unlock better gear faster
- Extract early when you have valuable loot rather than risking everything
- Always carry sufficient ammo, healing items, and essential tools for every drop
Whether you’re preparing for deployment to Fortuna III or organizing your inventory at Prospect Station, these 10 essential strategies will dramatically improve your survival rate and success in The Cycle: Frontier.
The Cycle: Frontier represents a groundbreaking first-person extraction shooter that masterfully blends PvE and PvP elements within a persistent universe. The game unfolds across two distinct locations: Fortuna III, the hostile planet where intense combat and resource gathering occur, and Prospect Station, your strategic hub for trading, equipment acquisition, and mission preparation. As a Prospector, your primary mission involves deploying to Fortuna III to secure valuable resources and artifacts for the three major Factions operating from Prospect Station. Naturally, you’re also pursuing personal wealth to upgrade your arsenal and improve your planetary survival capabilities. Veterans of extraction shooters like Escape From Tarkov will immediately recognize the core gameplay loop, though The Cycle: Frontier introduces unique mechanics that demand specialized strategies.
On the treacherous surface of Fortuna III, your objective is to rapidly accumulate valuable items while simultaneously neutralizing both AI-controlled creatures and rival Prospectors. Once you’ve secured sufficient loot, your objective shifts to reaching an Evacuation Ship to safely depart the planet with your hard-earned rewards. However, if you perish before reaching extraction, you’ll lose nearly all acquired gear and resources to whatever enemy eliminated you. The fundamental goal involves strategic combat against both environmental threats and human opponents while systematically building your resource stockpile for both financial gain and equipment advancement.
This comprehensive guide delivers 10 advanced tactics to elevate your performance in The Cycle: Frontier. While some concepts may seem fundamental to experienced gamers, this title incorporates numerous complex systems that benefit from detailed explanation and strategic analysis.
Let’s address this critical survival element immediately, as many players discover its importance through costly mistakes. Unlike contemporary shooters such as Apex Legends that eliminate fall damage entirely, The Cycle: Frontier maintains realistic environmental hazards. Being a true survival experience, you can absolutely perish from high-altitude drops onto Fortuna III’s terrain. Even moderate falls from seemingly safe heights will deplete your health significantly more than anticipated. Crucially, wearing armor provides minimal protection against severe impact damage – attempting to descend steep cliffs or tall structures without proper planning often results in fatal consequences. The tutorial deliberately omits this vital information, making it essential knowledge for every serious Prospector.
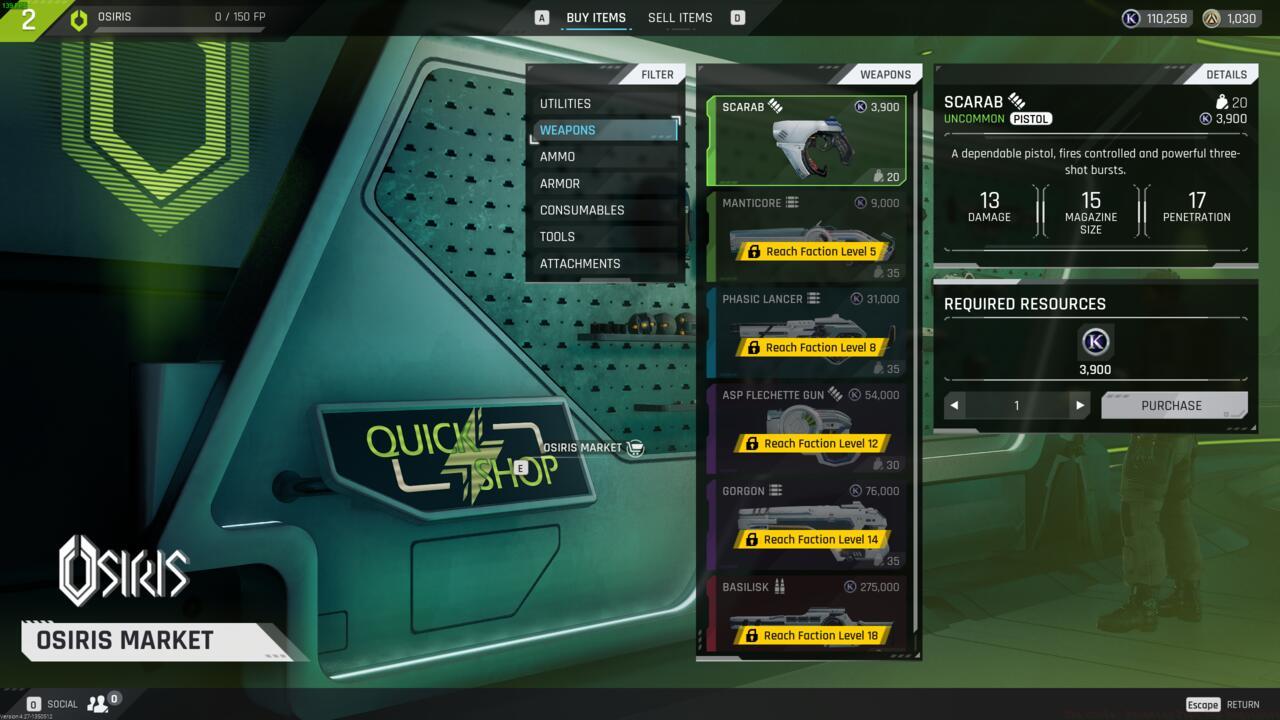
The Osiris Faction marketplace – your primary destination for faction-specific gear and upgrades
Among the most frequently underestimated survival elements in The Cycle: Frontier is strategic Stamina management. Once you deploy to Fortuna III, your Stamina bar transforms into both your greatest tactical asset and most dangerous liability. Maintaining full Stamina reserves when encountering hostile forces dramatically increases your survival probability compared to engaging with even partially depleted reserves. The game implements punishing movement restrictions when Stamina drops below 50%, making controlled movement essential rather than constant sprinting and jumping. This disciplined approach significantly simplifies combat encounters and improves your positioning options during firefights.
While seemingly intuitive, this represents one of the most common tactical errors new Prospectors commit. Since Fortuna III teems with dangerous indigenous lifeforms like Striders alongside competing players, you’ll frequently confront multiple simultaneous threats. Imagine encountering a Striders pack to your left while simultaneously spotting an enemy Prospector advancing across open terrain to your right. Our recommended strategy involves prioritizing whichever threat detected you first. When choosing between engaging players or creatures, trust your tactical instincts. If carrying significant valuable inventory, generally avoid player confrontations unless directly threatened or competing for critical objectives like Evac Ship access. Attempting to eliminate Striders then immediately engaging enemy players typically results in catastrophic failure, as you’ll face coordinated aggression from multiple directions. Concentrate on neutralizing one threat completely before addressing others.
This principle might appear self-evident, yet selecting early evacuation over extended looting frequently determines survival versus complete loss. This strategic approach applies to The Cycle: Frontier in multiple dimensions. Naturally, whenever you’ve accumulated satisfactory resources for a single deployment, immediately locate and proceed to the nearest extraction point. Pursuing “just one more” valuable item or mission objective often leads to disaster, leaving you empty-handed. Remember that fresh Prospectors continuously deploy from Prospect Station to Fortuna III, meaning new hostile elements can materialize unexpectedly at any moment, potentially ending your expedition prematurely.
During initial gameplay phases, the character Badum correctly advises completing assignments for all three Factions. Throughout the early game progression, you should actively pursue completion of all introductory Punch In missions across the three Faction organizations. However, as you advance through these missions and increase each Faction’s reputation level, strategic specialization becomes essential. Each Faction maintains unique inventory within their specialized markets, particularly regarding weapon selections. If targeting specific armaments available through particular Factions, concentrate reputation building specifically with that organization to accelerate weapon acquisition. Available armaments remain locked behind specific Faction reputation tiers, meaning higher reputation levels unlock progressively superior equipment access. Attempting simultaneous progression across all three Factions inevitably slows advancement toward unlocking your desired specialized gear. While eventually maximizing all Faction relationships remains optimal, focused sequential progression enables faster access to high-tier weapons and equipment.
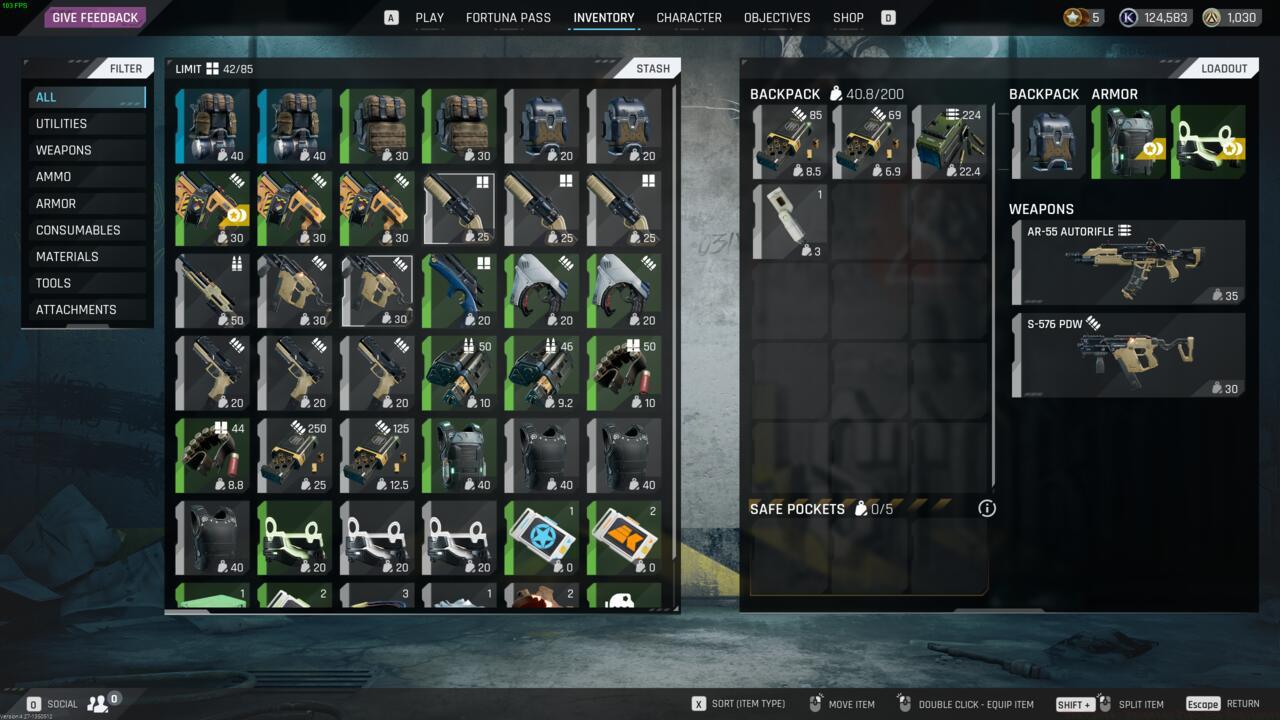
Consistently liquidate and organize acquired valuable items between deployments. Establish a systematic approach to inventory management, prioritizing high-value items for immediate sale while retaining essential resources for future missions. This approach maximizes your financial returns and ensures optimal loadout preparation for subsequent drops to Fortuna III.
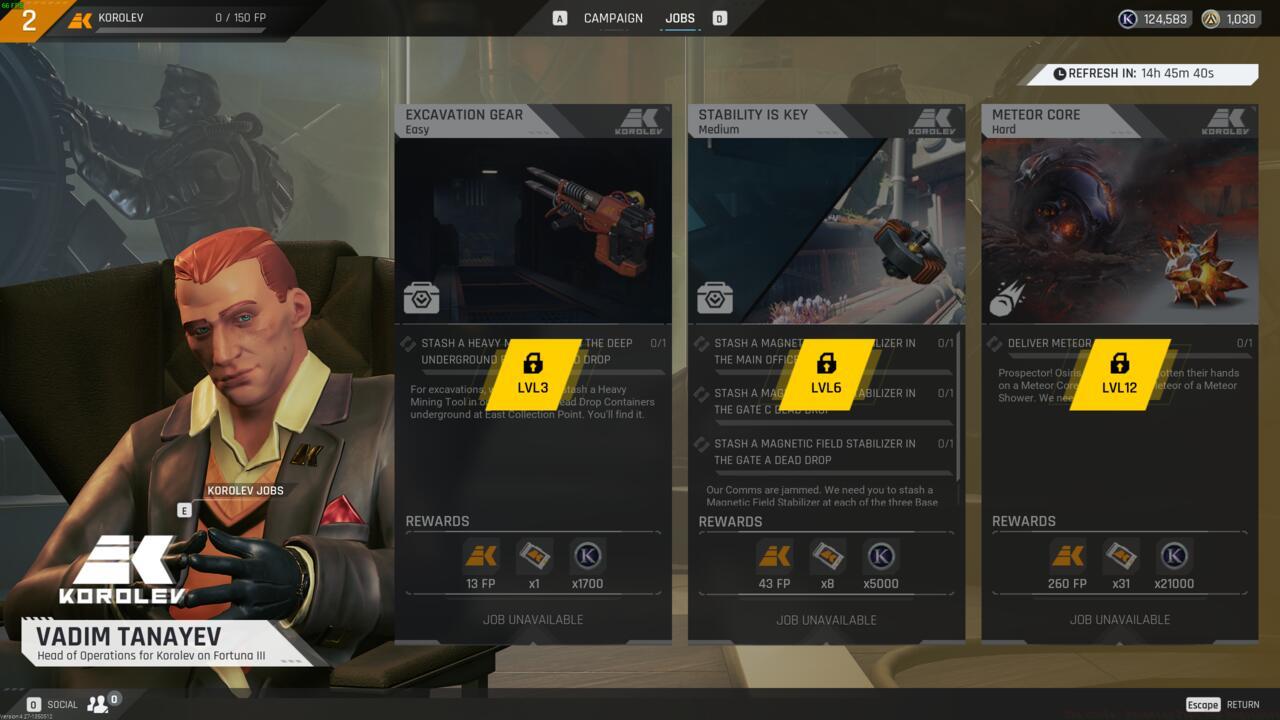
Regularly complete Daily Jobs to maintain consistent resource flow and reputation gains. These time-limited assignments provide crucial materials, currency, and faction standing that accelerate your overall progression through the game’s content.
Overcome hesitation regarding the Insurance system implementation. This protective mechanism can salvage your investment in valuable gear when missions go catastrophically wrong. Understanding insurance mechanics represents a critical component of long-term resource preservation and risk management.
Ensure adequate ammunition supplies for every planetary deployment. Underestimating your ammunition requirements represents one of the most common and preventable causes of expedition failure. Always carry sufficient reserves to handle multiple engagements without rationing during critical combat situations.
Never deploy without comprehensive medical supplies and essential exploration tools like the Mineral Scanner. These items frequently determine whether challenging situations become recoverable versus fatal encounters.
For comprehensive weapon strategies and loadout optimization, consult our detailed BF6 Weapons Unlock Guide to optimize your combat effectiveness on Fortuna III.
Action Checklist
- Test fall damage thresholds in safe zones to understand lethal heights
- Practice stamina-conserving movement patterns during low-risk deployments
- Identify your primary faction based on desired end-game weapons
- Establish evacuation criteria based on loot value before each deployment
- Create inventory management templates for quick sorting and selling between runs
- Develop engagement decision protocols for different threat combinations
No reproduction without permission:SeeYouSoon Game Club » The Cycle: Frontier Tips For Beginners Master survival tactics, resource management, and strategic planning to dominate The Cycle: Frontier