TL;DR
- The Armillary decision occurs after ‘A High Price to Pay’ quest with permanent story consequences
- Ship placement increases Starborn space encounters for combat-focused players seeking XP and loot
- Outpost placement provides strategic security but requires advanced base-building investment
- Carrying artifacts avoids beacon effects but sacrifices organized artifact management
- Your choice directly impacts Starborn spawn rates and available combat opportunities
Discover the optimal placement strategy for Starfield’s pivotal Armillary device to maximize your gameplay experience while managing critical story consequences.
The Starfield Armillary represents a crucial narrative device that becomes available approximately midway through your campaign journey. This significant story moment presents players with a strategic choice regarding artifact storage that carries lasting implications for your progression. Important advisory: this guide contains major story spoilers from the mid-game campaign.
Your Armillary placement decision emerges during the climax of the A High Price to Pay mission sequence. This watershed narrative moment forces you to select between defending The Lodge headquarters or checking on companion safety at The Eye orbital station. Regardless of your choice, one crew member will inevitably perish, with surviving allies regrouping aboard The Eye to deliberate about artifact security protocols.
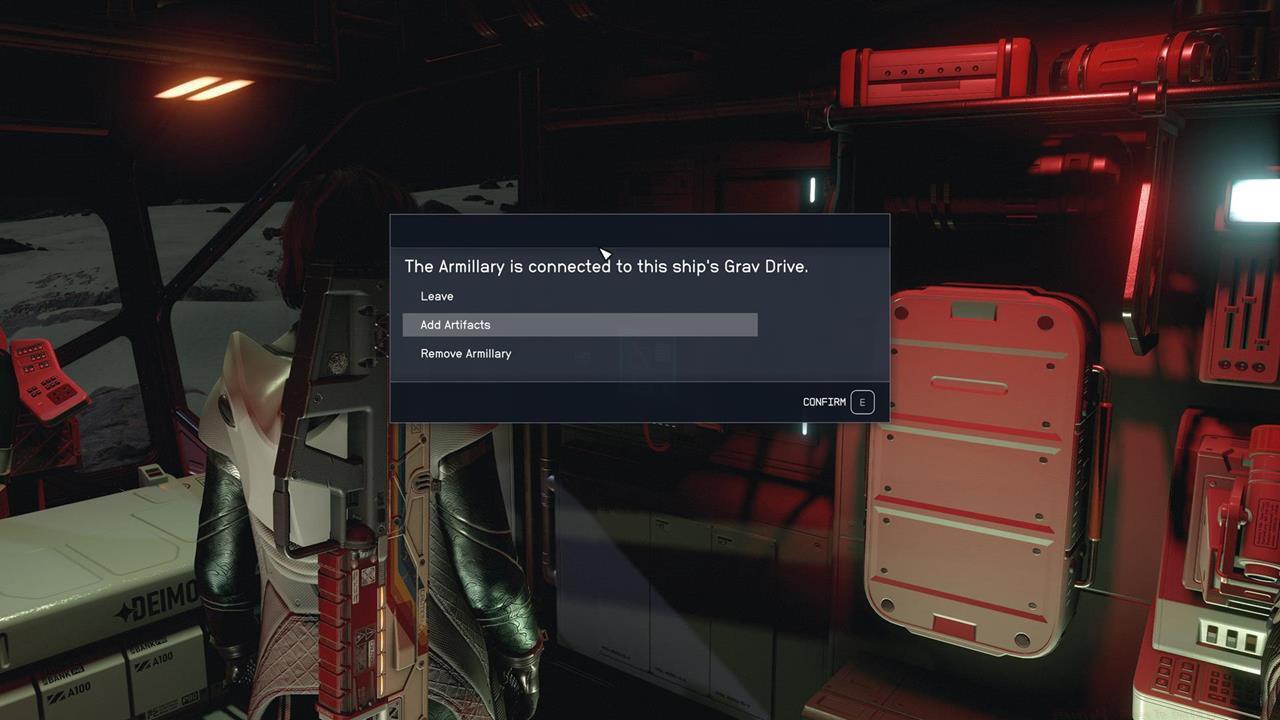
The Armillary’s primary function involves centralized artifact containment, offering three distinct implementation approaches with varying gameplay ramifications.
- Construct the Armillary aboard your spacecraft – Access the control panel situated immediately right of the pilot’s cockpit position. The interface will display a clear construction prompt for device assembly.
- Establish the Armillary within an planetary outpost – This alternative demands prior establishment of a functional surface base. After deploying your outpost beacon, navigate to the Quest management interface and select the Armillary construction option.
- Forego Armillary construction entirely – Artifacts possess zero mass properties, ensuring they never contribute to inventory encumbrance calculations.
Ship-based Armillary installation provides the most streamlined implementation process for immediate deployment.
Ship installation offers rapid deployment with immediate Starborn encounter benefits.
Fundamentally, the Armillary operates as a homing beacon that attracts hostile Starborn factions pursuing the same cosmic artifacts. Selecting ship-based installation significantly increases the probability of Starborn vessel intercepts during space navigation. Choosing to avoid construction altogether may result in randomized Starborn appearances during planetary exploration or space travel.
Our testing deliberately excluded the outpost deployment scenario, though we speculate Starborn forces wouldn’t automatically assault crew members stationed at your base. Our preferred strategy involved spacecraft installation, which consistently generated increased Starborn ship spawn rates, consequently creating more space combat engagements.
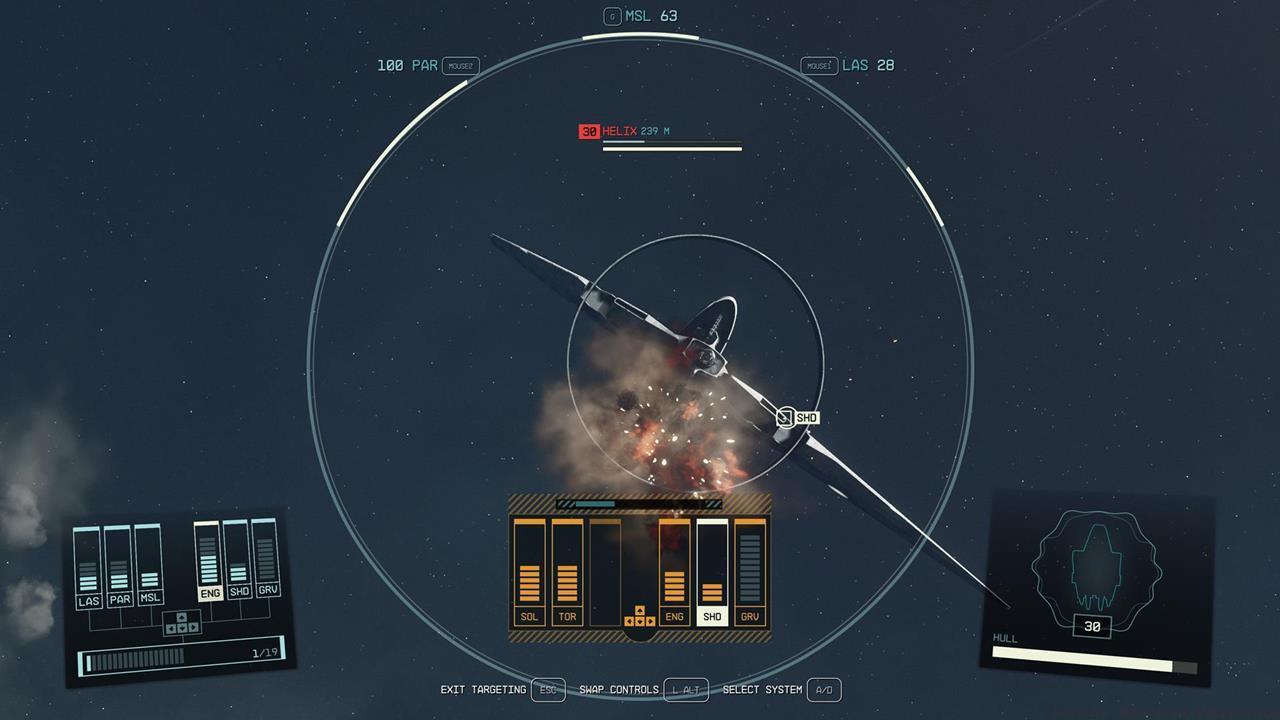
Enhanced Starborn encounters provide valuable combat experience and loot acquisition opportunities.
For combat-oriented players seeking frequent engagements, ship installation proves ideal—Starborn intercepts yield substantial experience points, valuable loot, and ship combat proficiency. However, this approach demands consistent combat readiness and adequate ship armaments.
Outpost deployment offers superior security for artifact conservation but requires significant resource investment in base development. This method suits players prioritizing exploration over constant combat, similar to strategic approaches discussed in our Class Guide for role specialization.
The no-construction alternative provides maximum exploration freedom but sacrifices organized artifact management. This mirrors the flexibility seen in weapon selection strategies from our Weapons Unlock guide, where choice dictates playstyle.
Consider your current ship capabilities, combat proficiency, and desired encounter frequency when making this critical decision, much like the comprehensive planning required in our Complete Guide to game systems. Each option supports different endgame strategies with unique advantages and compromises.
Action Checklist
- Complete ‘A High Price to Pay’ quest and assess your combat readiness before deciding
- Evaluate your ship’s combat capabilities—ensure weapons and shields can handle increased Starborn encounters
- For outpost placement, establish a secure planetary base with adequate defenses first
- Monitor Starborn encounter frequency and adjust strategy based on combat performance
- Regularly review artifact collection progress and adjust placement strategy as needed
No reproduction without permission:SeeYouSoon Game Club » Starfield – Where To Build The Armillary Strategic guide to Armillary placement in Starfield with combat optimization and risk analysis