TL;DR
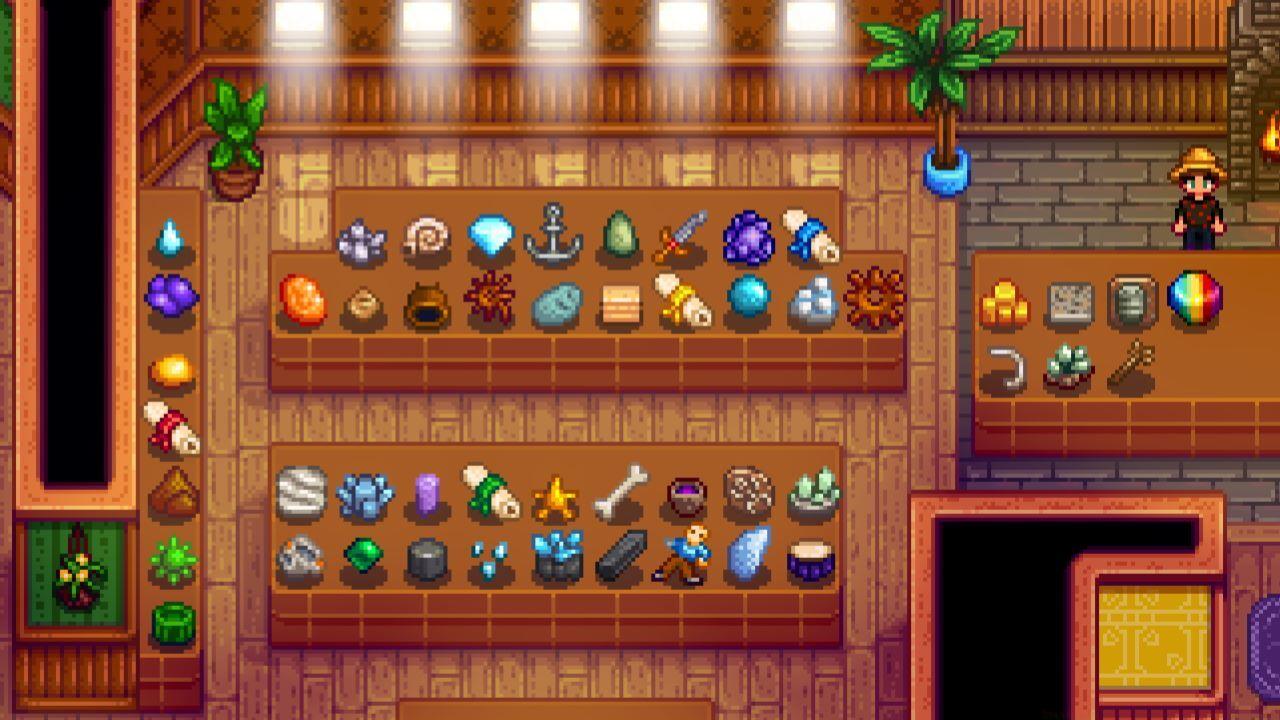
- Complete museum collection requires 95 items total (53 minerals, 42 artifacts) for ultimate Stardrop reward
- Strategic geode processing at Blacksmith (25g each) is most efficient mineral acquisition method
- Critical milestones include sewer key at 60 items and Dwarvish Translation Guide for all scrolls
- Donation placement is flexible with option to rearrange displays anytime
- Advanced players should focus on Omni Geodes and specific mining levels for rare finds
Building a complete museum collection demands strategic planning combined with persistent exploration throughout Pelican Town and beyond.
During your initial weeks in Stardew Valley, curator Gunther approaches with an urgent request to revitalize the struggling museum. He specifically seeks rare artifacts and geological specimens to rebuild the institution’s prestige. The donation system operates similarly to museum mechanics in popular life simulation games, requiring one specimen of each unique item to achieve full completion. Successfully donating every piece earns the ultimate prize: a precious Stardrop that permanently expands your energy capacity.
The museum maintains consistent operating hours from 8:00 AM to 6:00 PM daily, closing only during seasonal town festivals. Situated in the southeastern district adjacent to Clint’s Blacksmith shop, the facility houses extensive literary archives where discovered lost books become accessible, plus spacious exhibition areas for new acquisitions. To contribute items, simply converse with Gunther who grants complete freedom in display placement with future rearrangement options available.
Gunther distributes progression rewards at specific donation thresholds, including cumulative item counts plus separate tracking for artifacts and minerals. While most bonuses provide quality-of-life improvements, three rewards significantly impact gameplay: Sewer access key at 60 donations, the energy-boosting Stardrop at 95 items, and the Dwarvish Translation Guide obtained by donating all four Dwarvish Scrolls, enabling communication with the reclusive Dwarf race.
Strategic item placement allows creative exhibition designs that can be reorganized as your collection grows.
Display customization remains entirely flexible, permitting donated specimens to be positioned according to personal preference with unlimited rearrangement capabilities.
Acquiring all donation items involves diverse methods tailored to each category’s characteristics. The complete collection comprises 95 distinct specimens: 53 mineralogical examples and 42 archaeological artifacts.
Mineral acquisition primarily occurs through underground excavation, though alternative procurement methods exist. Precious gems generate from corresponding mineral nodes—emerald deposits yield emeralds exclusively, while universal gem nodes produce randomized precious stones. The four forageable minerals—Quartz, Earth Crystal, Frozen Tear, and Fire Quartz—appear throughout the standard mines and extend into the dangerous Skull Cavern.
Geode minerals constitute the largest acquisition category, obtained by processing geological specimens at the blacksmith for 25 gold each. Geodes manifest as four variants: standard, frozen, magma, and omni-geodes. While the first three types contain predetermined mineral sets, omni-geodes potentially yield any mineral, establishing them as the optimal farming method. Some minerals occasionally surface in fishing treasure chests, though their appearance remains too unreliable for efficient collection.
Advanced collection strategies involve prioritizing Omni Geode processing while systematically farming specific mine levels for rare artifacts. Efficient players should focus on levels 1-20 for Dwarvish Scrolls, 30-40 for ancient artifacts, and 60-80 for rare minerals. Common mistakes include selling duplicate artifacts instead of donating and neglecting to check the traveling merchant’s inventory for rare specimens.
For optimal progression, establish a weekly routine: mine on lucky days, process all geodes immediately, and always carry a hoe for artifact spots. Season-specific artifacts appear in different locations: spring favors mountain areas, while winter reveals beach artifacts. Time investment varies significantly—casual completion typically requires 2-3 in-game years, while optimized strategies can achieve full collection within 18 months.
More Stardew Valley guides:
Stardew Valley: How To Upgrade Your Tools
Action Checklist
- Visit Gunther immediately to unlock donation system and understand reward structure
- Establish daily mining routine focusing on levels with highest artifact spawn rates
- Process all geodes at blacksmith immediately and prioritize Omni Geode acquisition
- Check traveling merchant every Friday and Sunday for rare artifacts and minerals
- Systematically farm specific seasons and locations for remaining artifacts
No reproduction without permission:SeeYouSoon Game Club » Stardew Valley: How To Complete The Museum Master the Stardew Valley Museum with expert strategies for artifacts, minerals, and valuable rewards