TL;DR
- Four Blue Medallions located in Chapter 2’s Cliff area after Ada’s first Leon sighting
- Optimal collection route saves 2-3 minutes versus random searching
- Use pistol with scope for precision shooting across varying distances
- Complete all medallions before progressing to ensure immediate reward collection
- Strategic positioning eliminates backtracking and maximizes efficiency
Mastering the Blue Medallion challenges in Resident Evil 4’s Separate Ways DLC provides crucial advantages for Ada Wong’s mission. This expansion reveals Ada’s parallel storyline during Leon Kennedy’s campaign, featuring several narrative intersections between the two protagonists. Among the returning gameplay mechanics from the main title, the Blue Medallion destruction requests offer valuable rewards. The initial challenge emerges in Chapter 2’s Cliff section, presenting four strategically placed targets.
Understanding the reward system is essential – while completion notification appears immediately after destroying the final medallion, you must wait until your next Merchant encounter to actually receive your spoils. This mechanic encourages thorough exploration before advancing to new areas.
The Cliff area represents a compact but vertically complex environment encountered after Ada witnesses Leon for the first time in this DLC chapter. This location features multiple elevation levels connected by grapple points, requiring strategic movement planning. The section concludes with a locked door where you’ll discover the Blue Medallion request, immediately signaling the beginning of this optional objective.
Professional players recommend adopting a systematic search pattern starting from the request location and working backward. This approach minimizes unnecessary backtracking and ensures you don’t miss any well-concealed targets. The area’s vertical design means you’ll need to consistently check both high and low vantage points.
Time-conscious players can complete all four medallions in approximately 4-6 minutes using optimized routes, compared to 8-12 minutes with haphazard searching. The key is understanding the spatial relationships between platforms and using the grapple hook efficiently between targets.
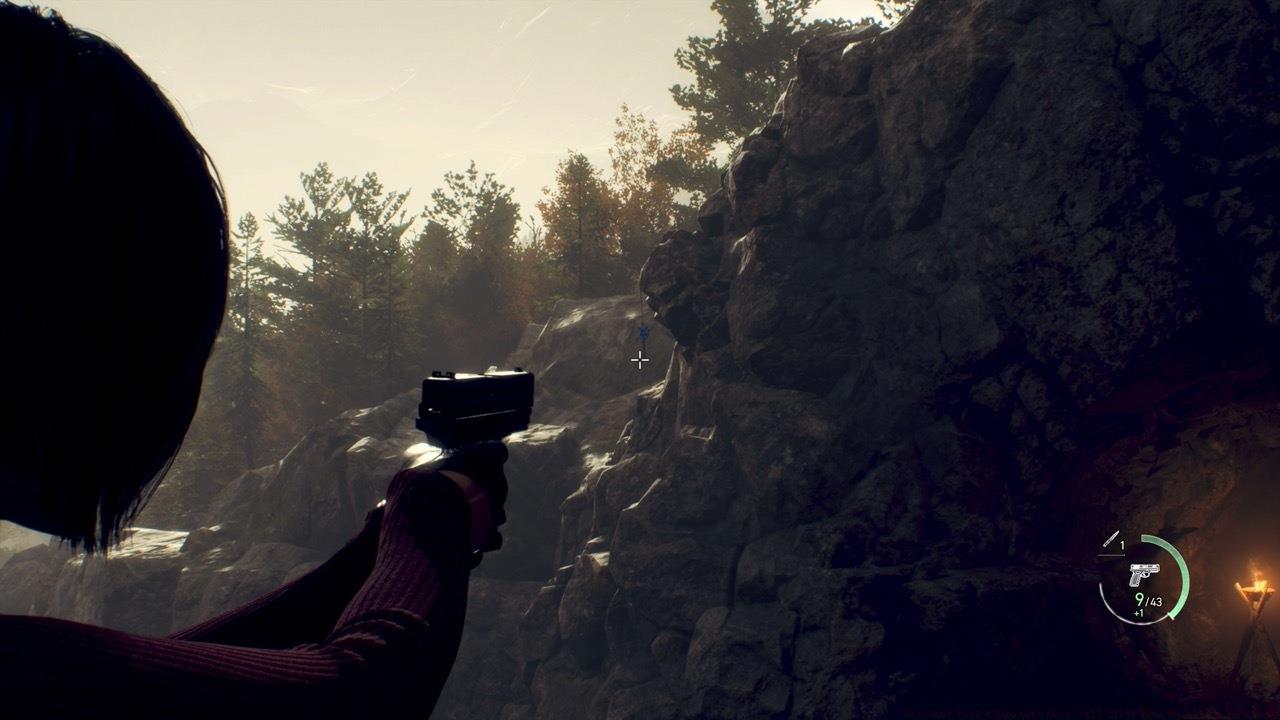
Medallion 1: Initial Discovery – Immediately after acquiring the request, execute a 180-degree turn from the locked door. Your first target hangs conspicuously from an overhead structure, serving as an easy introduction to the challenge. This positioning deliberately teaches players to thoroughly survey their immediate surroundings before moving forward.
Medallion 1
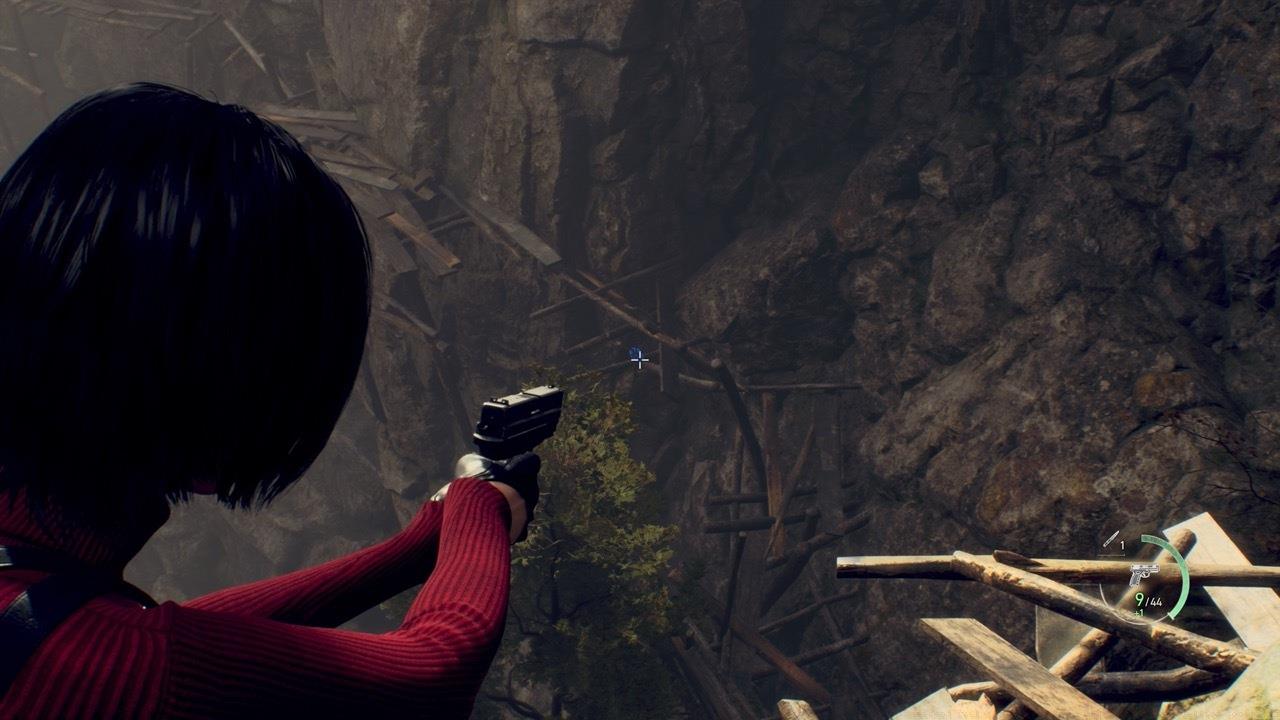
Medallion 2: High Platform – Utilize your grapple to ascend to the uppermost cliff platform. Proceed to the farthest extremity of this elevated walkway and scan the ceiling area above you. The second medallion dangles from an overhead outcropping, requiring precise aiming upward.
Medallion 2
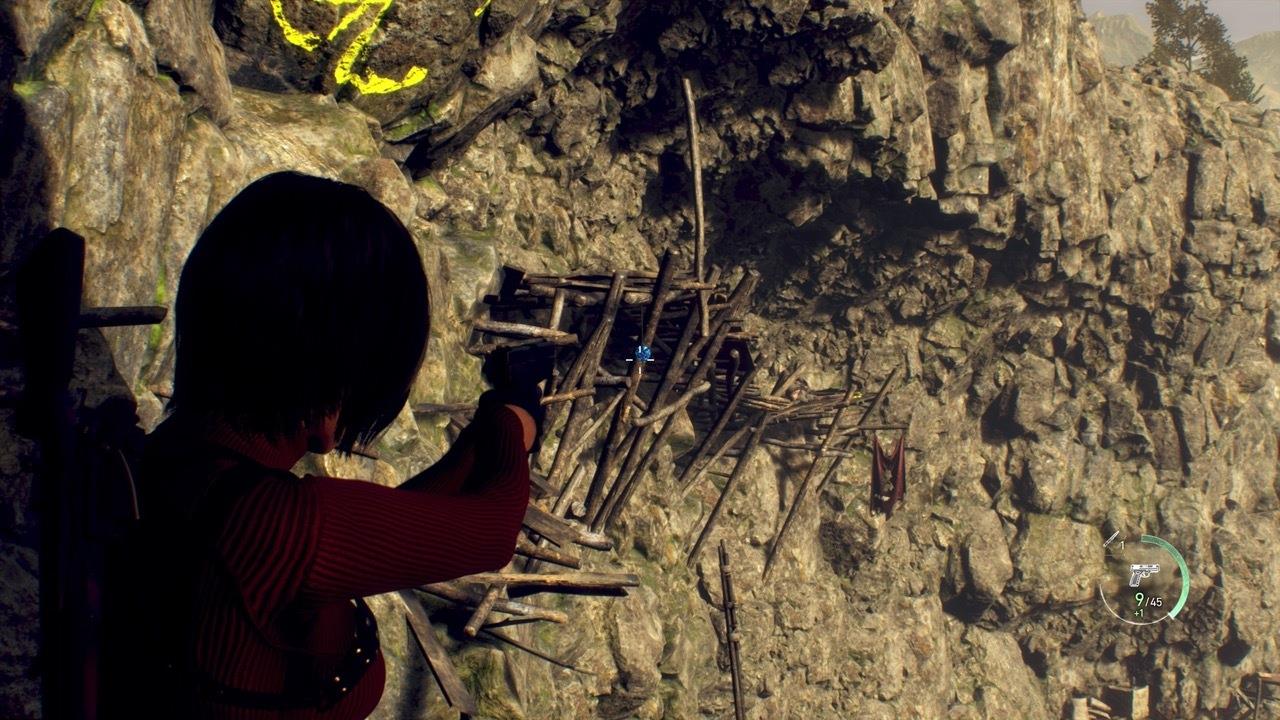
Medallion 3: Wooden Debris – Return to the starting edge of the high platform but resist the urge to grapple downward immediately. Instead, direct your gaze downward toward the shattered wooden structures positioned beneath the door area. The third medallion nestles among these broken planks, partially obscured from direct view.
Medallion 3
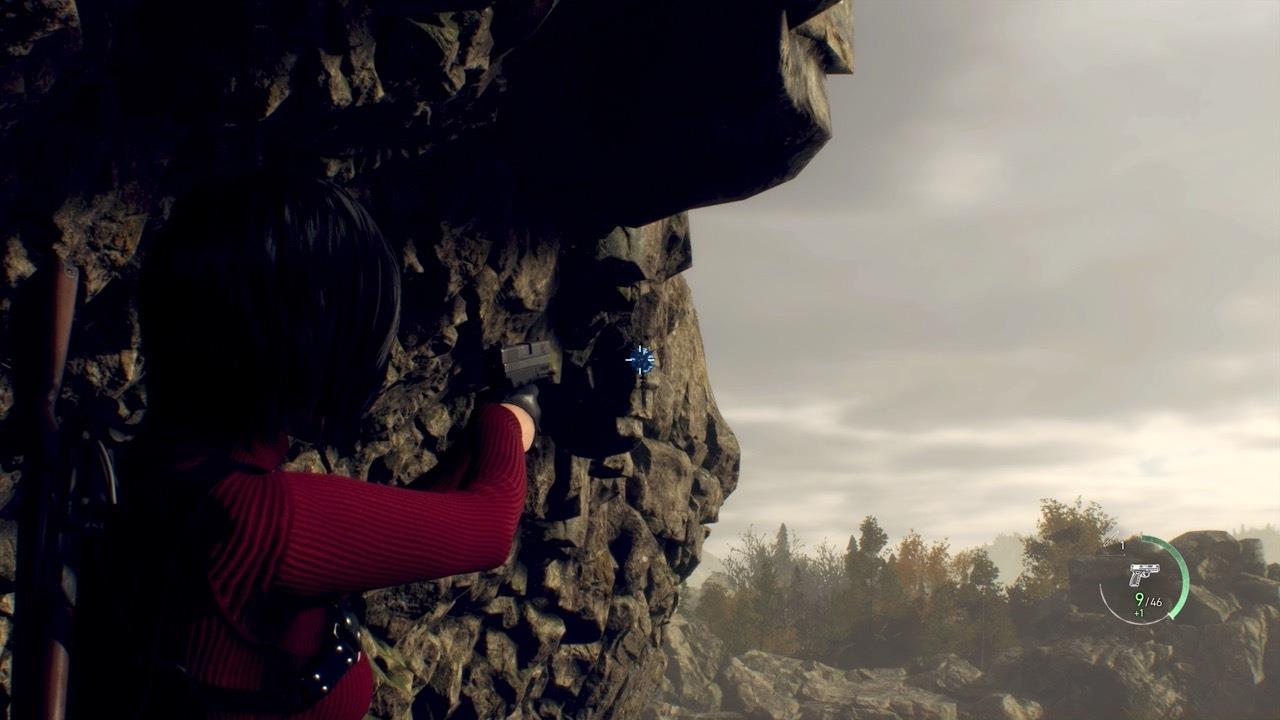
Medallion 4: Rock Formation – The concluding medallion requires examining the left-side rock formations when facing the locked door. It swings from a natural stone outcropping, blending somewhat with the environment and representing the most challenging target to spot.
Medallion 4
Weapon selection dramatically impacts your efficiency in this challenge. A scoped pistol proves invaluable for the longer-distance shots, particularly Medallion 2 on the high platform. For players struggling with accuracy, upgrading weapon stability or using laser sights can significantly improve hit rates.
Avoid these common mistakes: progressing beyond the area before completing all medallions (forcing tedious backtracking), inadequate ammo conservation leading to insufficient shots for all targets, and failing to methodically check all vertical levels in this multi-tiered environment.
Advanced tactical approach: Begin with Medallion 1 immediately after getting the request, then grapple to the high platform for Medallion 2, descend carefully to spot Medallion 3 in the wooden wreckage below, and finally locate Medallion 4 on the left rock formation. This sequence minimizes movement between targets and ensures you don’t miss any well-hidden medallions.
For speedrunners and efficiency-focused players, memorizing the exact positions and practicing the route can reduce completion time to under 3 minutes. The key is integrating medallion destruction into your natural progression through the area rather than treating it as a separate activity.
Action Checklist
- Acquire request from locked door then immediately turn around to spot first medallion
- Grapple to highest platform and walk to furthest edge to locate second medallion above
- Return to platform edge, look down at broken wood beneath door area for third medallion
- Scan left-side rock formations from door perspective to identify final medallion
- Verify completion notification and proceed to next Merchant for reward collection
No reproduction without permission:SeeYouSoon Game Club » Resident Evil 4 Separate Ways – All Cliff Blue Medallion Locations Complete guide to finding all four Blue Medallions in the Cliff area with expert strategies and time-saving tips