TL;DR
- Acquire Chakram – Shadow of the Simurgh upgrade first for essential teleportation abilities
- Execute precise crystal manipulation using Dimensional Claw and shadow copy placement
- Master the three puzzle chambers with specific teleportation and platforming techniques
- Synchronize all three clock symbols simultaneously to activate the mechanism
- Collect valuable rewards including Amulet Holder and access to Simurgh Gate
Successfully navigating the Upper City Clock Puzzle requires strategic preparation and specific abilities. Unlike simple environmental puzzles, this challenge demands mastery of advanced movement mechanics and precise item manipulation.
The Chakram – Shadow of the Simurgh upgrade serves as the foundation for solving this complex puzzle. This ability transforms your Chakram from a simple throwing weapon into a teleportation anchor point, fundamentally changing your approach to platforming challenges.
This entire sequence forms part of The Celestial Guardians mission, where you must activate four constellations scattered throughout Mount Qaf. The Clock Puzzle itself occupies the northeastern quadrant of the Upper City district.
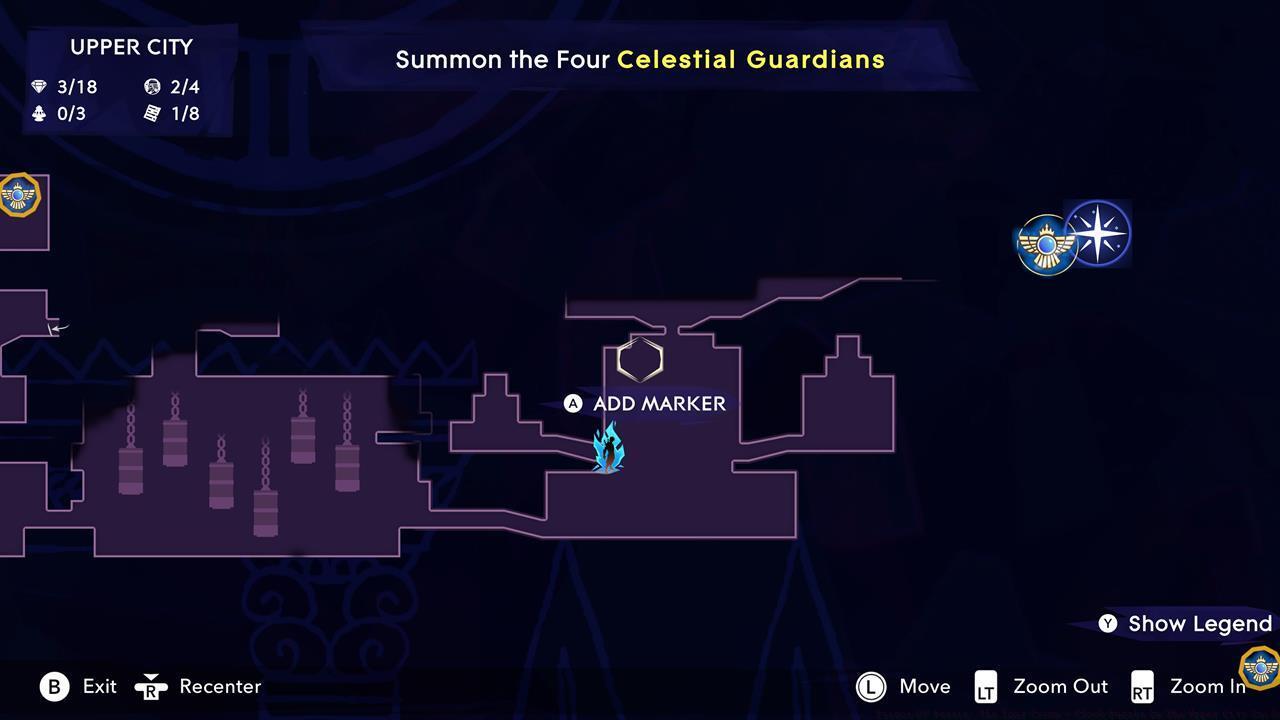
Strategic planning is crucial – visiting the northwestern constellation first to obtain the Chakram upgrade makes the entire Clock Puzzle significantly more manageable.
Pro Tip: Attempting the Clock Puzzle without the Chakram upgrade requires extremely precise platforming and may take 3-4 times longer to complete.
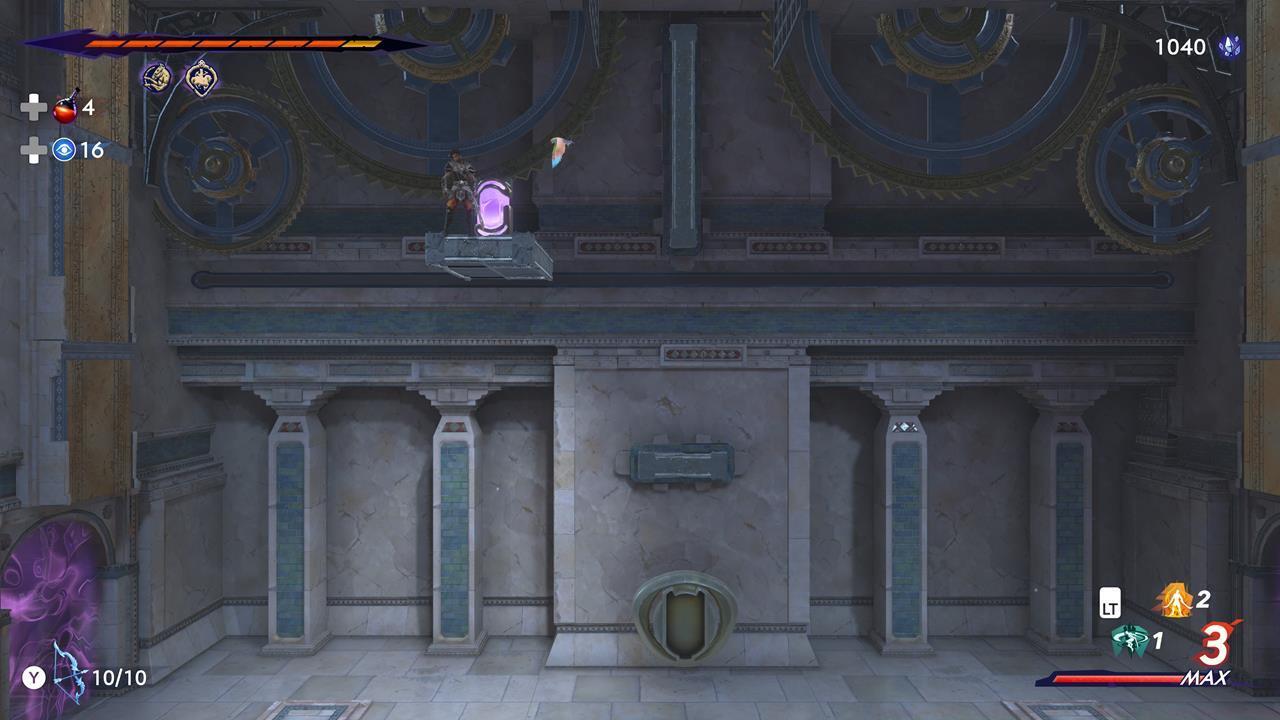
The initial chamber presents a vertical navigation challenge that tests your understanding of the Chakram teleportation mechanics. Begin by entering the room positioned at the base of the main chamber complex.
- Aim your Chakram throw precisely at the elevated platform containing the first crystal. The targeting reticle should clearly indicate when you’ve locked onto the correct surface.
- Execute the teleportation to reach the crystal platform, then immediately deploy Dimensional Claw to secure the crystal object.
- Position the crystal within its designated receptacle to materialize a temporary platform structure.
- From this newly formed ledge, launch your Chakram toward the uppermost section of the chamber and teleport to establish a Shadow of the Simurgh anchor point in the confined alcove.
- Retrieve the crystal and teleport back to your shadow copy. Be aware that the access hatch will automatically seal during this process. Expert players can attempt a mid-air crystal toss using Dimensional Claw during descent.
The Chakram teleportation ability fundamentally changes vertical navigation, allowing access to previously unreachable areas.
Common Mistake: Players often misjudge the timing for the mid-air crystal transfer. Practice the Dimensional Claw throw during the initial descent phase rather than waiting until the last moment.
This chamber emphasizes wall-running proficiency combined with strategic shadow placement. The solution requires coordinating multiple ability activations in rapid succession.
- Utilize wall-running maneuvers to approach the vacant crystal receptacle, activating Shadow of the Simurgh when positioned optimally.
- Employ Dimensional Claw to capture the crystal located at the chamber’s lower level, then teleport to your shadow duplicate to deposit it in the receptacle.
- Project your Chakram to the chamber’s ceiling and teleport to establish another shadow anchor point.
- Secure the crystal during your descent, then teleport to the upper shadow copy for final placement in the highest receptacle.
Mastering the timing between wall-jumps and shadow activation is critical for efficient completion of this chamber.
Advanced Technique: For speedrunners, you can chain the crystal grab and teleport in a single fluid motion, reducing completion time by approximately 30%.
The most technically demanding chamber requires perfect execution of teleportation chains combined with aerial mobility techniques. This puzzle tests your mastery of the game’s movement system.
- Acquire the crystal using Dimensional Claw and position it in the initial receptacle.
- Leap toward the recessed wall section and generate a Shadow of the Simurgh duplicate.
- Retrieve the crystal and instantly teleport to your copy. Immediately execute an air dash leftward to position yourself above the higher platform, creating another shadow copy upon achieving proper elevation.
- Return the crystal to the receptacle, then teleport to the platform ledge.
- Hurl your Chakram to the chamber’s peak and establish a final shadow anchor.
- Reclaim the crystal and teleport to the uppermost shadow to complete the final placement.
This chamber represents the peak of platforming complexity in the Clock Puzzle sequence, requiring flawless execution of multiple advanced techniques.
Optimization Tip: The entire right chamber can typically be completed in 2-3 minutes with proper technique, compared to 5-7 minutes for inexperienced players.
With all three chamber puzzles completed, the final phase involves synchronizing the clock’s intricate mechanism. Return to the central chamber to engage with the clock’s control interface.
- Three distinct pressure plates correspond to the chromatic symbols: azure, crimson, and golden.
- Activating a plate halts the corresponding symbol ring while the others maintain rotation.
- The objective requires strategic plate activation when each symbol illuminates. Begin by standing on the azure plate during its luminous phase to immobilize that ring. Then, precisely time your movement to the crimson plate as its symbol approaches illumination.
Perfect synchronization requires anticipating each symbol’s illumination cycle and positioning yourself accordingly.
Once all three symbols achieve simultaneous illumination, the clock mechanism engages completely. This breakthrough grants access to the Simurgh Gate and advances the narrative toward its conclusion. Additionally, you’ll discover a treasure chest containing an Amulet Holder. For comprehensive information about amulet system enhancements, consult our detailed amulet slot upgrades guide.
Reward Insight: The Amulet Holder represents one of several upgrade components available throughout Mount Qaf. Proper amulet management significantly enhances combat effectiveness in later game segments.
Prince of Persia: The Lost Crown delivers an extraordinary expedition across the mystical landscapes of Mount Qaf. We explore additional game systems and mechanics in our comprehensive guides hub.
Action Checklist
- Acquire Chakram – Shadow of the Simurgh upgrade from northwestern Upper City
- Complete bottom chamber using teleportation and mid-air crystal transfers
- Master left chamber wall-running and shadow placement sequence
- Execute right chamber teleportation chain with air dash integration
- Synchronize all three clock symbols simultaneously
- Collect Amulet Holder reward and proceed through Simurgh Gate
No reproduction without permission:SeeYouSoon Game Club » Prince Of Persia: The Lost Crown – Clock Puzzle In The Upper City Guide Master the Upper City Clock Puzzle with advanced teleportation techniques and crystal manipulation strategies