TL;DR
- Boost Emblems provide stat bonuses with trade-offs, requiring strategic balancing
- Acquire emblems through Energy Rewards Gacha and Season Points without spending currency
- Build synergistic loadouts that complement your Pokemon’s strengths and playstyle
- Upgrade bronze emblems to silver/gold for enhanced effects through merging system
- Avoid common pitfalls like over-specialization and ignoring negative stat penalties
Discover comprehensive strategies for maximizing Pokemon Unite’s Boost Emblem System, covering everything from acquisition to advanced optimization techniques.
Pokemon Unite celebrated its first anniversary with significant content additions including Glaceon and Buzzwole releases, with Tyranitar soon to follow. The game maintains consistent monthly updates since launch, featuring special login bonuses, anniversary missions, commemorative cosmetics, and incentives for returning players.
Among all anniversary updates, the Boost Emblem System represents the most impactful gameplay addition. This definitive guide explores emblem mechanics, acquisition methods, strategic implementation, and advanced optimization approaches.
Boost Emblem Fundamentals
For players experienced with MOBA systems like League of Legends’ Runes or Arena of Valor’s Arcana, Boost Emblems function similarly as customizable stat modifiers. These equippable enhancements provide attribute adjustments across various combat metrics including attack speed, damage output, magical penetration, defensive capabilities, and movement parameters.
Emblems enable strategic differentiation even when using identical Pokemon. You might prioritize attack speed enhancements while an opponent using the same character focuses on raw damage amplification, creating diverse build possibilities within the same character selection.
The defining characteristic distinguishing Pokemon Unite’s system from other MOBAs is that all Boost Emblems incorporate negative stat penalties alongside positive bonuses. This trade-off mechanic demands careful consideration during loadout construction – is increased movement speed worth sacrificing hit points on already fragile Pokemon?
Advanced players should note that emblem effects stack multiplicatively rather than additively, making certain combinations particularly potent. Understanding these interaction mechanics is crucial for maximizing your competitive advantage.
Obtaining Boost Emblems Efficiently
Players can acquire Boost Emblems through two primary methods, both accessible without spending premium currency.
The Energy Rewards Gacha system serves as the primary emblem source, requiring 100 Energy per roll. Critical configuration step: ensure the gacha is set to Boost Emblems mode rather than Fashion Items to avoid wasting energy resources.
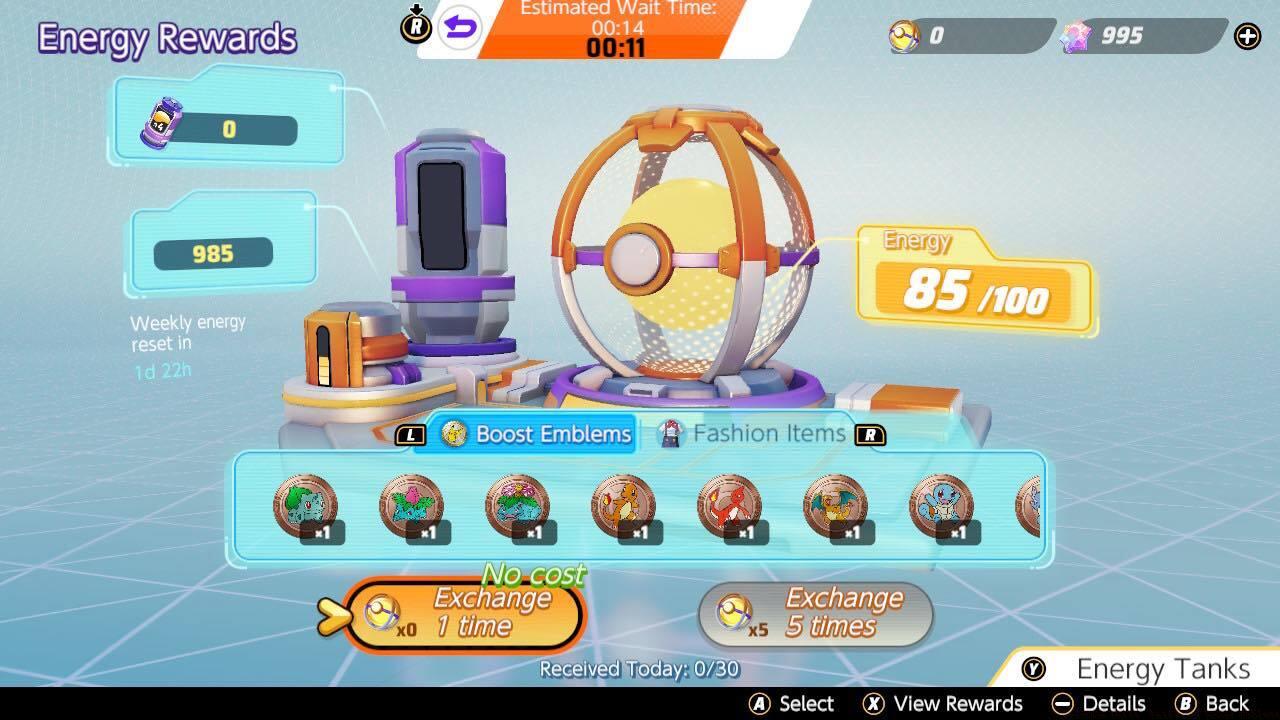
Energy Rewards Gacha Shop Interface
Season Points Rewards provide the secondary acquisition channel, offering specific emblems as ranked progression milestones. These seasonal rewards often include limited-time emblems unavailable through other methods.
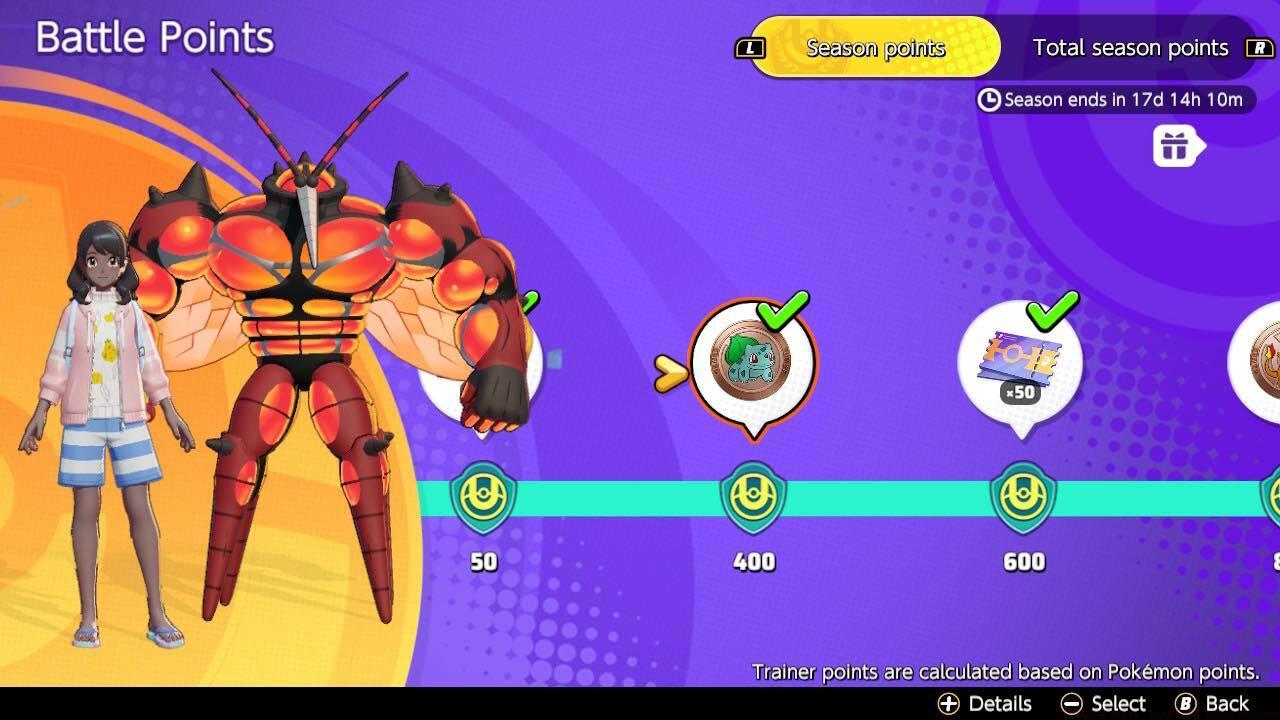
Current Season Points Rewards Structure
Premium Gold Gengar Boost Emblem – Seasonal Reward
Optimization Tip: Focus your energy expenditure during emblem rate-up events, which typically increase rare emblem drop probabilities by 30-50%. Daily energy caps mean strategic timing significantly impacts long-term collection progress.
Strategic Loadout Construction
Effective emblem utilization requires understanding both individual emblem properties and synergistic combinations. The system interface provides comprehensive stat visualization and loadout management tools.
Emblem Selection and Configuration Interface
Comprehensive Emblem Library with Stat Details
Build specialized loadouts that complement your Pokemon’s inherent strengths. For example, cooldown reduction emblems combined with critical hit enhancements can create devastating burst damage combinations on appropriate characters.
Optimized Cooldown and Critical Hit Loadout Example
The emblem merging system allows upgrading lower-tier emblems: combining three bronze emblems creates one silver version, while three silvers produce a gold emblem with enhanced effects.
Bronze Emblem Merging Process Demonstration
Upgraded Silver Nidoking Emblem Result
Common Strategic Errors: Many players overlook negative stat penalties when building loadouts, creating unintended weaknesses. Others over-specialize in single stats rather than creating balanced enhancements. Always consider how emblem choices affect your Pokemon throughout the entire match duration, not just early game performance.
Advanced players should create multiple loadout presets for different team compositions and match scenarios. Having specialized builds for offensive pushes, defensive holds, and objective contests provides significant competitive flexibility.
Action Checklist
- Configure Energy Rewards Gacha to Boost Emblems mode before spending energy
- Collect and analyze emblem stat trade-offs, prioritizing bonuses that complement your main Pokemon
- Build at least three specialized loadouts for different combat scenarios
- Merge duplicate bronze emblems to create silver versions for enhanced effects
- Test loadouts in practice mode to verify stat interactions and identify optimal combinations
No reproduction without permission:SeeYouSoon Game Club » Pokemon Unite: Basics Of Boost Emblems Master Pokemon Unite's Boost Emblem System with strategic builds, acquisition methods, and optimization tips