TL;DR
- DMZ Season 5 introduces new equipment upgrades accessible through Mission Objectives menu
- Three-stage armor plate progression requires dead dropping keycards and skeleton keys
- Team coordination significantly accelerates upgrade completion across multiple deployments
- Strategic dead drop placement and timing optimize challenge progression efficiency
- Rebreather and self-revive equipment provide tactical advantages for different playstyles
The latest seasonal update for Call of Duty: Warzone’s DMZ mode introduces substantial gameplay enhancements through its upgraded equipment system. Season 5 brings fresh tactical options that can dramatically improve your infiltration survival rates and mission success potential.
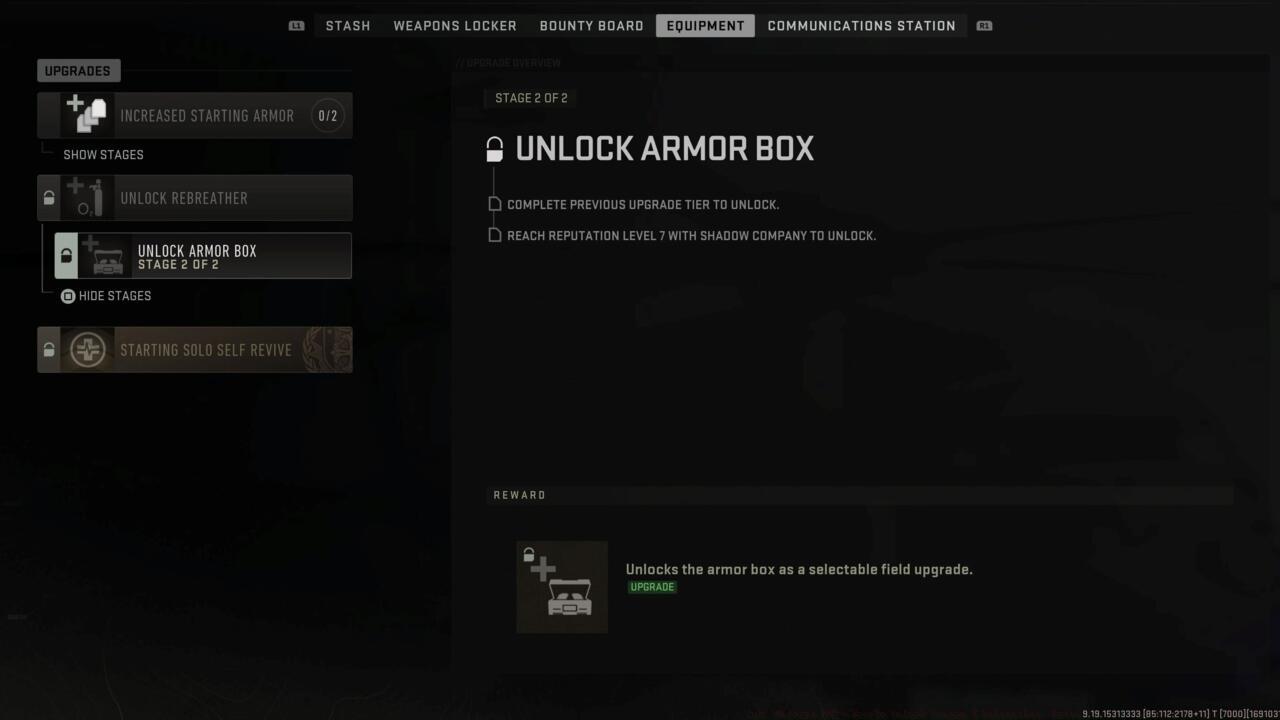
DMZ equipment upgrade menu
Navigating the interface can prove challenging for newcomers, but mastering the upgrade pathways delivers significant competitive advantages. The Mission Objectives tab adjacent to your deployment selection houses the comprehensive Upgrades menu where you’ll discover these valuable bonuses.
Within the Equipment section specifically, you’ll encounter multiple upgrade tiers that provide everything from additional protective gear to specialized field equipment. Understanding this system’s structure is crucial for maximizing your DMZ operational effectiveness.
The armor plate enhancement challenge follows a structured three-phase completion system that progressively increases your starting defensive capabilities. Each successfully completed stage provides tangible battlefield benefits that can determine mission outcomes.
Stage 1 Requirements – Successful completion grants three armor plates at deployment initiation
- Deposit eight stronghold keycards at designated dead drop locations
- Submit one skeleton key through the same dead drop mechanism
This progression system offers remarkable flexibility through its map-agnostic completion parameters. The distinctive white dumpsters serving as dead drop points accept various items for challenge credit and experience point accumulation. Crucially, these objectives don’t require single-session completion, allowing strategic pacing across multiple infiltration attempts.
Team collaboration further accelerates progression since squad members can collectively contribute deposited items toward individual challenge completion. While stronghold keycards represent relatively common loot finds, the elusive skeleton key may necessitate crafting via Buy Station barter systems using collected components.
Stage 2 Objectives – Achievement unlocks four armor plates at match commencement
Seasoned operators should prioritize dead drop locations based on spawn proximity and exfil route efficiency. The most strategically valuable dumpsters typically situate near central map areas with multiple access points, reducing travel time between objectives.
Common Strategic Errors: Many players underestimate the value of coordinating dead drop runs with regular loot collection routes. Attempting dedicated dead drop missions without secondary objectives often wastes valuable deployment opportunities. Additionally, neglecting to communicate specific keycard needs with teammates results in duplicated efforts and slowed progression.
For optimization, schedule dead drop activities during natural mission transitions or while moving between objective zones. Advanced players complete 60-70% of their dead drop requirements incidentally while pursuing other goals rather than through focused sessions.
The newly introduced Rebreather field upgrade provides underwater tactical advantages, particularly on maps with substantial aquatic areas like Ashika Island. Meanwhile, the self-revive kit proves invaluable for solo operators facing unexpected engagements without backup support.
Understanding upgrade interdependencies can significantly reduce overall completion time. Some equipment unlocks provide benefits that directly facilitate subsequent challenge requirements, creating efficient progression pathways when properly sequenced.
Action Checklist
- Access Upgrades menu via Mission Objectives tab before deployment
- Collect stronghold keycards during regular looting activities
- Coordinate with teammates for efficient skeleton key acquisition and dead drop coordination
- Identify optimal dead drop locations along natural travel routes
- Craft skeleton key at Buy Station if natural loot proves elusive
No reproduction without permission:SeeYouSoon Game Club » CoD: Warzone DMZ – How To Unlock Season 5 Rebreather, Extra Plates, And More Helpful Equipment Master DMZ Season 5 upgrades with expert strategies for armor plates and equipment unlocks