TL;DR
- NBA Templates provide real-player inspired starting points for all five positions
- Each position has specialized builds optimized for specific playstyles and team needs
- Badge selection and attribute balancing are crucial for maximizing build effectiveness
- Advanced customization allows for hybrid builds that can dominate multiple aspects of gameplay
- Proper attribute distribution and badge synergy separate elite builds from average ones
Discovering optimal player configurations for each basketball position can dramatically enhance your NBA 2K24 MyCareer experience. The game offers extensive customization freedom, but strategic build selection separates competitive players from casual ones.
When diving into MyCareer mode creation, many players feel overwhelmed by the sheer number of attribute combinations and badge options available. This comprehensive guide provides carefully crafted best MyPlayer builds specifically designed for next-generation console versions, ensuring you start with competitive advantages.
Understanding build fundamentals is essential before committing to any specific archetype. Each position demands different attribute priorities and badge combinations to excel in their respective roles.
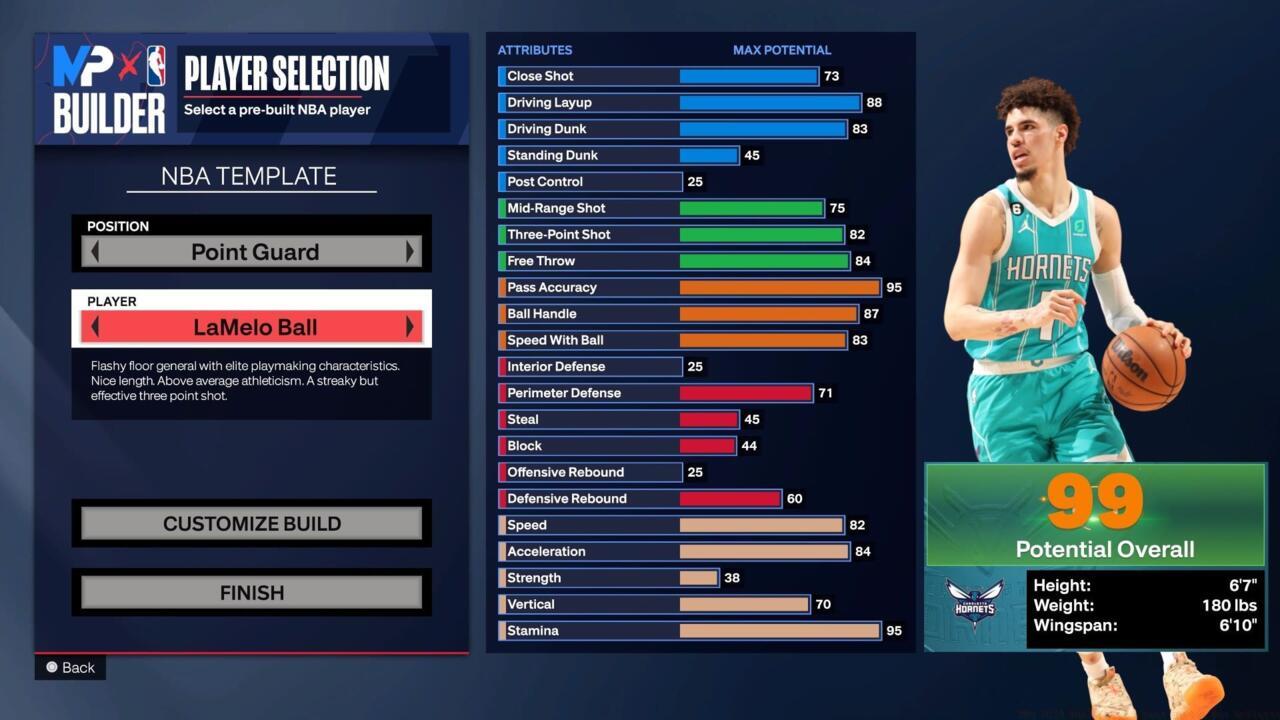
LaMelo Ball represents one of ten distinct template options available for Point Guard creations.
This year’s iteration introduces enhanced guidance through NBA Templates that model your player’s statistical foundation after actual professional athletes. These templates serve as excellent starting points for players who prefer not to manually configure every attribute from scratch.
After selecting your preferred NBA Template, you retain full customization control to adjust attributes according to your specific playstyle preferences. This system effectively bridges the gap between accessibility and deep customization.
Pro Tip: Always examine the badge distribution in templates before committing, as some provide better badge combinations than others for your intended playstyle.

The 3pt Shot Hunter archetype delivers exceptional offensive firepower combined with reliable defensive capabilities.
This Point Guard configuration enables significant impact on both ends of the court. You’ll consistently connect from beyond the arc while actively disrupting opponent possessions through steals and defensive pressure.
The primary limitation involves restricted driving dunk capabilities. Players who prioritize aggressive rim attacks should consider modifying this build to incorporate more finishing attributes.
This construction provides access to Gold-tier Deadeye, Glove, and Interceptor badges. For players seeking Gold Limitless Range, increasing Three-Point Shot to 96 while slightly reducing Steal rating represents a viable trade-off depending on individual preference.

These statistical distributions create the foundation for the 3pt Shot Hunter build.
- Perimeter Defense: 83
- Defensive Rebound: 41
Common Mistake: Many players overlook the importance of playmaking attributes in this build, limiting their ability to create separation for open shots.
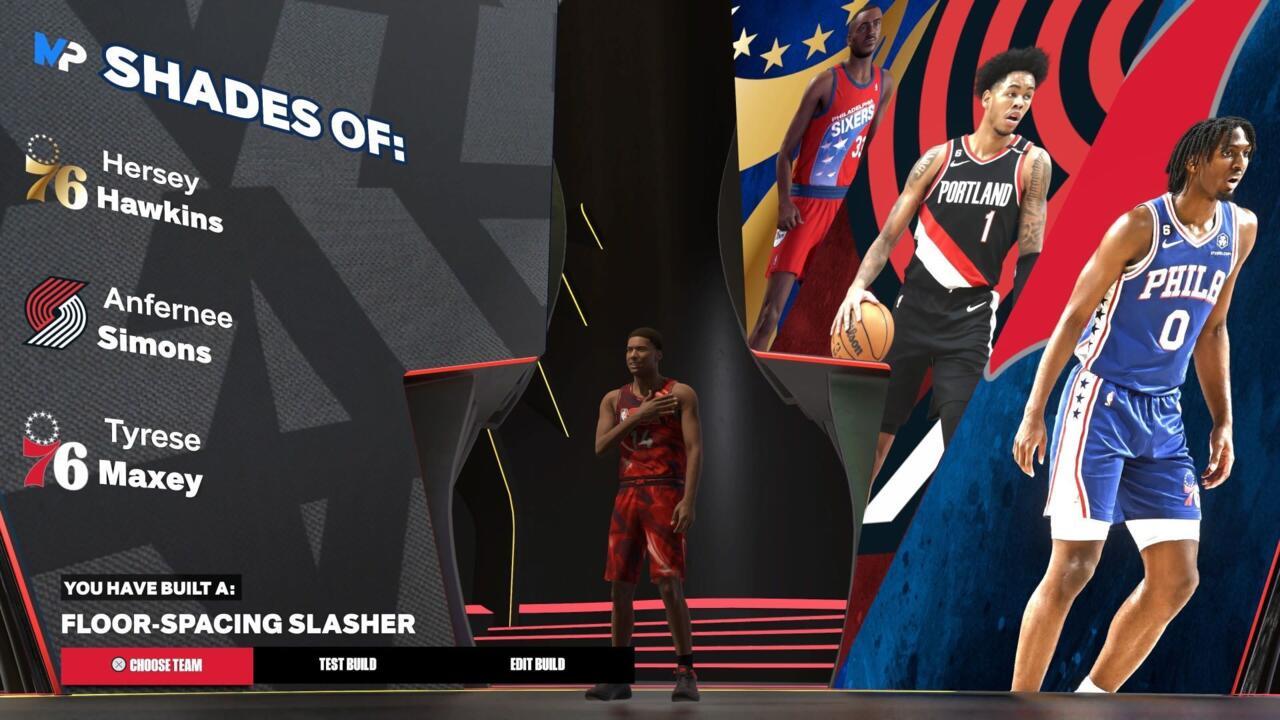
Floor-Spacing Slasher specializes in creating offensive chaos through lane penetration while maintaining outside shooting threats.
This Shooting Guard archetype excels at forcing defensive compromises. Defenders must respect your three-point capability while simultaneously preparing for explosive drives to the basket.
The ideal attribute distribution emphasizes driving layup and dunk ratings alongside respectable three-point shooting. This dual-threat approach makes you unpredictable and difficult to defend.
These statistical priorities establish the framework for an elite slashing Shooting Guard.
Advanced Technique: Master the hop step gather into a dunk animation to maximize finishing efficiency against interior defenders.

3 & D Threat Small Forwards deliver consistent two-way production through reliable perimeter defense and efficient outside shooting.
This Small Forward configuration provides balanced contributions across all game aspects. You’ll lockdown opposing wings while spacing the floor offensively.
The build prioritizes defensive attributes like perimeter defense and steal alongside three-point shooting. This combination makes you invaluable in modern NBA 2K24 team constructions.
These statistical benchmarks define the requirements for an effective two-way Small Forward threat.
Optimization Tip: Balance your physical attributes carefully—adequate speed and acceleration are crucial for defending quicker guards.
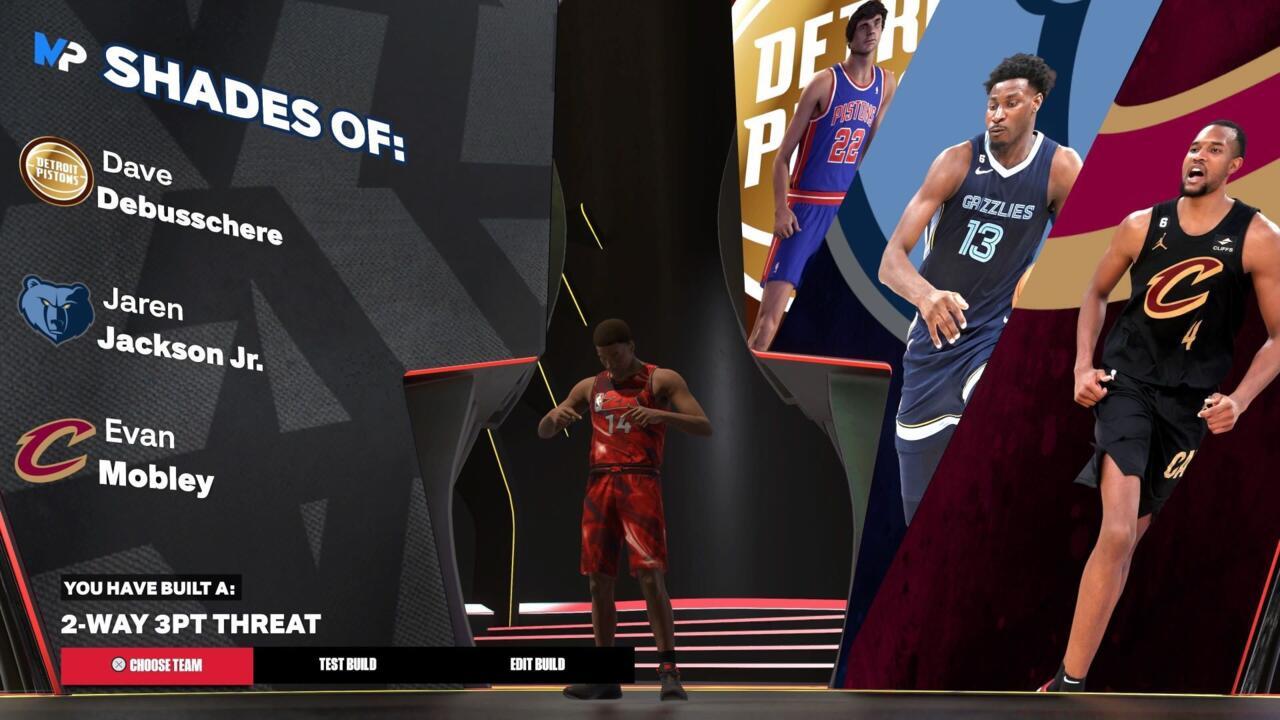
This Power Forward archetype channels the modern big man versatility exemplified by players like Jaren Jackson Jr.
The 2-Way 3pt Threat Power Forward combines interior defensive presence with reliable perimeter shooting, creating matchup nightmares for traditional big men.
Focus on developing both defensive and offensive capabilities simultaneously. You’ll protect the rim while stretching defenses with your shooting range.
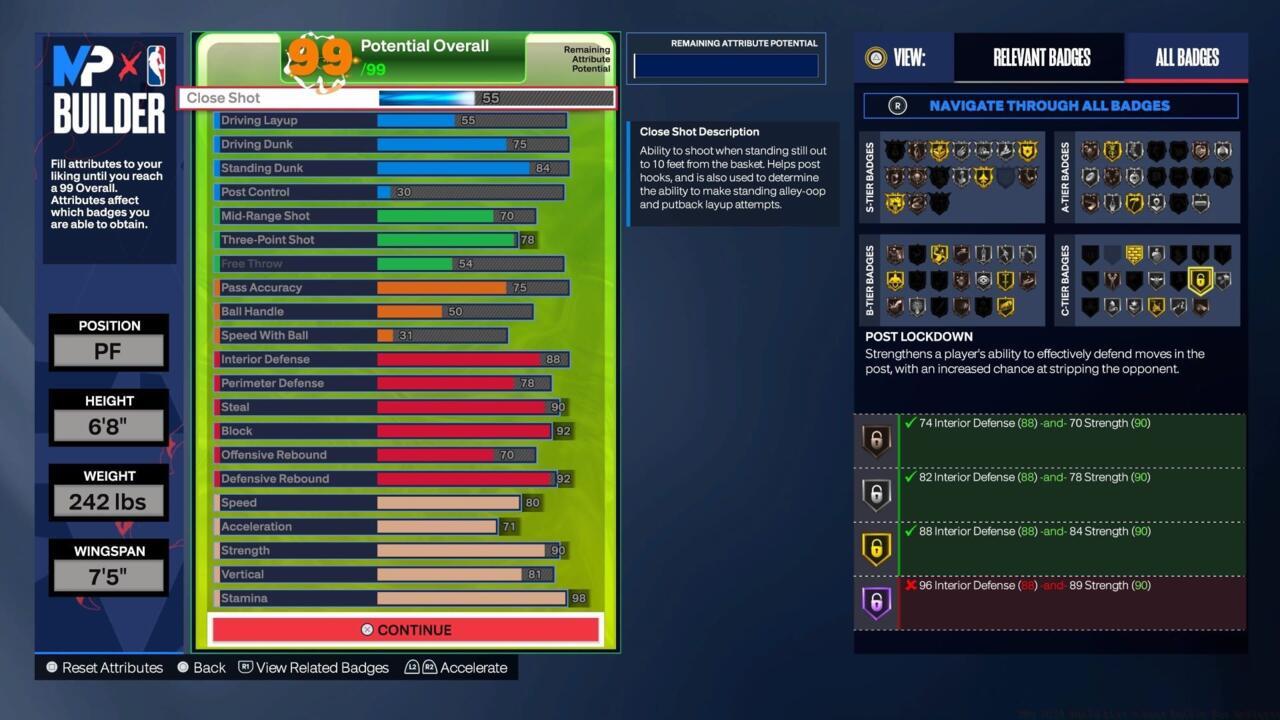
Concentrate on these statistical areas to construct an effective two-way three-point shooting Power Forward.
Strategic Insight: Use your shooting threat to draw opposing big men away from the paint, creating driving lanes for teammates.
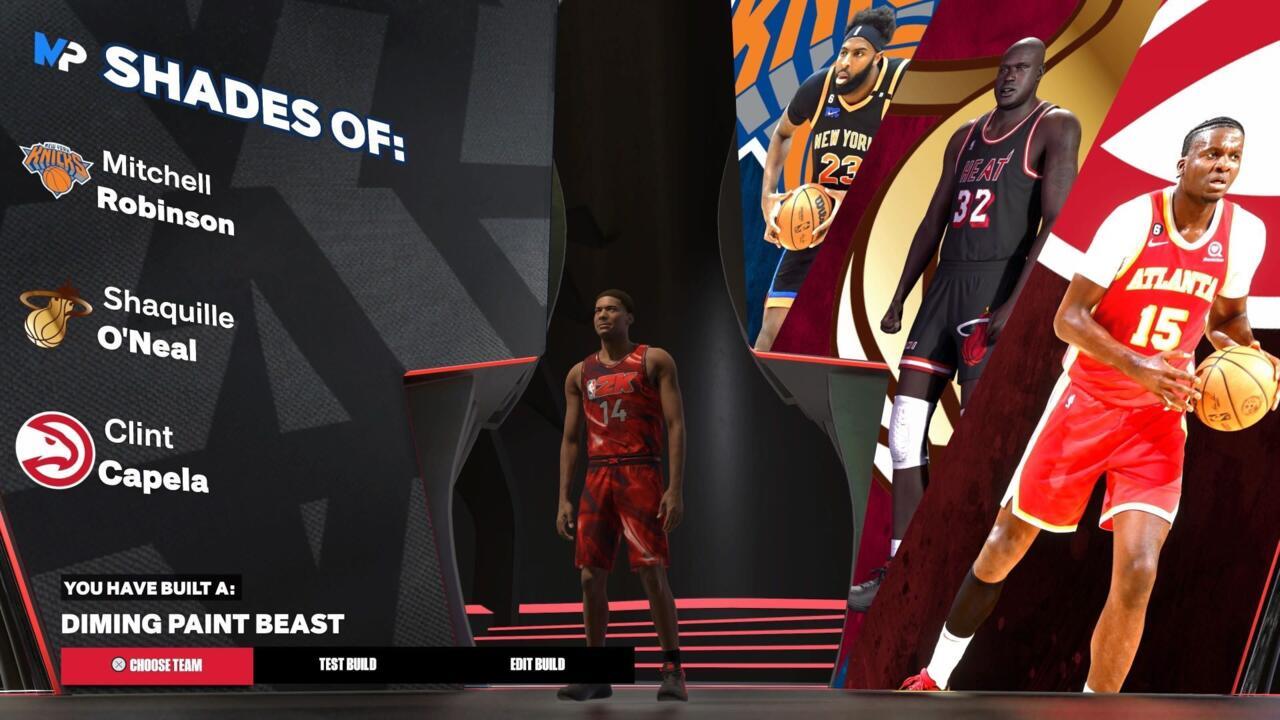
This Center configuration embodies the playmaking big man archetype with dominant interior presence.
The Diming Paint Beast Center dominates the painted area while facilitating offense through exceptional passing vision and ability.
This build emphasizes traditional center strengths—rebounding, interior defense, and post scoring—while incorporating modern playmaking elements.
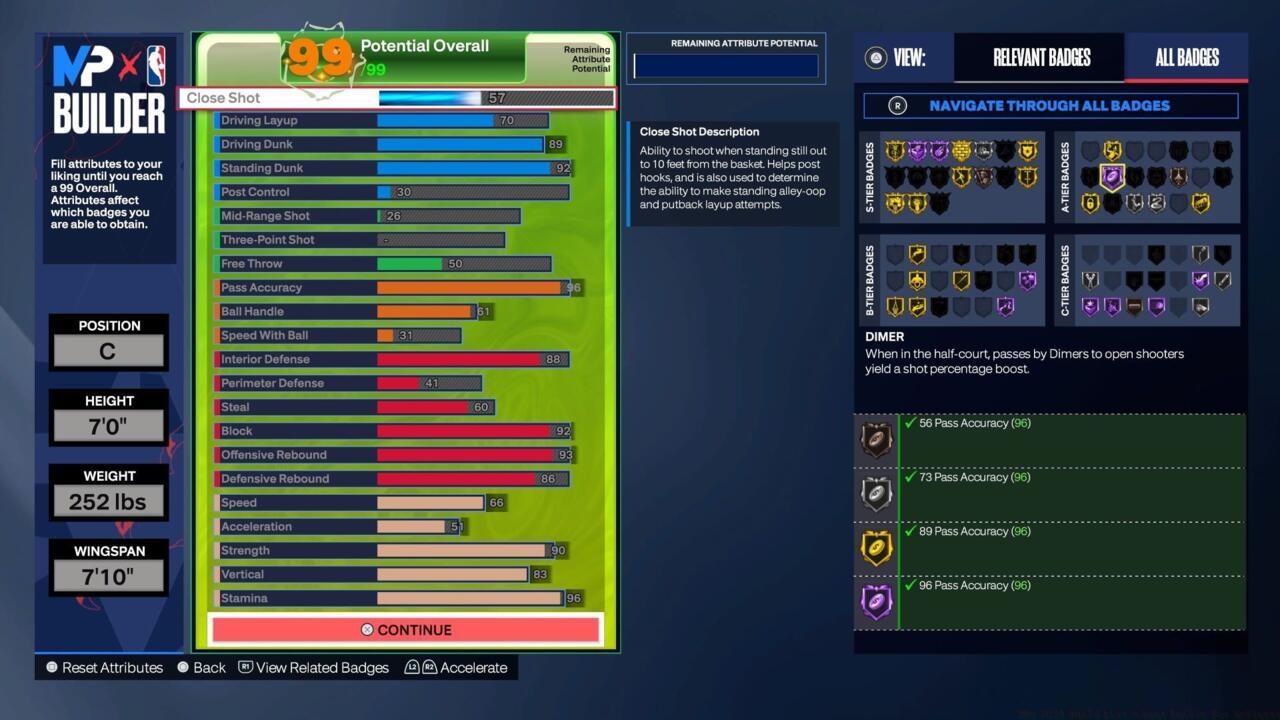
Allocate resources into playmaking attributes to develop your complete Diming Paint Beast Center.
Pro Advice: Master the art of the outlet pass after defensive rebounds to initiate fast breaks and create easy scoring opportunities.
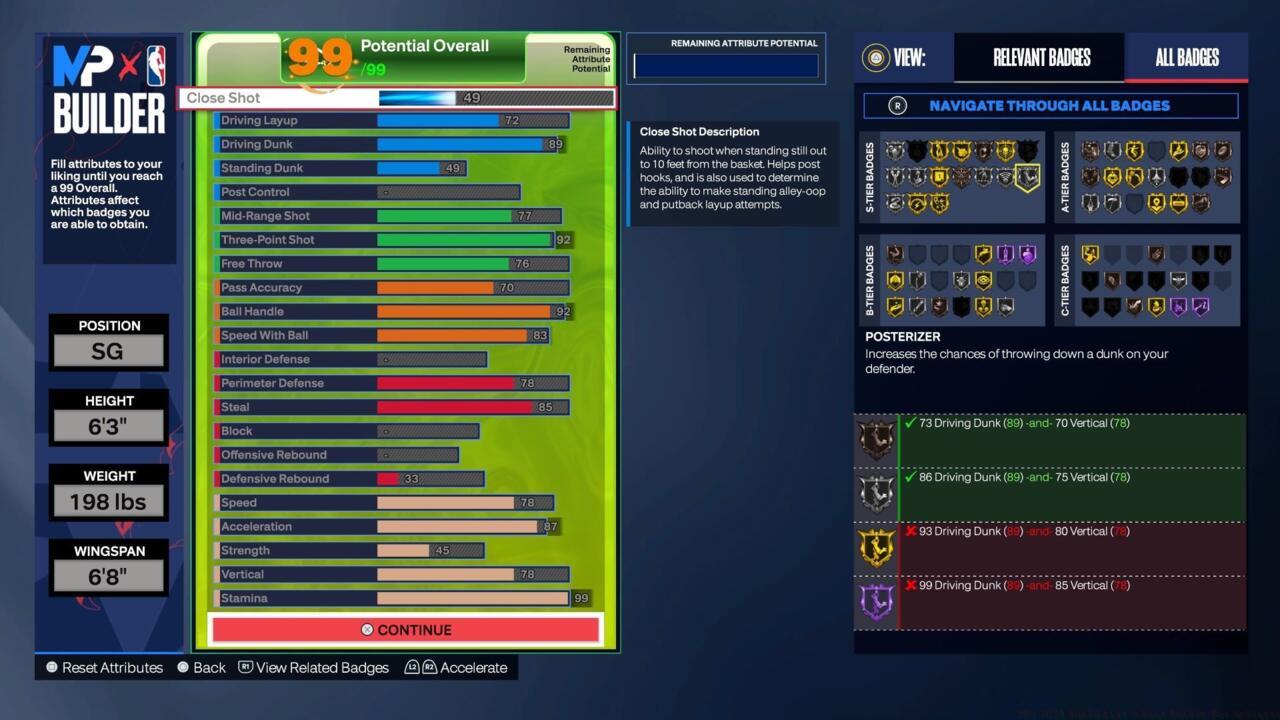
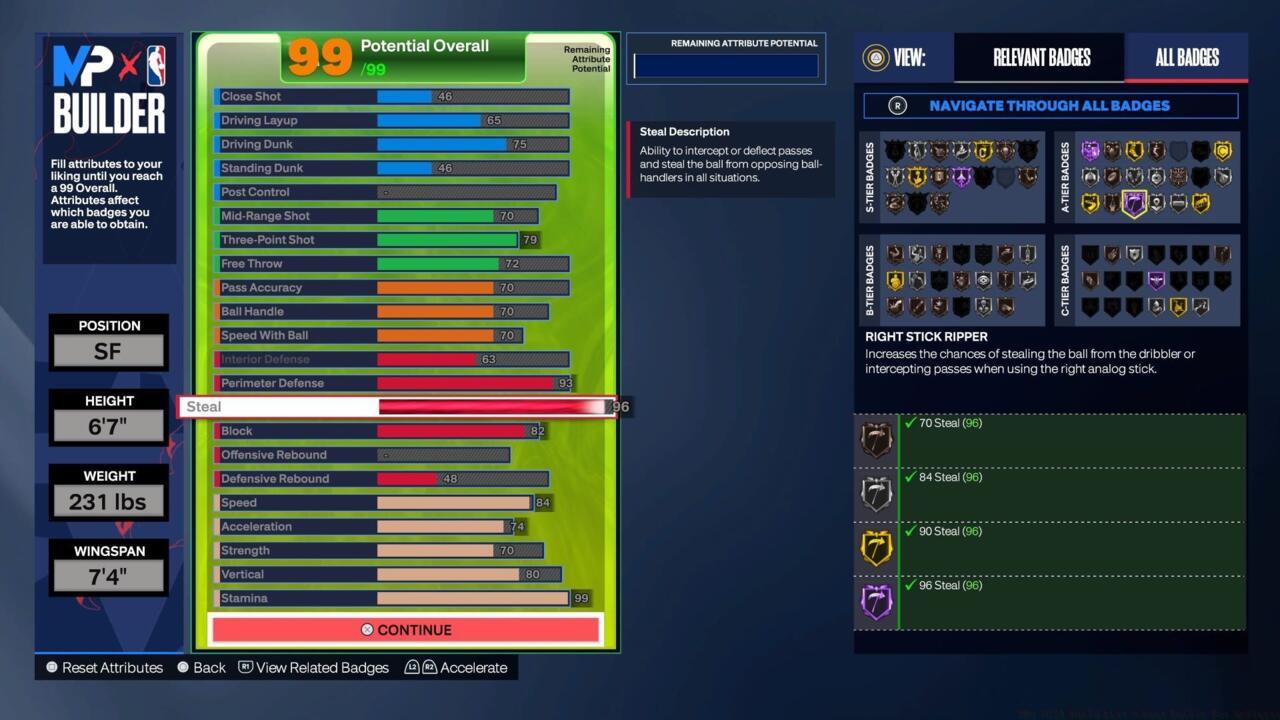
Beyond basic attribute distribution, elite players understand the critical importance of badge synergy and attribute prioritization. Certain badge combinations dramatically enhance specific playstyles.
Badge Optimization: Always consider how your badges interact with your primary attributes. For example, Glove becomes significantly more effective with higher steal ratings.
Common Pitfalls: Many players spread their attribute points too thinly across multiple categories, resulting in a jack-of-all-trades but master-of-none scenario.
Time Investment: Plan for approximately 2-3 hours of gameplay testing to properly evaluate any new build configuration.
For comprehensive gaming strategies beyond MyPlayer creation, explore our Battlefield 6 Complete Guide for detailed tactical approaches.
Creating effective MyPlayer builds requires understanding both positional requirements and personal playstyle preferences. The builds presented here provide excellent foundations that can be customized further based on individual needs.
Remember that successful builds complement your natural playing tendencies while addressing team composition needs. Continuously refine your approach as you gain more gameplay experience.
For players interested in weapon systems and class selection in other titles, check out our BF6 Weapons Unlock Guide and BF6 Class Selection Guide for additional gaming insights.
Action Checklist
- Analyze your preferred playstyle and identify which attributes will maximize your effectiveness
- Select appropriate NBA Template as foundation, examining badge distributions carefully
- Customize attribute distribution based on position-specific recommendations
- Test your build in MyCareer or practice modes for 2-3 hours
- Refine badge selections and attribute balances based on gameplay performance
- Share your build with community forums for additional optimization suggestions
No reproduction without permission:SeeYouSoon Game Club » NBA 2K24 Build List – Best Builds For MyPlayer Master NBA 2K24 MyPlayer creation with expert builds for every position and advanced customization strategies