TL;DR
- Artifacts function as spell-like abilities with three equip slots and individual cooldown timers
- Power levels scale artifact effectiveness, with higher-level versions providing significant damage and utility boosts
- Strategic artifact combinations create powerful synergies that can overcome challenging dungeon encounters
- Effective cooldown management through rotation and timing is crucial for sustained combat performance
- Targeted farming methods and understanding drop mechanics accelerate artifact acquisition
Minecraft Dungeons represents a dramatic departure from its block-building origins, transforming into an action-packed dungeon crawler with isometric combat. While it retains the familiar Minecraft aesthetic, the gameplay shifts focus from creative construction to tactical combat against hordes of enemies. The artifact system stands as one of the most significant mechanical innovations, offering players powerful abilities that can turn the tide of battle.
This comprehensive guide explores artifact mechanics in depth, covering acquisition methods, strategic selection criteria, and advanced cooldown management. We’ve enhanced the original artifact table with practical usage notes to help you make informed decisions about your loadout.
While artifacts share magical themes with enchantments, they operate through entirely separate systems. For players new to the game, we recommend consulting our beginner’s guide before diving into artifact optimization. Advanced players will find value in our weapon unlock strategies and class specialization guides to complement their artifact choices.
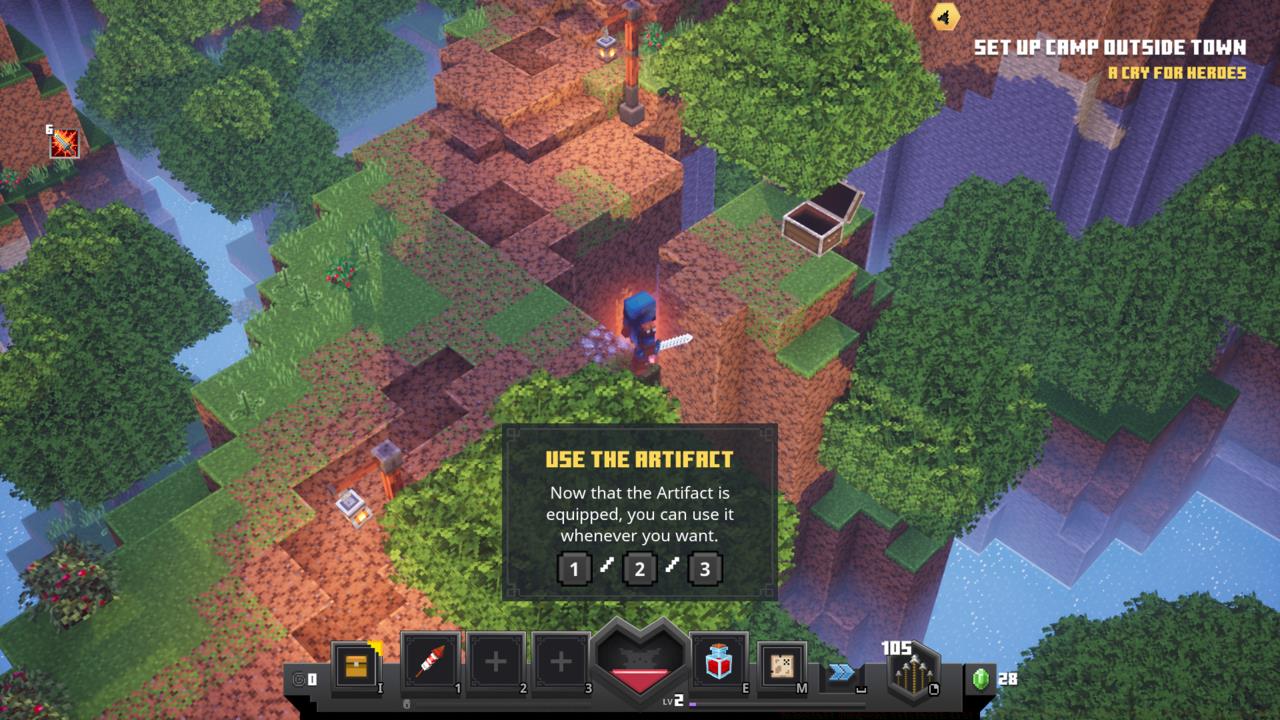
Artifacts in Minecraft Dungeons serve as your primary active abilities, functioning similarly to spells in traditional role-playing games. You can equip three artifacts simultaneously, creating a versatile toolkit for handling diverse combat scenarios. Each artifact enters a cooldown state after activation, temporarily disabling it until the timer expires—though some artifacts feature remarkably brief recovery periods that enable frequent usage.
The power scaling system determines artifact effectiveness, with higher power levels delivering substantially improved performance. For instance, a level 5 Tasty Bone might summon a wolf dealing 20 summon damage, while a level 20 version could exceed 45 damage. As you advance through difficulty levels, artifacts discovered in chests and from defeated enemies progressively increase in power, ensuring your abilities remain relevant throughout your adventure.

Understanding artifact interactions with your weapon choices and armor abilities creates powerful synergies. For example, soul-based artifacts like Lightning Rod benefit tremendously from armor that increases soul gathering, while attack-speed artifacts pair exceptionally well with fast-hitting weapons. This depth of strategic combination separates novice players from dungeon-crawling experts.
Artifacts appear naturally throughout your Minecraft Dungeons journey, meaning you don’t need to dedicate extensive time specifically hunting for them. However, players seeking specific artifacts or upgraded versions can employ targeted farming techniques to accelerate their acquisition.
The most reliable artifact sources include dungeon chests, boss defeats, and occasional enemy drops. Higher difficulty settings significantly improve both drop rates and power levels, making adventure and apocalypse modes essential for end-game optimization. Specific bosses have higher chances to drop particular artifacts, allowing focused farming for desired abilities.
Common mistakes include overlooking artifact potential in early game or failing to upgrade artifacts matching your current power level. Many players mistakenly discard lower-level artifacts without considering their utility in specific situations or their potential for future upgrades through blacksmith services.
Optimal artifact selection depends heavily on your playstyle, current equipment, and the specific challenges you’re facing. Defensive builds benefit tremendously from Iron Hide Amulet and Totem of Shielding, while aggressive players may prefer Death Cap Mushroom combined with high-damage weapons.
For crowd control situations, artifacts like Wind Horn and Shock Powder provide invaluable breathing room. Soul-based builds should prioritize Harvester and Lightning Rod, especially when paired with soul-gathering armor. Understanding these synergies dramatically improves your combat effectiveness.
Advanced players should consider creating situational loadouts for specific dungeon types. Narrow corridors favor artifacts with piercing or area effects, while open spaces benefit from summoning artifacts that create additional combatants. The most overlooked strategy involves tailoring your artifact selection to counter specific enemy types and boss mechanics.
Many players make the critical error of using artifacts reactively rather than proactively. The most successful dungeon crawlers plan their artifact usage around anticipated encounters, positioning themselves optimally before activation to maximize effectiveness.
Effective cooldown management separates competent players from dungeon masters. The key principle involves staggering artifact activations to maintain constant ability availability rather than using all three simultaneously.
Soul-based artifacts like Corrupted Beacon and Lightning Rod operate outside traditional cooldown systems, instead consuming soul energy. These become incredibly powerful in builds focused on soul collection, potentially allowing near-continuous usage during intense combat sequences.
Develop the habit of tracking cooldown states during combat, prioritizing artifacts with shorter recovery times for frequent use while reserving longer cooldown abilities for critical moments.
A common pitfall involves saving powerful artifacts for “perfect” situations that never arrive. It’s generally more effective to use abilities regularly rather than hoarding them for hypothetical scenarios. Practice timing your artifact rotations to create overlapping windows of advantage.
| Artifact | Cooldown | In-Game Description & Strategic Notes |
|---|---|---|
| Boots of Swiftness | 5 seconds | Provides brief movement speed enhancement – Excellent for kiting tough enemies or repositioning during boss fights |
| Corrupted Beacon | N/A (based on souls) | Emits high-intensity beam dealing continuous damage to enemies – Best paired with soul gathering equipment |
| Death Cap Mushroom | 30 seconds | Significantly boosts attack speed and movement velocity – Essential for damage-focused builds |
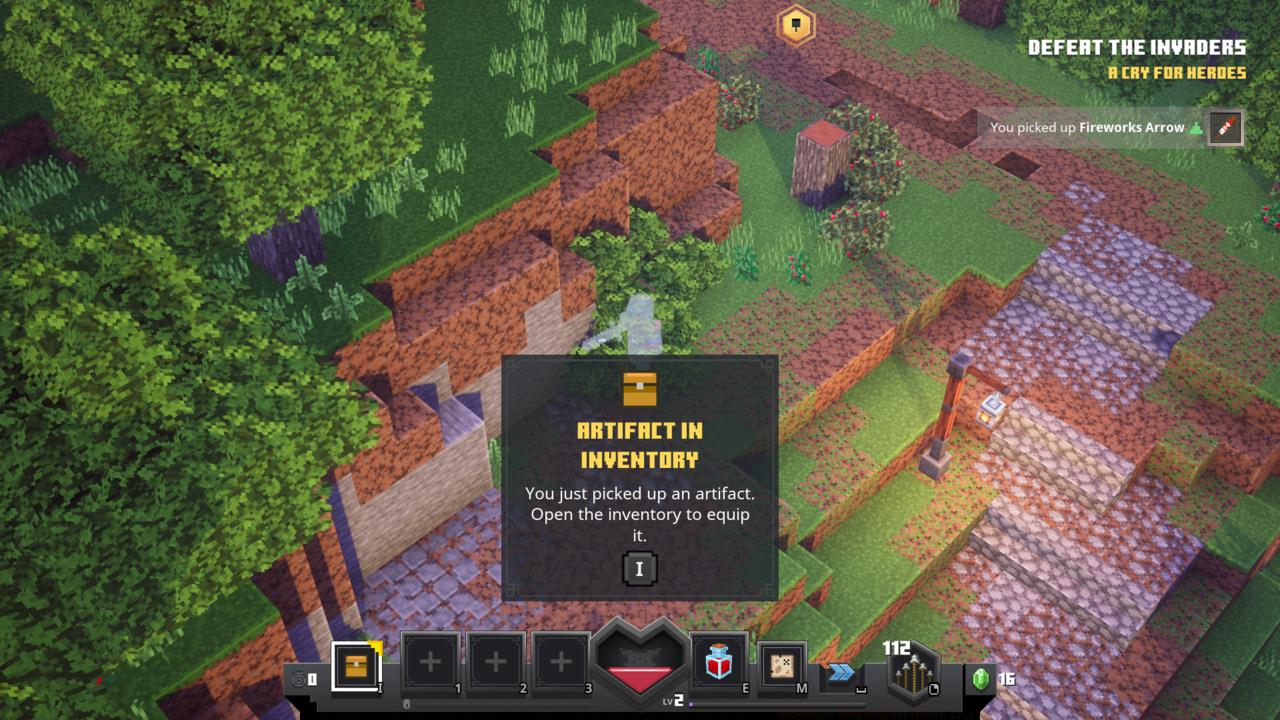
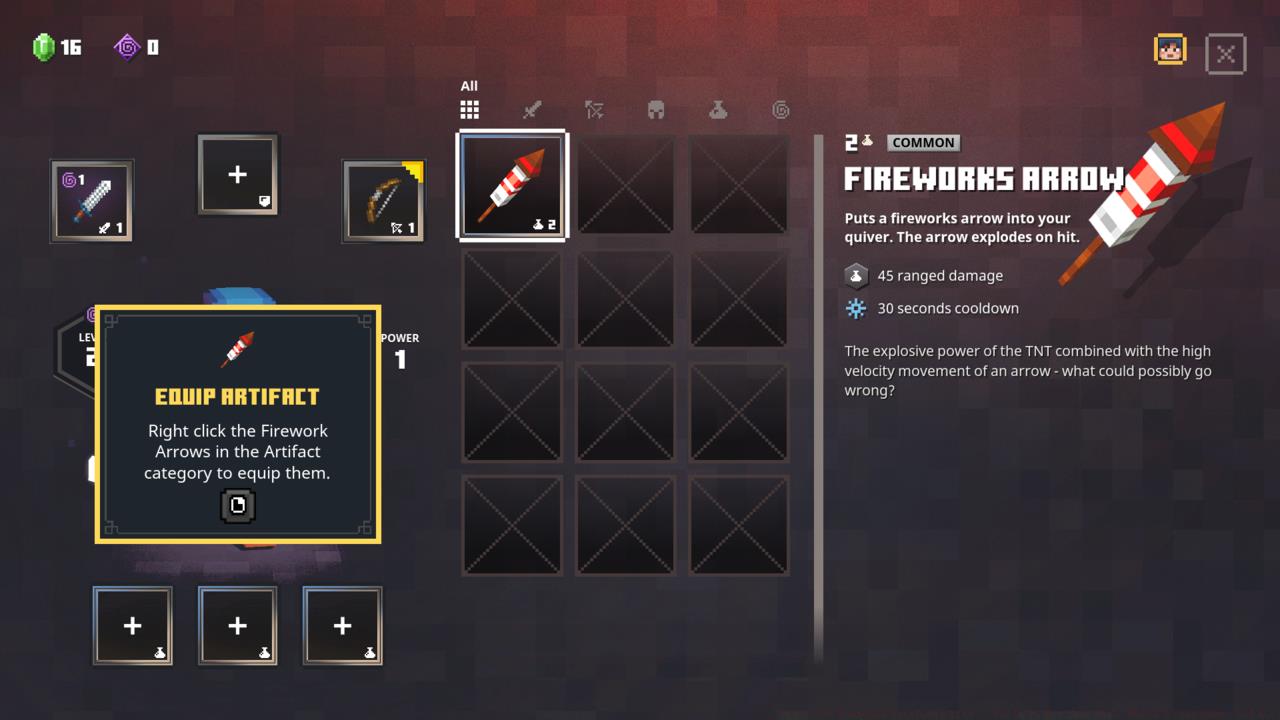
| Fireworks Arrow | 30 seconds | Adds explosive firework arrow to quiver that detonates on impact – Perfect for clearing grouped enemies |
| Fishing Rod | 5 seconds | Drags nearest enemy within range to your location while briefly stunning them – Excellent for isolating priority targets |
| Flaming Quiver | 30 seconds | Grants incendiary arrows that set targets ablaze – Highly effective against clusters of weaker enemies |
| Ghost Cloak | 6 seconds | Temporarily enter spectral form to pass through enemies and mitigate incoming damage – Crucial escape tool |
| Golem Kit | 30 seconds | Conjures Iron Golem ally to assist in combat – Provides valuable distraction and additional damage |
| Harvester | 1 second | Releases accumulated souls in destructive area explosion – Scales powerfully with soul collection |
| Iron Hide Amulet | 25 seconds | Offers substantial defensive enhancement for limited duration – Vital survival tool for melee builds |
| Light Feather | 3 seconds | Enables aerial tumble that stuns and repels encountered enemies – Excellent mobility and crowd control |
| Lightning Rod | N/A (based on souls) | Expends soul energy to summon lightning strike on targeted area – High burst damage option |
| Love Medallion | 30 seconds | Converts up to three hostile creatures into temporary allies for ten seconds before they vanish – Exceptional for reducing incoming damage |
| Shock Powder | 15 seconds | Stuns adjacent enemies – Perfect emergency button when surrounded |
| Soul Healer | 1 second | Restores health to most wounded nearby ally including yourself – Essential support ability |
| Tasty Bone | 30 seconds | Summons wolf companion to fight alongside you – Reliable additional damage source |
| Torment Quiver | 1 second | Provides slowing arrows that repel enemies and penetrate obstacles – Excellent control tool |
| Totem of Regeneration | 25 seconds | Creates healing aura totem that regenerates health for you and allies – Cornerstone of group survival |
| Totem of Shielding | 20 seconds | Erects mystical barrier that protects surrounding allies from projectile attacks – Counters ranged-heavy encounters |
| Wind Horn | 10 seconds | Repels enemies away from you while briefly slowing them – Excellent defensive positioning tool |
| Wonderful Wheat | 30 seconds | Summons llama ally to join battle – Provides ranged support and distraction |
Action Checklist
- Experiment with different artifact combinations across three equipment slots to discover synergies
- Identify your preferred playstyle and select artifacts that complement it
- Practice cooldown rotation by staggering artifact usage rather than simultaneous activation
- Farm specific bosses on higher difficulties to target desired artifact upgrades
- Create situational loadouts tailored to specific dungeon types and enemy compositions
No reproduction without permission:SeeYouSoon Game Club » Minecraft Dungeons Artifacts List — Guide To How They Work, Where To Get Them, And More Master Minecraft Dungeons artifacts: acquisition strategies, optimal builds, and cooldown management techniques