TL;DR
- The Breaker Box provides critical utility functions but creates dead ends in room drafting
- Five dial controls manage key systems: Keycard bypass, Gym step saving, Dark Room lighting, Garage access, and secret Cabinet
- Strategic placement in corners maximizes utility while minimizing drafting limitations
- The puzzle requires collecting clues from specific rooms before activation
- Proper dial sequence management can save 15-20 steps per run when optimized
GameSpot may receive revenue from affiliate and advertising partnerships for sharing this content and from purchases through links.
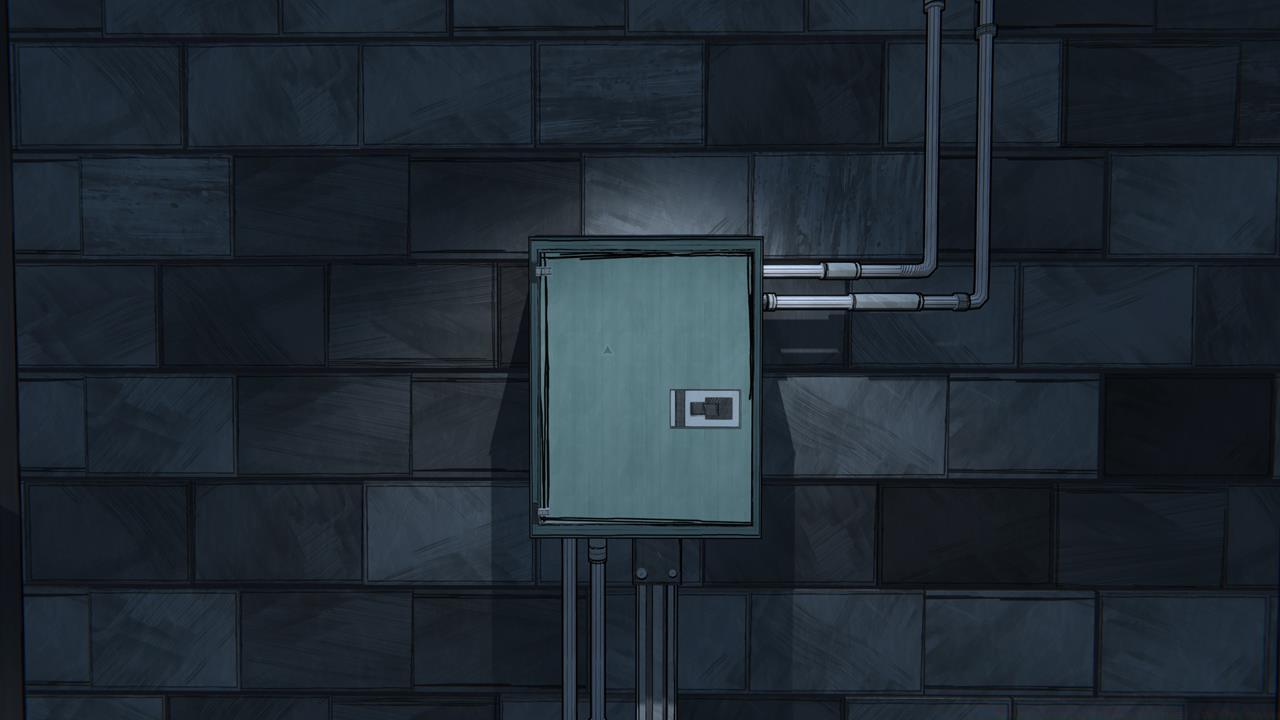
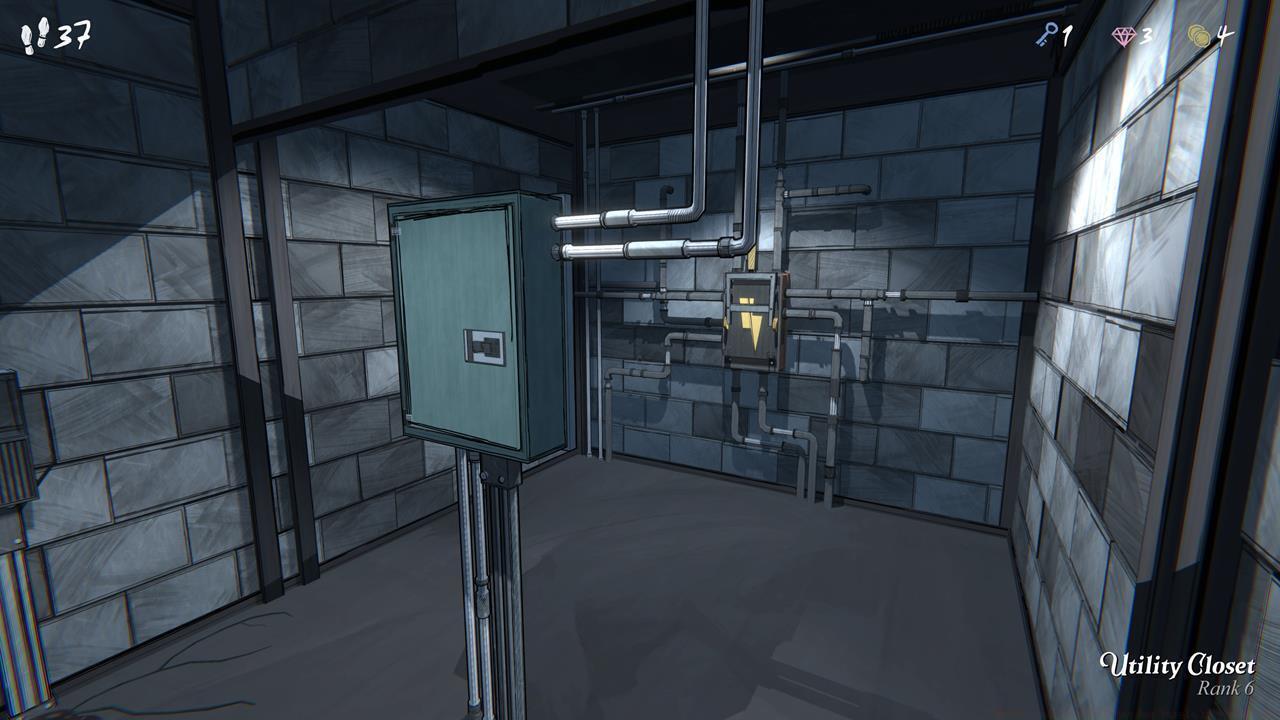
Are you struggling to master the Breaker Box mechanism in Blue Prince? Located within the compact Utility Closet, this electrical control panel offers some of the most valuable functionality available throughout your exploration runs. Beyond its apparent capabilities, it conceals a hidden secret waiting to be uncovered by observant players.
The Utility Closet containing the Breaker Box appears frequently during room drafting sequences. However, its primary drawback stems from being a terminal endpoint – no additional rooms can branch from this location. This architectural constraint means careful positioning becomes essential for maximizing its benefits while minimizing route limitations.
When drafting the Utility Closet, prioritize corner placements where the dead-end nature causes minimal disruption to your overall mansion layout. Strategic positioning allows you to access the Breaker Box functions without sacrificing valuable exploration pathways.
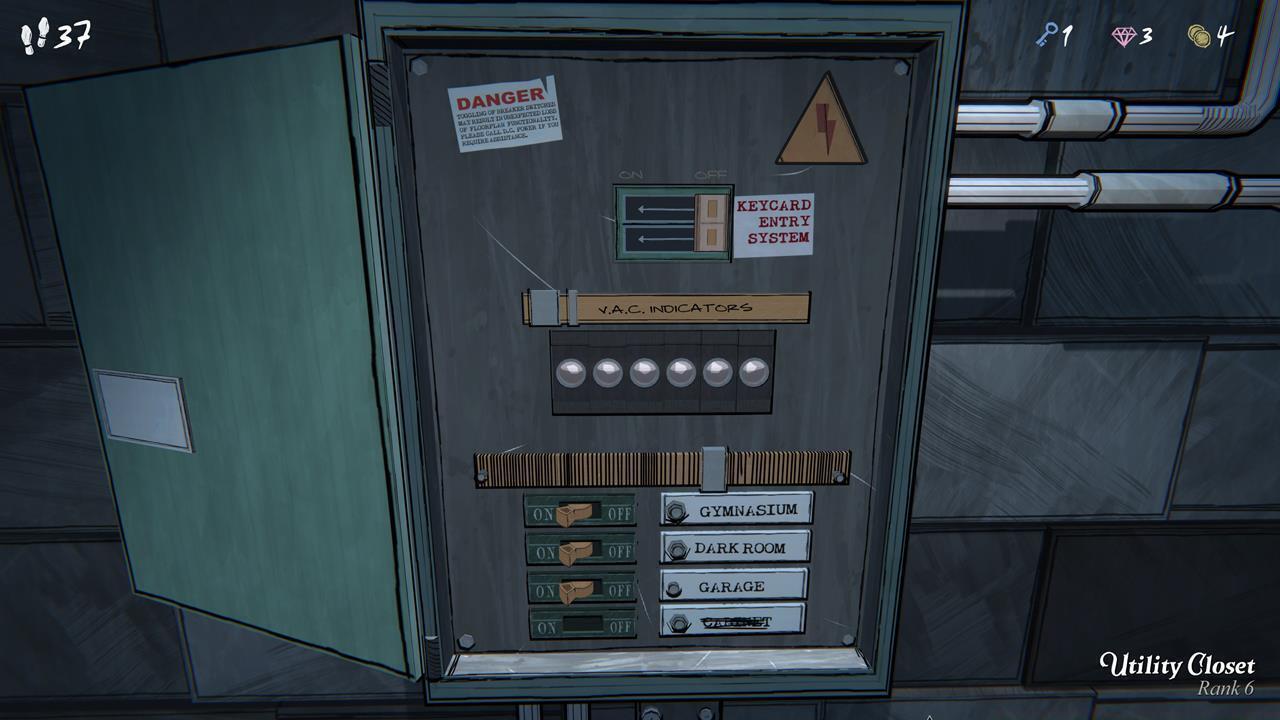
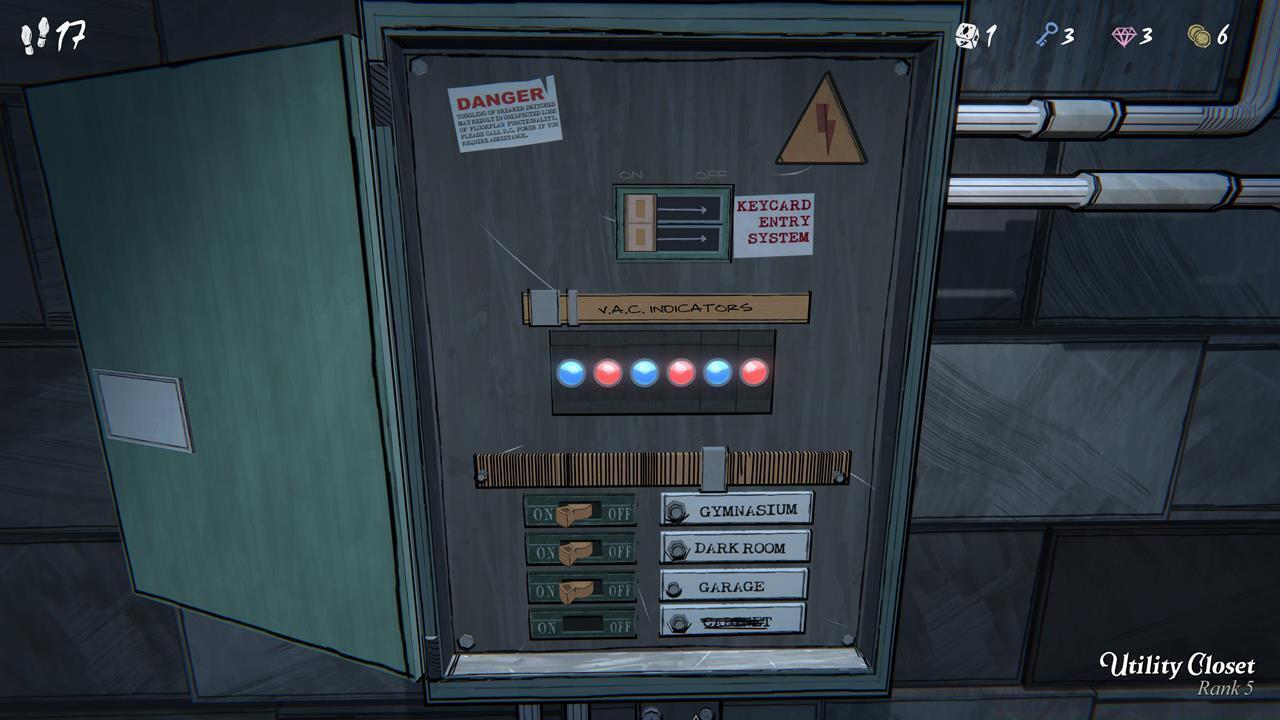
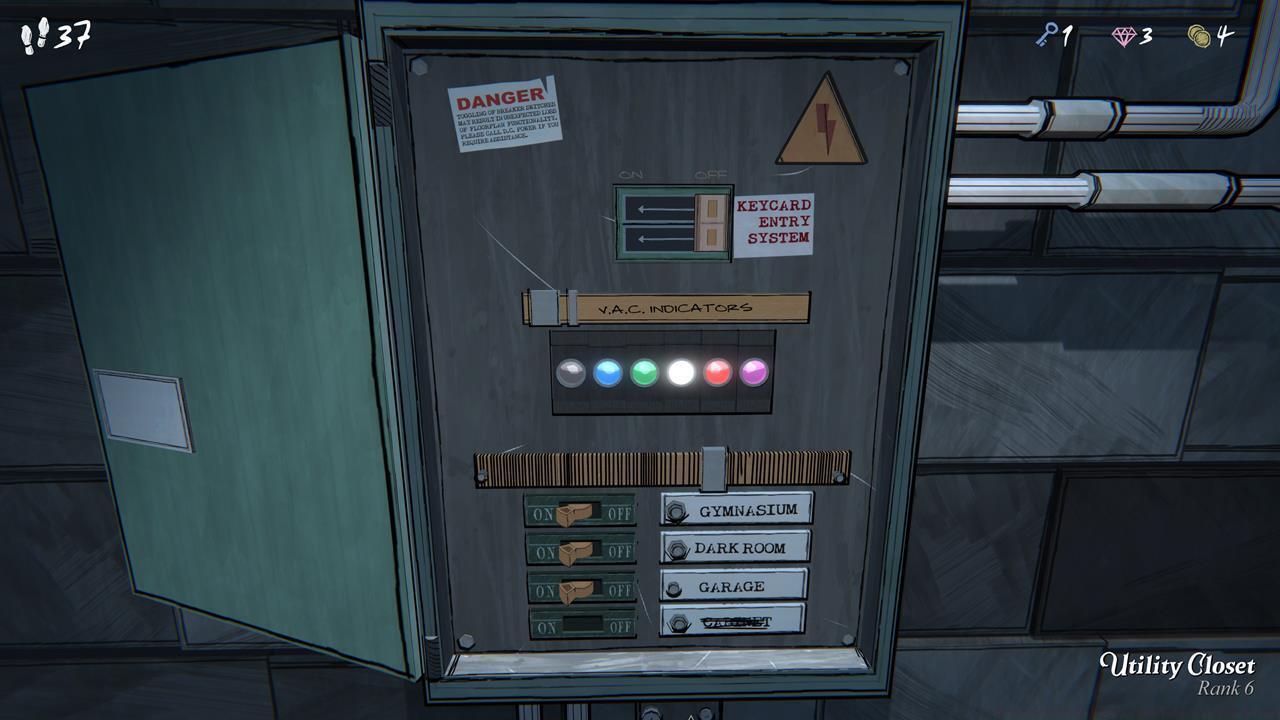
The Breaker Box interface features five distinct toggle switches, each governing different mansion systems. Understanding their individual functions and optimal activation timing significantly enhances your exploration efficiency.
- Keycard Entry System – Disabling this function allows you to bypass sealed metal doors entirely, eliminating Keycard requirements. This can save substantial inventory space and streamline progression through secured areas.
- Gymnasium – Normally, entering the Gymnasium costs 2 movement steps. By deactivating the lights via the Breaker Box, you neutralize this penalty entirely, preserving your limited step resources.
- Dark Room – This control illuminates the Dark Room, though with an important caveat: the lights automatically extinguish upon initial entry regardless of Breaker Box settings. You must return to reactivate them, after which you can clearly view drafting options and potentially discover clues related to the Campsite/Orchard Gate.
- Garage – Opening the Garage Doors requires this switch activation. Similar to the Dark Room, the doors automatically close upon first entry, necessitating a return trip to the Breaker Box if drafted earlier. Successfully opening them provides access to the West Gate area.
- Cabinet – This dial connects to an end-game secret sequence. We’ll preserve the discovery experience by avoiding spoilers, but note that its function becomes crucial during later gameplay stages.
Beyond its standard functions, the Breaker Box conceals a sophisticated puzzle that rewards successful solvers with permanent upgrades. Understanding the activation requirements and solution process transforms this utility item into a game-changing asset.
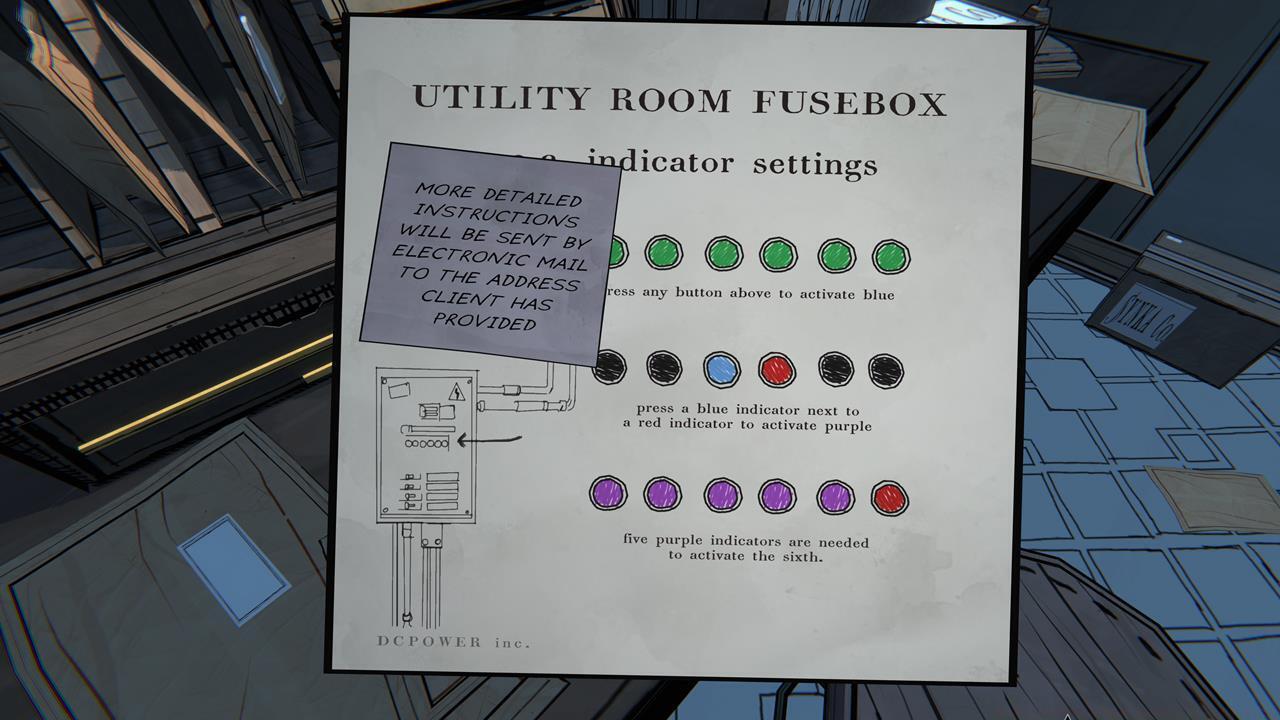

The puzzle activates only after you’ve collected specific clues from the Mail Room and Office locations. These clues provide essential codes and sequence information necessary for proper Breaker Box configuration. Missing either clue renders the puzzle unsolvable during that run.
Optimal solving requires visiting the Utility Closet twice: first to establish baseline functions, then later after clue collection to input the correct sequence. Plan your route accordingly to accommodate this backtracking requirement without exhausting your step count.
Successful puzzle completion typically requires 3-5 attempts for most players, as the solution involves both spatial reasoning and careful observation of environmental patterns.
Many players undermine their Breaker Box effectiveness through avoidable errors. Recognizing these pitfalls and implementing optimization strategies dramatically improves your success rate and resource conservation.
Avoid drafting the Utility Closet too early – Placing it before accessing key areas like the Garage or Dark Room wastes its potential. Wait until you’ve identified which functions will provide the most immediate benefit.
Manage your step economy carefully – The need to return to the Breaker Box after visiting controlled rooms can consume 4-6 extra steps per activation. Bundle your Breaker Box usage to minimize backtracking.
Prioritize Gymnasium control for step conservation – If you plan multiple Gym visits, disabling the step penalty can save 10+ steps per run, significantly extending your exploration capabilities.
Advanced players should note that the Breaker Box puzzle solution remains consistent across runs once discovered, making subsequent completions much faster. Documenting the correct sequence saves considerable time in future attempts.
For comprehensive strategies on mansion exploration and resource management, consult our Complete Guide to master all gameplay systems.
Action Checklist
- Draft Utility Closet in corner positions to minimize dead-end impact
- Collect Mail Room and Office clues before attempting the puzzle
- Activate Gymnasium control when planning multiple visits to conserve steps
- Bundle Breaker Box usage to minimize backtracking and step waste
- Document puzzle solution for consistent future completion
No reproduction without permission:SeeYouSoon Game Club » How To Solve The Breaker Box Puzzle In Blue Prince Master the Breaker Box puzzle in Blue Prince with strategic utility closet placement and dial optimization