TL;DR
- The gnome appears immediately in Chapter 3 and requires systematic pursuit through multiple hiding spots
- Use companion assistance for door opening and precise arrow shots for bottle destruction
- Strategic cart positioning enables ladder access to continue the chase sequence
- The gnome ultimately leads to a button that activates the essential light bulb puzzle
- Complete the circuit puzzle to power the elevator and progress through Carnevale
How to locate the essential lightbulb and energize the elevator mechanism in Chapter 3 of Little Nightmares 3
Pursuing the elusive gnome throughout Little Nightmares 3 presents a substantial obstacle, as this miniature character consistently evades capture by concealing himself or rapidly retreating when you draw near. Persistence proves crucial, since securing his cooperation becomes mandatory for resolving the illumination enigma within Chapter 3, Carnevale. Successfully completing this electrical conundrum subsequently enables elevator operation.
Discover the comprehensive methodology for apprehending the gnome throughout Little Nightmares 3, deciphering the light bulb configuration, and initiating the Chapter 3 elevator system.
Expert players recommend approaching this sequence with patience, as rushed movements often trigger unnecessary escapes. The gnome’s behavior follows predictable patterns that can be mastered through observation. Understanding the level layout beforehand significantly reduces completion time, with experienced players typically finishing this section in 8-12 minutes.
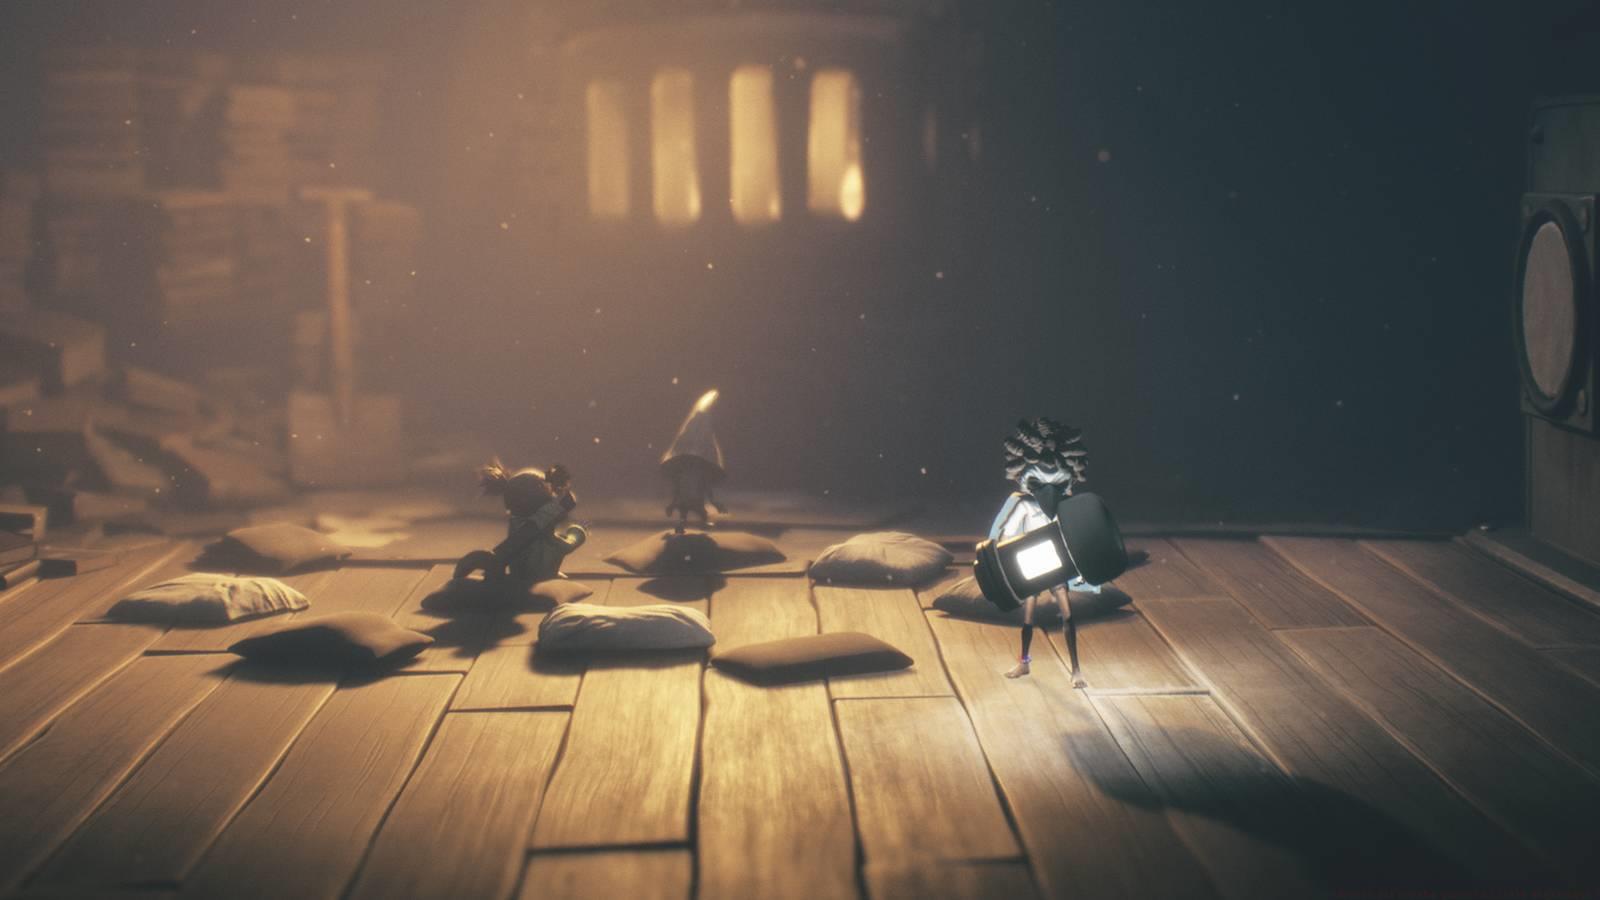
The gnome materializes inside the introductory chamber of Chapter 3, Carnivale, ensuring you cannot overlook his presence. When he dashes into the subsequent area, summon your partner for elevation assistance to unlock the doorway (while remaining vigilant for the concealed bear trap positioned at the rear).
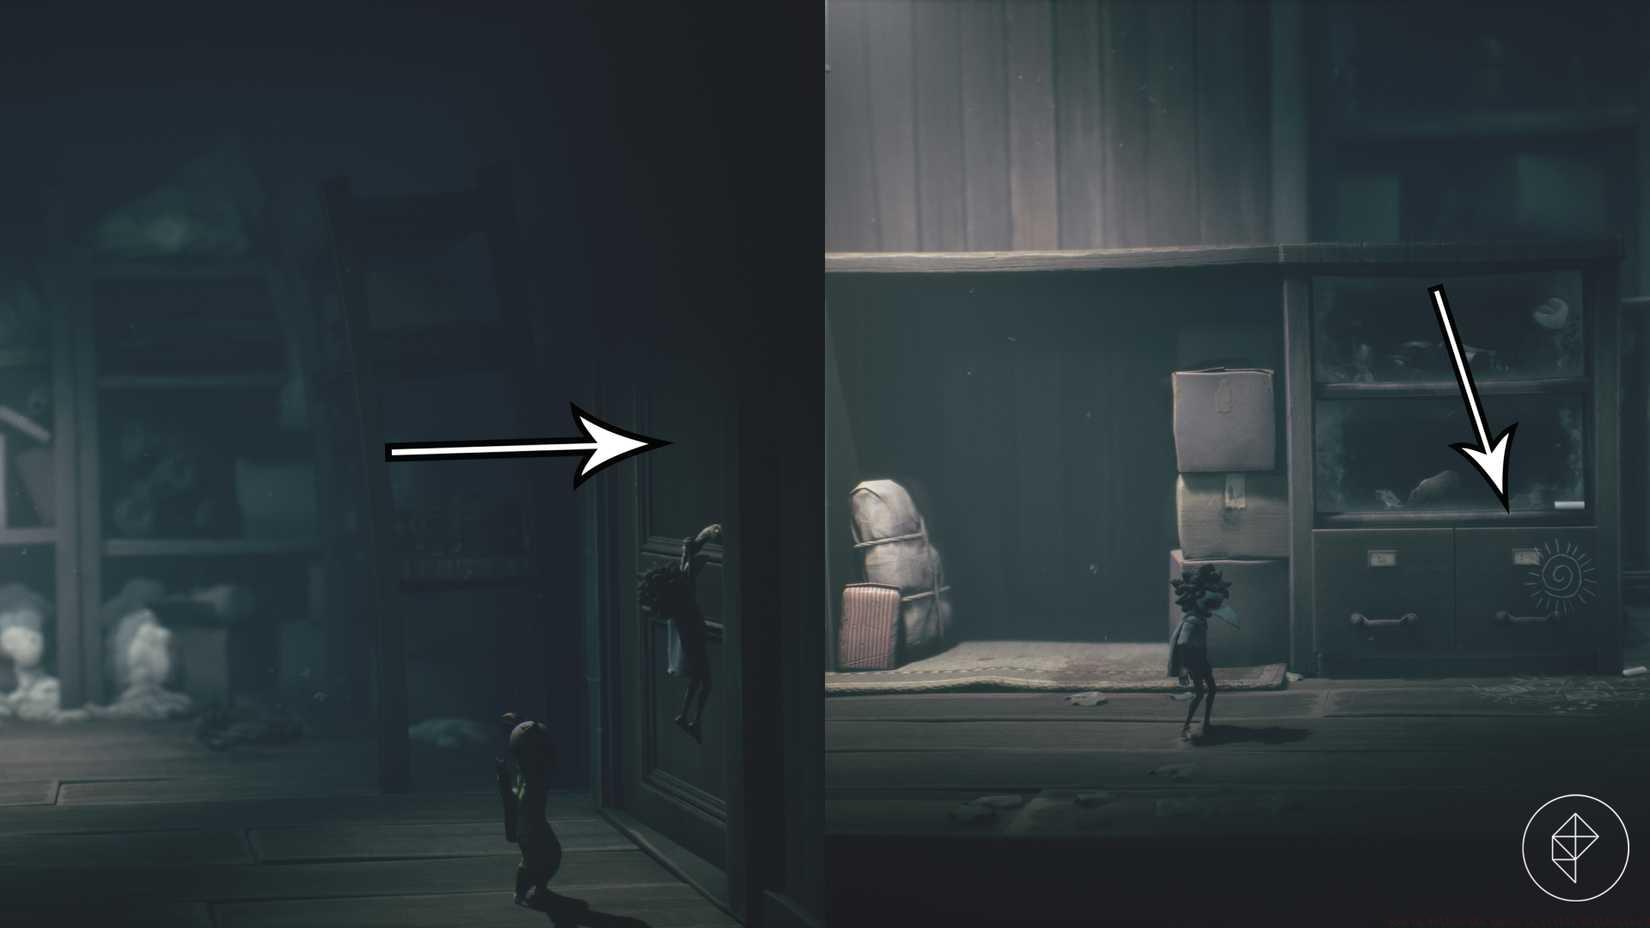
The gnome conceals himself within the storage drawer situated on the right side; extend it outward to expose him.
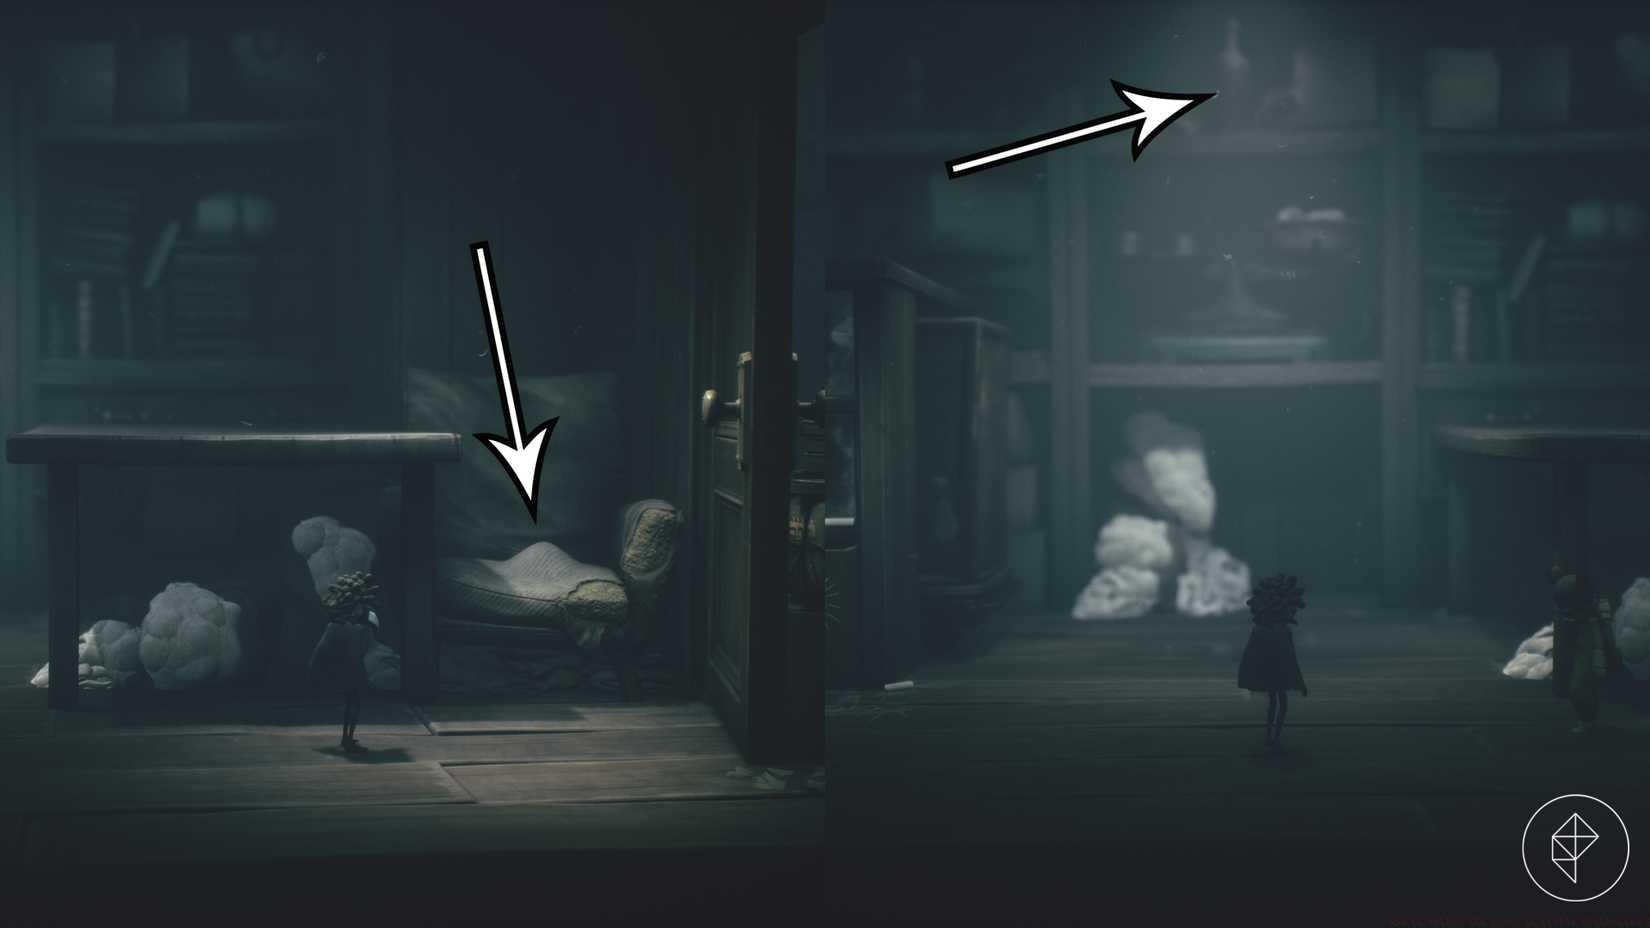
His subsequent refuge resides inside the reclining chair. Avoid striking the small creature using any tools; simply bounce upon the seating surface several instances to compel the gnome’s departure.
Graphic: Marloes Valentina Stella/Polygon | Source images: Supermassive Games/Bandai Namco Entertainment via Polygon
When he retreats behind the glass container inside the shelving unit, target it precisely using one of Low’s projectiles.
Graphic: Marloes Valentina Stella/Polygon | Source images: Supermassive Games/Bandai Namco Entertainment via Polygon
The gnome will escape via a wall aperture and descend a vertical ladder during this process. To access this ladder, drag the substantial wagon (containing suspended doll figures) toward the right side. The separation between the wagon and the platform might appear excessively wide, but you can successfully traverse the gap by seizing the wagon and hoisting yourself upward.
Graphic: Marloes Valentina Stella/Polygon | Source images: Supermassive Games/Bandai Namco Entertainment via Polygon
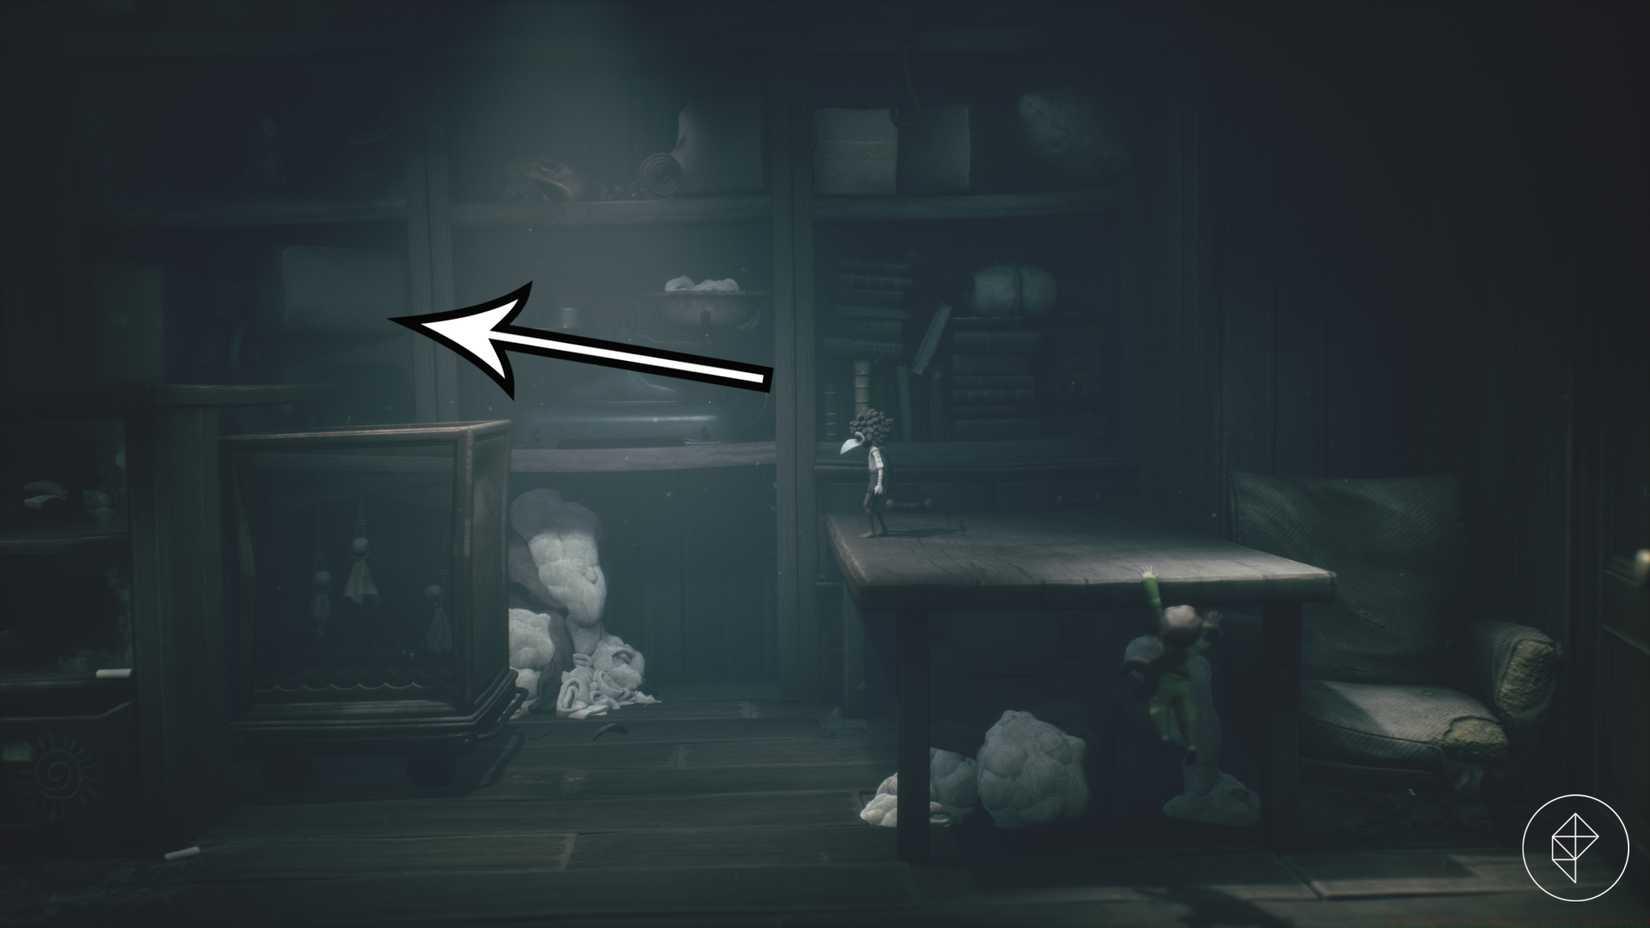
Ascend the ladder and proceed along the passage through the air duct system. Lower yourself into the corridor, where you’ll encounter multiple route options; to the left, an inoperative elevator lacking a light bulb connection exists, to the right, a fragile glass entrance awaits (you’ll discover a collectible doll artifact here), and along the poorly illuminated hallway, the gnome will be positioned. Pursue the gnome.
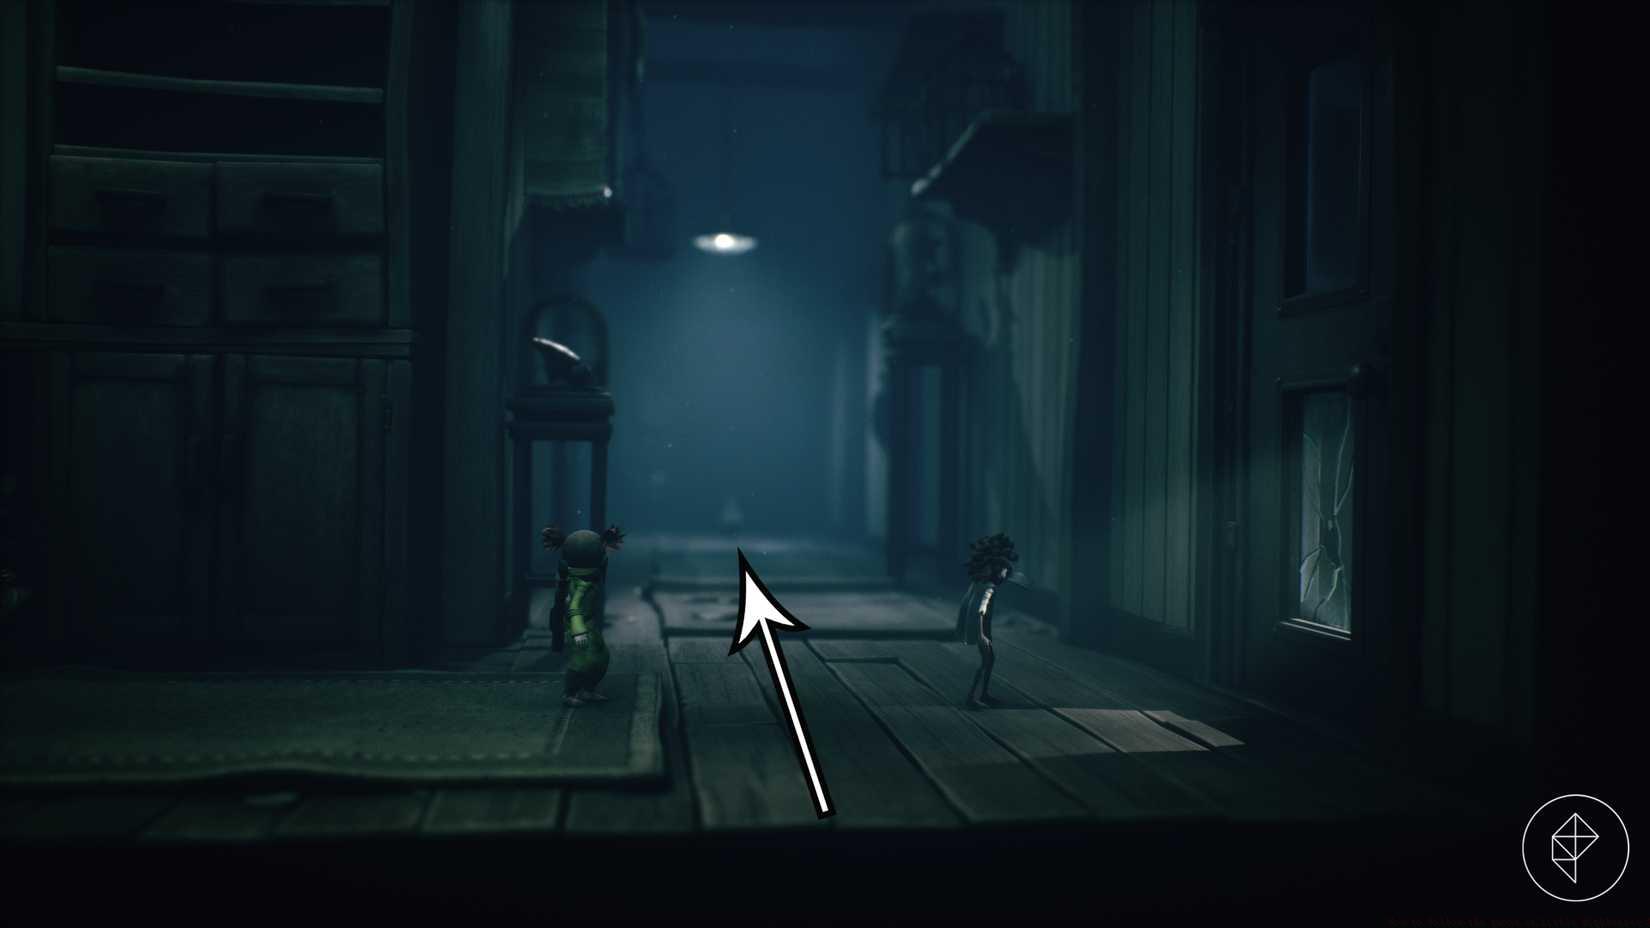
Graphic: Marloes Valentina Stella/Polygon | Source images: Supermassive Games/Bandai Namco Entertainment via Polygon
The gnome directs you toward a sizable switch located within an unlit chamber. If you attempt to capture the gnome at this juncture, he will evade once more.

Graphic: Marloes Valentina Stella/Polygon | Source images: Supermassive Games/Bandai Namco Entertainment via Polygon
Seasoned players emphasize maintaining consistent pacing rather than sprinting, as excessive speed frequently causes the gnome to trigger premature escape sequences. Coordinate with your companion character efficiently—ensure they’re positioned correctly before initiating interactions. The bottle-breaking segment requires precise timing; wait until the gnome fully settles behind the glass before firing Low’s arrow.
Common errors include mishandling the cart positioning, resulting in unreachable gaps. Always pull the cart completely to the right until it aligns with the platform edge. Many players overlook the doll collectible in the glass doorway—while optional, it contributes to completion percentage. The ventilation shaft section contains subtle visual cues indicating the correct path; follow the faint glowing markings on the duct walls.
For those struggling with the Battlefield 6 mechanics, understanding character movement patterns in Class Guide can provide transferable skills for navigating these environmental puzzles. The systematic approach required here mirrors the tactical planning needed in BF6 Conquest modes.
After the gnome reveals the button mechanism, the actual light bulb puzzle commences. The gnome will eventually provide the essential illumination component needed to activate the elevator’s power system. This circuit-based challenge requires connecting energy sources to specific terminals, similar to electrical puzzles in other horror adventure titles.
Successfully completing this segment grants access to elevated areas of Carnevale and progresses the narrative significantly. The elevator activation not only advances the story but also unlocks additional exploration opportunities in previously inaccessible zones. Players should prepare for increased difficulty following this puzzle sequence, as the game intensifies its challenges thereafter.
For comprehensive guidance on similar puzzle mechanics across different game segments, consult our Complete Guide to master environmental interactions. Understanding these fundamental principles will enhance your performance in both Little Nightmares 3 and other titles featuring complex puzzle systems.
Action Checklist
- Locate initial gnome appearance in Chapter 3’s first chamber
- Systematically check drawer, chair, and cabinet hiding spots
- Precisely shoot bottle with Low’s arrow when gnome is positioned behind it
- Position cart correctly and navigate to ladder access point
- Follow gnome to button and complete light bulb circuit puzzle
No reproduction without permission:SeeYouSoon Game Club » How to follow the gnome in Little Nightmares 3 Master the gnome chase puzzle in Little Nightmares 3 with expert strategies and time-saving techniques