Master Gogmazios with detailed phase strategies, elemental tactics, and environmental traps for successful Elder Dragon hunting
Understanding Gogmazios: The Tar-Soaked Elder Dragon
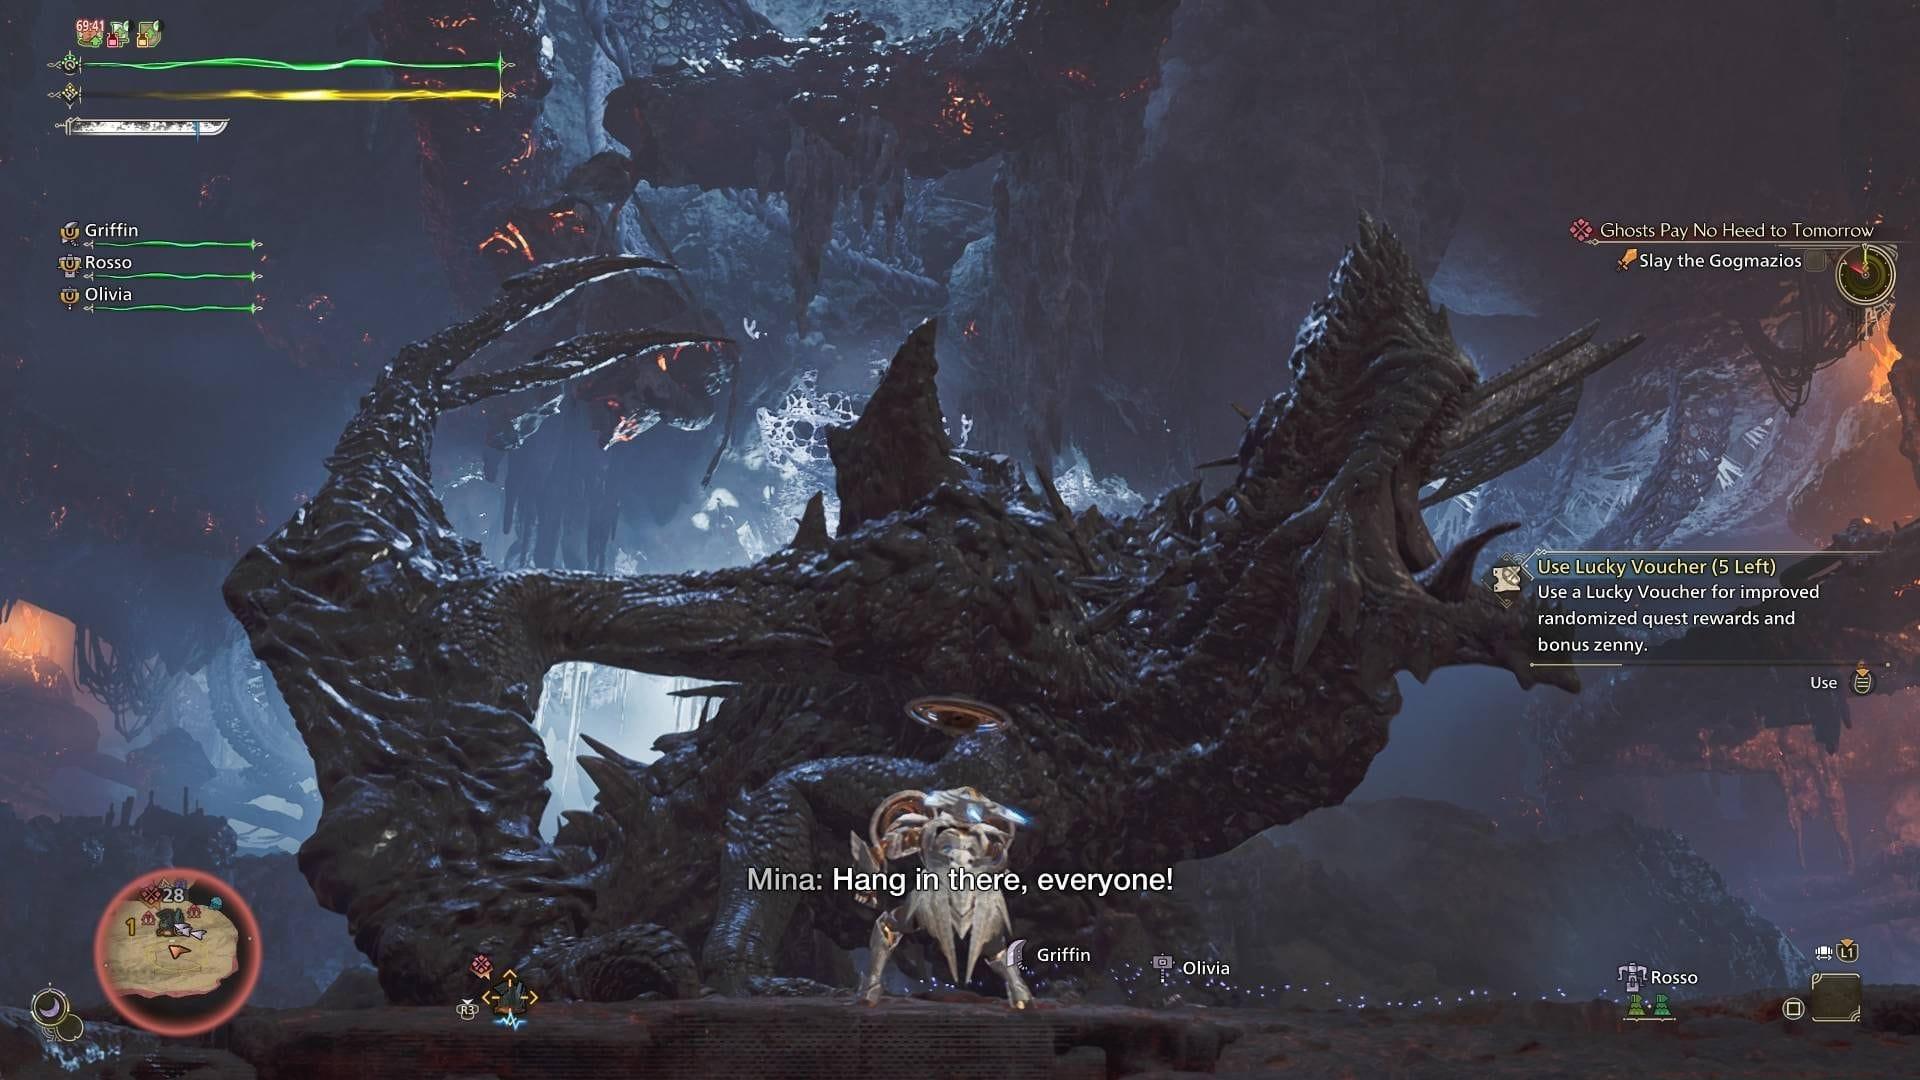
Conquering Gogmazios, the inaugural Elder Dragon encounter within Monster Hunter Wilds’ Forbidden Lands, demands meticulous elemental weapon selection and mastery of a critical damage verification mechanic. This formidable adversary represents one of the expansion’s most rigorous combat examinations, capable of overwhelming even thoroughly equipped hunters through its multi-phase assault patterns.
Explore the Complete Monster Hunter Wilds Bestiary to familiarize yourself with all potential encounters!
Gogmazios exhibits pronounced vulnerability to Dragon and Fire elemental damage. During initial engagement phases, employ Fire-based armaments to liquefy the viscous oil coating its epidermis before transitioning to Dragon-element weaponry. Optimal damage output necessitates Slash- or Blunt-type implements targeting the creature’s cranial region and wingarm appendages.
- Comprehensive Healing: Potion / Mega Potions / Ancient Potions
- Team Support: Lifepowder / Dust of Life
- Maintain Fire Resistance exceeding 20 points to achieve complete immunity against Fireblight status effects
- Essential skills include Guard Up and Aquatic/Oilslit Mobility for enhanced defensive capabilities
- Strategic utilization of Environmental Traps enables significant damage dealing and attack interruption
- The Mending Mantle provides valuable defensive utility throughout the engagement
Phase 1: Oil Management and Environmental Warfare
Initial engagement revolves around systematic armor degradation through precise elemental application. Deploy Fire-element weaponry to thermally destabilize the adhesive petroleum secretions, subsequently switching to Dragon-element armaments once the protective layer has been compromised.
Gogmazios typically executes three primary assault patterns during this stage: eruptive Lava Geysers, devastating Downward Slam maneuvers, and aggressive forward lunges culminating in biting attacks. Defensive specialists wielding Guard Up-enhanced equipment can successfully parry hazardous oil expulsion attacks.
Concentrate offensive efforts on wingarm targets to destabilize the creature, creating opportunities for focused cranial strikes. Environmental traps deliver monumental damage potential – during Phase 1, collapsing a Deteriorated Scrap Metal structure onto properly positioned targets inflicts approximately 4000 damage. Precise positioning beneath these structures before activation is critical.
When Gogmazios initiates its incendiary beam attack, immediately ascend to elevated terrain for safety. The fundamental Fire-to-Dragon elemental strategy remains consistent throughout this combat phase.
Common Mistakes to Avoid: Do not prematurely switch to Dragon element before completely removing tar armor. Avoid standing in residual oil patches that impede mobility. Never trigger environmental traps without proper monster positioning.
Phase 2: Elderbreaker Mechanics and Advanced Tactics
Environmental warfare intensifies with additional tactical resources including supplementary Deteriorated Scrap Metal caches, volatile Blastcoal deposits, and the formidable Ancient Forge installation. Primary objective shifts to dislodging the Elderbreaker artillery piece from the creature’s dorsal region – achieve this by toppling Gogmazios through sustained appendage damage then concentrating attacks on its back.
The liberated Elderbreaker requires connection to three Loose Nexus Nodes distributed throughout the arena. This process creates significant vulnerability windows – maintain situational awareness of incoming attacks and execute timely evasive maneuvers when necessary. Upon successful nodal integration, allow complete charging to 100% capacity before activating the weapon system.
Advanced Tactics: Coordinate with hunting partners to create distraction during node connection. Time Elderbreaker activation with environmental trap triggers for maximum damage stacking. Use the weapon during monster enrage periods for enhanced effectiveness.
Successfully navigating this phase transitions the conflict to the concluding engagement area, where aerial combat mechanics become predominant.
Phase 3: Aerial Combat and Elemental DPS Check
The culminating battle phase features frequent aerial maneuvers by the Elder Dragon. Effectively counter these flight patterns using the Compact Anti-Wyvern Gun (obtain ammunition from Gogmazios itself), targeting cranial, wing, and caudal regions. Remember to fully charge each shot before discharge for maximum impact.
Additional environmental options include collapsing two rubble pillars onto the creature to create ground engagement opportunities. During Phase 3, exclusively employ Dragon-element weaponry to address the critical damage verification mechanic.
When Gogmazios begins charging its catastrophic area-of-effect assault, you must inflict sufficient Dragon-element damage throughout the charging sequence to substantially reduce the attack’s potency. Navigator Nadia provides real-time feedback: “We’re not keeping its power in check! Keep attacking!” indicates failing the check, “We seem to be containing its power! Keep it up!” signals partial success requiring continued effort, and “We’ve got its power in check!” confirms successful verification.
Upon ultimate attack initiation, seek protection behind Fabius’ defensive barrier. Failed elemental verification renders Fabius incapable of complete damage mitigation. Alternative protection methods include personal blocking with Guard Up-enhanced equipment, though the NPC shield remains the superior option.
Should you fail the damage verification, immediately ascend either elevated structure to evade the devastating attack. These platforms provide single-use protection as they disintegrate following initial utilization.
Optimization Tips: Build Dragon Attack skill to level 5 for maximum elemental output. Use Demon Powder and Might Seeds to boost damage during DPS checks. Time your Slinger shots to interrupt Gogmazios’ most dangerous attacks.
Rewards and Material Drops
Successful Gogmazios engagements yield these valuable resources (source: Game8):
- Gogmazios Certificate S – Completion proof
- Heavy Drakesbone Oil (Back, Tail) – Armor upgrading
- Gogmazios Fortalice (Head) – Defensive gear crafting
- Gogmazios Shredders (Wingarms) – Weapon enhancement
- Gogmazios Lacerator (Chest, Back) – Cutting weapon materials
- Mutated Armament (Head, Chest, Back, Wingarms, Tail) – Rare equipment creation
Gogmazios debuted in Monster Hunter Wilds through Title Update 4, establishing itself as the premier Elder Dragon encounter within the Forbidden Lands region. The complete monster catalog now encompasses 33 distinct creatures.
- Essential beginner strategies for Monster Hunter Wilds mastery
- Comprehensive Switch Axe builds and combo techniques
- Locating Tough Guardian Bone resources
- Defeating Guardian Arkveld: Weakness exploitation and tactical approaches
No reproduction without permission:SeeYouSoon Game Club » How to defeat Gogmazios in Monster Hunter Wilds Master Gogmazios with detailed phase strategies, elemental tactics, and environmental traps for successful Elder Dragon hunting