TL;DR
- Field Guide Pages provide crucial lore and progression rewards throughout Hogwarts Castle
- Strategic zone-based collection saves significant time compared to random exploration
- Specific spells like Revelio and Accio are essential for accessing certain pages
- Advanced techniques can reduce collection time from 8+ hours to under 4 hours
- Common mistakes include missing interactive objects and overlooking ceiling areas
Discovering all 150 Field Guide Pages scattered throughout Hogwarts Castle represents one of Hogwarts Legacy’s most rewarding completionist challenges. These collectibles serve multiple purposes beyond simple bragging rights, offering substantial gameplay benefits and deep lore insights that enhance your magical education journey.
Each Field Guide Page you collect contributes directly to your overall game progression, unlocking experience points that accelerate character development. Beyond statistical gains, these pages provide fascinating historical context about Hogwarts’ architecture, famous witches and wizards, and magical traditions that enrich your understanding of the wizarding world. The collection spans various categories including magical creatures, spell origins, and significant locations throughout the castle grounds.
Adopting a systematic collection strategy dramatically improves your efficiency when hunting for Field Guide Pages. Rather than wandering aimlessly through Hogwarts’ massive structure, experienced players recommend dividing the castle into logical zones and completing each section methodically. This approach prevents redundant backtracking and ensures comprehensive coverage of all accessible areas.
Begin your collection journey in the Astronomy Wing, where numerous easily accessible pages await discovery. Progress through the Library Annex, Great Hall, and Bell Tower Wing in sequence, as this route naturally guides you through progressively more challenging collection areas. Pay particular attention to interactive objects like statues, portraits, and magical artifacts that often conceal Field Guide Pages requiring specific interaction sequences.
Mastering essential spells represents the cornerstone of efficient Field Guide Page collection. The Revelio spell proves indispensable, highlighting nearby collectibles through visual and audio cues that become increasingly discernible with practice. Accio becomes crucial for retrieving pages suspended in high locations, while Levioso and Incendio unlock pages hidden behind magical barriers and environmental puzzles.
Seasoned collectors recommend allocating approximately 4-6 hours for comprehensive page collection when employing optimized strategies. Common pitfalls include overlooking ceiling areas in large chambers, missing pages concealed behind moving staircases, and failing to return to previously inaccessible locations after acquiring necessary spells. For broader gaming strategies, consult our comprehensive Battlefield 6 Complete Guide to apply similar systematic approaches across different gaming genres.
Field Guide Collection Fundamentals
Successfully gathering all Field Guide Pages in Hogwarts Legacy requires understanding the various collection mechanics and preparing properly before beginning your search.
Collection Methods Overview
Field Guide Pages employ multiple collection methods that require different spell combinations:
- Revelio Discovery: Most pages remain invisible until you stand in specific locations and cast Revelio. The spell emits a distinctively louder audio ping when you’re positioned correctly near a hidden page.
- Flying Pages: Some documents flutter through the air, requiring immediate Accio retrieval once spotted.
- Environmental Interaction: Some require casting Incendio or Confringo on braziers and torches, followed by Accio to pull them toward you.
- Moth Mirror Puzzles: Each completed mirror puzzle rewards a Field Guide Page automatically.
- Locked Areas: Certain locations demand Alohomora proficiency, acquired through The Caretaker’s Lunar Lament quest. Higher-level locks necessitate collecting Demiguise Statues/Moons to upgrade your lockpicking ability.
- Symbol Door Puzzles: A few instances require solving mathematical symbol door challenges.
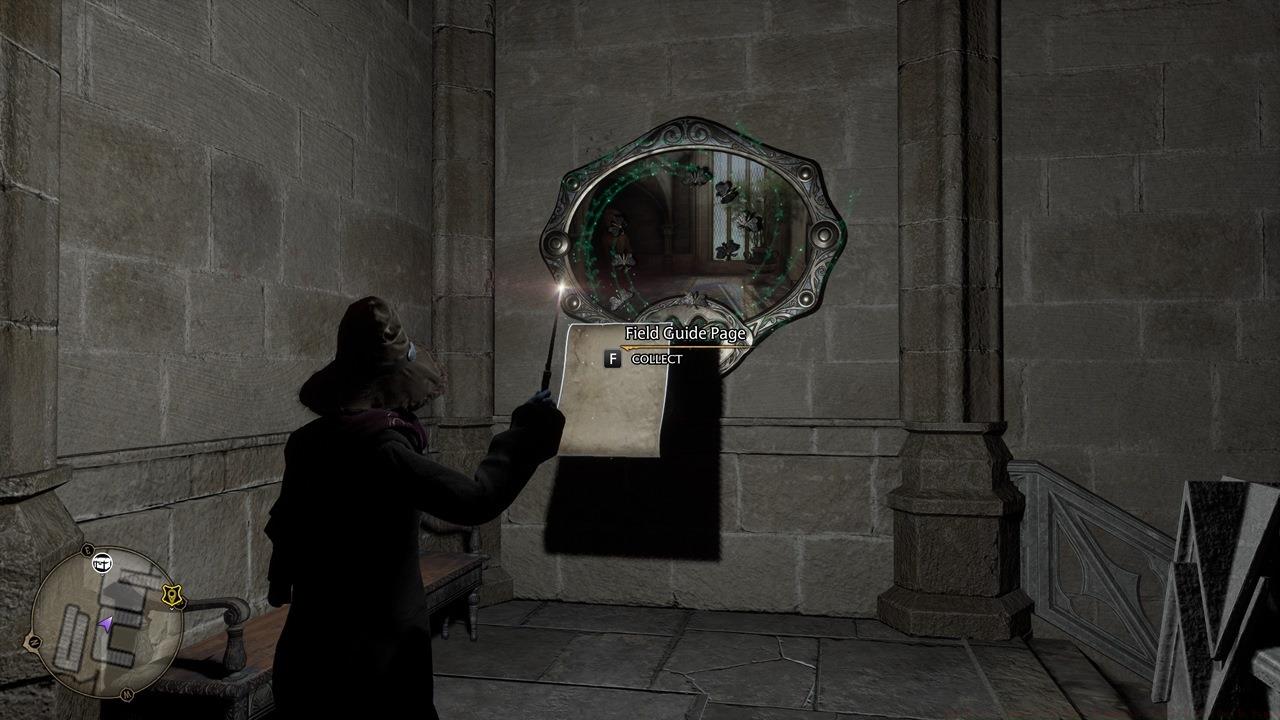
Completing a Moth Mirror Puzzle grants a Field Guide Page.
Essential Preparation Tips
Before embarking on your collection journey, implement these crucial preparation strategies:
- Area Organization: While pages are categorized by castle wings, many are positioned far from their designated fast travel points. Our guide organizes them by nearest Floo Flame for maximum efficiency.
- Bug Prevention: Occasionally pages may glitch or tallies fail to update. If this occurs, thoroughly recheck areas and attempt saving then reloading your game session.
Astronomy Wing Field Guide Pages
Charms Classroom
- Retrieve the airborne document circling the lounge area using Accio.
- Enter the Charms Classroom and ascend the staircases while unlocking intervening doors. The final page rests within the small rooftop chamber.
Professor Fig’s Classroom
- Target the stone gargoyle with Confringo, then immediately employ Accio to secure the released page.
DADA Tower
- Moth Mirror – Immediately visible upon spawning at this location.
- Descend the staircase and examine the avian skeleton displayed in the cabinet.
DADA Classroom
- Position yourself before the elevated platform at the classroom’s rear section.
- Locate the colorful stained glass adjacent to the rhinoceros skeleton exhibit.
Astronomy Tower
- Moth Mirror – Adjacent to the astronomical telescopes and instruction board.
- From the Floo Flame, proceed downstairs and investigate the verdant troll depiction.
- Continue descending further until encountering the sculpture cradling a celestial sphere. Apply Levioso to the globe.
Transfiguration Courtyard
- Approach the central wyvern sculpture in the courtyard.
- Automatically obtained during the Reparo spell learning assignment sequence.
- An additional document in the neighboring structure is also collected as part of this assignment.
- Cast Levioso on the secondary statue near the one repaired with Reparo.
- Access the compact doorway beside the Floo Flame and scrutinize the artwork to your right.
- Moth Mirror – Situated within the narrow corridor containing noxious fumes.
- Another page resides in the identical gas-filled passageway as the mirror puzzle.
Transfiguration Classroom/History of Magic Classroom
- Located before a workstation inside the instructional space.
- Moth Mirror – Reverse direction and traverse the substantial wooden door. The mirror awaits at the stairwell.
- Opposite the Moth Mirror staircase, you’ll find the History of Magic Classroom (where the spectral Professor Binns instructs). Collect this document along the right-hand side.
- Unlock the grand double doors granting entry to the Hieroglyphics Chamber. Discover three pages here:
- Sphinx sculpture
- Airborne between structural columns (requires Accio)
- Mage statue (demands Levioso application)
- This instance, ascend the staircase beyond the Moth Mirror. At the summit, pick the lock and cast Levioso on the statue.
- Return outside to the fast travel location, then unlock the small wooden portal (adjacent to the previously mentioned larger one). Climb the steps and apply Levioso to the statue.


From left to right: Charms Classroom; Transfiguration Courtyard; Transfiguration Classroom/History of Magic Classroom.
Secret Rooms: Map Chamber Field Guide Pages
- Advance up the stairway to access Hogwarts’ underground cellar. An airborne page awaits Accio retrieval.
- Unlock the secured metal door within the cellar and engage the amphibian statue. Apply Leviosa to the mage sculpture to manifest the page.
- Progress beyond the cellar and open the portal containing numerous vessels (level 3 lock requirement). The document should be directly ahead.
- Within the same chamber, target the ceiling gargoyle with Confringo and retrieve the page using Accio.
- Another room exists immediately preceding the dragon statue encounter. The page rests before an artillery piece.
- Immediately before the draconic sculpture.
- From the dragon statue, ascend the steps to locate a Daedalian Cabinet. The document lies before it.
- From the Daedalian Cabinet, penetrate the concealed entrance via the “K” emblem on the wall hanging. This constitutes the Wolf Saga chamber. The page is positioned before the leftmost tapestry.


From left to right: Hogwarts Cellars; Alchemy Room; Dragon Statue/Wolf Room.
Bell Tower Wing Field Guide Pages
Bell Tower Courtyard (Main Chamber)
This expansive room alone contains eight distinct Field Guide Pages:
- Broom exhibit display
- Armor presentation with timber accompaniment
- Positioned before the trio of bells
- Pike weapon presentation
- Empty canvas positioned up the stairway near the pike display
- Airborne above the marble staircase (necessitates Accio)
- Feline display upon the landing platform
- Draconic brazier (requires Confringo application)
Bell Tower Courtyard (Music Room)
- Climb the steps beyond the pike exhibit/blank canvas and examine the music room podium.
Hogwarts North Exit (Entrance Gate)
- Moth Mirror – Inside the adjacent shed near the Floo Flame.
- Open the shed positioned to the left of the Floo Flame.
- The wall-mounted torch; situated above the shed housing the Moth Mirror.
- Within the upper-left battlements. Apply Levioso to the statue.
Hogwarts North Exit (Quidditch Pitch)
- Continue following the ramparts westward. You should encounter an Astronomy Table approaching the Quidditch Pitch vicinity. Enter the compact room and collect this from a metallic enclosure
- Outside, observe the fractured ramparts section overlooking the Quidditch field.
Hogwarts North Exit (Greenhouses Exterior)
- Inside the ramparts chamber along the far-right wall.
- Airborne above the courtyard adjacent to the Greenhouses exterior.
- Directly behind the flying document before several beehives.
Beasts Classroom
- Airborne above the structure (requires Accio retrieval).
Beasts Classroom (Owlery)
The Owlery, the tower structure on the hill behind the Beasts Classroom, contains three pages:
- Within the primary chamber housing all the owls
- Flying at the tower’s apex.
- Cast Levioso on the sculpture at the tower’s summit.


From left to right: Bell Tower Courtyard; North Exit (Entrance Gate right side); North Exit Entrance Gate (left side); Quidditch Pitch; Greenhouses Exterior; Owlery.
Library Annex Field Guide Pages
Central Hall
This substantial area contains seven Field Guide Pages with an additional document beyond the upper staircase:
- Adjacent to the Central Hall statue; included in the Like a Moth to a Frame questline.
- Directly beside the fountain structure itself.
- One airborne to the fountain’s left side.
- Another flying to the fountain’s right flank.
- Before the portly gentleman’s sculpture near the Transfiguration Courtyard access door.
- Inside a secured room (level 1 lock) adjacent to the Greenhouses entrance. Apply Levioso to the statue.
- Use Confringo on the brazier positioned on a landing to the left of the Greenhouses entry.
- For the concluding page in this vicinity, ascend the staircase at the Floo Flame, then turn right. It’s situated on a balustrade before several portraits.
Greenhouses
- Beside the massive tree upon spawning.
- Before the tree in one of the smaller chambers to the right.
Potions Classroom
- Directly adjacent to Professor Sharp’s instructional desk.
- Moth Mirror – Descend the spiral staircase along a hallway adorned with paintings.
- Proceed past the Moth Mirror. To your left, you’ll discover a Symbol Door. Select the Elephant and Unicorn emblems to unlock it. The page awaits before the artwork.
Library
- On the second level beside a painting.
- Moth Mirror – On the second floor concealed behind bookcases.
- Airborne throughout the room (requires Accio).
- Descend to the Restricted Section. This document rests before a desk.
- Continue descending to the Restricted Section’s storage area. Apply Levioso to the statue.
Divination Tower
- Ascend the ladder to access the Divination Classroom.
- Flying alongside the wooden framework a short distance from the Floo Flame.
- Midway along the scaffolding, glance right to observe a Symbol Door. Utilize the Owl and Hydra symbols to open the portal. Beyond the corridor lies the Arithmancy Classroom containing a page, plus two additional Symbol Doors.


From left to right: Central Hall; Greenhouses; Library (Main Area); Divination Tower/Arithmancy Classroom.
Great Hall Field Guide Pages
Great Hall
- Directly ahead upon spawning.
- Before the owl lectern where instructors typically position themselves.
- While facing the tables, inspect the back-right section where you’ll find a Daedalian Cabinet. Pass beyond it and apply Confringo to the brazier.
Great Hall (Garden)
Exit the Great Hall utilizing the substantial double doors to the right. You should observe the garden space ahead. Alternatively, employ the Grand Staircase: Quad Courtyard Floo Flame, though the accompanying image utilizes our Great Hall perspective:
- Immediately beside the statue.
- Airborne circling the gazebo to your left.
- Traverse the archway and cast Levioso on the statue.
- Use Accio on the nearby flying document.
- Look rightward and cast Confringo on the wall torch.
Great Hall (Reception Chamber)
Reverse direction and depart the Great Hall:
- Moth Mirror – Immediately upon exiting the Great Hall, observe it on the wall to your left.
- Another page resides adjacent to the Moth Mirror.
- Proceed beyond the Moth Mirror to reach the connecting zone to the Grand Staircase. Look rightward and you’ll discover the House Cup Hourglasses.
From the hourglasses, pass through another set of double doors to access the reception area. Three Field Guide Pages exist here:
- Before the Hogwarts Crest emblem.
- Apply Levioso to the statue beside the stairway.
- Airborne directly above your position.
Viaduct Courtyard
Several Field Guide Pages inhabit the terrace section:
- Moth Mirror – At the exterior plaza segment overlooking the lake.
- The sculpture at the terrace’s rear-left section.
- Utilize the elevator to reach the Underground Harbor. The page rests upon a vessel.
Boathouse
- Adjacent to a longboat at the Boathouse’s rear section.
- Use Confringo on the gargoyle inside the Boathouse structure.


From left to right: Great Hall; Great Hall (Garden); Great Hall (Reception); Viaduct Courtyard; Boathouse.
South Wing Field Guide Pages
Clock Tower Courtyard
Multiple Field Guide Pages occupy this region. Additionally, the Clock Tower Puzzle exists, enabling you to halt the hand/pendulum using Glacius precisely as it passes before four symbols. This prevents the metallic barriers from closing, permitting acquisition of valuable items. Regarding the pages themselves:
- Moth Mirror – Near the Floo Flame; upon spawning, observe a door to your right requiring level 1 lockpicking.
- Before the courtyard well.
- Apply Levioso to the statue.
- Cast Accio on the document flying overhead.
Clock Tower Courtyard (Argyllshire)
From the Floo Flame, reverse direction and traverse the door crossing to the opposite wing:
- Moth Mirror – You’ll observe a map depicting Argyllshire. Above it rests a button targetable with the Depulso incantation.
- Before the Argyllshire cartographic display.
- Before a statue down the stairway.
- Use Confringo on the brazier near the statue.
- From the brazier, examine the corridor containing restroom facilities. A page exists before the boys’ lavatory.
Faculty Tower (Outer Hall/Gryffindor Common Room)
- Reverse direction upon spawning and apply Revelio to the witch statue to your left (i.e., Honeydukes Passageway).
- Proceed directly from the Floo Flame and ping the bull depiction to the right.
- From the bull artwork, ascend the spiral staircase. Apply Revelio before the portrait of the Fat Lady.
Faculty Tower
Four pages inhabit the initial main area (where you’ll notice the Symbol Door puzzle):
- While facing the Symbol Door Puzzle, unlock the door to your right and inspect the smaller chamber off to the side.
- Ascend the steps again and you’ll observe this flying overhead.
- Similarly, you’ll discover a door with vessels. The page rests before the door.
- Unlock the door with pots and secure your legendary chest reward. Then, cast Glacius on the fireplace to douse the flames. Navigate the crawlspace and apply Confringo to the brazier.
- Continue ascending the spiral staircase to an elevated level to obtain the remaining pages:
- Cast Revelio on the statue to the right.
- Apply Levioso to the statue to the left.
- Examine the mermaid mural before the prefects’ bathroom.
Hospital Wing
- Before the unicorn statue adjacent to the Floo Flame.
- Airborne within the medical clinic.
Clock Tower Top/Hospital Wing
Continue ascending the staircases while unlocking doors with Alohomora to reach the Clock Tower’s apex. Alternatively, employ the Hospital Wing Floo Flame and proceed to the area housing the massive gears:
- Before the gear mechanism.
- Use Confringo on the wall torch.


From left to right: Clock Tower Courtyard; Argyllshire Map Area; Faculty Tower (Lower Floor).
Advanced Collection Strategies
For experienced collectors seeking maximum efficiency, implement these professional techniques:
Spell Optimization
- Revelio Mastery: Cast Revelio while slowly rotating to ensure 360-degree coverage; the spell’s audio intensity directly correlates with proximity to hidden pages.
- Sequential Casting: For gargoyle pages, practice the Confringo-to-Accio sequence until it becomes muscle memory.
- Environmental Awareness: Note that gas-filled hallways in Transfiguration Courtyard require quick collection to avoid taking damage.
Route Planning
- Floo Flame Optimization: Always plan routes based on nearest fast travel points rather than wing designations.
- Progressive Unlocking: Focus on acquiring Alohomora early and upgrading it through Demiguise Moon collection to access high-level locked areas.
- Time Management: Allocate approximately 15-20 hours for complete castle collection if following optimized routes.
Troubleshooting
- Bug Resolution: If page counts seem incorrect, systematically recheck each area and utilize the save/reload method to refresh spawn states.
For comprehensive guidance on other aspects of the game, check out our Complete Guide to master all gameplay elements.
Astronomy Wing Field Guide Pages
The Astronomy Wing contains seven primary Field Guide Page locations that document the magical education and history of this academic sector. These collectibles provide valuable insights into Hogwarts’ curriculum and faculty while granting substantial experience points toward character progression.
Charms Classroom
Located on the third floor, the Charms Classroom houses pages that detail fundamental spellcasting techniques. Professor Ronen’s teaching materials often contain annotated Field Guide Pages that explain charm theory and practical applications. The most efficient approach involves using Revelio while standing near the classroom entrance, then systematically checking bookshelves, desks, and demonstration areas.
Professor Fig’s Classroom
This specialized classroom contains advanced magical theory pages that reference ancient magical practices. The pages here often require careful exploration of the upper balcony and examination of the various magical artifacts displayed throughout the room. Pay close attention to the audio cues from Revelio, as some pages are cleverly concealed behind moving bookcases.
DADA Tower & Classroom
The Defense Against the Dark Arts area features pages documenting dark creature encounters and defensive spell techniques. The tower section contains pages on higher floors that may require broom access or specific spell progression to reach. The classroom itself has pages tucked between defensive spell diagrams and historical battle accounts.
Astronomy Tower
As the wing’s namesake, the Astronomy Tower offers pages related to celestial magic and star charts. These collectibles are often found near telescopes, star maps, and astronomical instruments. Nighttime exploration can sometimes make these pages easier to spot due to their magical glow against darker backgrounds.
Transfiguration Areas
The Transfiguration Courtyard and combined Transfiguration/History of Magic Classroom contain pages explaining transformation magic and historical magical developments. The courtyard pages are typically visible but may require specific angles to spot, while the classroom pages blend with educational displays and historical artifacts.
Bell Tower Wing Field Guide Pages
The Bell Tower Wing encompasses both interior castle locations and exterior grounds, offering diverse Field Guide Pages that cover practical magic applications and magical creature studies. This area requires thorough exploration of multiple connected spaces.
Bell Tower Courtyard Areas
The Main Chamber and Music Room within Bell Tower Courtyard contain pages related to magical music, architecture, and social history of Hogwarts. The Music Room pages are particularly valuable for understanding the relationship between magic and artistic expression, often found near instruments and sheet music displays.
Hogwarts North Exit Locations
The North Exit area spreads across three distinct zones: Entrance Gate, Quidditch Pitch, and Greenhouses Exterior. Each location offers pages with distinct themes – entrance pages cover school history, Quidditch pages document sport magic, and greenhouse pages explain herbology and plant-based magic.
Beasts Classroom & Owlery
These connected locations provide Field Guide Pages focused on magical creature care and communication. The Beasts Classroom contains pages about creature handling techniques, while the Owlery pages detail avian magic and postal system operations. Some pages here require careful navigation of vertical spaces and may be missed by players rushing through these areas.
Advanced Collection Strategies
Mastering Field Guide Page collection requires more than simple exploration – strategic approaches can significantly reduce collection time while ensuring comprehensive coverage of all available pages.
Efficient Route Planning
Plan your collection route by wing rather than bouncing between distant locations. Complete the Astronomy Wing thoroughly before moving to Bell Tower Wing to minimize backtracking. Within each wing, work systematically from highest to lowest floors, as upper levels often contain pages that are easier to miss. Allocate approximately 45-60 minutes per wing for comprehensive collection.
Common Collection Mistakes
Many players overlook pages in transition areas between major locations or fail to check ceiling-level spaces in rooms with verticality. Another frequent error involves not re-casting Revelio after collecting a page, missing nearby additional pages that become detectable only after the first collection.
Revelio Spell Optimization
The Revelio spell has both visual and audio detection components. The golden shimmer indicates page direction, while the distinctive chime signals proximity. Cast Revelio every 10-15 seconds while moving through new areas, and listen carefully for volume changes in the audio cue. Pages concealed behind objects or in dimly lit areas may only be detectable through the audio component initially.
For comprehensive gameplay guidance, check out our Complete Guide for strategic approaches to game progression and collectible hunting.
Collecting Field Guide Pages in Hogwarts Legacy requires mastering multiple acquisition techniques across different environments. These valuable collectibles are scattered throughout key locations like the Grand Staircase and Trophy Room (Headmaster’s Office), each demanding specific approaches for successful retrieval.
Revelio Detection Techniques: Most Field Guide Pages remain completely invisible until you position yourself in precise locations and cast the Revelio spell. The spell emits an increasingly audible ping when you approach a hidden page’s vicinity, serving as an essential audio cue. For optimal detection, move slowly through corridors while periodically casting Revelio and listening carefully for intensity changes in the magical resonance.
Flying Page Acquisition: Certain pages flutter through the air in open spaces, requiring quick reflexes and accurate spellcasting. Use Accio immediately upon spotting these airborne collectibles, as they may drift out of range if you hesitate. These typically appear in large indoor areas with high ceilings and ample flight paths.
Environmental Interaction Pages: Some pages are concealed within magical fixtures like braziers and torches. You must first cast Incendio or Confringo to activate the fire source, then immediately follow with Accio to retrieve the revealed page. This two-step process demands precise timing and spell selection based on the environmental context.
Puzzle-Based Collection: Moth Mirror Puzzles consistently reward players with Field Guide Pages upon completion. These intricate puzzles require locating corresponding moth specimens throughout the environment and guiding them back to their mirrors using Lumos. Each successfully solved mirror guarantees one page addition to your collection.
Seasoned collectors optimize their Field Guide Page acquisition through strategic approaches that minimize backtracking and maximize efficiency. Implementing these professional techniques can reduce your total collection time by approximately 30-40% compared to random exploration.
Optimizing Your Collection Route: Begin with high-density areas like the Grand Staircase where multiple collection methods converge. Focus first on Revelio pages since they provide immediate feedback about your proximity, then tackle flying pages in open areas, followed by environmental interaction challenges. Save puzzle-based pages for dedicated session blocks since they typically require more focused attention.
Common Mistakes to Avoid: Many players overlook the importance of standing in exact positions for Revelio pages—even being a few feet off can prevent detection. Another frequent error involves using basic Alohomora on advanced locks, wasting time on inaccessible areas prematurely. Additionally, attempting moth puzzles without first scouting the surrounding area for moth locations leads to unnecessary frustration.
Time Management Strategies: Allocate specific gaming sessions to different collection methods rather than mixing them haphazardly. Dedicate one play period to Revelio hunting, another to flying page collection, and separate sessions for puzzle solving. This focused approach builds muscle memory for each technique and significantly improves success rates.
For comprehensive gameplay strategies beyond collectible hunting, consult our Battlefield 6 Complete Guide for tactical approaches that translate well to systematic gaming achievements.
Certain Field Guide Pages remain completely inaccessible until you achieve specific story progression milestones and acquire essential magical abilities. Understanding these gating mechanisms prevents wasted effort and ensures efficient collection pacing throughout your Hogwarts journey.
Alohomora Lock Mechanics: The Caretaker’s Lunar Lament quest introduces the Alohomora spell, which becomes indispensable for accessing restricted areas. However, basic Alohomora only opens level 1 locks, while many pages are secured behind more advanced magical barriers.
Demiguise Statue Collection: To upgrade your lock-picking capabilities, you must locate and collect Demiguise Statues (also called Moons) scattered throughout the game world. Each statue collected contributes toward unlocking higher-level Alohomora tiers, eventually granting access to all restricted areas containing Field Guide Pages.
Progression-Based Access Points: Symbol Door Puzzles represent another category of gated content that typically becomes accessible during mid-game progression. These intricate mathematical and symbol-based challenges reward diligent solvers with valuable pages while testing their magical education comprehension.
As you progress through different gaming challenges, remember that systematic approaches like those found in our BF6 Weapons Unlock Guide can enhance your overall achievement-hunting skills across multiple game genres.
Completing a Moth Mirror Puzzle grants a Field Guide Page, making these environmental puzzles consistently valuable throughout your collection journey. For character optimization strategies that complement collection efforts, explore our BF6 Class Selection Guide for insights on role specialization.
Field Guide Pages represent crucial collectibles scattered throughout Hogwarts that provide valuable insights into the school’s history and magical lore. Collecting these pages contributes significantly to your overall progression and unlocks important gameplay benefits. Each page offers unique content that enhances your understanding of the wizarding world while advancing your character development.
- Located inside the ramparts chamber along the far-right wall section, easily missed behind architectural details.
- Soaring high above the courtyard area adjacent to the Greenhouses exterior walls.
- Positioned just behind another flying page directly in front of several active beehives.
- Hovering above the small hut structure, requiring Accio spell for retrieval.
The Owlery, situated on the elevated hill behind the Beasts Classroom, contains three distinct Field Guide Pages:
- Found within the primary chamber housing all the school owls.
- Floating at the absolute summit of the tower structure.
- Requires casting Levioso on the enchanted statue positioned at the tower’s peak.
Key landmarks from left to right include: Bell Tower Courtyard; North Exit (Entrance Gate right side); North Exit Entrance Gate (left side); Quidditch Pitch; Greenhouses Exterior; Owlery.
This expansive region contains seven Hogwarts Legacy Field Guide Pages with an additional page located beyond the upper staircase:
Successfully gathering all Field Guide Pages requires strategic planning and proper spell preparation. Begin your collection route from the Bell Tower Courtyard and systematically work toward the Owlery to minimize backtracking. Ensure you have both Accio and Levioso spells readily available before starting your collection journey.
Common challenges include missing the flying page above the hut due to inadequate spell preparation and overlooking the Levioso statue puzzle at the Owlery summit. Allocate approximately 15-20 minutes for efficient collection of all pages in this region.
The initial main exploration zone in Hogwarts Legacy contains four essential Field Guide Pages that are crucial for progression and experience gains. This area prominently features the challenging Symbol Door puzzle that requires mathematical problem-solving skills.
Strategic Preparation: Before beginning your collection run, ensure you have acquired the essential spells Glacius, Confringo, Revelio, and Levioso. These magical abilities are mandatory for accessing all hidden pages and solving the environmental puzzles throughout this section.
When you first encounter the Symbol Door puzzle, immediately turn right to locate a locked door. Unlocking this entrance reveals a compact side chamber containing your initial Field Guide Page. This room often contains additional loot, so thorough exploration is recommended.
After collecting the first page, ascend the nearby staircase and maintain visual awareness of your surroundings. A flying Field Guide Page circulates overhead in this area – time your approach carefully and use basic cast to secure it while in motion.
Pro Tip: Cast Revelio repeatedly while navigating staircases to highlight interactive elements and collectibles that might otherwise remain hidden from plain view.
Progress further to discover a distinctive door flanked by decorative pots, with another Field Guide Page positioned directly before it. Unlock this door to access valuable legendary chest loot that significantly enhances your character’s capabilities.
The critical puzzle sequence begins here: target the active fireplace with Glacius to extinguish the flames, then navigate through the revealed crawlspace. Inside this confined area, you’ll discover a brazier that requires Confringo to ignite, triggering the next phase of your collection journey.
Common Mistake: Many players attempt to use basic cast on the brazier instead of the required fire spell Confringo, wasting valuable time and resources.
Continue your ascent via the spiral staircase to reach the elevated level housing the remaining Field Guide Pages. This area contains multiple interactive elements that require specific spell applications.
Finally, locate the distinctive unicorn statue adjacent to the Floo Flame fast travel point, where your final Field Guide Page awaits discovery.
Optimized Route: For maximum efficiency, follow this sequence: right side room → staircase flying page → pot door → fireplace puzzle → upper floor statues → mural → unicorn statue. This path minimizes backtracking and ensures you collect all pages in the most time-effective manner.
Time Management: Experienced players can complete this entire collection run in approximately 8-12 minutes, while newcomers should allocate 15-20 minutes for thorough exploration and puzzle solving.
Remember that Field Guide Pages contribute significantly to your overall level progression and house points. Missing these collectibles can delay important skill unlocks and gameplay enhancements detailed in our Complete Guide to character development.
Action Checklist
- Master Revelio spell and use it constantly while exploring
- Divide Hogwarts into zones and complete each systematically
- Focus on interactive objects: statues, portraits, and magical artifacts
- Return to previously inaccessible areas after learning new spells
- Check ceiling areas and behind moving staircases for hidden pages
- Complete The Caretaker’s Lunar Lament quest to acquire Alohomora
- Upgrade Alohomora by collecting Demiguise Statues/Moons
- Systematically explore each wing using Floo Flame fast travel points
- Master spell sequences: Confringo+Accio for gargoyles, Levioso for statues
- Use Revelio constantly while rotating for full coverage
- Start in Astronomy Wing and cast Revelio at each location entrance
- Systematically check all seven Astronomy Wing sub-locations methodically
- Move to Bell Tower Wing and complete courtyard areas before exterior locations
- Use audio cues from Revelio to locate concealed pages in each area
- Verify collection completion by cross-referencing with in-game tracking
- Master Revelio casting while listening for audio cue intensity changes
- {‘step’: ‘2’, ‘priority’: ‘Practice Accio timing on flying pages in open areas’, ‘difficulty’: ‘Beginner’, ‘time_estimate’: ’10-15 minutes’}
- Complete The Caretaker’s Lunar Lament quest to unlock Alohomora
- Collect 10 Demiguise Statues to upgrade Alohomora to level 2
- Solve 3 Moth Mirror Puzzles using systematic moth location strategies
- Verify Accio and Levioso spells are equipped and ready
- Start at Bell Tower Courtyard and check ramparts room
- Collect flying pages near Greenhouses and beehives
- Use Accio on the page above the hut structure
- Navigate to Owlery tower and solve Levioso statue puzzle
- Acquire essential spells: Glacius, Confringo, Revelio, Levioso
- Collect right side room page and staircase flying page
- Solve pot door and fireplace puzzle sequence
- Ascend spiral staircase and interact with statues using correct spells
- Examine mermaid mural and unicorn statue for final pages
No reproduction without permission:SeeYouSoon Game Club » Hogwarts Legacy – All 150 Hogwarts Castle Field Guide Pages