TL;DR
- Safes contain substantial Mercers and appear on every Freelancer map with clear mini-map indicators
- Use your camera to scan three glowing documents or electronics within close proximity to each safe
- Opening safes is always illegal – ensure complete isolation regardless of your current disguise
- Lethal explosives of any type work for forced entry, not just specialized demolition equipment
- Choose your method based on time constraints, available equipment, and current infiltration status
Freelancer safes represent crucial income sources in Hitman’s roguelite mode, typically containing between 500-2000 Mercers depending on the mission difficulty and location. These secure containers appear consistently across all maps, providing predictable revenue streams for strategic players.
The Freelancer mode brilliantly layers roguelite progression mechanics over the expansive levels from the World of Assassination trilogy. While this addition has been widely praised by the community, the game frequently delays tutorial information until after players have already experimented with new mechanics through trial and error.
For many gameplay elements this approach works adequately, but safe mechanics have proven particularly confusing for newcomers. Each safe displays prominently on your mini-map with a distinctive icon that becomes highlighted when activating Agent 47’s instinct ability. However, approaching the safe interface reveals only that three distinct codes are required for access, offering no direction on acquisition methods.
Successfully accessing these secure containers requires understanding two fundamentally different approaches: the meticulous code-gathering method or the direct explosive entry technique. We’ll explore the stealth-focused approach initially for those prioritizing discretion.
Early in your Freelancer career, you’ll notice the permanent camera fixture in your inventory that previously saw limited application during the main campaign. This specialized equipment becomes absolutely essential for acquiring safe codes, as many players overlook its critical function in this game mode.
When pursuing the code-based entry method, activate your instinct vision to survey the immediate area surrounding the safe—typically confined to adjacent rooms or connected spaces. Search for distinctive glowing objects including thick document folders, active laptop computers, or illuminated tablets. These items require scanning with your camera equipment as demonstrated below.
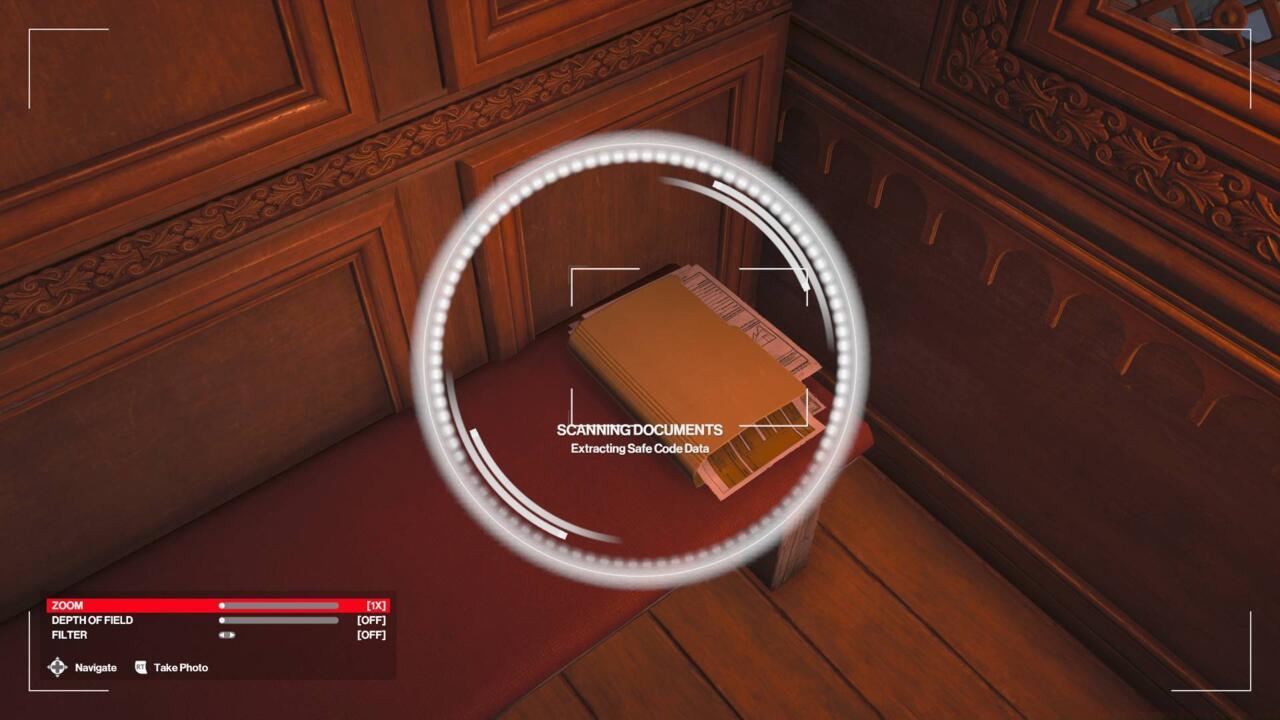
Three scannable objects will be found nearby a safe.
Successfully scanning all three required objects grants immediate safe access capability. However, unlocking any safe constitutes an illegal action regardless of your current disguise status. This critical detail means you must account for visibility when proceeding with the actual unlocking process. Any NPC observing your actions will become suspicious immediately, with guards responding with lethal force without hesitation. Strategic positioning and timing are therefore paramount.
The code-based method isn’t universally optimal despite its stealth advantages. Let’s examine the alternative explosive entry approach for different tactical situations.
Many players mistakenly believe specialized demolition charges or similar purpose-built explosives are necessary for traditional safe cracking. In reality, any lethal explosive device functions effectively for this purpose, unlike concussive or disorientation explosives that lack destructive capability. Simply ensure you possess explosives designed for elimination rather than diversion.
Even unconventional explosive devices like the explosive baseball prove perfectly adequate when deployed against safe doors. The key distinction lies in the explosive’s damage type rather than its form factor or intended purpose.
Strategic deployment of explosives requires careful environmental assessment. Consider collateral damage potential, noise propagation through the environment, and guard patrol patterns before initiating detonation. The explosive method typically resolves in 5-10 seconds but generates significant attention, making timing crucial.
Advanced players should note that proximity mine placement on the safe door allows for remote detonation from safer positions, providing tactical flexibility not available with the manual code entry approach.
Seasoned operatives develop method selection criteria based on multiple situational factors. The stealth approach typically requires 60-90 seconds for complete code acquisition but maintains your cover, while explosive entry delivers immediate results at the cost of alerting nearby personnel.
Optimization involves preparing multiple approaches simultaneously. Carry both a camera and compact explosives like micro remote explosives to adapt to changing circumstances during missions.
Common mistakes include scanning objects in the wrong order (wasting time), using non-lethal explosives (ineffective), or attempting safe access with insufficient isolation. Always verify the area is completely clear of potential witnesses before proceeding with either method.
For comprehensive Freelancer strategies, consult our Complete Guide to master all aspects of this challenging game mode. Understanding these mechanics will significantly enhance your Class Guide effectiveness and complement your Weapons Unlock progression.
Action Checklist
- Locate safe using mini-map and instinct vision highlighting
- Assess situation: available time, current disguise, guard density
- Choose method: stealth (codes) for discretion or explosive for speed
- Execute chosen method with proper isolation and timing
- Secure contents and exit area before reinforcements arrive
No reproduction without permission:SeeYouSoon Game Club » Hitman Freelancer Safe Codes: How To Open Safes In Any Level Master safe cracking in Hitman Freelancer with stealth and explosive methods for maximum profit