TL;DR
- Complete the first three Chasm Delvers quests before attempting these final missions
- Solve the Seelie puzzle by strategically positioning both Seelies while manually activating the third totem
- Prepare Cryo and Hydro characters for the dual Abyss Lector encounter
- Use Lumenstone Adjuvant to clear black ooze from monuments and totems
- Collect the Curious Cube after defeating Agnarr and Egill for progression
Mastering The Chasm’s concluding world quests requires strategic preparation and understanding of the unique mechanics involved. These final chapters deliver significant lore revelations while testing your puzzle-solving abilities.
Genshin Impact’s expansive Chasm region features an extensive world quest series titled The Chasm Delvers. To access these culminating missions, players must first complete the initial three segments of this quest chain, which serve as prerequisites for advancing through the latest Archon Quest narrative. Our focus here covers the concluding two installments: Perils in The Dark and Wherefore Did the Spiritstone Descend. These quests incorporate intricate environmental puzzles and culminate in a challenging confrontation with a specialized variant of the formidable Ruin Serpent boss enemy.
Essential Preparation Tips: Ensure your Lumenstone Adjuvant is upgraded to at least level 6 for optimal ooze-clearing efficiency. Bring a balanced team with strong elemental coverage, particularly including characters who can apply consistent Cryo and Hydro effects for the mandatory boss encounters. Allocate approximately 45-60 minutes for uninterrupted completion of both quests.
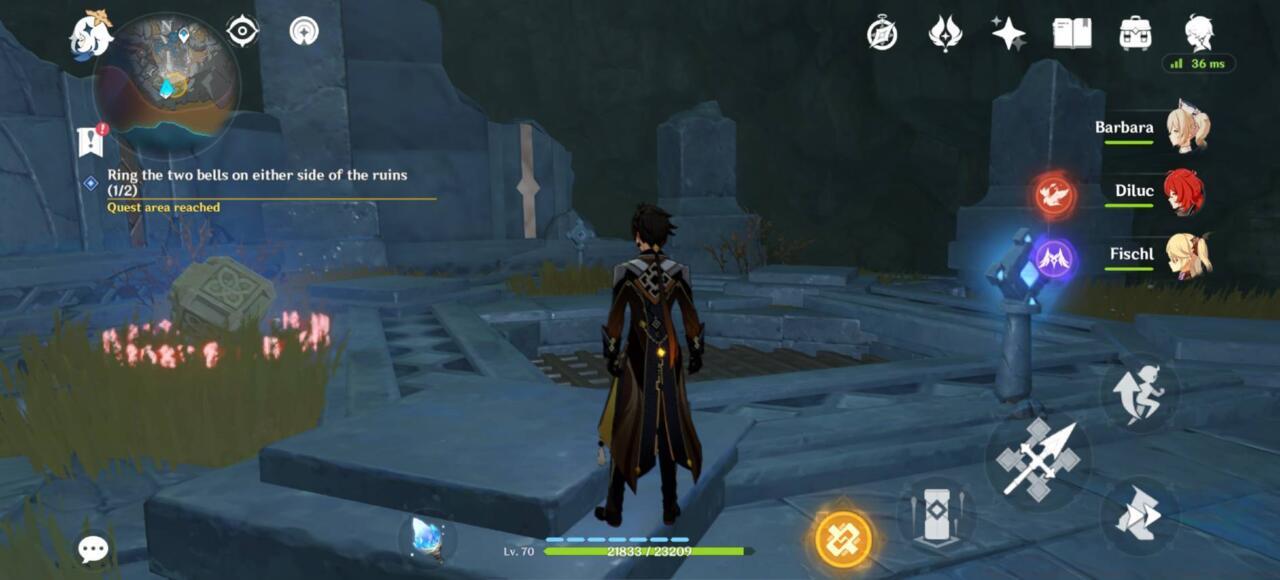
Navigating to the northern bell location presents a straightforward but methodical challenge that requires systematic enemy clearance and environmental interaction.
Descend to the area adjacent to the corrosive ooze and utilize your Lumenstone Adjuvant to purify the area. The revealed Fatui operative’s journal provides explicit directions to activate both northern and southern bells within the ancient ruins.
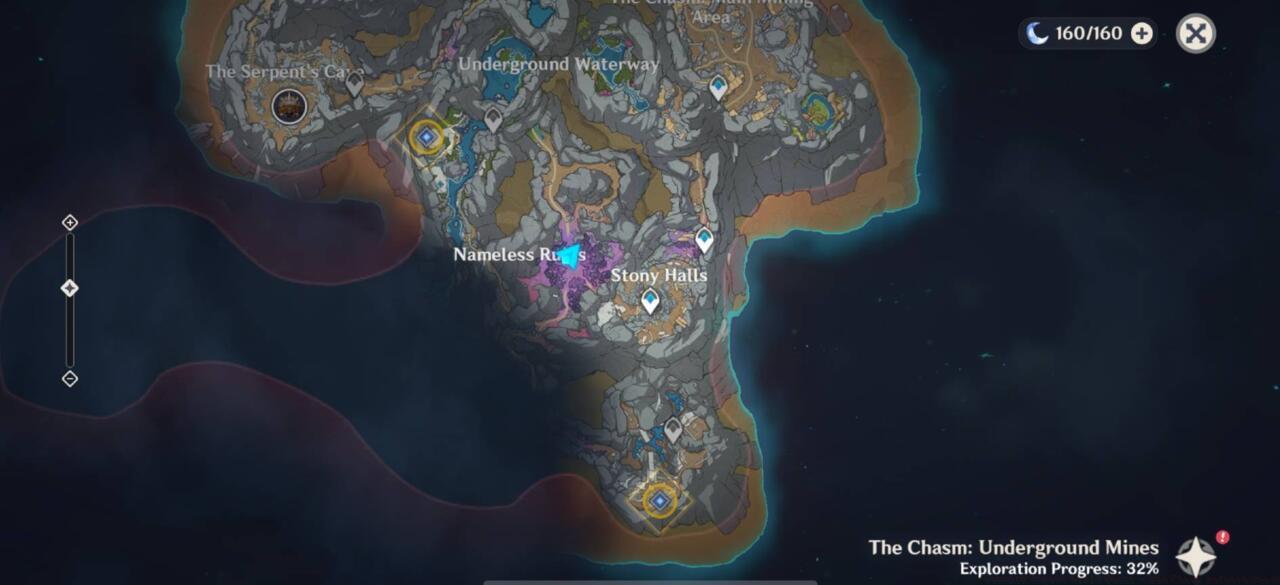
Strategic bell placement across The Chasm’s northern and southern sectors
Common Pitfalls to Avoid: Don’t attempt to purify multiple monuments simultaneously—the spawning enemies can overwhelm unprepared players. Ensure your Adjuvant energy is fully charged before beginning the process to avoid interruptions. The Shadowy Husk possesses moderate resistance to physical attacks, so prioritize elemental reactions for efficient elimination.
The southern bell presents a significantly more complex challenge centered around an intricate Seelie navigation puzzle that demands spatial awareness and timing precision.
Southern ruin configuration prior to Seelie puzzle resolution
Ascend to the ruin’s apex where a new floating Seelie awaits interaction. Engaging this Seelie triggers the opening of the sealed gate below. Descend through the newly accessible passage, purify the residual ooze, and engage the Ruin Grader guardian. Upon defeating this mechanical foe, return to the upper level and strike the bell to complete activation.
Advanced Puzzle Strategy: For speedrunners, you can bypass one Seelie entirely by quickly activating three totems manually while the first Seelie travels to its position. This saves approximately 30-45 seconds but requires precise timing and movement. The Ruin Grader is vulnerable to elemental reactions that target its core weak points—focus attacks on its leg joints to temporarily disable it.
Following successful bell activation, prepare for consequential boss engagements that test your combat proficiency and team composition effectiveness.
Upon quest progression completion, you’ll confront the formidable duo of Electro and Pyro Abyss Lectors identified as Agnarr and Egill. Deploying Cryo and Hydro characters in your party configuration significantly accelerates defeating these elemental specialists. After vanquishing both Lectors, secure the dropped Curious Cube artifact for subsequent narrative development.
Confrontation with Haftvad the Worm during the quest’s climax
Dual Lector Combat Strategy: Focus initial attention on the Pyro Lector (Egill) to eliminate his persistent shield generation. Utilize Cryo applications to trigger Melt reactions for amplified damage. The Electro Lector (Agnarr) will periodically attempt to resurrect his counterpart—interrupt this process with Hydro applications to create Electro-Charged reactions that stagger him. Position yourself to maintain both enemies within your field of view to anticipate their synchronized attacks.
Reward Analysis: Completion yields 50 Primogems, 3 Hero’s Wit, 6 Mystic Enhancement Ore, and the narrative-progressing Curious Cube. The cube initiates the subsequent quest phase involving the mysterious spiritstone’s origins and significance within The Chasm’s deeper lore narrative.
Action Checklist
- Verify completion of first three Chasm Delvers quests and upgrade Lumenstone Adjuvant to level 6
- Assemble team with Cryo and Hydro characters for elemental coverage
- Navigate to north bell, purify monuments sequentially, defeat Shadowy Husk
- Solve south bell Seelie puzzle using coordinated positioning strategy
- Defeat Abyss Lector duo using elemental reaction priorities
- Collect Curious Cube and prepare for subsequent spiritstone investigation
No reproduction without permission:SeeYouSoon Game Club » Genshin Impact World Quest – The Chasm Delvers Guide Master The Chasm's final quests with expert puzzle solutions and boss strategies for Genshin Impact players