TL;DR
- Floor design significantly impacts Minecraft build aesthetics and functionality
- Built-in crafting tables and storage optimize space while maintaining visual appeal
- Strategic block combinations create unique atmospheres for different room purposes
- Advanced checkerboard patterns add depth and complexity to traditional designs
- Water and stained glass floors require special techniques but offer stunning results
GameSpot may receive revenue from affiliate and advertising partnerships for sharing this content and from purchases through links.
Most Minecraft builders focus extensively on walls, roofs, and exterior details while treating floors as an afterthought. This common approach often results in monotonous wood plank or stone surfaces that fail to contribute to the overall architectural vision. However, intentional floor design serves as the foundation that ties together your entire build’s aesthetic and functional elements.
Well-executed flooring can dramatically alter spatial perception, establish thematic consistency, and even enhance gameplay efficiency. By moving beyond basic materials, you unlock creative possibilities that transform ordinary structures into extraordinary builds with distinct personality and purpose.
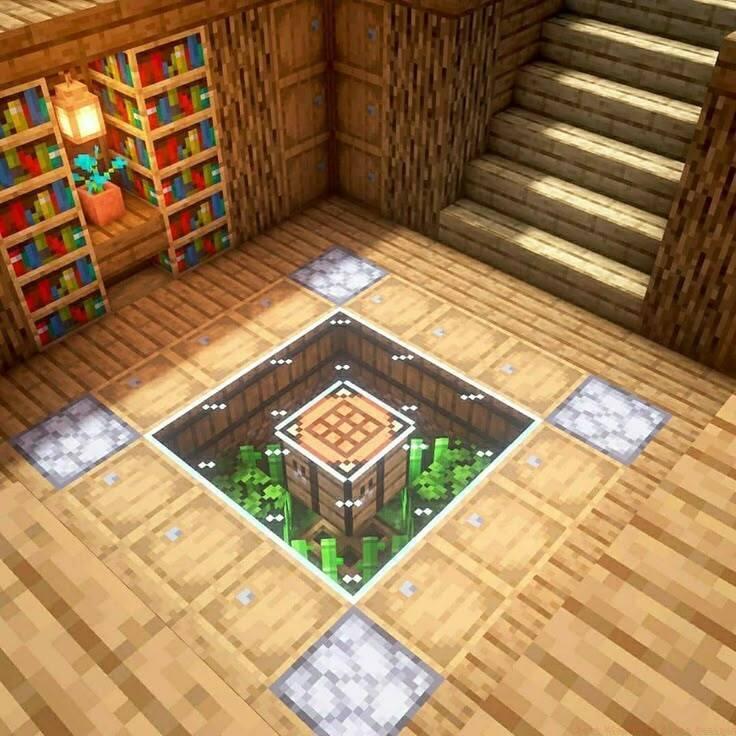
Incorporating functional blocks directly into your flooring represents one of the most practical yet underutilized design strategies. The showcased example demonstrates how a crafting table can become a centerpiece rather than an obstruction when surrounded by glass panels and strategic vegetation placement.
This approach eliminates clutter while maintaining immediate access to essential crafting capabilities. For optimal results, position these integrated elements in high-traffic areas where their functionality aligns with room purpose—crafting stations near storage areas, furnaces in kitchen spaces, or enchantment tables in library settings.
Common mistake: Placing interactive blocks in awkward locations that disrupt workflow. Solution: Map your movement patterns before finalizing floor integration placements.
The sophisticated combination of Cherry Logs, Purple Terracotta, and Muddy Mangrove Roots creates a rich, textured foundation that works exceptionally well for mood-specific environments. Accented with End Stone, Chorus Flower, and strategic String placements, this palette evokes mystery and refinement.
This particular arrangement excels in spaces designed for specialized activities like potion brewing, enchanting, or secret meetings. The darker tones naturally suggest subterranean or intimate settings, but with proper lighting integration, it can adapt to various architectural contexts.
Pro tip: Balance dark floor schemes with adequate illumination—consider hidden glowstone beneath trapdoors, strategically placed sea lanterns, or end rod configurations that complement rather than overwhelm the aesthetic.
.jpg)
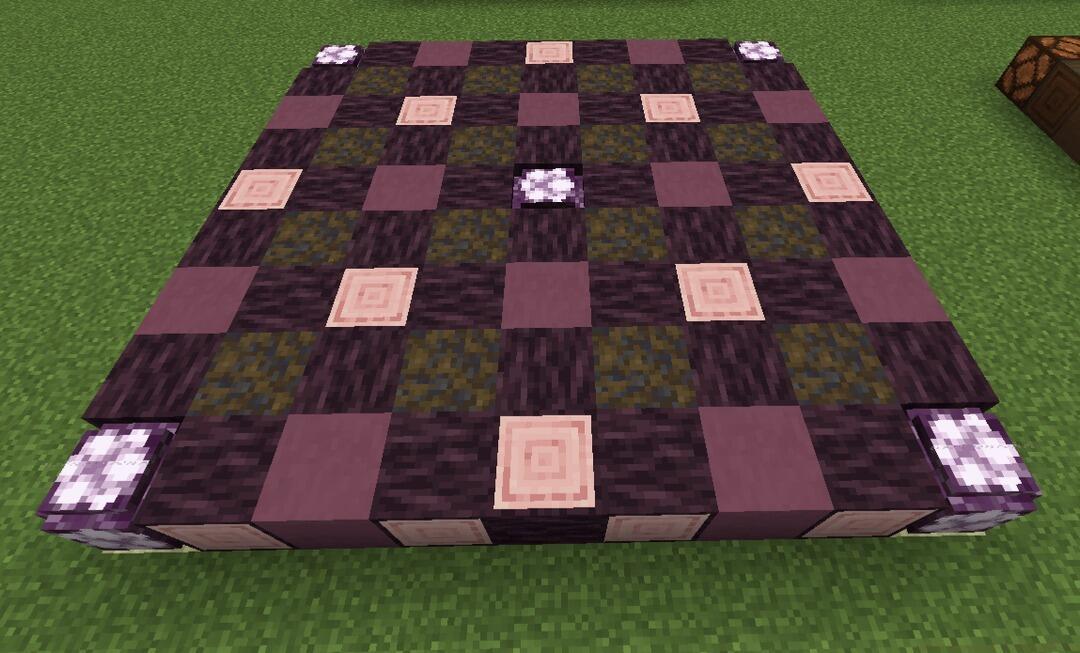
While traditional checkerboard arrangements provide reliable visual interest, advanced implementations leverage multiple wood types and terracotta variations to achieve depth and complexity. The showcased design demonstrates how dark oak, spruce, and various terracotta shades can create cozy, inviting spaces without appearing overly busy.
For players seeking to master this technique, consider experimenting with non-square patterns—diamonds, hexagons, or alternating strip configurations that break from conventional grid layouts.
RGB wool implementations offer vibrant color possibilities, while stone-based checkerboards establish medieval or fantasy themes. Advanced builders might incorporate elevation variations using slabs and stairs to create three-dimensional floor textures.
Time estimate: A medium-sized room (15×15 blocks) requires approximately 30-45 minutes for precise checkerboard execution.

Integrating water elements into flooring creates stunning visual effects and practical benefits, though it requires careful planning. The demonstrated design utilizes mod-assisted block trimming for precision, but vanilla alternatives achieve similar results through strategic placement and containment methods.
Vanilla implementation requires using waterlogged slabs, stairs, or strategically placed source blocks beneath barrier materials. Glass panes or iron bars often work well as containment while maintaining visibility.
Safety consideration: Ensure water elements don’t create mobility issues or unintended flooding. Incorporate drainage systems or controllable water sources using pistons and redstone for functional flexibility.

Stained glass floors represent an advanced technique that transforms light and color into architectural elements. The interplay between overhead illumination and translucent flooring creates dynamic visual effects that change throughout the day-night cycle.
Strategic color selection follows basic principles: cool tones (blue, green) create calming environments, while warm hues (red, orange) establish energetic spaces. Layering different colors produces gradient effects and complex patterns.
For optimal results, place light sources beneath stained glass to maximize color saturation and diffusion. This approach works exceptionally well in multi-level builds where upper floors can influence lower-level lighting atmospheres.
Advanced application: Combine stained glass with water elements for amplified light refraction, or use them as indicators in complex redstone contraptions.
Action Checklist
- Analyze room purpose and traffic patterns before selecting floor design
- Experiment with block combinations in creative mode before survival implementation
- Integrate functional blocks (crafting tables, chests) into flooring for space optimization
- Implement strategic lighting to complement floor color schemes and materials
- Test water and stained glass features thoroughly to ensure mobility and functionality
No reproduction without permission:SeeYouSoon Game Club » Best Minecraft Floor Designs Transform your Minecraft builds with innovative floor designs that elevate aesthetics and functionality