TL;DR
- Dehya excels as an HP-focused support using Tenacity of the Millelith for team buffs and damage absorption
- Her elemental skill’s persistent Pyro field enables consistent artifact set procs even when off-field
- Prioritize HP% main stats for support builds while balancing Energy Recharge requirements
- Avoid common mistakes like neglecting skill timing and underestimating her defensive utility
- Advanced players can optimize through substat tuning and specific team compositions
Mastering Dehya’s artifact selection requires understanding her unique hybrid capabilities in Genshin Impact. Unlike traditional damage dealers, she offers exceptional defensive utility while maintaining respectable offensive presence.
Dehya joined playable rosters in version 3.5, bringing versatile kit mechanics that reward strategic artifact choices. Her banner availability provides access to a character who bridges damage and support roles effectively.
The core decision revolves around prioritizing her damage mitigation capabilities versus maximizing personal damage output. Most players find optimal performance by leveraging her HP-scaling talents for consistent team support.
Common Mistake: Many players initially build Dehya as main DPS, overlooking her superior performance as a defensive support unit. Her elemental skill creates a persistent field that both damages enemies and redirects incoming damage from active characters.
The Tenacity of the Millelith artifact set stands as Dehya’s premier support configuration for several compelling reasons. This build capitalizes on her inherent strengths while addressing her damage limitations.
- 2-piece bonus: +20% HP – significantly boosts her scaling abilities
- 4-piece bonus: When an elemental skill hits opponents, all party members gain +20% ATK and +30% shield strength for three seconds; can be triggered even when the character isn’t on the field
- Preferred main stats: HP%/HP%/HP% for maximum support effectiveness
Dehya’s trial demonstration features Tenacity of the Millelith because it synergizes perfectly with her kit design. The damage from both her elemental skill and burst scales directly with maximum HP, making the 2-piece bonus immediately valuable.
Her elemental skill creates a substantial Pyro area-of-effect field that persists off-field, enabling continuous artifact proc opportunities. The coordinated attacks within this field trigger the 4-piece bonus repeatedly, maintaining near-perfect uptime on attack buffs.
Advanced Tip: Time your skill placements to coincide with enemy spawn patterns for maximum buff coverage. The damage redirection mechanic also benefits from increased HP, enhancing her team protection capabilities.
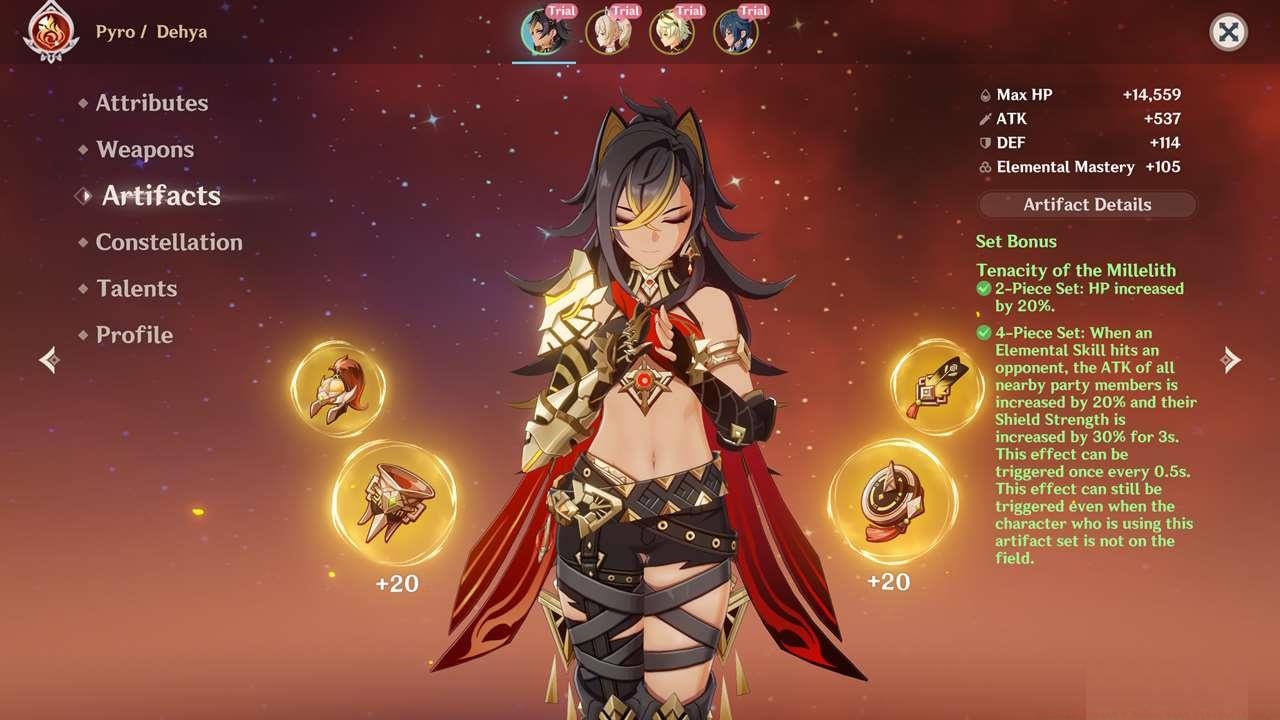
Dehya’s trial configuration demonstrates the Tenacity of the Millelith set in action, showcasing optimal support playstyle.
While Tenacity of the Millelith excels for support, several alternative artifact sets accommodate different team needs and player preferences.
- 2-piece bonus: +15% Pyro damage – ideal for damage-focused builds
- Crimson Witch of Flames: Enhances reaction damage for vape or melt compositions
- Emblem of Severed Fate: Excellent for burst-focused rotations requiring Energy Recharge
For players seeking more aggressive Dehya builds, combining 2-piece Tenacity with 2-piece Crimson Witch provides balanced HP and damage benefits. This hybrid approach maintains her survivability while boosting Pyro damage output.
Early Game Solution: Until you farm optimal sets, mix 2-piece HP% bonuses from Tenacity and Vourukasha’s Glow for immediate performance gains.
The Emblem of Severed Fate set becomes valuable in teams where Dehya’s burst serves as primary damage source. This requires careful Energy Recharge management through substats and weapon choices.
Optimizing Dehya’s performance extends beyond simple artifact selection to detailed stat balancing and rotation mastery.
Substat Priority Guide: HP% > Energy Recharge > Crit Rate/Damage > Elemental Mastery. Aim for 160-180% Energy Recharge for comfortable burst uptime.
Common Rotation Mistakes: Placing her skill too early before swapping to damage dealers, or failing to reposition it for new enemy waves. Her field duration lasts 12 seconds with 20-second cooldown, requiring strategic timing.
Energy management proves crucial – without sufficient Energy Recharge, her burst becomes inconsistent, reducing overall team damage output. Pair her with Pyro battery characters if using Energy-hungry builds.
Advanced players should consider team-specific optimizations. In mono-Pyro compositions, focus on damage; in reaction teams, balance Elemental Mastery with HP for optimal support damage.
Action Checklist
- Farm Tenacity of the Millelith domain for HP% focused pieces
- Prioritize HP% sands, HP% goblet, and HP% circlet for support build
- Balance Energy Recharge substats to reach 160-180% threshold
- Test skill placement timing to maintain artifact buff uptime
- Optimize team rotations to maximize her off-field support value
No reproduction without permission:SeeYouSoon Game Club » Genshin Impact – Dehya Best Artifacts Guide Master Dehya's artifact builds for optimal support and damage roles in Genshin Impact