TL;DR
- Secure Healing Materia immediately after Barret’s train scene for essential survival capability
- Thoroughly explore side tunnels for Star Pendant, hi-potions, and Moogle Medal collectibles
- Use Thunder magic against Slug Bots and Ice spells for Queen Grashtrikes to maximize stagger damage
- Target Crab Warden’s legs systematically to disable its most dangerous electrical attacks
- Manage ATB charges strategically between healing and offensive abilities during boss encounters
This comprehensive walkthrough provides detailed guidance for conquering the fifth chapter of Final Fantasy VII Remake on PS4, including precise locations for all weapons, armor upgrades, and rare collectibles. Understanding the strategic flow of this mission will significantly enhance your combat effectiveness and resource acquisition.
Following our spoiler-free progression guide returns you to Sector 7 plate operations with Jessie, Biggs, and Wedge executing a critical new assignment. While Chapter 4 featured Cloud’s motorcycle combat sequences reminiscent of the original game’s intense minigames, Chapter 5 introduces new enemy types and environmental challenges that demand tactical adaptation. Proper preparation and exploration habits established here will pay dividends throughout your Complete Guide to the game’s later stages.
Begin the chapter inside the moving train compartment. After initial dialogue exchanges with Tifa, proceed to Barret’s designated train car for critical story development. Immediately following the cinematic sequence, thoroughly search the area to locate the essential Healing Materia – this restorative magic becomes indispensable for surviving upcoming encounters.
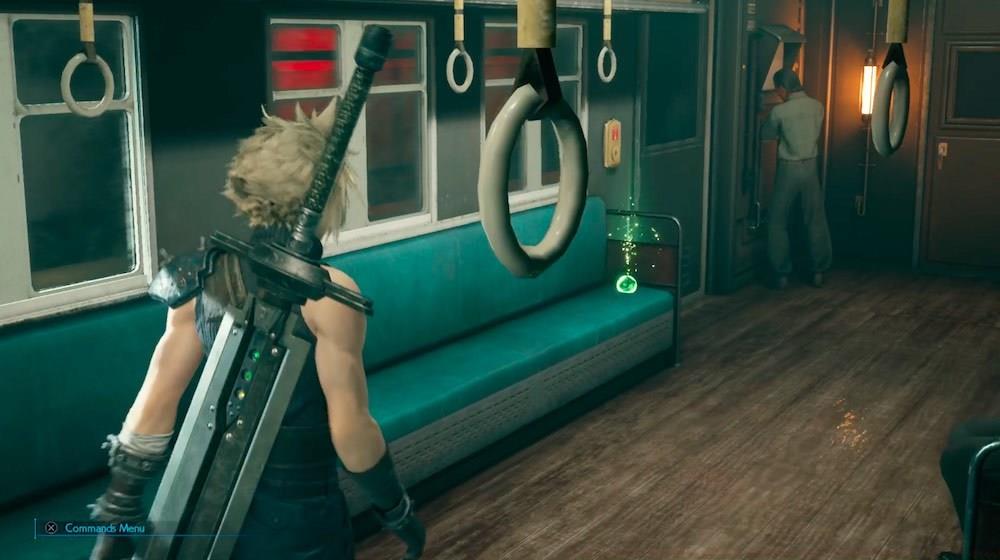
Prioritize collecting the Healing Materia immediately after Barret’s scene concludes, as delaying this acquisition significantly increases early combat difficulty.
Combat initiation occurs rapidly against Shinra’s automated Slug Bot drones. These mechanical adversaries demonstrate particular vulnerability to Thunder-based spells, while Tifa’s rapid combo attacks prove exceptionally effective for building their stagger meters. Mastering this enemy type’s weakness pattern provides foundational knowledge for approaching similar mechanized opponents throughout your Weapons Unlock progression.
After disembarking from the train, utilize the bench and vending machine positioned on the left-side platform to replenish health and acquire any necessary equipment upgrades. Progressing further into the tunnel network, carefully inspect the right-side section for an accessible platform containing destructible Shinra crates. Destroy these containers to access a treasure chest containing two hi-potions – these items provide crucial emergency healing during demanding engagements.
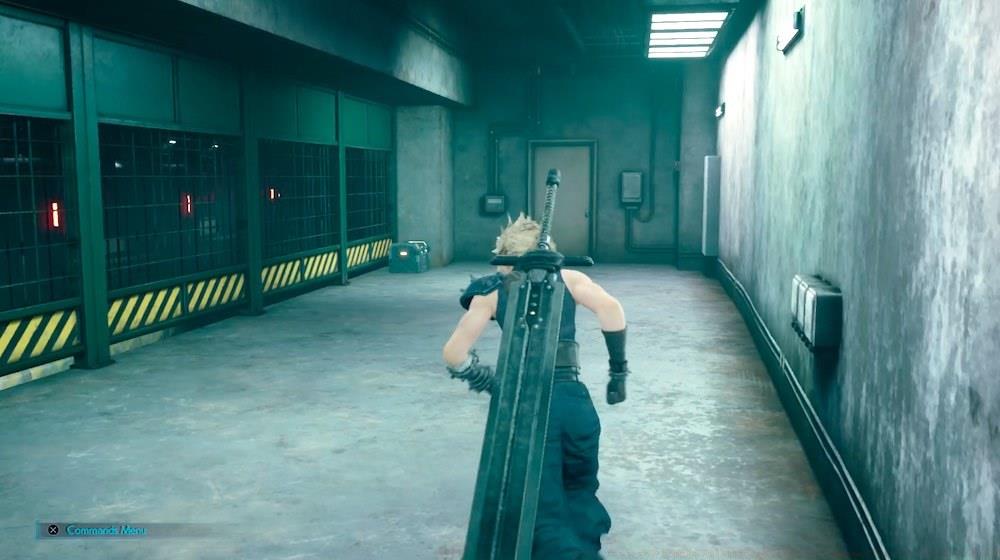
Systematically explore every side tunnel and storage room, as these areas frequently contain treasure chests with armor upgrades, accessory enhancements, and occasionally new weapons that dramatically impact combat effectiveness.
Upon reuniting with Barret, turn right before advancing toward your primary objective to discover a concealed storage area. This hidden room contains a chest holding an elixir – an extremely valuable item that fully restores HP and MP for your entire party during critical situations.
Continue following the railway tracks until encountering your initial Slug Bot squad. After neutralizing these threats, scan the southern track perimeter for a staircase leading to an elevated platform. Ascend these stairs and proceed to the rear section of this area, where you’ll confront Wererat enemies and discover a chest containing the Star Pendant accessory – this equipment provides valuable status effect resistance that proves invaluable against certain enemy types.
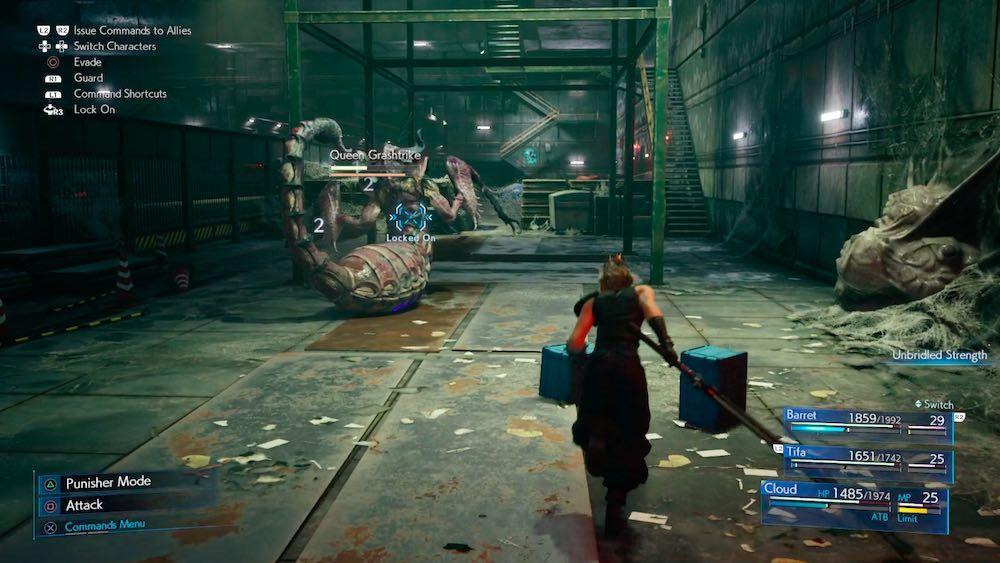
While Queen Grashtrikes appear formidable initially, applying Ice-elemental attacks rapidly fills their stagger gauge, enabling devastating damage opportunities. This elemental interaction principle extends to many combat scenarios detailed in our comprehensive Class Guide for strategic character development.
Advance further until confronting a mixed enemy group comprising Slug Bots, Guard Dogs, and an Elite Grenadier. Search the adjacent track areas for additional Shinra crates positioned between the rails; demolishing these containers yields a precious Moogle Medal collectible.
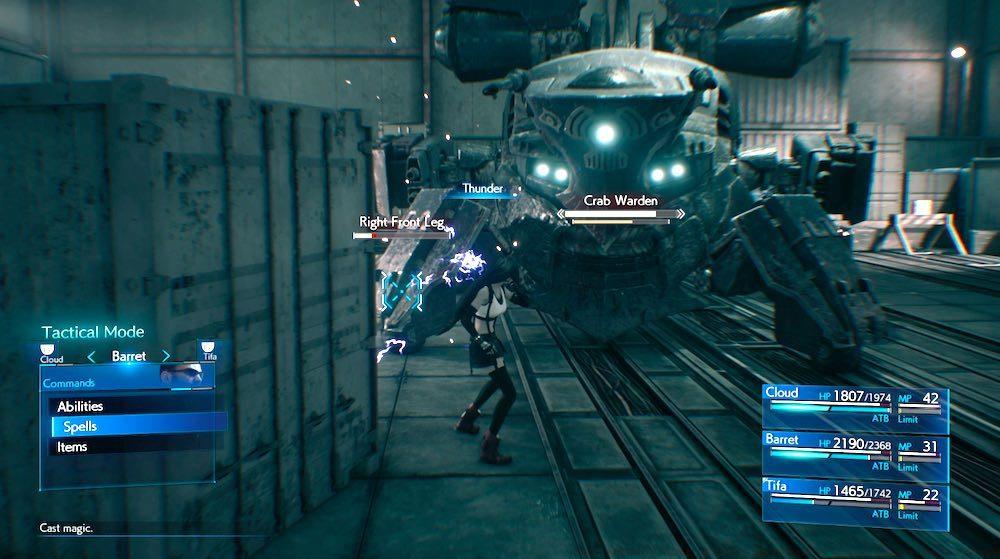
Systematically disabling the Crab Warden’s leg components represents the most effective strategy for neutralizing this boss threat. Concentrate attacks on individual limbs to progressively reduce its mobility and offensive capabilities.
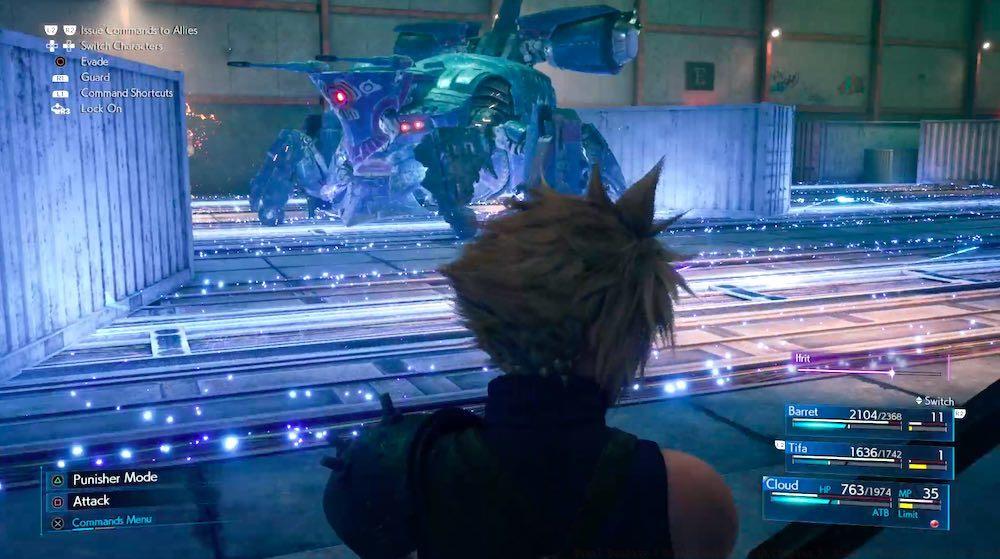
Remain vigilant against the Crab Warden’s tendency to electrify flooring directly ahead and surrounding its position, followed by charging electrical energy throughout the entire track system – recognizing these attack patterns early enables effective positioning and damage mitigation.
Action Checklist
- Collect Healing Materia immediately after Barret’s train scene
- Use bench and vending machine on left platform for healing and supplies
- Thoroughly explore right tunnel side for hi-potions chest
- Check storage room right of Barret for elixir chest
- Defeat initial Slug Bots then ascend southern staircase for Star Pendant
- Destroy Shinra crates between tracks after Elite Grenadier fight for Moogle Medal
No reproduction without permission:SeeYouSoon Game Club » Final Fantasy 7 Remake Walkthrough Chapter 5: Dogged Pursuit (Spoiler-Free) Master Final Fantasy VII Remake Chapter 5 with expert strategies, collectible locations, and boss tactics