TL;DR
- Complete four Modular Reactor trials using specific characters and Cactuar weakness mechanics
- Use Cactuar Statue beams to locate Cactuar Rocks and obtain reactor keys
- Switch between Yuffie’s physical/magical attacks and Aerith’s light/dark wards strategically
- Prioritize rainbow Cactuars for time extensions and Gold Gigantuars for maximum points
- Finish Chapter 12 to access final two trials and unlock Gilgamesh summon materia
Embark on one of Final Fantasy 7 Rebirth’s most unconventional side quests that will test your combat adaptability and puzzle-solving skills. The Corel Protorelic chain stands out for its unique mechanics and progression requirements that many players find initially confusing.
Many objectives in Final Fantasy 7 Rebirth follow straightforward patterns, but the Modular Reactor challenges introduce complex mechanics that require strategic thinking. This comprehensive guide breaks down every step to ensure you conquer all four trials efficiently.


You can’t unlock the Modular Reactor (left), unless you get the key by shining a beam that leads you to the Cactuar Rock (right).
The Corel Protorelic quest operates on a distinctive progression system that demands careful planning:
- Access the initial two objectives starting in Chapter 9: The Planet Stirs, where a Sand Giant appears but typically doesn’t interfere with your objectives initially.
- Your primary mission involves locating structures completely overgrown with cacti vegetation, identified as Modular Reactors in the game world.
- Approaching these reactors reveals they’re locked, requiring specific keys to gain entry.
- Acquire keys by obtaining Cactuar Statues and using the D-pad Up button to project green directional beams toward Cactuar Rock locations.
- Navigate to each Cactuar Rock, activate the statue’s beam, defeat spawning Cactuar enemies, then interact with the landmark to receive the necessary key.
- Return to the corresponding Modular Reactor to unlock the entrance, descending to encounter the goblin Kid G and his specialized combat trials.
- Complete time-limited challenges defeating numerous Cactuar types, with specific character assignments and distinct weakness patterns for each variant.
- Note that progressing to the final two objectives requires completion of Chapter 12: A Golden Key for story progression reasons.
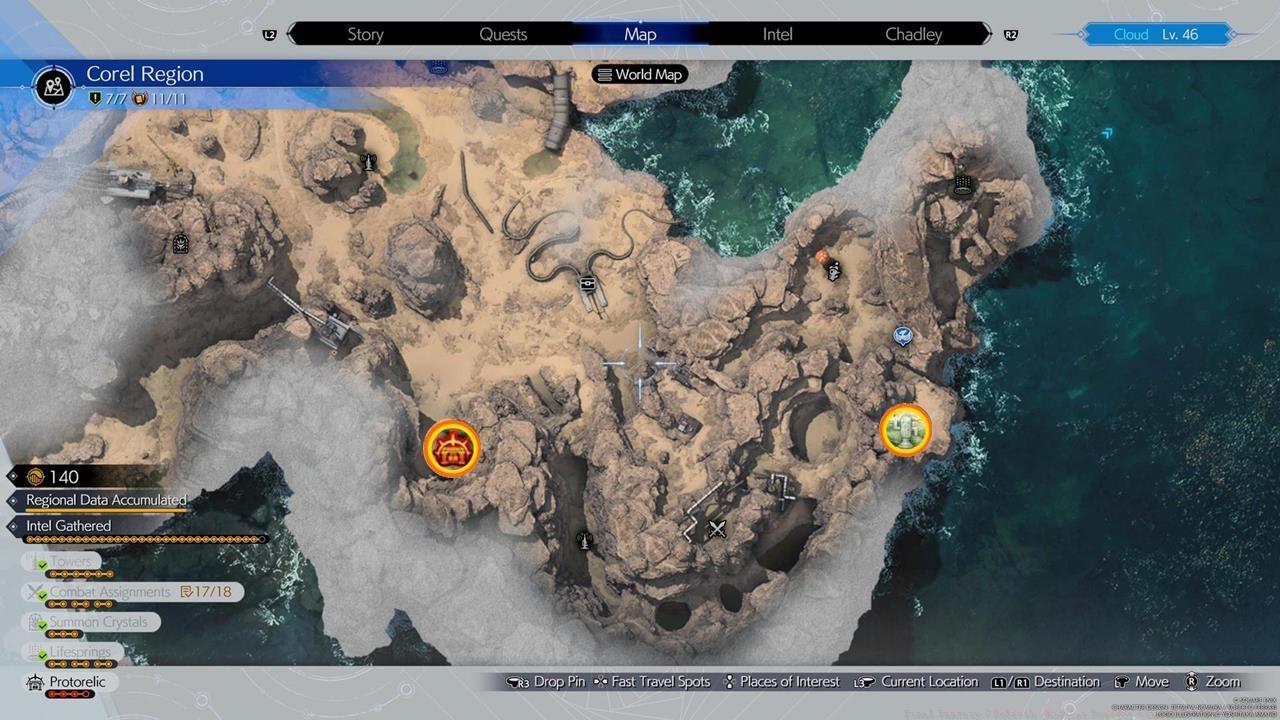
Begin your Protorelic journey by interacting with the first Modular Reactor, then following the procedural steps to pinpoint the corresponding Cactuar Rock location. Securing the key from this landmark grants access to the reactor interior where your first challenge awaits.
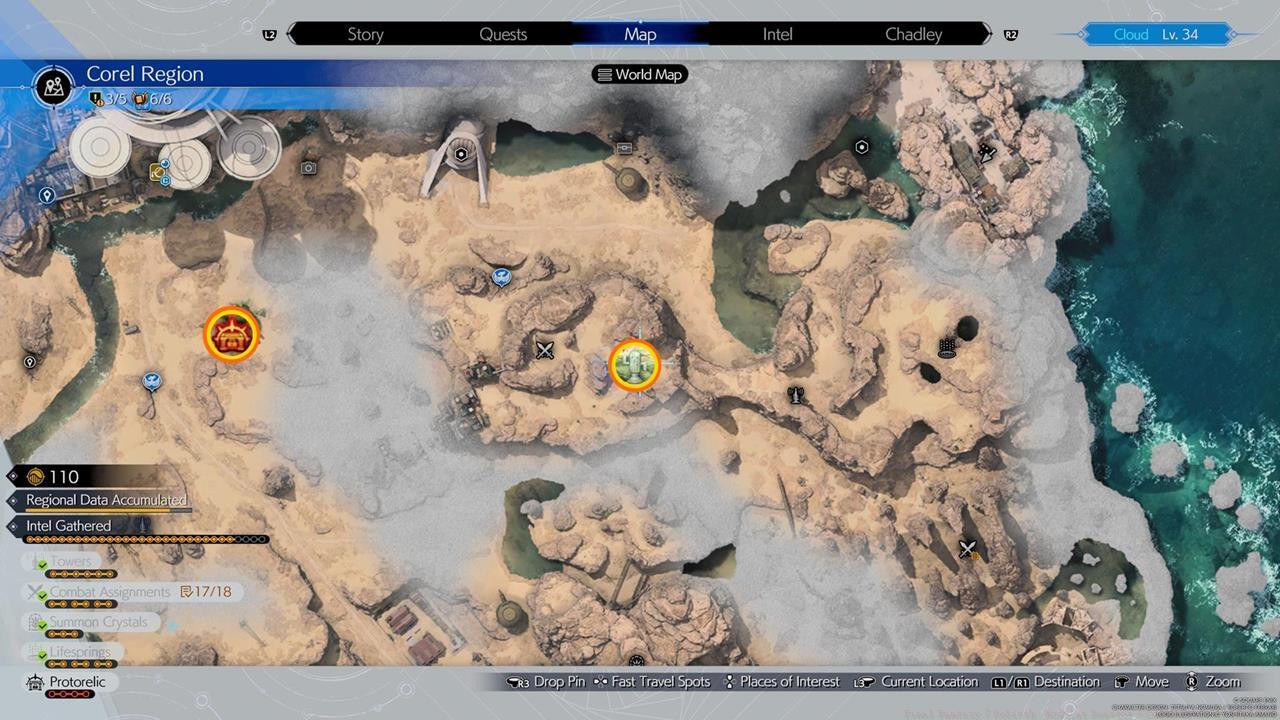
A map showing the location of the first Modular Reactor and Cactuar Rock.
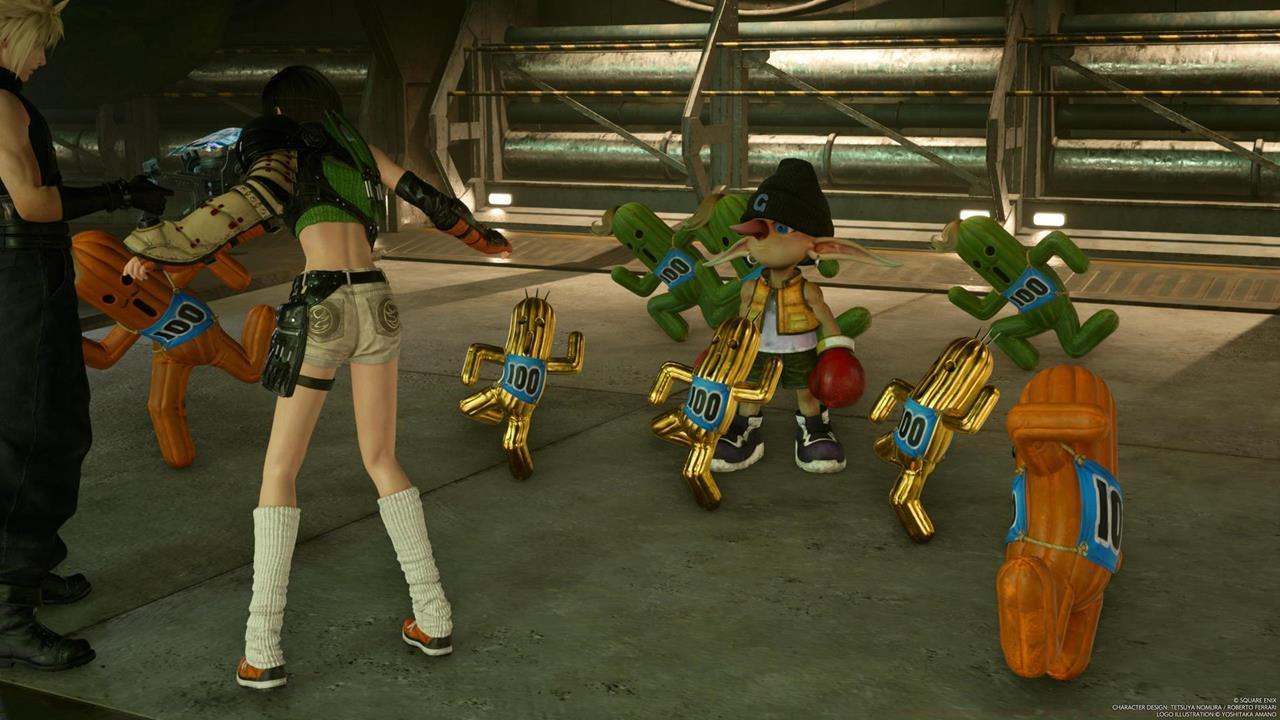
Kid G’s inaugural trial assigns Yuffie as your combatant, presenting these strategic considerations:
- Primary adversaries include green and orange Cactuar variants with clearly defined damage vulnerabilities.
- Green Cactuars possess significant weakness to physical damage types, making them vulnerable to standard attacks.
- Orange Cactuars demonstrate pronounced weakness to magical damage, requiring elemental approaches.
- Employ Yuffie’s basic physical strikes against green enemies for maximum efficiency.
- Against orange foes, deploy her shuriken throws combined with Elemental Ninjutsu techniques to exploit their magical vulnerability.
- Always prioritize targeting rainbow-colored Cactuar specimens, as they provide crucial time limit extensions when defeated.
- Maintain constant awareness of enemy spawn patterns to optimize your positioning and attack sequences.
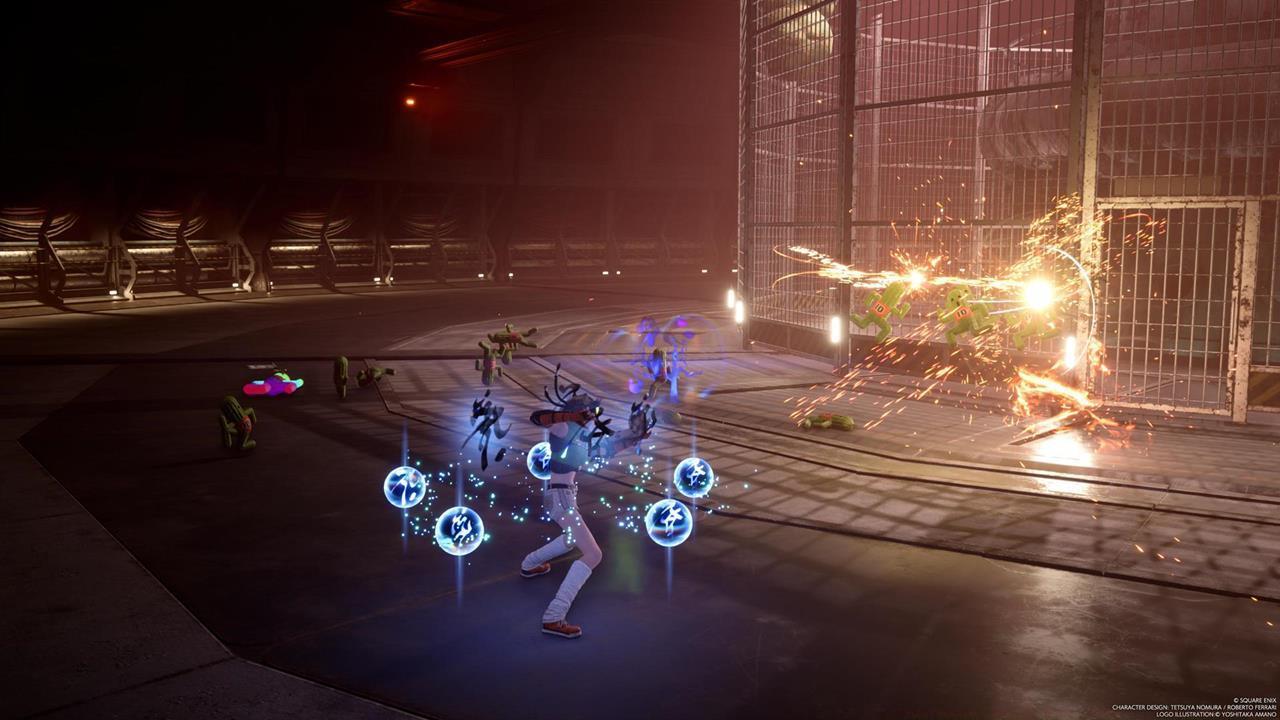
Switch between Yuffie’s physical and Elemental Ninjutsu attacks depending on your targets.
Pro Tip: Pre-charge Yuffie’s Elemental Ninjutsu before orange Cactuars spawn to maximize damage output during their vulnerable periods.
After conquering the initial trial, proceed to the subsequent Modular Reactor situated in Final Fantasy 7 Rebirth’s eastern region near a Chocobo Stop location.
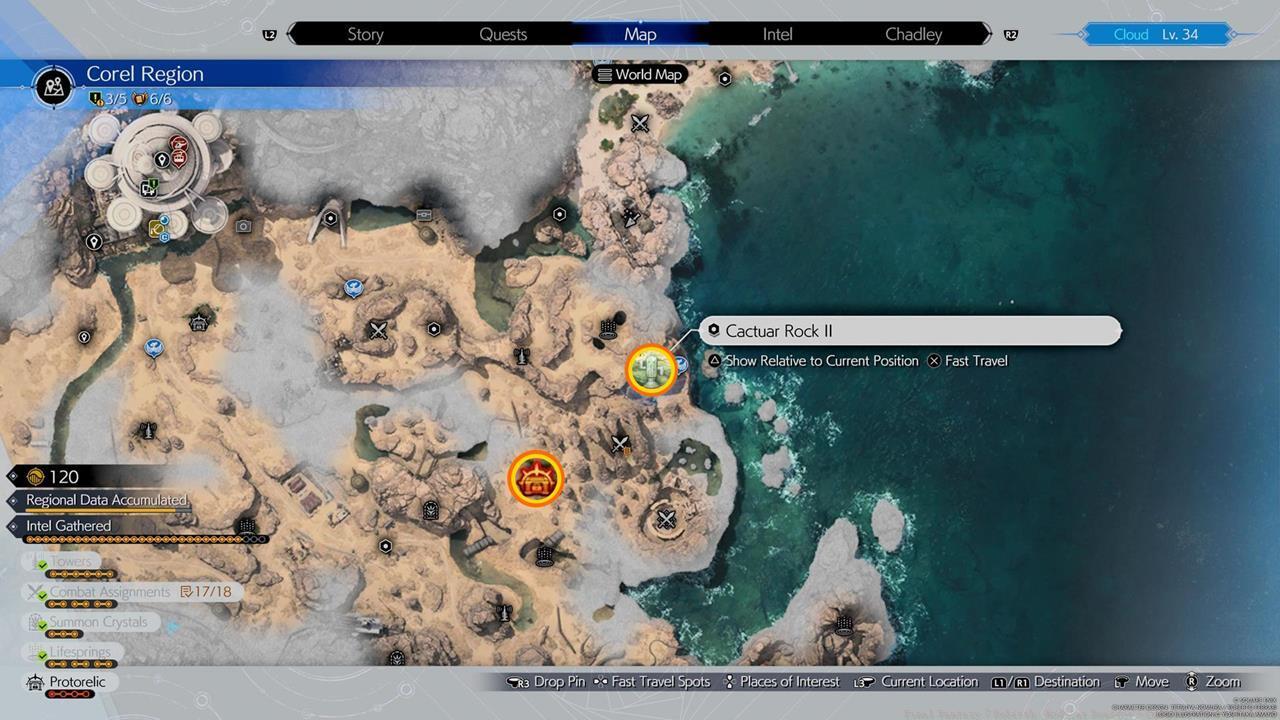
A map showing the location of the second Modular Reactor and Cactuar Rock.
Kid G’s second examination introduces Aerith as your designated character with these specialized mechanics:
- Aerith possesses the ability to generate both light wards (activated via L2) and dark wards (triggered with R2).
- This stage introduces two new Cactuar classifications with color-based vulnerability systems.
- Lighter-hued adversaries necessitate placement of light wards (L2) to create damage-enhancing auras.
- Darker-colored opponents require deployment of dark wards (R2) to establish their corresponding vulnerability fields.
- Position yourself within these created auras to significantly amplify your basic attack capabilities against the corresponding enemy types.
- Standard Cactuar variants (green/physical, orange/magic, rainbow/timer) continue appearing throughout the challenge duration.
- Master the timing of ward placement to ensure auras are active when their vulnerable enemies spawn.
- Coordinate your positioning to maintain optimal damage output while managing the time constraint effectively.
Upon completing this examination, Kid G indicates he requires additional preparation time for the subsequent trial. As previously noted, the third objective only becomes accessible toward the conclusion of Chapter 12, representing several hours of gameplay beyond this point.
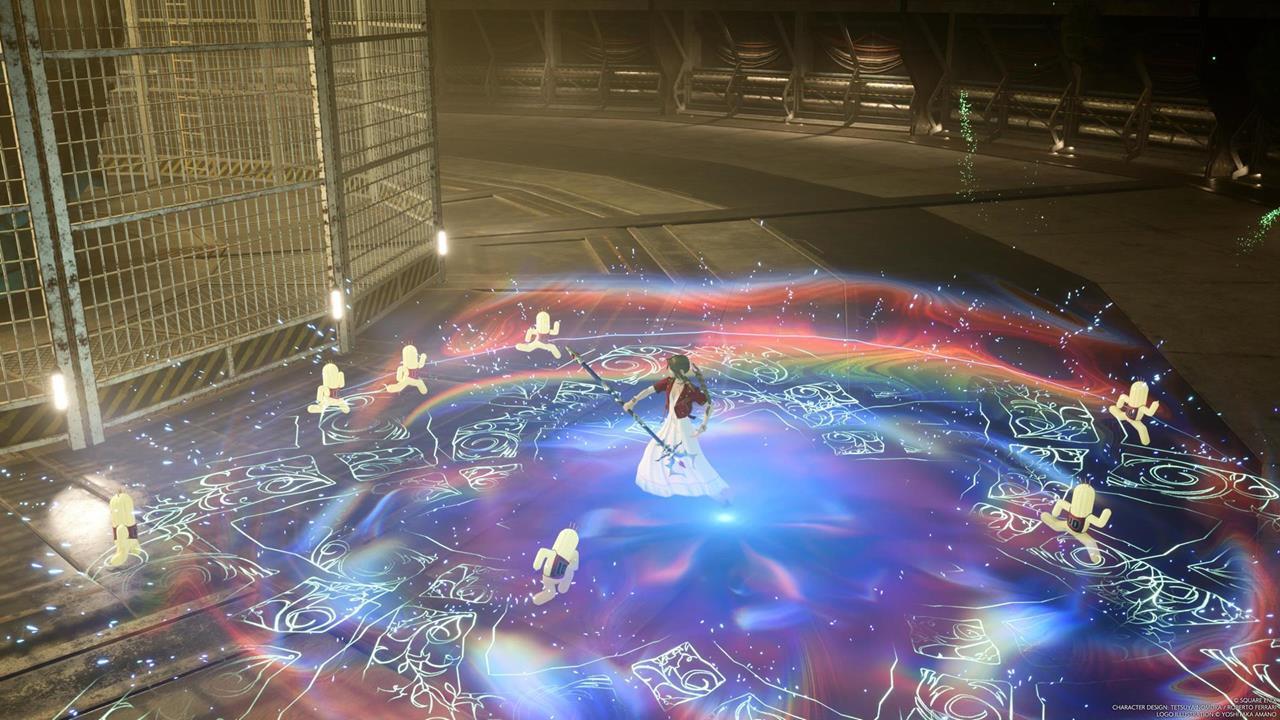
Create auras that empower Aerith’s basic attacks.
Common Mistake: Players often waste precious seconds by placing wards too early or positioning themselves outside the aura boundaries, significantly reducing damage efficiency.
Assuming you’ve progressed through Chapter 12’s primary missions, Kid G will initiate contact announcing the next trial’s readiness. This signals your need to journey to the designated Modular Reactor and its associated Cactuar Rock location.

A map showing the location of the third Modular Reactor and Cactuar Rock.
Kid G’s third examination returns to Yuffie as your combatant, introducing these advanced combat dynamics:
- Gigantuars contribute substantial point values, making them high-priority targets whenever they appear.
- Gold Cactuar specimens award significantly more points compared to standard Cactuar and Magituar variations.
- Cactuar entities possess the ability to transform into Magituars during combat, and vice versa.
- Maintain constant visual awareness of enemy transformations to immediately adjust Yuffie’s damage type accordingly.
- Develop rapid assessment skills to identify which damage type (physical or magical) each enemy currently exhibits.
- Execute seamless transitions between Yuffie’s combat styles to capitalize on shifting enemy vulnerabilities.
- Coordinate your attack patterns to maximize point accumulation while managing the ever-present time pressure.
You’ve got more Cactuars to beat up as Yuffie.
Optimization Tip: Advanced players can predict transformation patterns by observing subtle color shifts before the actual change occurs.
The ultimate Cactuar Rock resides in the southeastern extremity of the region. Travel to the Mogstool/Mog Shop location and utilize the coastal grapple points for access.
A map showing the location of the fourth Modular Reactor and Cactuar Rock.
The concluding examination requires Aerith’s participation again with these refined tactics:
- Continue alternating between light and dark aura deployments based on the specific Cactuar types engaged.
- Gold Gigantuars provide massive point rewards, though Aerith’s standard attacks often prove insufficient against them.
- The strategic approach involves evading their Body Slam assault, which causes them to collapse forward onto the ground surface.
- While they remain in this temporarily incapacitated state, execute Transcendence I or II abilities, enabling multiple energy beams to inflict catastrophic damage.
- Monitor their attack patterns carefully to anticipate the Body Slam maneuver and position yourself safely.
- Time your Transcendence casts precisely to maximize damage during their vulnerable recovery phase.
- Coordinate your positioning to maintain optimal distance for both evasion and counter-attack execution.
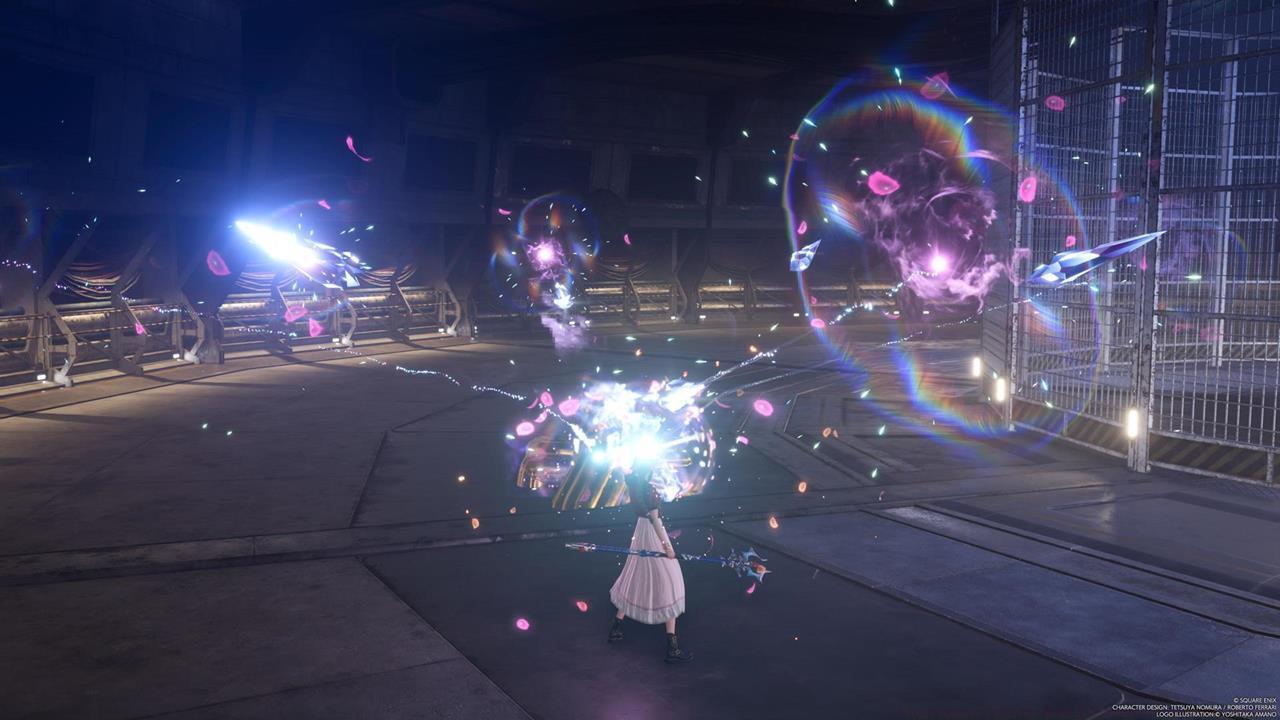
Use Transcendence to deal as much damage as possible once Gold Gigantuars fall down due to their own Body Slam mishaps.
Upon completion, you’ll have conquered all Final Fantasy 7 Rebirth Kid G trials. An narrative sequence awaits, featuring an individual Cloud’s party previously encountered within Midgar. The Sand Giant reappears as well. Additionally, you gain the opportunity to spar against Kid G directly.
That concludes the comprehensive methodology for acquiring the Corel Protorelic in Final Fantasy 7 Rebirth. Should you have remaining Protorelic quest chains unfinished, consult our comprehensive Protorelics guide for additional assistance. Ultimately, obtaining every Protorelic unlocks an endgame challenge featuring an exceptionally valuable reward: the Gilgamesh summon materia.
A magnificent journey awaits within Final Fantasy 7 Rebirth. We provide complete tactical guidance and strategic approaches in our FF7 Rebirth guides hub.
Time Estimate: Allow 45-60 minutes to complete all four trials, accounting for travel time between locations and potential retries.
Action Checklist
- Locate and interact with first Modular Reactor to initiate quest chain
- Use Cactuar Statue beam to find Cactuar Rock and obtain key
- Complete Yuffie’s first trial by switching damage types strategically
- Progress through Chapter 12 main story to unlock remaining trials
- Finish all four trials and witness concluding cutscene
No reproduction without permission:SeeYouSoon Game Club » Final Fantasy 7 Rebirth: Modular Reactor – Corel Protorelics Guide Master the Corel Protorelic quest with expert strategies for all four Modular Reactor trials and Cactuar challenges