TL;DR
- Ambush Shard creates projectiles behind targets, bypassing shields and defensive positioning
- Requires 23 Intelligence and found early in Witchbane Ruins at Weeping Peninsula
- Exceptionally effective in PVP against turtling players and shield-bearing enemies
- Low damage output but high tactical value for disrupting enemy formations
- Essential location for Sorceress Sellen questline with long-term relevance
Strategic deception often proves more valuable than brute magical force in Elden Ring’s complex combat ecosystem. While powerful incantations typically emphasize direct confrontation, Ambush Shard introduces sophisticated tactical options that reward clever positioning and timing.
This unique sorcery demands 23 Intelligence points to activate and generates magical projectiles that materialize directly behind your adversaries. After a short delay, these projectiles launch toward their targets, completely circumventing frontal defenses. This mechanic makes it particularly devastating against shield-wielding opponents and players who rely on defensive positioning in player-versus-player encounters.
The official item description provides crucial lore context:
One of the night sorceries of Sellia, Town of Sorcery. Launches a projectile from a distance removed from the caster, so as to strike the enemy from behind. This sorcery can be cast repeatedly. The Sellian sorcerers were assassins, and it is said that they often hunted their fellows.
From a statistical perspective, Ambush Shard delivers approximately 30% less damage than comparable intelligence-based projectiles like Glintstone Pebble. However, its unique positioning advantage often results in higher effective damage since it consistently strikes unprotected rear areas. The spell’s chain-casting capability allows for sustained pressure, forcing enemies to constantly reposition rather than maintaining optimal combat stances.
Ambush Shard awaits discovery within Witchbane Ruins located in Weeping Peninsula. This region becomes accessible during the early game phase by traveling to Limgrave’s southern extremity and crossing the land bridge into the peninsula. Navigation requires heading westward through the biome until encountering the distinctive ruins structure.
While investigating Witchbane Ruins, explorers will locate a descending staircase that leads to an underground prison facility. The sorcery scroll rests upon a deceased body within this confined space. This location holds additional significance beyond the immediate reward, as it becomes a crucial waypoint for players pursuing the extensive Sorceress Sellen narrative arc.
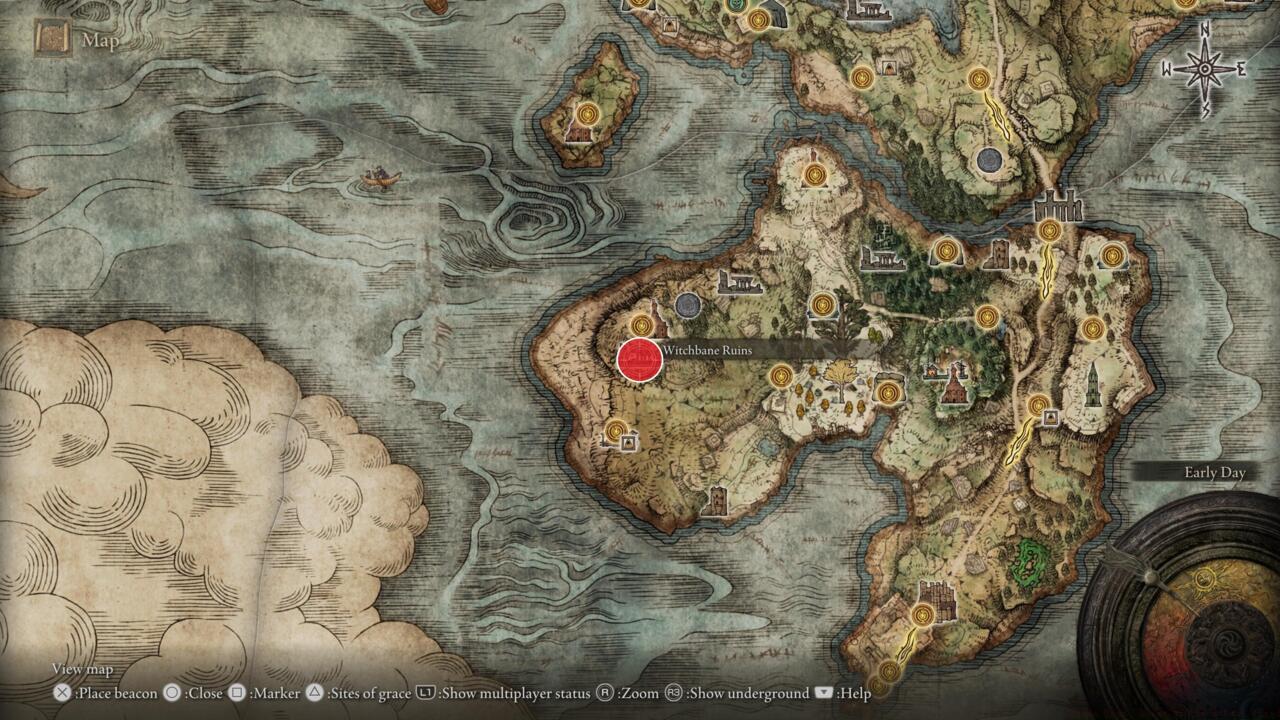
Witchbane Ruins
For optimal route efficiency, approach from the Church of Pilgrimage site of grace and head northwest. The ruins feature distinctive broken pillars and scattered debris, making them easily identifiable from a distance. Beware of the numerous rats patrolling the area—while individually weak, they can overwhelm unprepared adventurers through sheer numbers. The underground jail contains only minor threats, primarily consisting of basic skeleton warriors that pose little challenge to properly equipped characters.
Timing your visit strategically proves beneficial. Acquiring Ambush Shard before level 40 provides maximum tactical advantage, as its unique properties can compensate for limited spell variety during the mid-game progression phase. Many players find this sorcery particularly useful when confronting the challenging Leonine Misbegotten boss in nearby Morne Moangrave.
Mastering Ambush Shard transforms standard magical combat approaches, particularly in competitive scenarios. In PVP engagements, this sorcery excels against opponents utilizing greatshields or maintaining careful defensive spacing. The projectile’s rear-spawning behavior forces constant movement, disrupting established attack patterns and creating openings for follow-up assaults.
Against shield-bearing PVE enemies like Godrick Soldiers or Leyndell Knights, Ambush Shard provides consistent damage opportunities where conventional spells prove ineffective. Combine it with swift melee attacks—when enemies turn to face the magical projectiles, they expose their defenses to your physical assaults.
Common tactical errors include over-reliance on the spell’s positioning advantage while neglecting its modest damage output. Successful implementation requires treating Ambush Shard as a tactical disruptor rather than primary damage source. Pair it with area-denial sorceries like Crystal Burst or high-damage projectiles such as Comet to create devastating combinations.
Advanced practitioners can exploit environmental geometry to maximize effectiveness. Casting from elevated positions or around corners amplifies the disorientation effect, as enemies struggle to locate the source while projectiles spawn from unexpected angles. This approach proves exceptionally effective in legacy dungeons with complex architecture like Stormveil Castle or Raya Lucaria Academy.
For players developing their magical arsenal, our Class Guide provides essential intelligence-build optimization strategies that complement Ambush Shard’s unique capabilities.
Action Checklist
- Reach 23 Intelligence requirement through leveling or gear
- Travel to Weeping Peninsula via Limgrave’s southern bridge
- Navigate to Witchbane Ruins western sector
- Descend underground jail staircase and loot corpse
- Practice spell timing against shield enemies at Gatefront Ruins
- Integrate into spell rotations for PVP or challenging boss encounters
No reproduction without permission:SeeYouSoon Game Club » Elden Ring: Where To Get Ambush Shard Master Elden Ring's stealth sorcery with advanced tactics for PVP and shield-breaking combat