TL;DR
- Status effects like bleed and poison deal percentage-based damage that bypasses boss defenses
- Weapon upgrades provide significantly more damage increase than character leveling alone
- Strategic summon timing creates critical attack windows and distracts boss aggression
- Early game resource management determines your combat effectiveness against tough encounters
- Knowing when to retreat and explore other areas prevents frustration and wasted attempts
Many players encounter their first major roadblock when facing Margit the Fell Omen or Godrick the Grafted in Elden Ring’s opening hours. These initial boss encounters serve as deliberate skill checks designed to teach fundamental combat principles that will prove essential throughout your journey through the Lands Between.
FromSoftware intentionally crafted these early fights to be exceptionally demanding, forcing players to master attack pattern recognition, dodge timing, and strategic resource allocation. The solution isn’t simply grinding for more runes—though that certainly helps—but rather adopting a more analytical approach to combat preparation and execution.
The Shadow of the Erdtree expansion has introduced even more challenging content, making these foundational skills more valuable than ever. Our comprehensive Complete Guide offers additional strategies for overcoming difficult encounters.
Margit and Godrick possess specific vulnerabilities to status ailments that can dramatically shift the battle in your favor. Bleed (blood loss) accumulates through consecutive strikes with weapons like clubs, maces, or specialized daggers such as the Reduvia, which becomes available after defeating Bloody Finger Nerijus near Murkwater Catacombs.
The blood loss meter remains invisible unless you’re the target, typically filling after approximately five successful hits before triggering substantial percentage-based health reduction. This makes bleed particularly effective against high-health pool enemies since it deals damage based on a percentage of their maximum health rather than your weapon’s base damage.
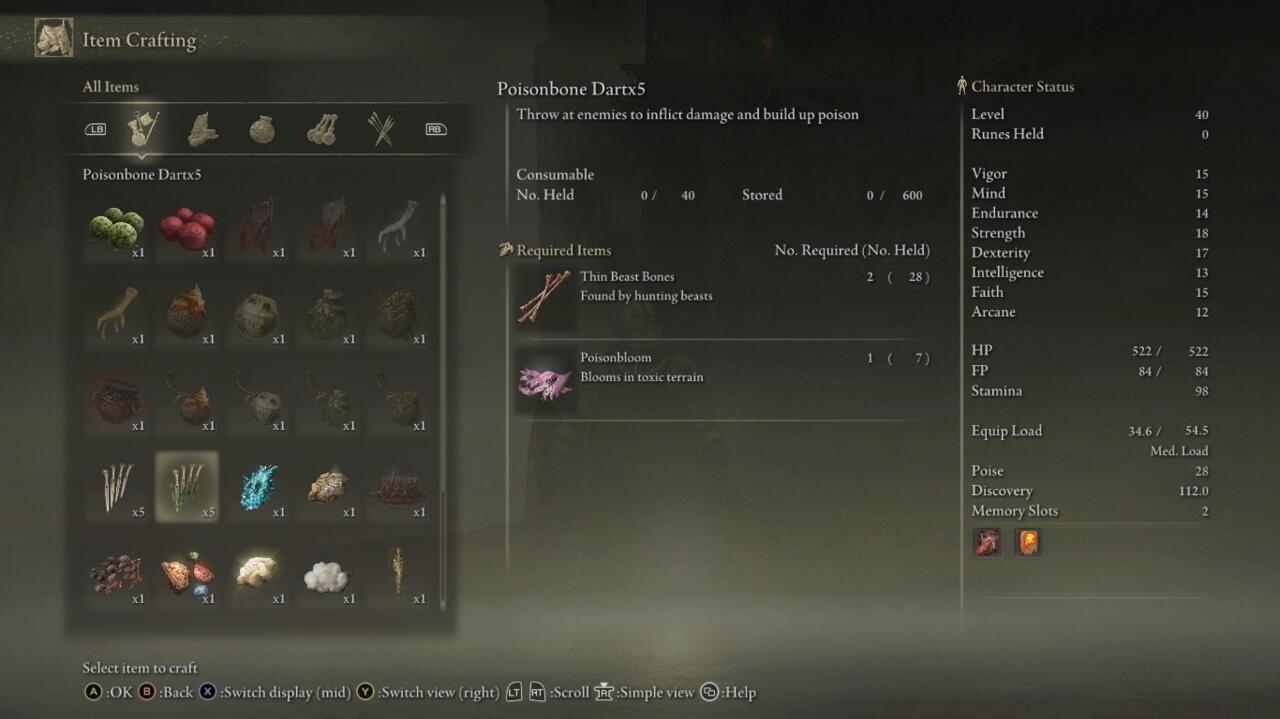
Poison application offers a more sustained damage-over-time approach. Locate Deserter’s Cookbook 2 within the destroyed structures at Dragon-Burnt Ruins to learn Poisonbone Arrow crafting. You’ll require a bow or crossbow, animal bones gathered from wildlife, and Poisonbloom harvested from the floral adversaries inhabiting Limgrave’s Waypoint Ruins.
Ranged poison strategies present execution challenges against Margit due to his aggressive closing speed and arena coverage. Faith-oriented builds can acquire Poison Mist from the Teardrop Scarab near Castle Morne Ramparts, though this offers less precision than projectile-based applications.

Poison arrows give you an edge in any encounter, including boss fights
Spirit summons fundamentally alter boss encounter dynamics by redistributing aggression and creating strategic openings. Deploy your chosen spirits immediately upon crossing the fog barrier to maximize their uptime and tactical value throughout the engagement.
The Lone Wolf spirits provide superior practical utility by damaging enemy Super Armor and generating critical hit opportunities through stance breaking. Their pack mentality enables surround tactics that can temporarily immobilize less agile opponents.
Jellyfish spirits function as durable distraction tools with remarkably high health pools relative to early game options. They absorb boss attention, allowing you to execute charged attacks, apply status effects, or reposition safely.
Optimal summon timing coincides with boss attack animations to minimize initial aggro drawing. Position yourself opposite your spirits to force the boss to choose between targets, creating predictable behavior patterns you can exploit.
Weapon upgrade level consistently proves more impactful than character level for overcoming Elden Ring’s most demanding encounters. Each enhancement tier provides substantial damage increases that far surpass the marginal gains from attribute scaling alone.
For the Margit confrontation, ensure your primary weapon reaches at least +3 reinforcement, with higher levels significantly improving your damage output and stagger potential. Advanced players should aim for +5 or higher through thorough exploration.
Smithing Stone acquisition represents a critical progression component. Mine tunnels scattered throughout Limgrave and the Weeping Peninsula contain abundant deposits, while specific enemy types have chances to drop these essential materials.
Resource allocation strategy becomes paramount—focus enhancement efforts on one or two primary weapons rather than distributing upgrades across multiple mediocre options. This concentrated approach yields dramatically better results against early game skill checks.
Pre-battle preparation often determines victory more than in-combat execution. Consumable buffs like Fire Grease or Magic Grease provide substantial damage augmentation without stat investment requirements.
Golden Rune items offer emergency level-up resources when you’re just shy of meaningful stat thresholds or weapon requirements. Strategic consumption at specific progression points can unlock powerful new capabilities.
Thorough inventory management ensures you enter each attempt with optimal equipment loadouts. Excess weight dramatically reduces roll effectiveness, while insufficient damage absorption increases the margin for error unacceptably.
Our Weapons Unlock guide provides additional insights into equipment optimization strategies that translate well across different gaming genres.
Intelligence-focused builds can leverage Glintstone sorceries to maintain safe distance while dealing consistent damage. Spellsword hybrid approaches offer particular effectiveness against these early encounters.
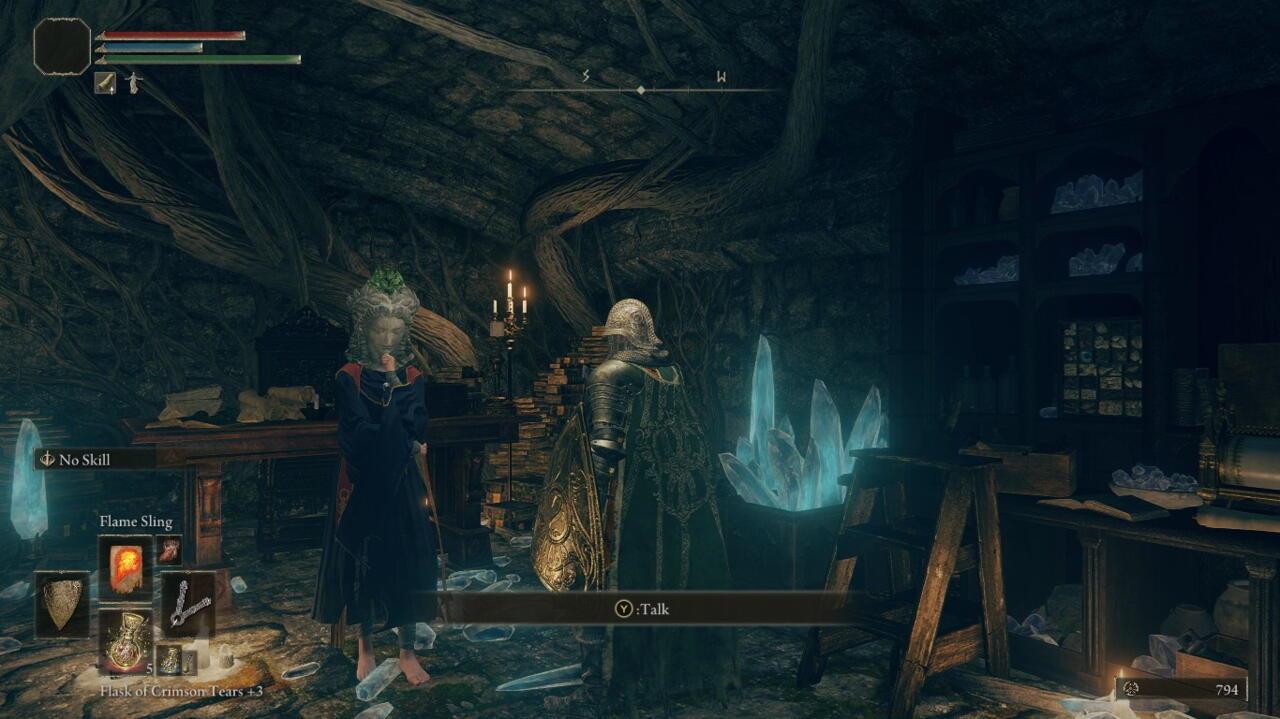
Acquire foundational spells from Sorcerer Sellen, located near the basement entrance in Waypoint Ruins. Her inventory includes essential projectiles like Glintstone Pebble and utility options such as Magic Glintblade.
Mana management proves critical for spellcaster success. The Cerulean Flask allocation should reflect your combat style—prioritize healing if you take frequent damage or focus on mana for ranged dominance.

Sellen sells magic spells by the basement door
Recognizing when to temporarily abandon a challenging encounter represents advanced strategic thinking. If you’re consistently dying within the first 30 seconds of the fight, your character likely lacks necessary progression milestones.
Clear indicators for strategic retreat include: inability to survive more than two hits, requiring more than five minutes to reach phase transitions, or failing to deal visible damage to boss health bars.
Alternative progression paths through the Weeping Peninsula, Stormfoot Catacombs, or Murkwater Cave offer alternative rune sources and upgrade materials without requiring boss completion.
Our comprehensive Class Guide explores how different playstyles require adjusted approach timing—knowledge that applies directly to Elden Ring’s class dynamics.
Action Checklist
- Upgrade primary weapon to +3 minimum using Smithing Stones from Limgrave mines
- Acquire Poisonbone Arrows or bleed-applying weapons based on your build
- Test spirit summons in easier areas to understand their behavior patterns
- Practice dodging specific attack sequences 5-10 times before committing to full attempts
- If struggling severely, explore Weeping Peninsula for additional levels and resources
No reproduction without permission:SeeYouSoon Game Club » Elden Ring – Stuck On Margit Or Godrick? Do These 7 Things To Beat Them Master Elden Ring's early bosses with strategic status effects, summons, and weapon enhancement tactics
