TL;DR
- Requires 25 Strength, 13 Dexterity, and 15 Faith for optimal hybrid builds
- Ordovis’ Vortex delivers devastating AOE damage with charge-up mechanics
- Located in Auriza Hero’s Grave behind challenging Crucible Knight duo boss
- Mimic Tear summon essential for splitting aggro in difficult boss encounter
- Upgrade priority enhances both physical damage and faith-based scaling
This formidable greatsword excels specifically for warriors blending physical might with divine power through Strength/Faith hybrid character builds.
Elden Ring’s vast arsenal includes Ordovis’ Greatsword as a premier choice for combatants seeking to integrate spellcasting with devastating melee assaults. For Strength and Faith hybrid configurations, this exceptional armament delivers substantial damage output while featuring a distinctive weapon art capable of efficiently dispatching enemy groups.
With Elden Ring: The Shadow of the Erdtree expansion now available, our comprehensive guides assist players through what many consider the game’s most demanding content. Consult our Complete Guide for essential resources including comprehensive world maps, premium weapon selections, boss defeat strategies, and extensive additional support.
Ordovis’ Greatsword demands 25 Strength, 13 Dexterity, and 15 Faith for proper wielding. It generates impressive damage figures and rapidly eliminates standard enemies and boss encounters, particularly after several upgrade enhancements.
The standout feature of Ordovis’ Greatsword undoubtedly remains its exclusive weapon technique: Ordovis’ Vortex. This ability requires a brief wind-up period before unleashing a ground-slam attack producing medium-radius area-of-effect devastation with tremendous damage potential. The skill can be charged for amplified destruction while consuming minimal FP, establishing it as an exceptionally valuable burst option during enemy vulnerability windows.
Ordovis’ Greatsword item description states:
Greatsword of Ordovis, one of the two honored as foremost among the knights of the Crucible. This sword is imbued with an ancient holiness. Its scarlet tint exemplifies the nature of primordial gold, said to be close to life itself.
Advanced Skill Mechanics: Ordovis’ Vortex features hyper armor during activation, preventing interruption from most attacks. The charged version requires approximately 2.3 seconds but delivers 40% increased damage and expanded area coverage. Timing the release during enemy attack animations maximizes effectiveness while minimizing counter-attack opportunities.
Ordovis’ Greatsword resides within the treacherous Auriza Hero’s Grave, situated adjacent to Leyndell, Royal Capital’s northern access point. Regrettably, this compact dungeon presents substantial difficulty, necessitating evasion of numerous death-dealing chariots capable of instant elimination. While descending to the dungeon’s depths, you must solve multiple environmental puzzles to neutralize chariot threats and eventually access the boss arena.
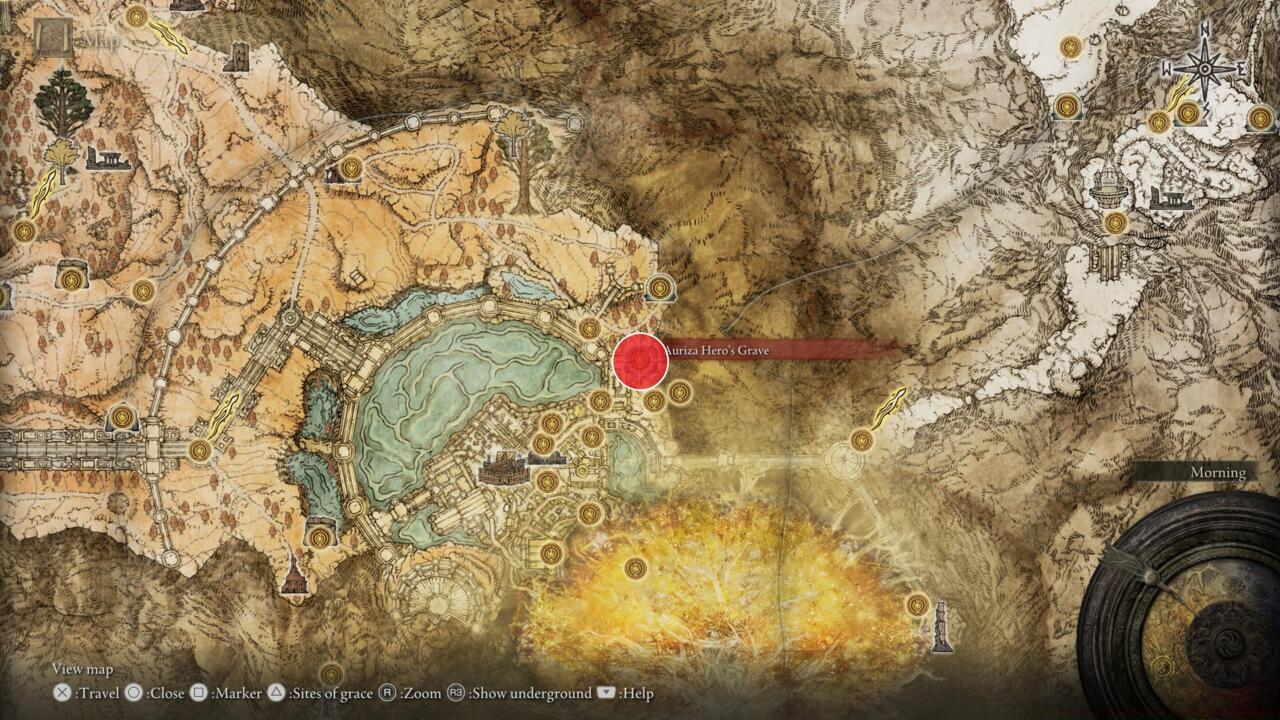
Auriza Hero’s Grave
Navigation Strategy: The dungeon features three primary chariot sections requiring specific countermeasures. First area: utilize side alcoves for safety. Second section: destroy chariots using explosive pots from elevated positions. Final segment: locate hidden passages behind illusory walls to bypass obstacles entirely. Total completion time averages 25-40 minutes for first-time explorers.
Common Mistakes to Avoid: Rushing through chariot sections causes repeated deaths. Attempting to fight chariots directly proves futile. Overlooking hidden pathways extends exploration time unnecessarily. Proper preparation with ranged weapons and healing items significantly improves success rates.
The challenge awaiting beyond the mist barrier proves equally demanding—dual Crucible Knights occupy the chamber, guaranteeing an extraordinarily difficult confrontation offering minimal attack opportunities, particularly for melee-focused builds. Eliminating these formidable opponents becomes a protracted endeavor unless you’ve progressed to endgame content and substantially exceeded their power level.
If experiencing difficulties against the twin Crucible Knights, consider employing the Mimic Tear Spirit Ash summon for combat assistance. This tactic helps separate the adversaries and creates openings to rapidly diminish one knight’s health while your spectral duplicate occupies the other. Regardless of your chosen approach for defeating these bosses, your perseverance rewards you with Ordovis’ Greatsword and profound accomplishment.
Advanced Combat Tactics: Focus initially on Ordovis, who possesses the more aggressive attack patterns. Utilize pillars for temporary cover and healing opportunities. Parry timing proves crucial—their sword swings feature predictable wind-ups perfect for counter attacks. For optimized Class Guide synergy, combine with incantations like Golden Vow for damage amplification.
Weapon Optimization: At maximum upgrade level (+10), Ordovis’ Greatsword achieves B-tier Strength scaling and D-tier Faith scaling. Pair with complementary Weapons Unlock strategies for balanced loadouts. The weapon excels when complemented with defensive buffs and mobility-enhancing equipment.
Action Checklist
- Reach Auriza Hero’s Grave northeast of Leyndell capital
- Navigate dungeon chariots using alcoves and hidden paths
- Prepare for Crucible Knight duo with Mimic Tear +9 or higher
- Defeat both knights focusing Ordovis first, using pillars for cover
- Upgrade weapon at Roundtable Hold using Somber Smithing Stones
No reproduction without permission:SeeYouSoon Game Club » Elden Ring: How To Get Ordovis’ Greatsword Master the Crucible Knight's legendary greatsword with comprehensive stats, strategies, and acquisition guide