TL;DR
- Reach level 120-150 with 40+ Vigor and max weapon upgrades before attempting
- Acquire the Blasphemous Claw from the tower near Beside the Great Bridge Site of Grace
- Use shield for phase one unpredictable attacks and spirit summons for ranged builds
- Master the golden glow timing for Blasphemous Claw parries during phase two
- Learn specific dodge patterns for ground slams and AoE attacks
Conquering Maliketh demands thorough preparation, as this mandatory endgame encounter presents one of Elden Ring’s most demanding challenges. Proper setup can dramatically reduce the difficulty curve and increase your success probability significantly.
Crumbling Farum Azula stands as arguably the most treacherous region in the Lands Between, featuring lethal environmental hazards, aggressive dragon encounters, and relentless Beastman patrols throughout its crumbling architecture. While navigating this zone proves exceptionally demanding, completing it represents the final milestone before confronting the game’s ultimate adversaries in Leyndell. Your primary obstacle remains Maliketh, the Black Blade, whose defeat is essential for progression.
Maliketh presents a dual-phase combat scenario requiring distinctly different tactical approaches for each transformation. Fortunately, strategic preparation combined with specific equipment choices can transform this seemingly impossible battle into a manageable encounter.
Unlike earlier optional zones that permit sequence breaking, Crumbling Farum Azula remains inaccessible through conventional means until reaching the appropriate story progression. Consequently, most players naturally achieve sufficient character levels by this stage. We recommend attaining at minimum level 120 (preferably approaching 150), with no less than 40 attribute points allocated to Vigor for survivability. Ensure your primary weapon reaches its maximum upgrade tier as well.
Ranged specialization builds face particular challenges in this confrontation when attempting solo combat. Maliketh possesses exceptional gap-closing capabilities, instantly traversing the arena to pressure distance-based fighters. He maintains relentless offensive pressure throughout the encounter, allowing minimal recovery windows. If employing bow tactics or spellcasting strategies, absolutely utilize Spirit Summons to create distraction opportunities. Optimal choices include resilient summons like Banished Knight Oleg or Lhutel the Headless who can absorb aggression while you position safely.
Melee-focused combatants should strongly consider incorporating a shield into their loadout. Phase one features several erratic attack patterns that prove exceptionally difficult to evade through rolling alone, but can be effectively blocked with minimal stamina expenditure. Any shield providing complete physical damage negation will serve adequately for this purpose.
One additional critical item requires acquisition before engaging this formidable foe…
The Blasphemous Claw functions as a specialized tool designed specifically to counter Maliketh’s most dangerous phase two abilities (detailed usage instructions follow in subsequent sections).
The Blasphemous Claw represents your most valuable asset against Maliketh’s deadliest attacks, making its acquisition non-negotiable for success.
To secure this essential tool, begin from the Beside the Great Bridge Site of Grace and ascend the staircase. Upon reaching the bridge section, turn left, moving away from the boss arena direction. Continue progressing forward, passing through the doorway and descending the subsequent staircases until you emerge onto an exterior terrace. Locate the ladder on your right and descend carefully, then proceed toward the distinctive tower structure containing the prize within its chest.
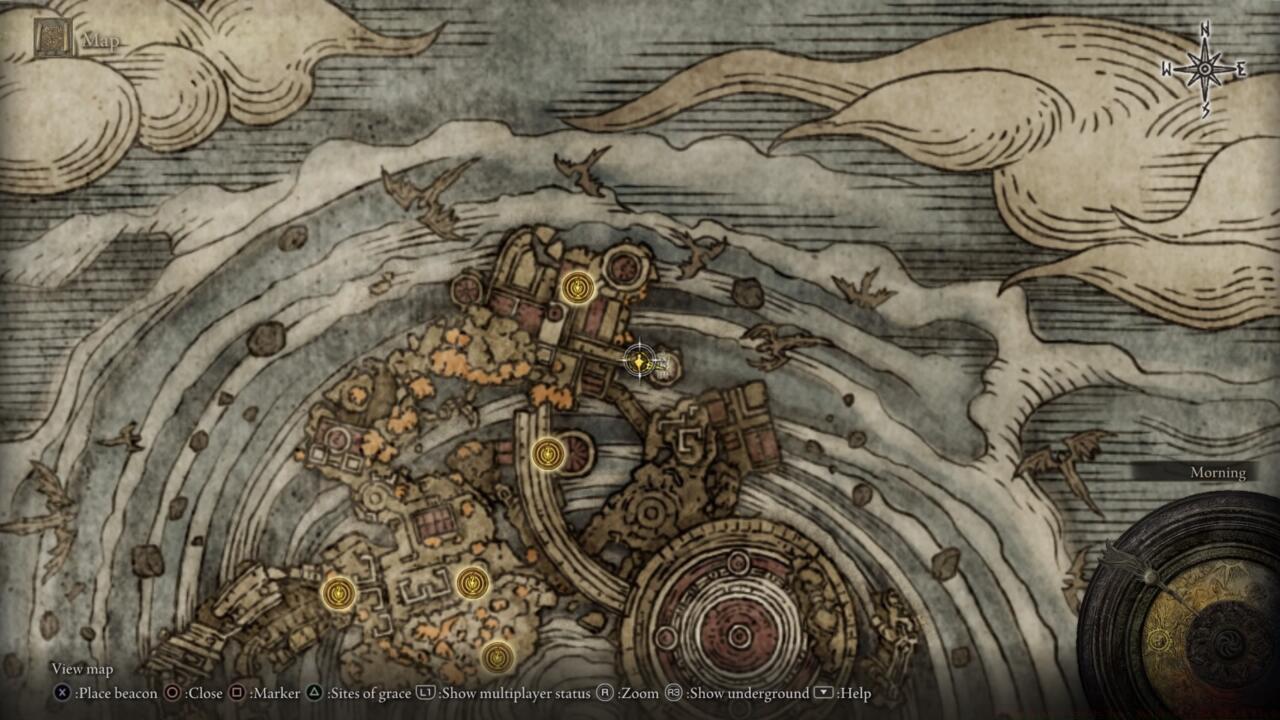
Blasphemous Claw location
Navigation Pro Tips: The path contains several hidden Beastman ambushes, so advance cautiously while scanning upper platforms for archers. Consider using the Weapons Unlock guide to optimize your weapon selection for the area’s enemies.
Understanding Maliketh’s two distinct combat phases is crucial for developing effective counter-strategies and timing your Blasphemous Claw usage perfectly.
Phase One: Beast Clergyman Tactics
This initial phase features aggressive melee combinations with occasional projectile attacks. Maintain medium distance to bait his leaping attacks, which create optimal punishment windows. His ground slam creates a shockwave requiring precise evasion timing.
When he slams his weapon into the ground, be ready to dodge away from the shockwave.
Critical Mistake Avoidance: Never become greedy during phase one; his quick recovery and counter-attack capabilities punish overextension severely. For comprehensive combat fundamentals, consult our Complete Guide to master fundamental mechanics.
Phase Two: Black Blade Execution
Maliketh’s transformation dramatically increases his speed and damage output. His attacks now inflict maximum health reduction through the destined death effect, making direct hits exceptionally punishing. This phase demands perfect execution of the Blasphemous Claw technique.
When Maliketh slams both hands into the ground, get out of the way of the craters to avoid damage.
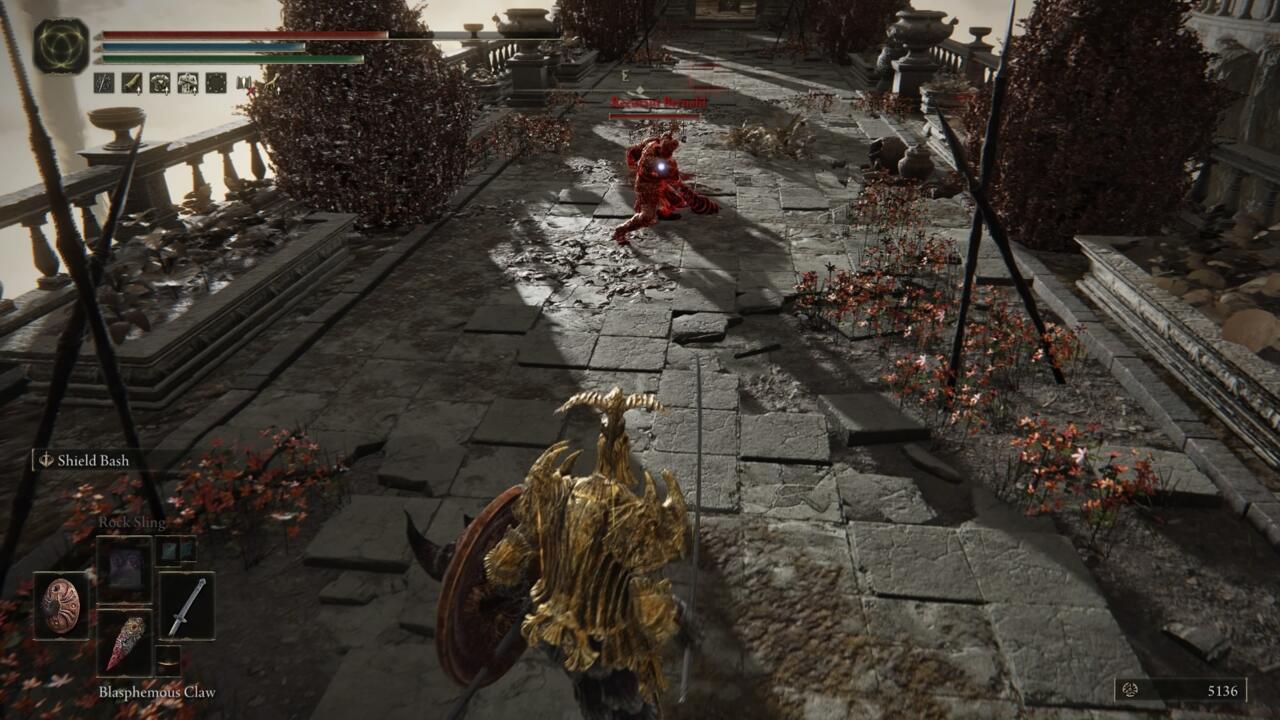
Blasphemous Claw Activation: The tool only functions against specific golden-glowing attacks during phase two. Time your usage precisely as his weapon begins emitting radiant energy.
As soon as the sword glows gold, be ready to parry his attack with the Blasphemous Claw.
Advanced Technique: Successful Blasphemous Claw parries create extended vulnerability windows, allowing multiple free attacks. Coordinate with spirit summons for maximum damage output during these openings. For optimal character configuration, reference our Class Guide to ensure your build synergizes with your strategy.
Movement Mastery: Maliketh’s aerial combos require spatial awareness and controlled positioning. Avoid corner trapping by maintaining center arena control and utilizing the pillars for temporary cover when necessary.
Action Checklist
- Achieve character level 120+ with 40 Vigor and max weapon upgrade
- Acquire Blasphemous Claw from tower near Beside the Great Bridge
- Select appropriate spirit summon (Oleg/Lhutel) and 100% physical shield
- Practice phase one dodges and shield blocks against Beast Clergyman
- Master Blasphemous Claw timing against golden glow attacks in phase two
No reproduction without permission:SeeYouSoon Game Club » Elden Ring – How To Beat Maliketh, The Black Blade Master Maliketh's two-phase battle with essential preparation strategies and the crucial Blasphemous Claw technique