TL;DR
- Ascendant Mysteries reveal Xivu Arath’s war plans through extended story sequences
- Scoroboth requires three relic throws with strategic positioning between health phases
- Light the Way involves precise portal navigation based on Hive rune patterns
- Tomb ship ambushes and exploding lanterns present critical environmental threats
- Optimal loadouts include high-damage weapons and mobility-enhancing armor mods
Discovering the Ascendant Mysteries within Destiny 2’s Ruins of Wrath provides crucial intelligence about Xivu Arath’s military operations and her brood’s activities. These elaborate hidden sequences deliver substantial narrative depth beyond standard mission content.
Similar to other Shattered Realm destinations explored during Season of the Lost, the Ruins of Wrath conceals mysterious secrets that expand the seasonal storyline. Ascendant Mysteries represent extended narrative segments embedded within the Ascendant Plane, revealing critical developments this season and emphasizing the strategic value of the Ascendant Realm. Within this Hive-dominated Shattered Realm zone modeled after lunar terrain, the war god Xivu Arath executes covert operations that demand immediate investigation and intervention.
Players will encounter two distinct Ascendant Mysteries throughout the Ruins of Wrath, each connected to specific beacon alignment objectives during progression. This comprehensive guide details both mystery locations and provides step-by-step resolution strategies.
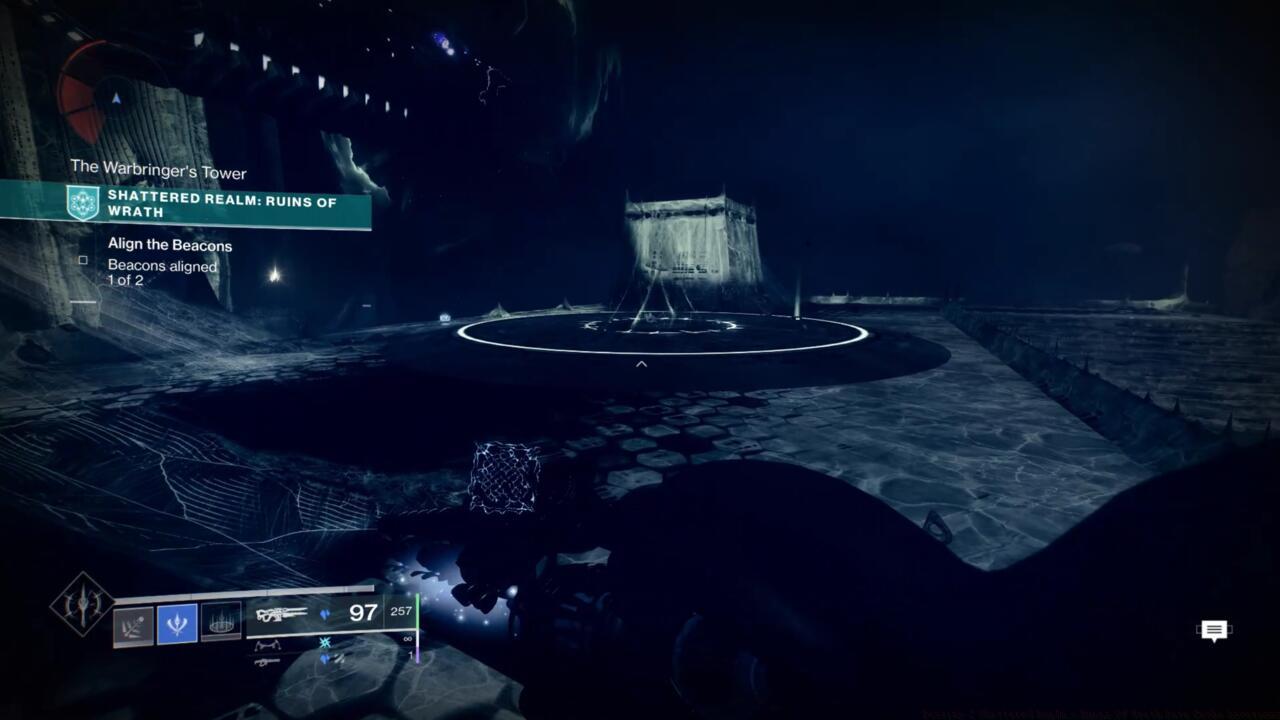
Activating the pressure plate after first beacon alignment grants access to Warbringer’s Tower previously inaccessible areas.
Following initial beacon alignment in the Staging Area, proceed toward the right flank when facing away from the Causeway entrance point. This sector contains Warbringer’s Tower, a structure that remained impenetrable during earlier Ruins of Wrath expeditions. Approaching the elevated platform preceding the Tower reveals an illuminated Hive plate emitting distinctive green energy. Maintaining position on the plate until full activation unlocks the Tower entrance, but remain vigilant as Hive tomb ships deploy assault forces during plate charging sequences.
Upon gaining entry, descend through the interior shaft to discover Mara Sov’s imprisoned subject: Scoroboth, designated Son of Xivu Arath. Initial engagement reveals this formidable Hive knight possesses protective shielding rendering him invulnerable to conventional attacks, necessitating alternative shield-disruption methodologies.
Within Scoroboth’s chamber, examine the right perimeter when oriented toward the primary shaft descending to subsequent Tower sections. Locate the Barrier obstructing a doorway and acquire the Barrier Breach marker adjacent to the entrance. Proceed through the corridor to retrieve a relic similar to artifacts encountered in The Corrupted Dreaming City Strike. Secure the relic but exercise patience before retreating—the massive Hive lanterns previously passed will detonate sequentially, causing fatal damage if caught within the blast radius.
Strategic relic deployment requires three successful impacts to completely neutralize Scoroboth’s defenses.
Successfully throwing the relic at Scoroboth dismantles his shield, enabling offensive maneuvers. After depleting approximately one-third of his health reservoir, he teleports deeper into the Tower’s subterranean complex known as the Undercroft. Descend the subsequent shaft to re-engage, then locate additional relics for subsequent shield-breaking sequences.
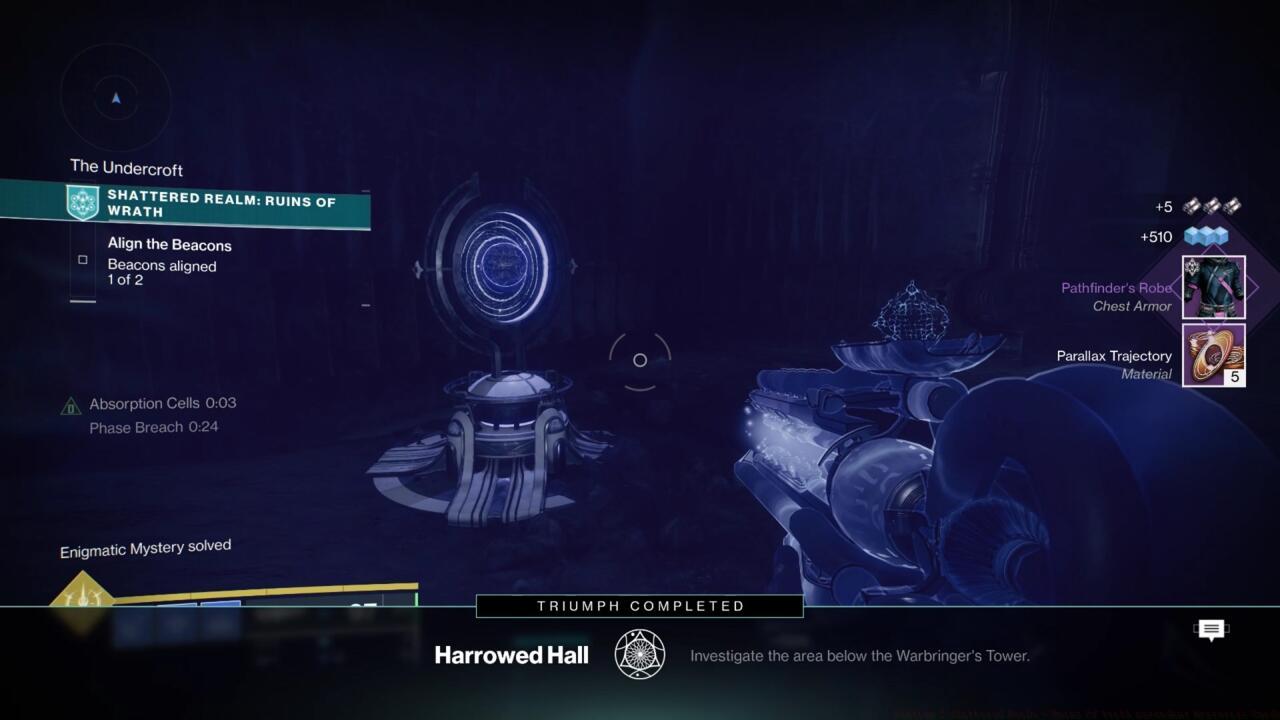
At the base of the following shaft, identify Toland’s manifestation as a luminous white sphere. The environment presents a brightly illuminated chamber in one direction and dimly lit passageways on the opposing side. Navigate through the doorway in the darker sector and turn rightward. Follow this path to its terminus to secure another relic. Transport it back to encounter Scoroboth awaiting confrontation within the well-lit anterior chamber.
Second beacon activation reveals the distant Soulfire-illuminated spire critical for puzzle resolution.
Following secondary beacon alignment, identify the prominent spire radiating with Soulfire energy in the middle distance. This structure serves as the focal point for the intricate light-based puzzle mechanism.
Portal selection must correspond precisely with Hive rune patterns inscribed adjacent to initial braziers.
Strategic portal navigation requires meticulous observation of Hive rune configurations etched into surrounding architecture. Each brazier station features specific rune combinations that dictate correct portal sequencing. Misidentification leads to reset requirements and potential enemy reinforcements.
The lighting sequence follows a progressive pattern where each successfully ignited brazier unlocks subsequent portal pathways. Maintain awareness of environmental cues and avoid rushing through sequences without proper rune verification.
Mastering these Ascendant Mysteries demands both combat proficiency and puzzle-solving acumen. For the Scoroboth engagement, prioritize high-damage weaponry like fusion rifles or rocket launchers to maximize damage during brief vulnerability windows. The BF6 Weapons Unlock Guide provides excellent insights into optimizing your arsenal for similar challenging encounters.
Environmental awareness proves critical throughout both mysteries. During plate activation sequences, position yourself with cover options to mitigate tomb ship assault damage. When navigating relic corridors, time your movements between lantern explosion sequences—typically following a 5-7 second detonation cycle after relic acquisition.
Common execution errors include premature relic throwing before proper positioning and misreading Hive rune patterns during portal sequences. Advanced players can complete both mysteries within 20-25 minutes using optimized routes and loadouts. Consider consulting the BF6 Class Selection Guide for character build optimization strategies that enhance survival in high-intensity scenarios.
The strategic implications of these discoveries extend beyond immediate gameplay. Understanding Xivu Arath’s methodologies provides valuable intelligence for future engagements, much like analyzing Battlefield 6 Complete Guide tactics for mastering complex battlefields. These mysteries represent essential narrative components that deepen player understanding of the escalating conflict within the Ascendant Plane.
Action Checklist
- Align first beacon in Staging Area and activate Hive pressure plate
- Secure first relic while avoiding lantern explosions (wait 5-7 seconds after pickup)
- Defeat Scoroboth through three-phase relic strategy
- Align second beacon and identify Soulfire spire
- Solve portal puzzle by matching Hive rune patterns
No reproduction without permission:SeeYouSoon Game Club » Destiny 2 Shattered Realm – Ruins Of Wrath Ascendant Mysteries Guide Master the Ruins of Wrath Ascendant Mysteries with expert strategies and tactical insights