TL;DR
- Two Lucent Moths spawn weekly in Savathun’s Throne World with specific locations
- Collecting moths unlocks story content, resources, and exclusive weapon rewards
- Use Fynch’s cave as your collection hub to track progress and display finds
- Location hints appear in-game but require environmental puzzle-solving expertise
- Strategic planning saves time and ensures you don’t miss limited weekly opportunities
The Witch Queen expansion introduces Savathun’s throne world as a sprawling new destination filled with hidden collectibles that extend beyond casual exploration. Unlike simple cosmetic items, these Lucent Moths serve as crucial narrative devices that progressively unveil the expansion’s deeper mysteries while providing tangible gameplay benefits.
Your primary objective involves tracking down these elusive glowing insects scattered throughout the throne world’s diverse regions. Each moth you capture contributes to Fynch’s growing collection in his cave headquarters, similar to how Beyond Light featured hidden penguin souvenirs. However, these moths offer substantially greater rewards including weapon unlocks, crafting materials, and critical story revelations about the Hive god’s schemes.
Bungie’s release strategy introduces two new specimens each week, creating an ongoing discovery process that maintains engagement between major content updates. While the game provides general area hints, the actual pinpoint locations and acquisition methods require careful environmental observation and sometimes complex puzzle-solving techniques.
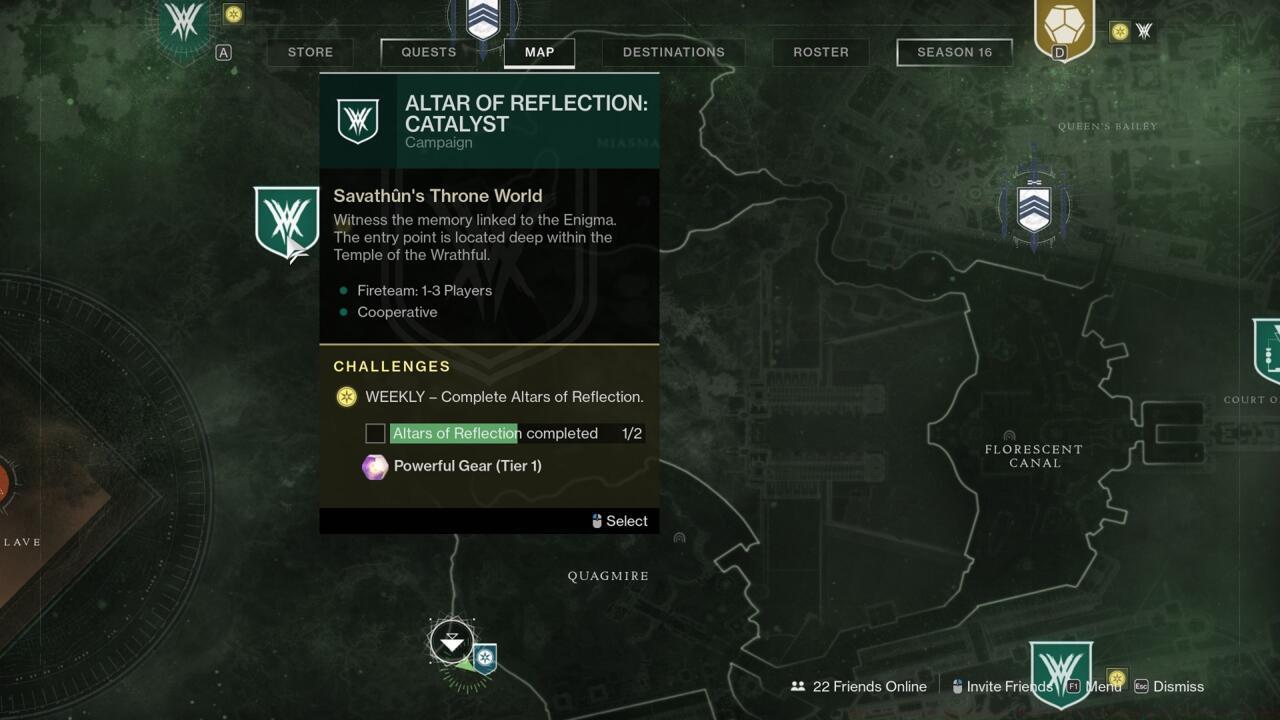
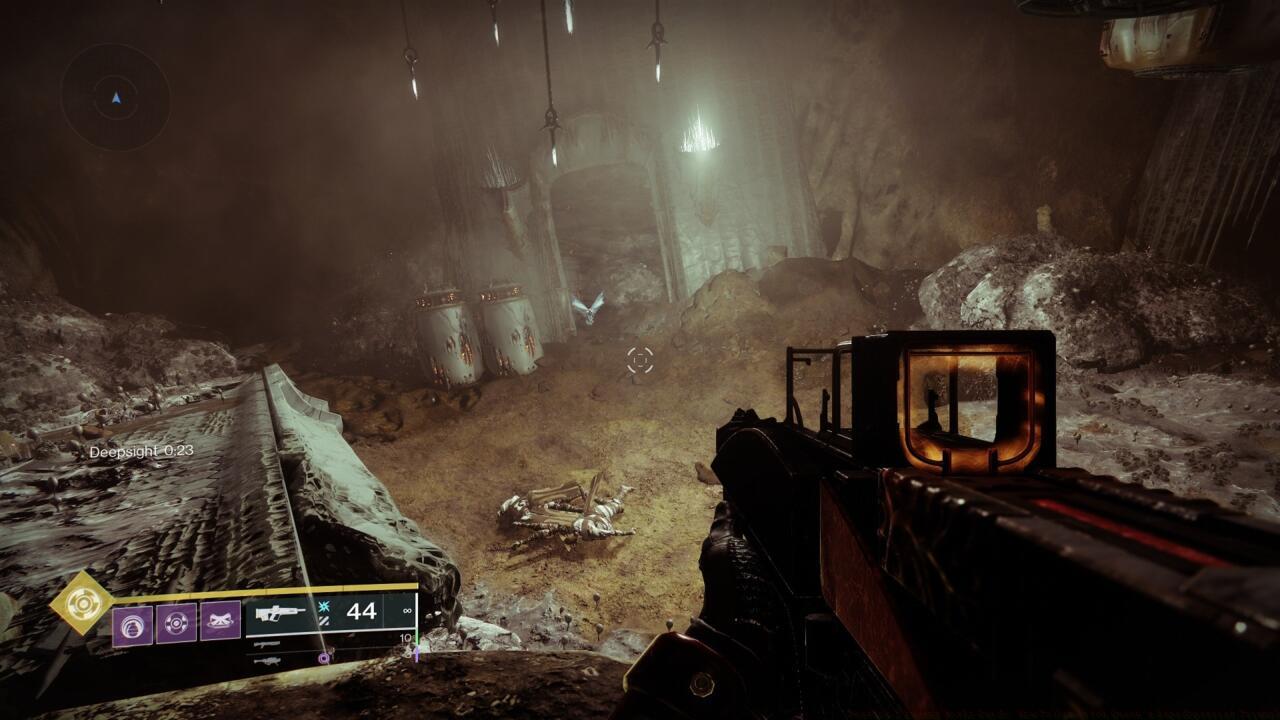
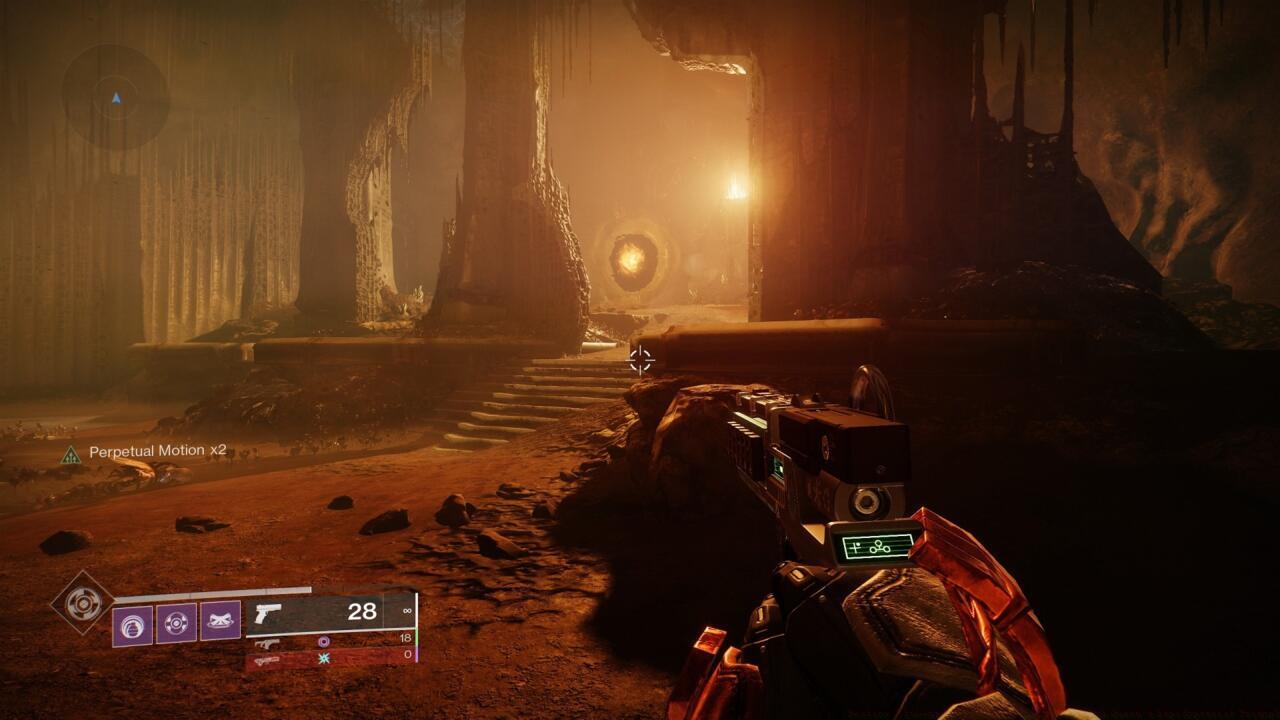
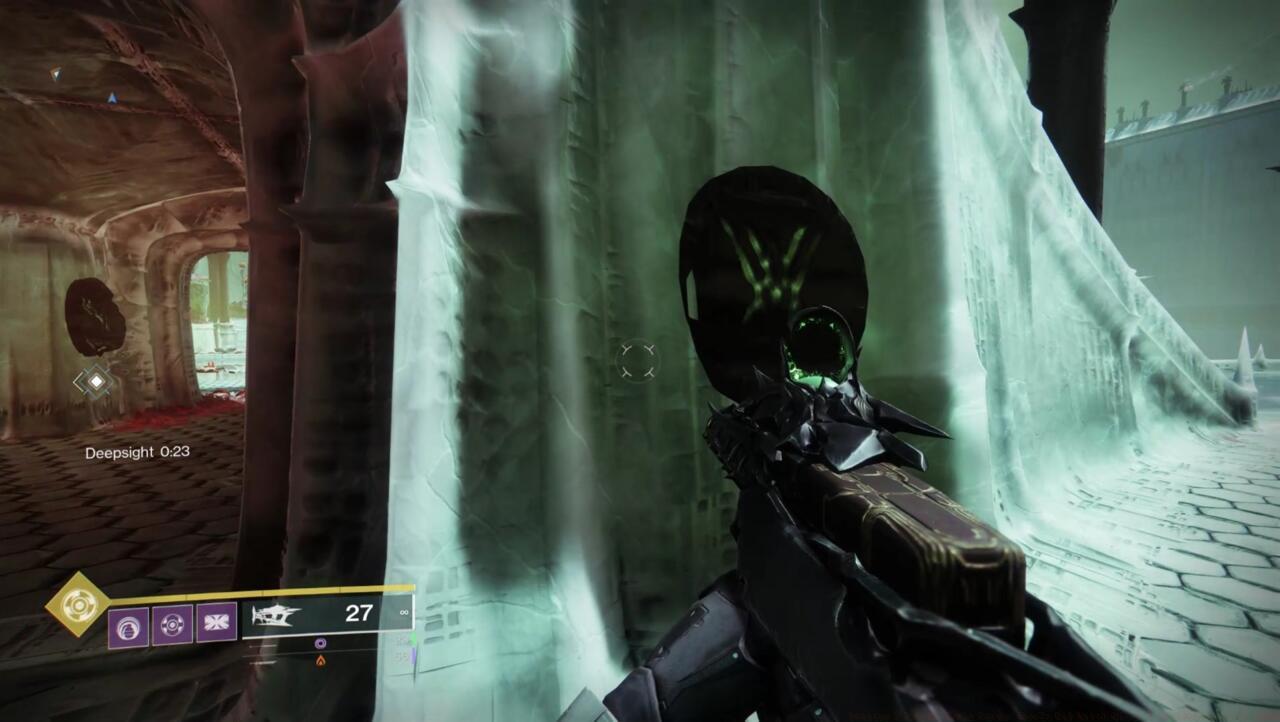
Moth No. 9: Altar of Reflection
This specimen requires completion of the Altar of Reflection activity, though its exact positioning changes based on your current mission progress. Look for subtle environmental clues like unusual glowing patterns or out-of-place architectural features that might conceal the moth’s resting place. Advanced players recommend scanning elevated surfaces and hidden alcoves that aren’t part of the main path.
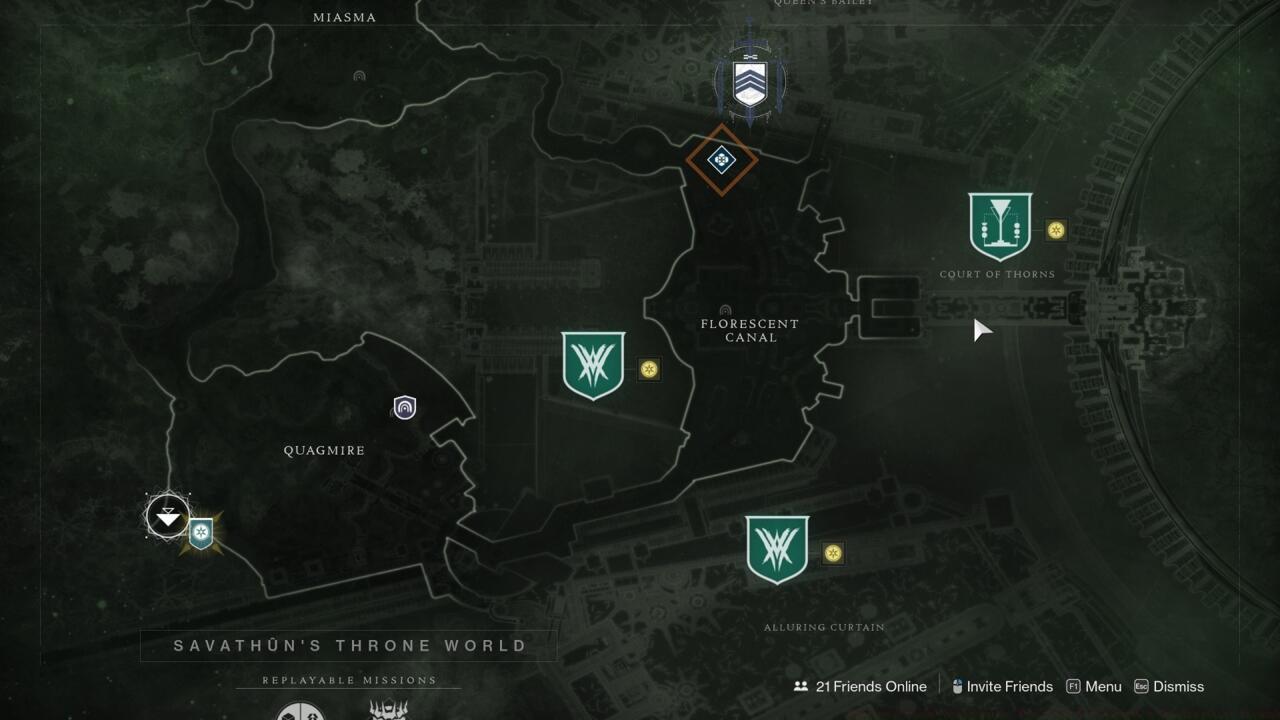
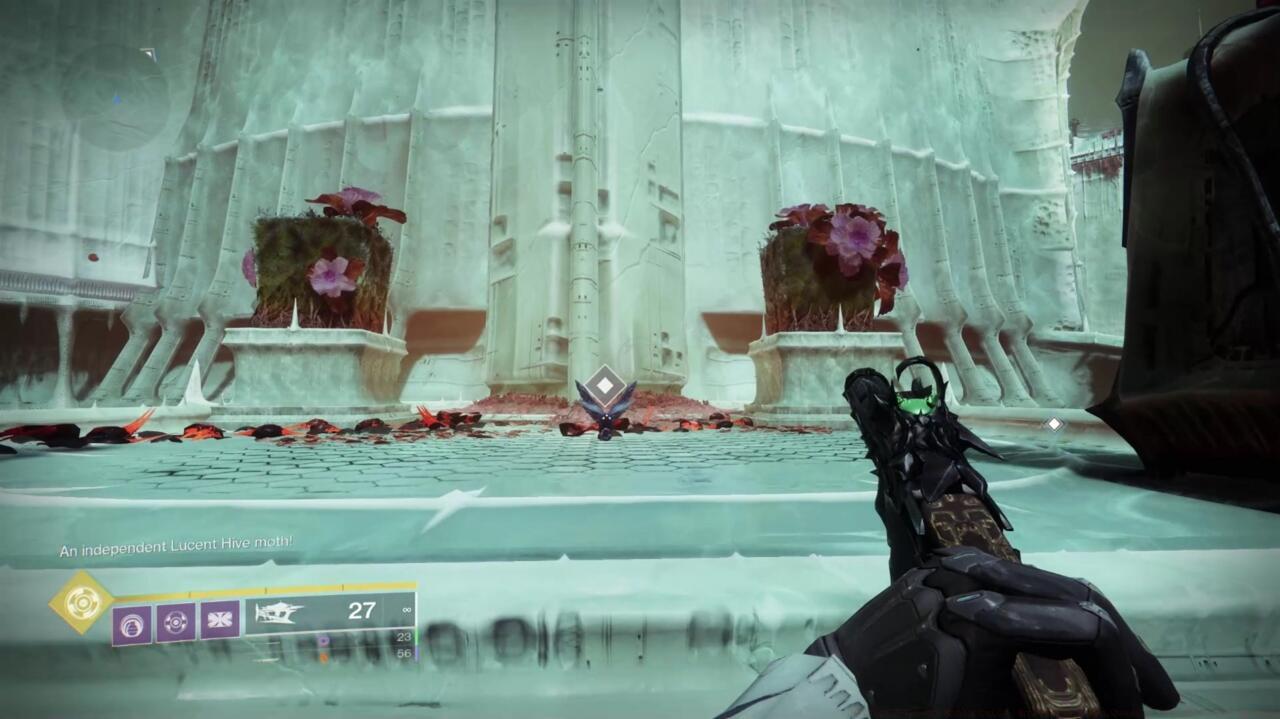
Moth No. 10: Fluorescent Canal
Located in the Fluorescent Canal region, this moth typically appears near the water channels or within the crumbling structures. Be prepared for potential combat encounters as some moths spawn in areas with significant enemy presence. The canal’s verticality means you’ll need to explore both upper walkways and lower drainage systems thoroughly.
Moth No. 7: Court of Thorns
The Court of Thorns location presents unique challenges with its multi-level design and dense vegetation. This moth often requires platforming skills or specific ability usage to reach secluded perches. Many collectors miss this one due to overlooking the area’s vertical dimension and focusing solely on ground-level exploration.
Moth No. 8: Witch’s Echo
Witch’s Echo contains numerous hidden chambers and secret passages where this moth might reside. Pay close attention to wall textures that might conceal entry points and listen for the distinct audio cues that indicate a collectible is nearby. The moth’s faint luminescence becomes more visible in darker sections of this zone.
Moth No. 5: Miasma
Miasma’s swampy terrain creates unique hunting conditions where the moth might be partially submerged or concealed within the toxic foliage. Use your ghost’s scanning function frequently and consider time-of-day factors that might affect visibility in this perpetually misty region.
Moth No. 6: Temple of the Wrathful
This temple location often requires solving minor environmental puzzles or activating specific mechanisms to reveal the moth’s location. The architecture here follows Hive design principles, so understanding their symbolic patterns can help predict where treasures might be hidden.
Seasoned Destiny 2 players recommend establishing efficient collection routes that minimize backtracking through hostile territory. Begin each weekly hunt by consulting Fynch for the general area hints, then methodically sweep each zone using systematic search patterns rather than random exploration.
Common mistakes include rushing through areas without thorough investigation, ignoring vertical space, and failing to account for mission progression requirements that might lock certain locations. Many moths become accessible only after completing specific story missions or achieving certain reputation levels with throne world factions.
Allocate approximately 15-30 minutes per moth depending on your familiarity with the area and puzzle-solving speed. Veteran hunters can typically complete both weekly moths in under an hour with proper planning, while newcomers should budget 60-90 minutes for their initial attempts.
For comprehensive gameplay enhancement, consult our Weapons Unlock guide to maximize your combat effectiveness during these collection runs. Understanding Class Guide mechanics can also provide mobility advantages for reaching difficult moth locations.
Lucent Moths represent one of the most engaging collectible hunts in Destiny 2’s Witch Queen expansion. These glowing insects are scattered throughout Savathun’s Throne World, each requiring unique approaches to locate and collect. Successfully gathering all ten moths completes the Lepidopterist Triumph, which contributes toward earning the coveted Witch Queen seal title.
Each moth presents distinct challenges, from simple visibility tests to complex puzzle-solving sequences. Understanding the mechanics behind each location will significantly reduce your collection time and frustration.
Many Guardians underestimate the preparation needed for certain moths, particularly those requiring specific reputation levels or activity access. Proper planning ensures you don’t waste valuable gaming sessions on incomplete attempts.
Moth No. 9: Altar of Reflection
Access this moth through the Altar of Reflection map node, which transports you nearly to the destination. Complete the standard Hive rune puzzle to unlock the main chamber door.
Upon entering the primary arena, immediately scan the right-side columns for a Deepsight activation point. Seasoned hunters recommend activating this node before engaging enemies to maximize your collection window.
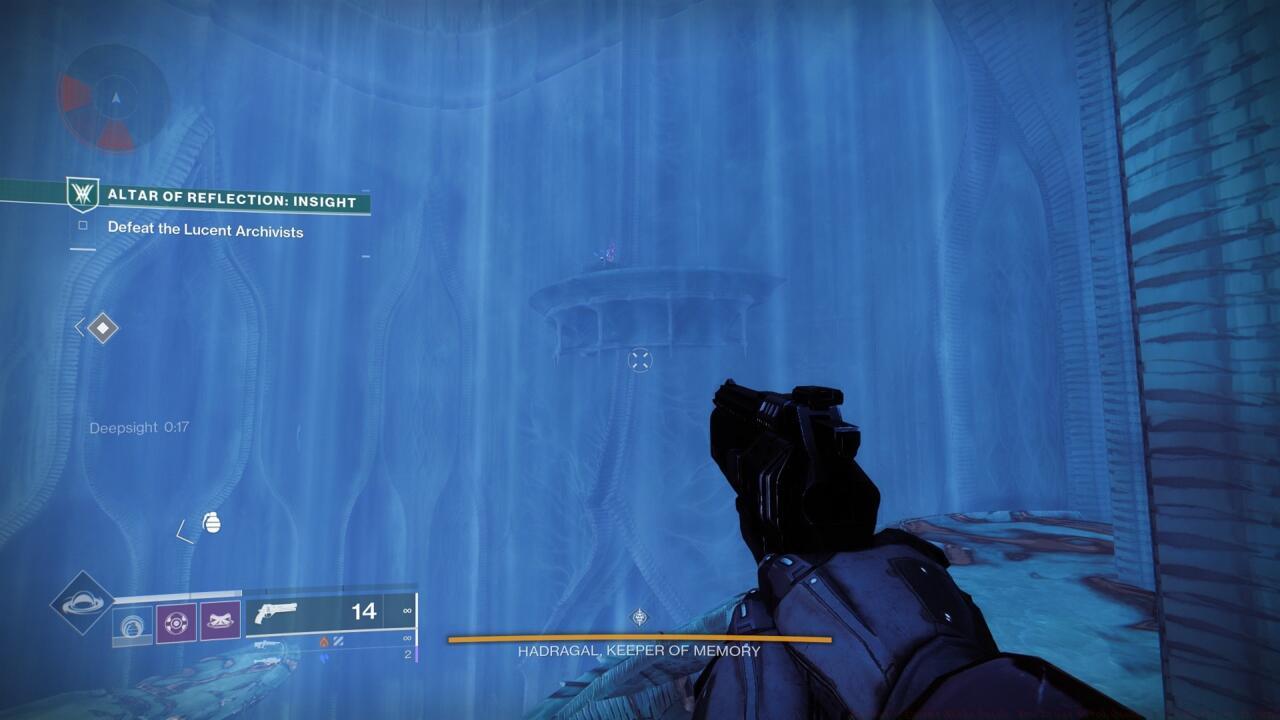
Strategic positioning is crucial here – face the entrance door after activation to spot the newly visible climbing platforms.
Execute a complete 180-degree turn post-activation to observe the transformed environment. The lucent moth awaits atop these platforms, positioned directly above your entry point.
Moth No. 10: Fluorescent Canal

Navigate to the Fluorescent Canal’s central area, focusing on the transition point leading toward the Court of Thorns.
This final specimen ranks among the most straightforward to locate, offering a charming visual spectacle. Identify the substantial fountain preceding the elevated platform that accesses the Court doorway, distinguished by multiple thrall statues with upward-reaching poses.

Patient observation reveals the moth gently circling on a miniature floating dish, basking in the Throne World’s artificial sunlight as it navigates its customized circular watercourse.
Submit this concluding moth to the cavern situated behind Fynch’s position to finalize the Lepidopterist Triumph requirement for the Witch Queen seal.
Moth No. 7: Court of Thorns
This specimen demands participation in the Wellspring activity via the Throne World access point. The activity alternates daily between Defend and Attack variants.
Optimal collection occurs during Defend rotations, enabling acquisition before activity commencement since it resides in a side chamber off the initial combat arena. During Attack phases, you must progress to the final boss encounter, though this presents minimal additional challenge for prepared Guardians.
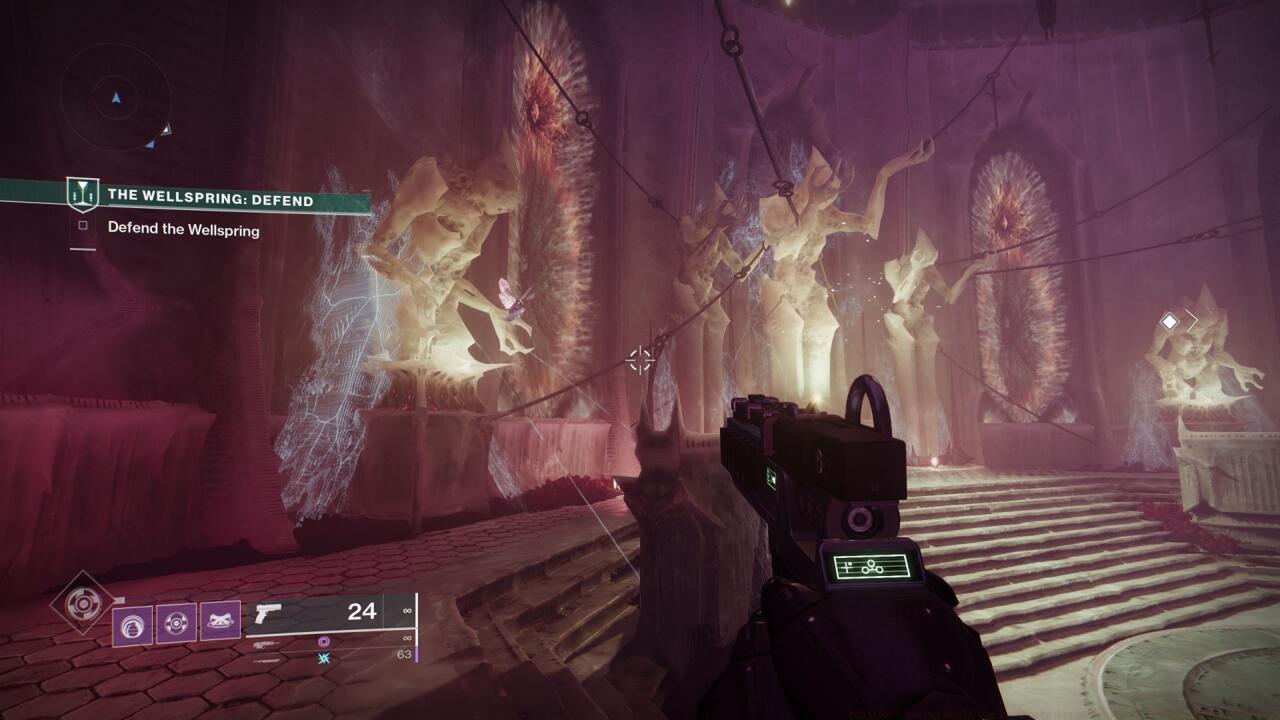
Thoroughly examine all three peripheral rooms within the main Wellspring chamber. Position yourself facing the central Wellspring mechanism – the moth occupies the right-side chamber.
Enter this rose-colored room and inspect the most accessible statue on the chamber’s left flank. The target perches delicately on its outstretched hand.
Moth No. 8: Witch’s Echo

Many veterans recall Witch’s Echo from the campaign narrative – this zone provides portal access to the Altar of Reflection for reviewing Savathun’s memories.


Approach from Quagmire and utilize the northwest passage leading to the Temple of the Wrathful and Temple of the Cunning. After traversing the orange portal, proceed through the Scorn-guarded structure ahead until emerging on the opposite side. Scale the temple’s exterior; your objective is the bridge positioned to your left.

Remain vigilant to avoid missing the Deepsight activation point situated against a wall within a cavern chamber populated by Scorn adversaries.
You’ll transition into a dimly lit cave next, with the Witch’s Echo designation appearing on your display. Continue advancement until reaching an illuminated cave section containing Hive technology and a Scorn contingent requiring elimination.
Thoroughly clear the chamber and systematically search the perimeter for a Deepsight node. Activate this mechanism and examine the opposing wall surface. A previously partially submerged doorway will dematerialize, exposing the concealed moth.
Moth No. 5: Miasma
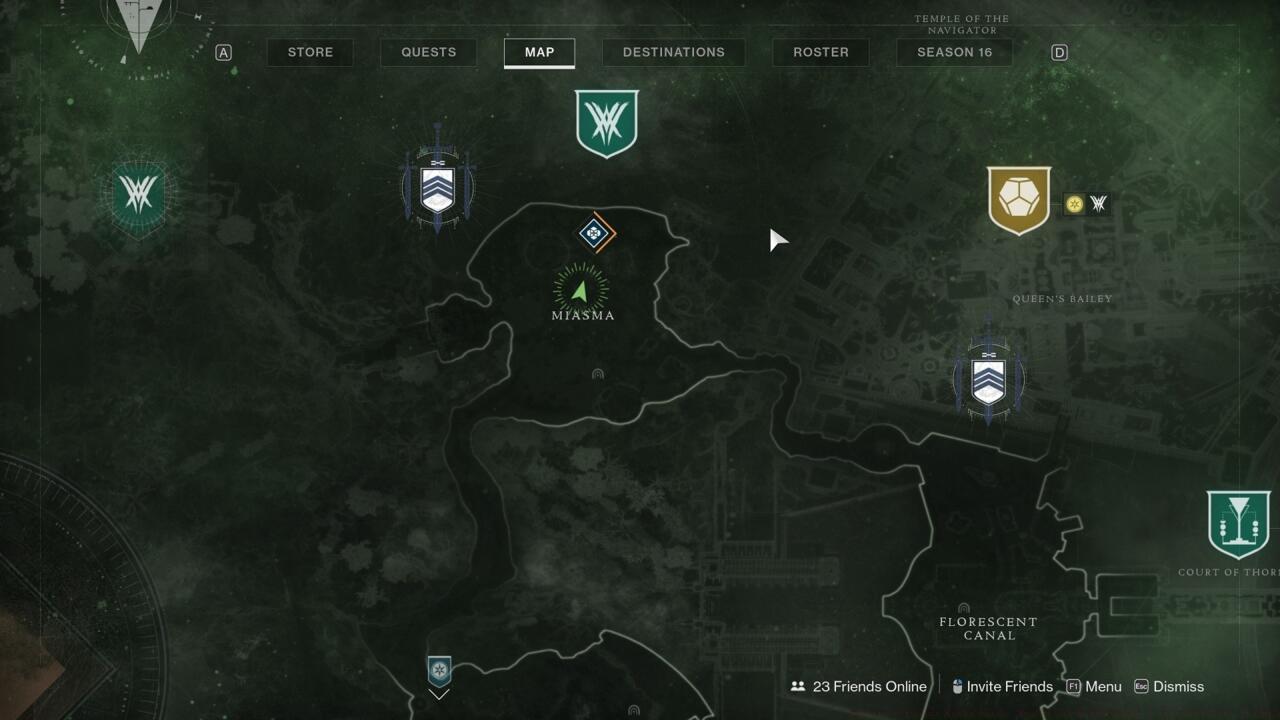
Utilize your sparrow for rapid transit from Quagmire toward Miasma’s northern sector, essentially targeting the zone’s central point.
Unlike other Lucent Moths demanding enemy engagement or puzzle resolution, this specimen primarily tests observational skills. Maintain elevated visual awareness, Guardian – your target inhabits arboreal surroundings.
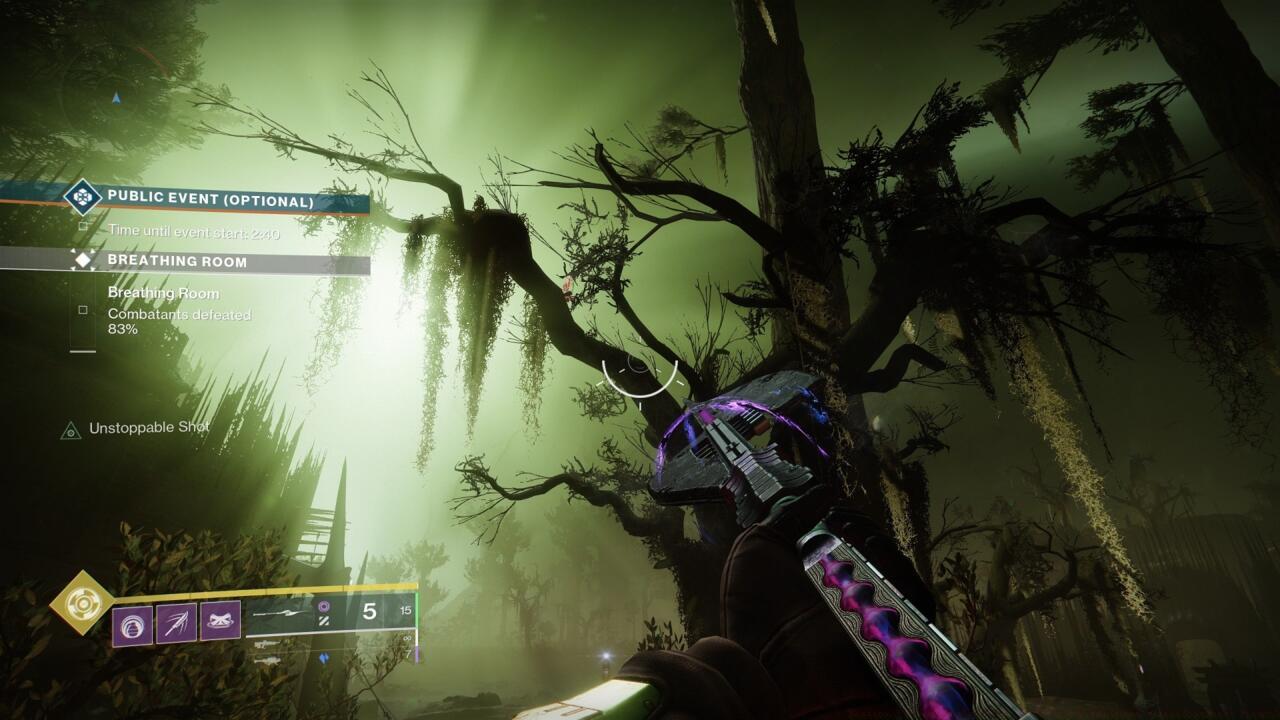
Ascending the tree structure presents challenges due to certain branches permitting fall-through behavior.
The arboreal landmark proves reasonably identifiable, positioned near Miasma’s perimeter where a flat, open marshland hosts public event markers. It also neighbors demolished Hive structures, situated westward of the substantial circular tower in the northeast area corner.
Moth No. 6: Temple of the Wrathful

Navigate toward the Temple of the Wrathful grounds. Minimal progression reveals the orange protective sphere enclosing your target.
Return to Quagmire and resume northward sparrow travel, bypassing the Miasma exit toward the pathway leading into the stone tunnels accessing the Temple of the Wrathful and Temple of the Cunning.

Proceed through the tunnel’s darkened section until emerging into a Scorn-populated cavern, then traverse the orange portal to your right.
Execute a right turn and proceed beyond the substantial temple entrance. This marks the courtyard boundary, obstructed by a stone barrier, where you’ll discover Scorn defenders protecting an orange sphere. Eliminate all hostiles and the protective field will vanish, disclosing the Lucent Moth.
Moth No. 3: Alluring Curtain
Access the Alluring Curtain by tracing the fortress perimeter route, a journey familiar to those completing the “Of Queens and Worms” questline for the Parasite Exotic grenade launcher.
Initiate from Quagmire’s spawn point and advance toward the easternmost exit reaching Alluring Curtain.

This expedition demands circumnavigation of the fortress exterior, presenting substantial platforming challenges throughout the route.
Maintain constant vigilance for Deepsight activation points, as these unveil climbing surfaces enabling ascension of the prominent towers projecting along the pathway.
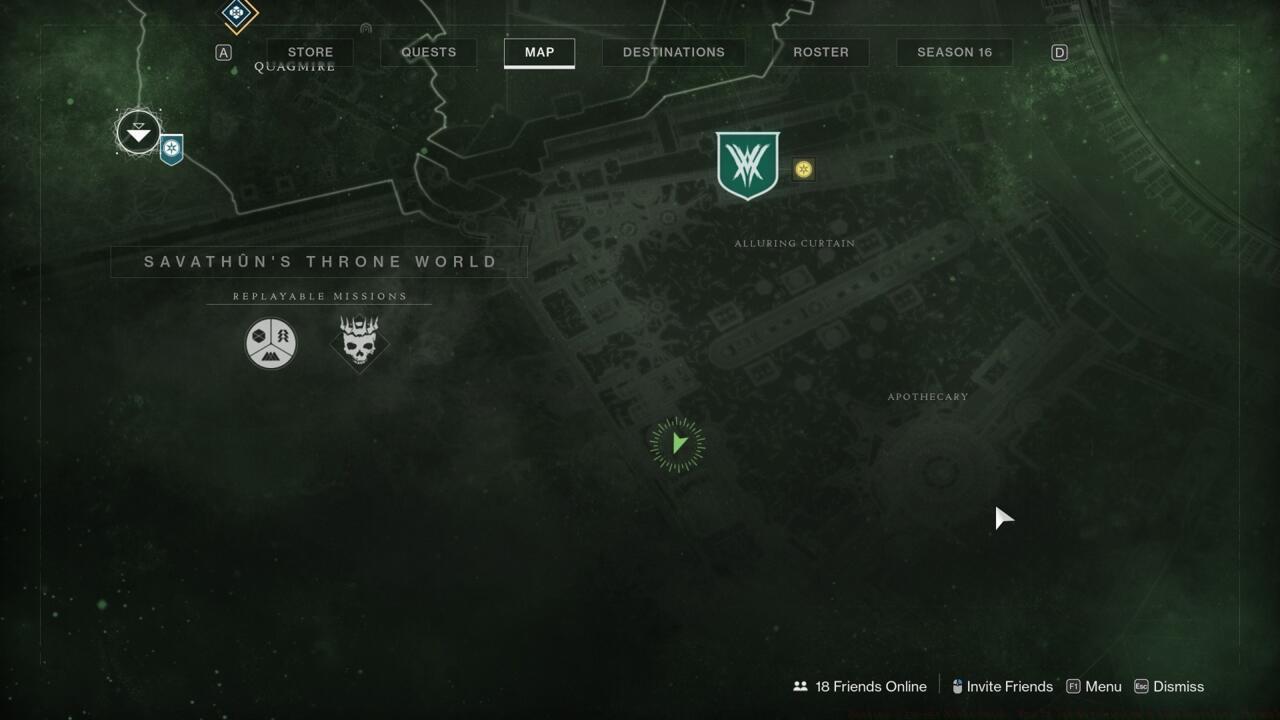
Moth No. 4: Temple of the Cunning
The Temple of the Cunning represents a location explored during The Witch Queen’s narrative campaign.
To revisit this site, journey to Quagmire and proceed northward into the cavernous zone where Scorn spawn, positioned just west of the cliff and adjacent Lost Sector.
The route should descend in elevation into rocky passageways, subsequently leading into darkened stone tunnels illuminatable by targeting glowing orange sacs.
Enter the portal and emerge before an imposing fortress integrated into the rock formation.
Campaign veterans will recall advancing through the forward doorway to access the Temple of the Wrathful; rather than penetrating the fortress interior, execute a leftward maneuver to circumnavigate its exterior.
Continue progression along the path until accessing the structure beyond the bridge. Persist in advancement; eventually encountering a stone barrier emitting radiant illumination, traversable by crouching.
Moth No. 1: Quagmire

The initial Lucent Moth represents the most accessible specimen to locate. From Fynch’s position, proceed eastward across Quagmire’s territory toward the regional Lost Sector.
When approaching the Lost Sector, positioned adjacent to a substantial cliff on the northern zone boundary, reorient to face westward.
Moth No. 2: Apothecary
Acquiring this second specimen demands Deepsight Resonance Tier 2 capability, obtainable from Fynch through Throne World reputation progression.
Additionally, prepare for an extended expedition to the Apothecary, a fortress segment accessed during the “Of Queens and Worms” quest narrative.
To reach this destination, navigate to the Florescent Canal region and proceed to the northern extremity, where you’ll discover an entrance to the fortress section designated Queen’s Bailey.
From this juncture, the route remains direct, so continue advancement through Queen’s Bailey until accessing an exterior zone.
Proceed beyond the staircase to the alternate square edifice. Upon arrival, locate a Deepsight Resonance activation point atop the turret and engage it.
This provides approximately 30 seconds to locate and eliminate five black circular seals bearing Savathun’s green Witch Queen emblem.
- Inside the square building on the right wall
- Outside of the building, on the back wall on the right side
- On the square pylon at the top of the stairs on the left side
- On the back side of the back-left pylon at the top of the stairs
- Outside the building on the left side from the stairs, just beside the doorway heading in
Eliminate all five emblems before your Deepsight duration concludes and the moth materializes atop the square structure at the summit of the compact staircase arrangement.
Seasoned moth hunters recommend systematic approaches to maximize efficiency. Begin each session by verifying your current Deepsight capabilities and reputation standing to avoid wasted expeditions.
Common mistakes include attempting Apothecary without Tier 2 Resonance or missing Wellspring rotation windows. Plan your collection route geographically rather than chronologically to minimize travel time between locations.
Allocate approximately 3-4 hours for complete collection if executing efficiently. Consider completing related activities simultaneously to optimize your Throne World engagement time.
Advanced techniques involve coordinating with fireteam members to cover multiple locations simultaneously, though each Guardian must collect moths individually.
Mastering the art of lucent moth collection in Destiny 2’s Throne World requires precise navigation and puzzle-solving skills. These elusive creatures represent key components for completing the prestigious Lepidopterist Triumph, which contributes directly to earning the coveted Witch Queen seal. Understanding their spawn mechanics and environmental triggers will significantly enhance your collection efficiency.
The moth hunting journey spans multiple Throne World zones, each presenting unique challenges and requiring different approaches. From intricate rune puzzles to environmental observation, each location tests your Guardian’s exploration capabilities in distinct ways.
Navigating to the Altar of Reflection moth begins with accessing the dedicated map node, which transports you nearly directly to the puzzle entrance. The Hive rune sequence must be deciphered correctly to unlock the main chamber, where you’ll encounter various Hive combatants including Archivists and boss-level threats.
Strategic Deepsight activation reveals the moth’s elevated position above your entry point. Immediately upon entering the chamber, scan the right-side columns to locate the Deepsight resonance node. Activating this perceptual enhancement creates temporary platforms that facilitate access to the moth’s perch.
Execute a complete 180-degree turn after triggering Deepsight to identify the newly formed ascent route. The lucent moth rests conspicuously atop these platforms, positioned directly above the doorway through which you initially entered the combat arena.
Journey to the central sector of Fluorescent Canal, positioning yourself near the transitional exit leading toward the Court of Thorns. This particular moth specimen stands out as both visually distinctive and relatively straightforward to locate compared to others in the collection.
Identify the prominent fountain structure situated immediately before the raised dais that ascends toward the Court doorway. Distinctive thrall statue formations mark this area, featuring multiple figures with upward-reaching poses at the fountain’s center. Patient observation reveals the moth’s distinctive floating pattern as it circumnavigates the water feature.
The creature leisurely floats atop a small circular dish, basking in the Throne World’s atmospheric conditions while following a consistent circular trajectory. Monitor the fountain’s complete rotation pattern for approximately 15-20 seconds to reliably spot the moth’s distinctive movement rhythm.
This specific moth specimen remains exclusively accessible through participation in the Wellspring matchmade activity. Fortunately, guardians can pursue this collectible during both Attack and Defend variant days, providing flexible scheduling opportunities.
Coordinate with your fireteam to ensure thorough area exploration during activity progression. The moth typically spawns in secondary areas rather than primary objective paths, requiring deliberate detour navigation. Team communication enhances discovery chances during intense combat scenarios.
Strategic positioning during objective advancement phases allows for efficient detour routes to moth locations. Plan your exploration during transitional moments between primary objective phases to maintain activity contribution while pursuing collection goals.
Submit your final moth specimen to the concealed cavern located behind Fynch’s position to finalize the Lepidopterist Triumph requirement for the comprehensive Witch Queen seal. This submission completes one of the multiple prerequisites for seal acquisition.
Common collection errors include insufficient environmental scanning, premature departure from observation areas, and misidentification of moth movement patterns. Allocate adequate time for each location—typically 5-7 minutes for puzzle-based moths and 2-3 minutes for environmental observation specimens.
Optimize your collection route by grouping geographically proximate moths during single Throne World sessions. This approach minimizes loading screen transitions and maximizes time efficiency. Consider consulting our Complete Guide for additional exploration techniques that translate well to Destiny 2’s environmental navigation.
Advanced players should coordinate moth collection with other Throne World triumphs to create efficient multi-objective sessions. This strategy proves particularly effective when combined with weapon proficiency objectives from our Weapons Unlock guide principles, adapting the efficiency mindset to Destiny’s collection systems.
Lucent Moths represent one of The Witch Queen’s most engaging collectible systems, requiring strategic enemy elimination rather than simple exploration. These ethereal creatures materialize only after defeating specific high-value targets or clearing designated combat encounters throughout the Throne World. Understanding their spawn mechanics is crucial for efficient collection.
Each moth follows distinct activation rules – some appear after boss eliminations, while others require complete area clears. The reward system ties directly into Destiny 2’s triumph completion, offering both lore entries and exclusive cosmetic rewards for dedicated collectors.
Seasoned players should note that moth spawns are location-specific and time-gated only by combat efficiency. Proper preparation with area-appropriate weapon loadouts can reduce collection time by up to 40% compared to unprepared attempts.
Begin your collection journey at Fynch’s outpost, heading eastward across the Quagmire toward the region’s designated Lost Sector. As you approach the northern cliffside area adjacent to the Lost Sector entrance, pivot westward to locate the subterranean passage beneath the prominent hill formation.
Upon entering this tunnel corridor, prepare for immediate combat engagement. A Lucent Hive fireteam spawns dynamically as you reach the tunnel’s midpoint, featuring a formidable Wizard among their ranks. Elimination of all hostile entities is mandatory for progression.
The critical mechanic here involves a protective green energy barrier on the western tunnel wall. This shield dissipates exclusively after total enemy clearance, revealing your first Independent Moth collectible. Many hunters fail here by overlooking remaining stragglers – ensure thorough area sweeps before investigating the barrier.
Navigate an extended pathway featuring multiple platforming sequences, ultimately reaching a distinctive courtyard area centered around an ornamental fountain. This location serves as your primary destination marker during this phase of the hunt.
Within this combat arena, you’ll confront Lucent Hive forces led by Ir Olena, designated as the Moth Keeper. Strategic targeting is essential here – while numerous enemies populate the area, only the elite Wizard’s defeat triggers the moth spawn. The collectible materializes precisely at Ir Olena’s final position, so position the engagement strategically.
Advanced hunters should prioritize the Wizard while utilizing area geometry for cover against supporting fire. The moth appears immediately upon the target’s elimination, regardless of remaining combatants, allowing for efficient collection during ongoing engagements.
The Temple of the Cunning, initially encountered during The Witch Queen campaign, requires specific navigation from the Quagmire region. Head northward into the cavernous Scorn spawning grounds positioned west of the cliff formation and adjacent Lost Sector.
Your descent follows a downward trajectory through rock-hewn passages, transitioning into lightless tunnels. Illuminate these areas by detonating the distinctive orange sacs scattered throughout the environment. These explosive containers provide temporary lighting essential for navigation.
Upon reaching the derelict subterranean structures teeming with Scorn forces, locate the glowing orange portal. This gateway transports you to the fortress approach. Campaign veterans will recognize the primary entrance to the Temple of the Wrathful – instead of proceeding inward, navigate leftward around the structure’s exterior perimeter.
Enter the adjacent chamber and eliminate all Scorn combatants. Successful clearance triggers the moth’s appearance on the left-side column. Many hunters miss this spawn by insufficient enemy elimination – ensure no stragglers remain in connected areas.
Continue along the external path until crossing the bridge and entering the opposing structure. Progress through this area until encountering a luminous rock formation emitting intense light beams – this barrier is traversable by crouching movement.
This segment precedes the temple’s main chamber, which typically requires a substantial descent onto a bridge structure. Reaching this drop point indicates overshooting your target destination.
Instead, locate the distinctive blue-tinted chamber featuring an elaborate crystalline chandelier and circular central platform. This arena contains numerous Scorn adversaries requiring complete elimination.
Upon successful clearance of all hostiles, the moth materializes on one of the room’s central columns. This location often confuses hunters due to its proximity to the main temple descent – careful navigation prevents unnecessary backtracking.
Optimize your loadout with area-of-effect weapons and high-damage precision tools. Wave-frame grenade launchers excel in tunnel environments, while scout rifles provide optimal performance in open courtyard engagements.
Time management proves crucial – experienced collectors complete all four moth locations in approximately 25-35 minutes. Inefficient routing or repeated combat failures can extend this to 60+ minutes.
Common pitfalls include inadequate enemy clearance verification, navigation errors in similar-looking tunnel systems, and improper boss engagement sequencing. Always confirm complete area security before investigating spawn locations.
For comprehensive gameplay enhancement, consult our Weapons Unlock guide for optimal armament selection. Understanding spawn mechanics through our Complete Guide provides foundational knowledge for all collection activities.
Action Checklist
- Visit Fynch weekly to receive new moth location hints and check your collection progress
- Systematically sweep each hinted area using grid-based search patterns
- Document locations and solutions for future reference and community sharing
- Complete associated activities or puzzles required to access certain moth spawns
- Verify Deepsight Resonance Tier 2 availability for Apothecary moth
- Check daily Wellspring rotation for Court of Thorns access
- Collect Week 1 moths (Quagmire & Apothecary)
- Complete Wellspring-dependent Court of Thorns moth
- Systematically progress through remaining weeks in geographical order
- Return all collected moths to Fynch’s cave
- Access Altar of Reflection via map node and solve Hive rune puzzle
- Activate Deepsight on right column, turn 180 degrees, climb platforms above door
- Travel to Fluorescent Canal center fountain, observe for 15-20 seconds to spot floating moth
- Complete Wellspring activity on either day type, explore secondary areas during objectives
- Submit all collected moths to Fynch’s hidden cave location
- Begin at Fynch’s location, navigate to Quagmire tunnel for first moth
- Follow platforming route to fountain courtyard, defeat Ir Olena
- Access Temple of the Cunning via Scorn caves, clear chamber enemies
- Navigate to crystal chandelier room, eliminate all Scorn forces
- Verify all moth collections in triumphs menu
No reproduction without permission:SeeYouSoon Game Club » Destiny 2 Lucent Moths Guide: How To Get Witch Queen’s Lepidopterist Triumph