TL;DR
- Visit Crow on Tangled Shore to start Bird of Prey quest
- Find hidden fireplace in Trostland EDZ to access mission
- Prepare loadout with all shield types and champion mods
- Navigate complex platforming sections to reach combat arenas
- Complete mission for Hawkmoon random rolls and catalyst
The latest chapter in Hawkmoon’s unfolding story brings Guardians a challenging new pursuit this week. As Destiny 2’s only Exotic weapon capable of rolling random perks, Hawkmoon offers unique replay value through the Harbinger mission.
To begin your journey toward acquiring new Hawkmoon variants and the coveted Exotic Catalyst, you’ll need to initiate the Bird of Prey questline. This mission follows in the footsteps of classic secret activities like The Whisper and Zero Hour, providing minimal guidance and requiring keen exploration skills.
First, travel to the Tangled Shore and locate the Crow. Provided you’ve completed previous Season of the Hunt content and already possess the base Hawkmoon, you’ll discover the new Bird of Prey Exotic mission available in his inventory. Accepting this quest directs you toward Earth’s European Dead Zone, though crucially omits waypoint markers for navigation.
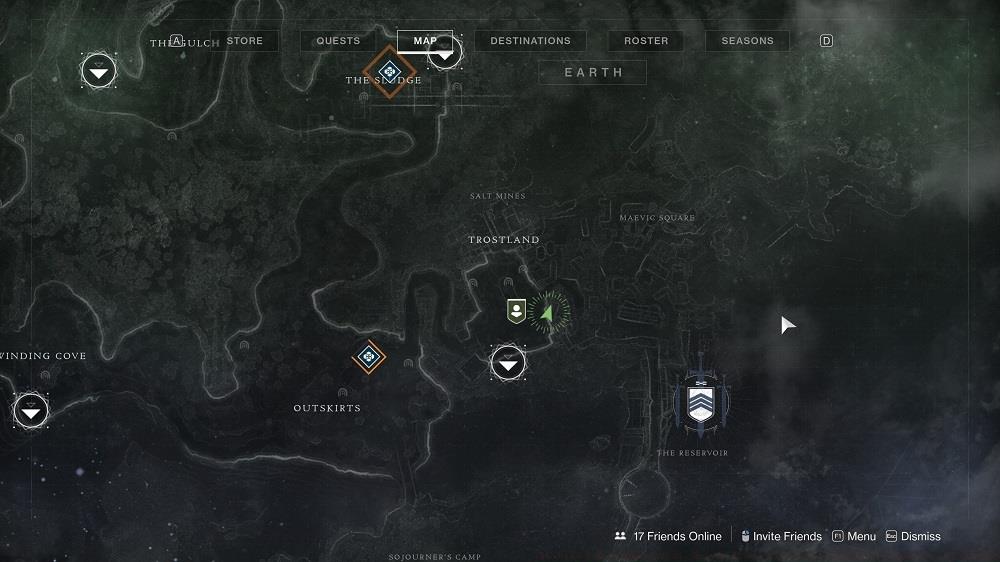
The distinctive fireplace entrance sits within the ruined structure east of Trostland’s central area.
Your next objective involves uncovering a concealed passage within the EDZ. Transmat into the Trostland landing zone and ensure Hawkmoon is actively equipped in your kinetic slot. Proceed to the eastern sector, entering the dilapidated building situated right of the roadway advancing toward Maevic Square.
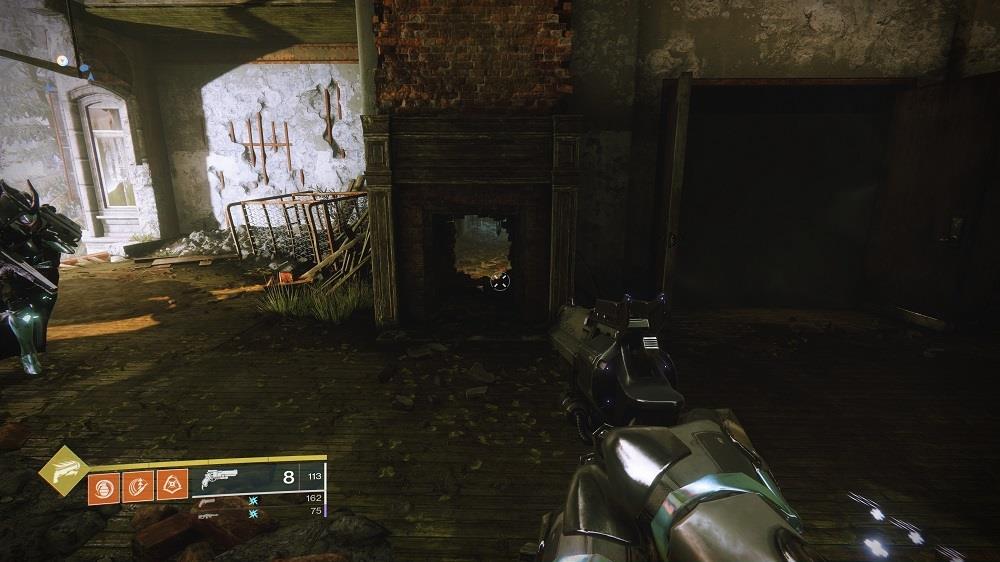
Access the second level of this war-torn structure to locate the crucial fireplace hiding the mission entrance.
Target the fireplace interior with your weapon and fire to demolish the false backing, exposing the hidden pathway forward. Seasoned Guardians recommend using precision weapons for this interaction to ensure clean penetration.
Immediately upon entering through the fireplace breach, scan leftward for an electrical panel emitting visible sparks. Engage with this fusebox to officially commence the Harbinger mission proper.
Upon mission activation, you’ll find yourself thrust into unfamiliar territory with scarce direction. Before advancing, carefully consider your equipment configuration as several punishing modifiers await, including the formidable Match Game mechanic.
Expect frequent weapon swapping to handle diverse combat scenarios. During initial segments, guarantee coverage for all three elemental shield types—you’ll predominantly encounter Void-shielded Taken Acolytes, though your primary targets, Savathun’s Emissaries, each possess distinct shield elements. The versatile Hard Light auto rifle excels here due to its intrinsic element-cycling capability, while heavy hitters like Xenophage provide reliable long-range damage.
Critical preparation note: You’ll require appropriate mods to counter Unstoppable Champions during later stages, so plan your armor modifications accordingly. Many veterans recommend incorporating both anti-barrier and unstoppable mods to handle the mission’s varied champion roster.
Mobility-enhancing Exotics prove invaluable for navigating the mission’s platforming challenges. Hunters benefit tremendously from ST0MP-EE5, while Titans can utilize Lion Rampant for enhanced aerial control. Warlocks may prefer Transversive Steps for improved general mobility during precision jumping sequences.
Advanced strategy: Consider building around protective mods like Protective Light or damage resistance mods specific to Taken enemies. The mission features numerous high-density combat encounters where survival often depends on effective damage mitigation.
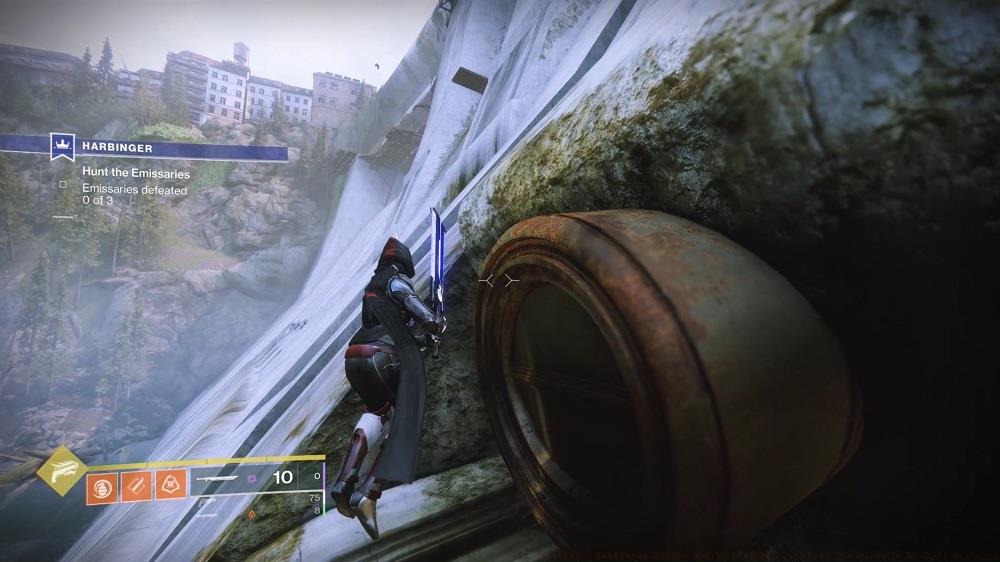
The Harbinger mission features extensive platforming sections that test even experienced Guardians’ mobility skills. After initial combat encounters, you’ll emerge into open areas requiring precise navigation.
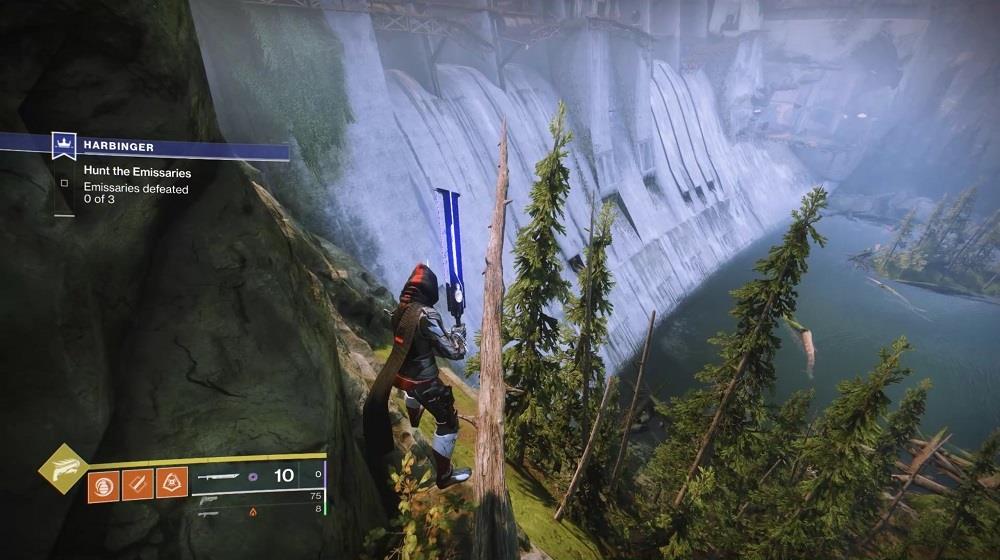
Eliminate the Taken sniper upon exiting, then leap to its former position and identify the distinctive flat tree below for your next destination.
From the flat tree platform, your objective becomes reaching the narrow ledge at the dam’s base. This requires careful positioning and controlled descent.
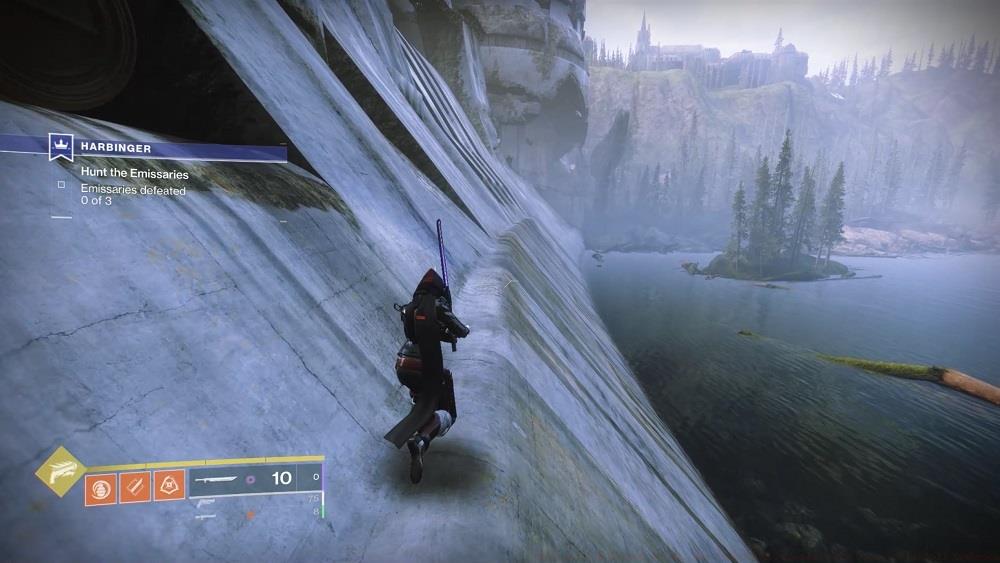
The target landing zone appears as a slender horizontal surface along the dam’s lower section.
Traverse rightward along this precarious ledge until spotting ascending handholds. The climbing route features irregular surfaces and requires patience.
Ascend using the visible irregularities and flat sections, targeting the rectangular hatch opening above.
Common navigation mistake: Rushing the platforming sections often leads to fatal falls. Take time to study each jump’s trajectory and consider using class abilities like Hunter triple jump or Warlock glide for additional aerial control.
Time optimization: Skilled players can complete the platforming sequence in approximately 5-7 minutes, while newcomers should budget 10-15 minutes for this segment alone.
The Harbinger mission’s combat encounters escalate in complexity and difficulty, demanding strategic adaptation throughout.
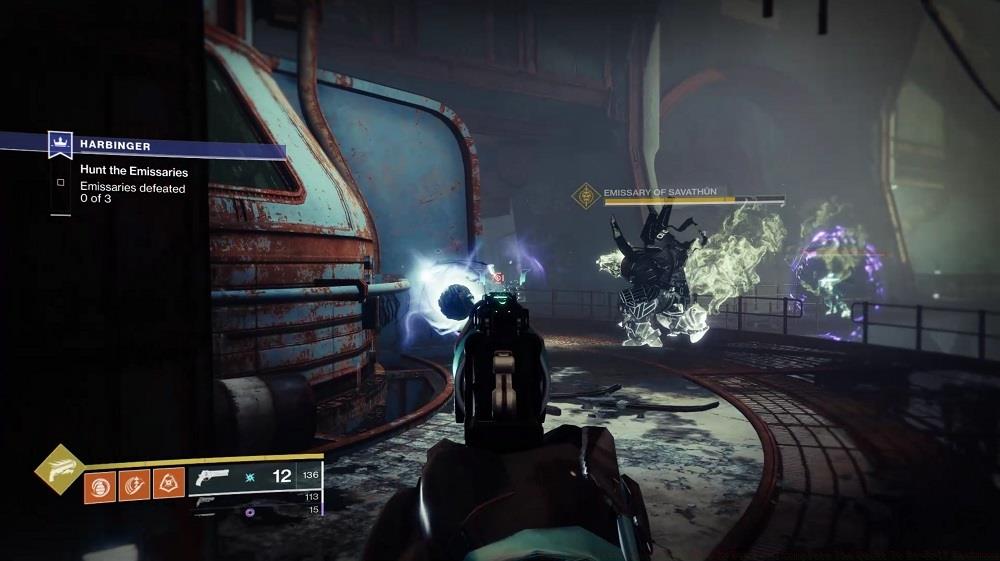
Pursue and eliminate the Emissaries systematically, beginning in the turbine chamber before tracking them through adjacent passageways.
The Emissary engagement unfolds in two distinct phases. Initially, confront them within the expansive turbine room, utilizing cover and elevation to your advantage. Subsequently, you must hunt each remaining Emissary through the connecting tunnels.
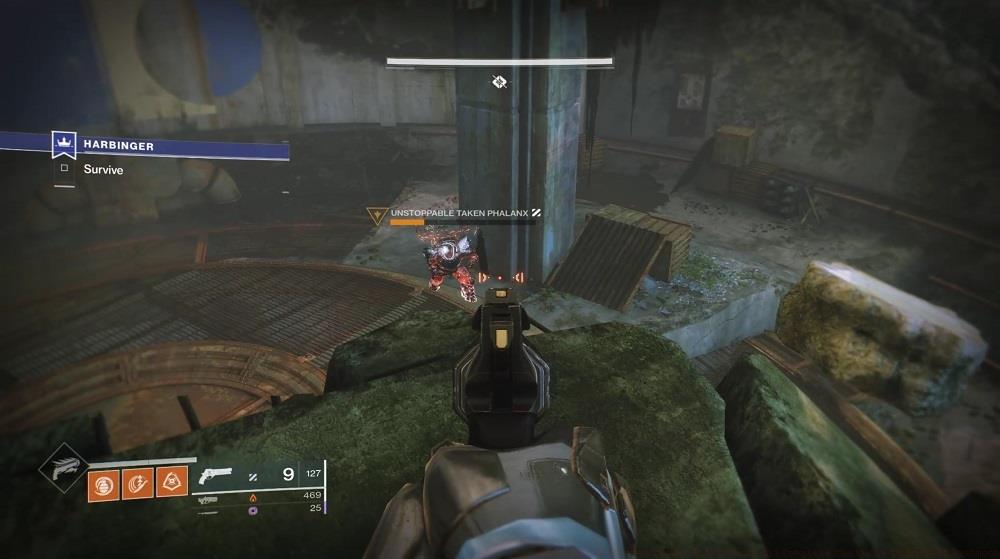
Following the Emissaries’ defeat, prepare for successive waves of Taken adversaries within the dam arena, featuring dangerous Unstoppable Champions.
Champion management becomes paramount during these encounters. Ensure your fireteam coordinates stunning and eliminating Unstoppable Champions efficiently to manage the escalating enemy density.
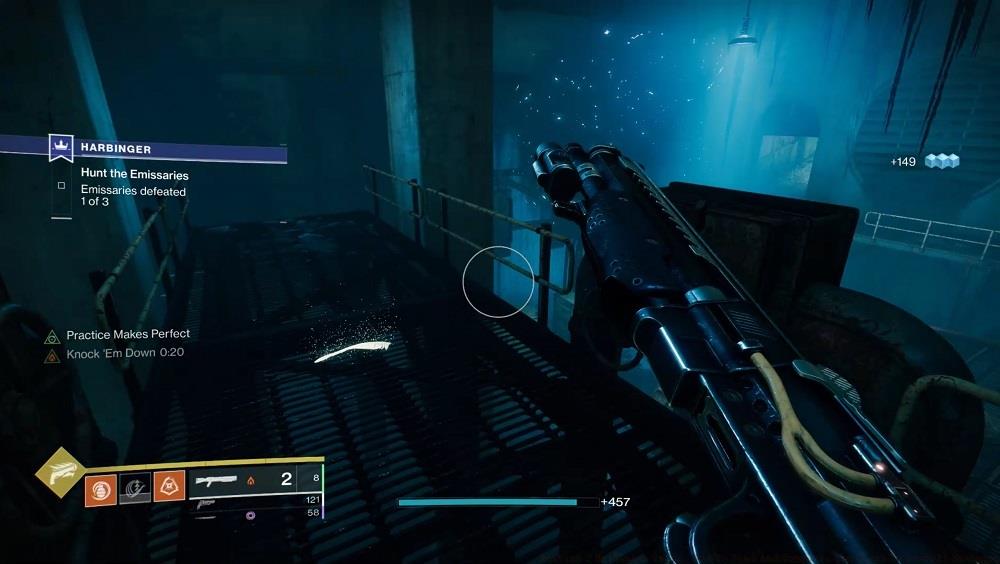
Remain vigilant for luminous Paracausal Feathers scattered throughout the mission environment.
The culminating confrontation pits you against Akorith, a formidable Taken commander. This boss delivers devastating attacks while summoning progressively stronger enemy waves.
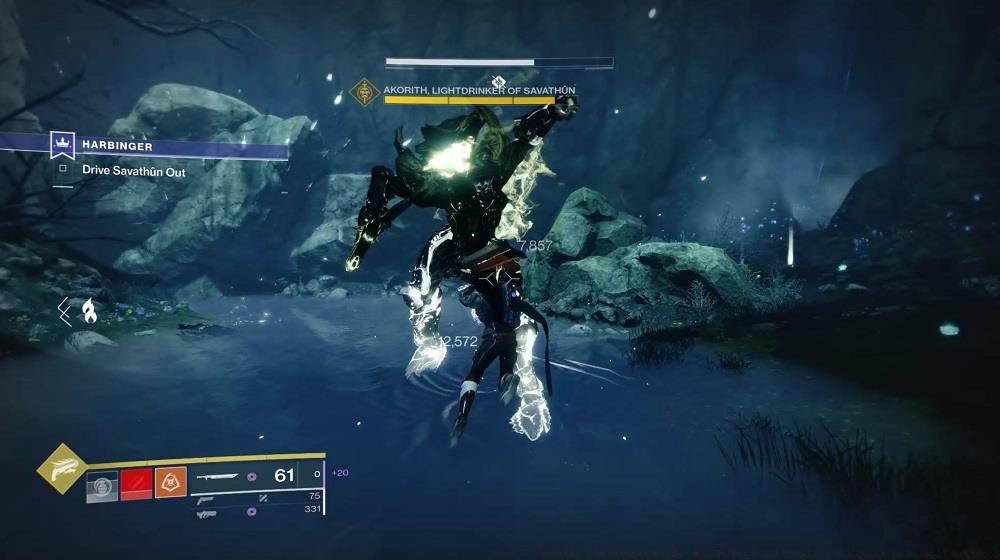
Akorith’s assault patterns demand constant positional awareness and prioritized target acquisition.
Optimal boss strategy: Maintain distance while utilizing long-range weaponry like sniper rifles or linear fusion rifles. Designate specific fireteam members for add-clear duties while others focus sustained damage on the boss.
Weapon synergy: Consider pairing a primary weapon with intrinsic unstoppable capability alongside a high-damage heavy weapon. Weapons with Vorpal Weapon or Boss Spec mods provide noticeable damage increases against Akorith.
Successful Harbinger mission completion yields substantial rewards centered around enhancing your Hawkmoon experience. Most significantly, you’ll receive additional Hawkmoon copies featuring randomly rolled perks, allowing customization to match your playstyle.
The mission also provides progress toward acquiring Hawkmoon’s Exotic Catalyst, which substantially improves the weapon’s performance. The catalyst introduces additional perks that synergize with Hawkmoon’s exotic trait, making subsequent completions increasingly valuable.
Paracausal Feather collection represents another key reward component. These collectibles contribute to broader quest progression and narrative development.
Weekly reset considerations: The Harbinger mission remains available for repeated completion, though reward structures follow Destiny 2’s weekly reset patterns. Subsequent runs may feel smoother as you internalize the mission’s routing and encounter mechanics.
Efficiency tips for repeat runs: Memorize feather locations to minimize backtracking, optimize loadouts based on previous experience, and coordinate with consistent fireteam members for improved synergy.
For those seeking to master Destiny 2’s combat systems, understanding mission mechanics translates to improved performance across all activities. Consider reviewing our Weapons Unlock guide for additional weapon optimization strategies that apply broadly to your Guardian’s arsenal.
Action Checklist
- Visit Crow on Tangled Shore to acquire Bird of Prey quest
- Equip Hawkmoon and locate Trostland fireplace
- Prepare loadout with all shield types and champion mods
- Navigate platforming sections to reach combat arenas
- Defeat Emissaries and survive champion waves
- Confront Akorith using ranged weapons and add-clear strategy
No reproduction without permission:SeeYouSoon Game Club » Destiny 2 Harbinger Guide: How To Find And Complete The Quest To Re-Roll Hawkmoon Complete guide to finding and completing the Harbinger mission for Hawkmoon random rolls and Catalyst