TL;DR
- Locate three hidden chests guarded by Reaver Vandals in Grasp of Avarice
- Damage Reaver Vandals to collect engrams triggering 30-second timers
- Each fireteam member must individually open all three chests
- Complete catalyst acquisition without finishing the entire dungeon
- Use strategic positioning to minimize risk during Burdened By Riches debuff
After securing your Gjallarhorn exotic rocket launcher, your next objective involves returning to the Grasp of Avarice dungeon to pursue its powerful catalyst enhancement. This legendary weapon maintains its iconic status from Destiny 1, delivering devastating area damage that becomes even more formidable with the catalyst unlocked.
Gjallarhorn represents one of Destiny’s most celebrated firearms, returning during the Bungie 30th Anniversary celebration content. The weapon’s raw destructive capability justifies the effort required to obtain its catalyst, which significantly amplifies its performance in both PvE and PvP scenarios.
The catalyst hunt requires specific actions within Grasp of Avarice, though fortunately these objectives can be accomplished on any difficulty setting. This accessibility makes the upgrade achievable for solo players and fireteams alike, provided they understand the mechanics involved.
Similar to other exotic catalysts for premium weapons, Gjallarhorn’s enhancement involves puzzle-solving mechanics rather than pure combat challenges. The process proves considerably more straightforward than catalysts for weapons like Vex Mythoclast or Whisper of the Worm, focusing on environmental navigation and timed objectives.
Three elite Fallen Vandals, designated as Reaver Vandals, serve as guardians for the treasure chests containing catalyst components. These high-value targets display yellow health bars characteristic of major enemies and wield Scorch Cannons, spawning in proximity to their corresponding chest locations.
Strategic engagement involves damaging Reaver Vandals without eliminating them, as their destruction isn’t necessary for progression. When sufficiently damaged, each Reaver Vandal drops a distinctive yellow engram identical to those used to access the Loot Cave entrance. Collecting this engram applies the Burdened By Riches debuff, initiating a critical 30-second countdown.
During this brief window, you must navigate to the adjacent treasure chest and activate it before the timer expires. Failure results in immediate death, resetting the attempt. Advanced players recommend scouting chest locations thoroughly before triggering the engram collection sequence.
For three-player fireteams—the most efficient approach—catalyst progression requires each member to personally open all three chests individually. No team credit is granted when only one player completes the interactions, requiring coordinated movement and timing among all participants.
Successfully unlocking all three treasure chests rewards your account with the Gjallarhorn catalyst, achievable without completing the entire dungeon run. Current dungeon mechanics limit armor and weapon acquisition to once weekly per character, making catalyst-focused runs particularly time-efficient for players with limited alternate characters.
Here are the specific locations and activation methods for each catalyst chest within Grasp of Avarice.
The initial chest presents the most straightforward location discovery. Entering the Loot Cave via the descending hole that materializes at the first crystal encounter deposits you into an expansive cavern swarming with hostile forces. Your entry positions you on the chamber’s left flank with structural supports overhead; ahead lie Hive combatants, while across the aquatic divide position the Reaver Vandal accompanied by two orange-health Dreg guardians.
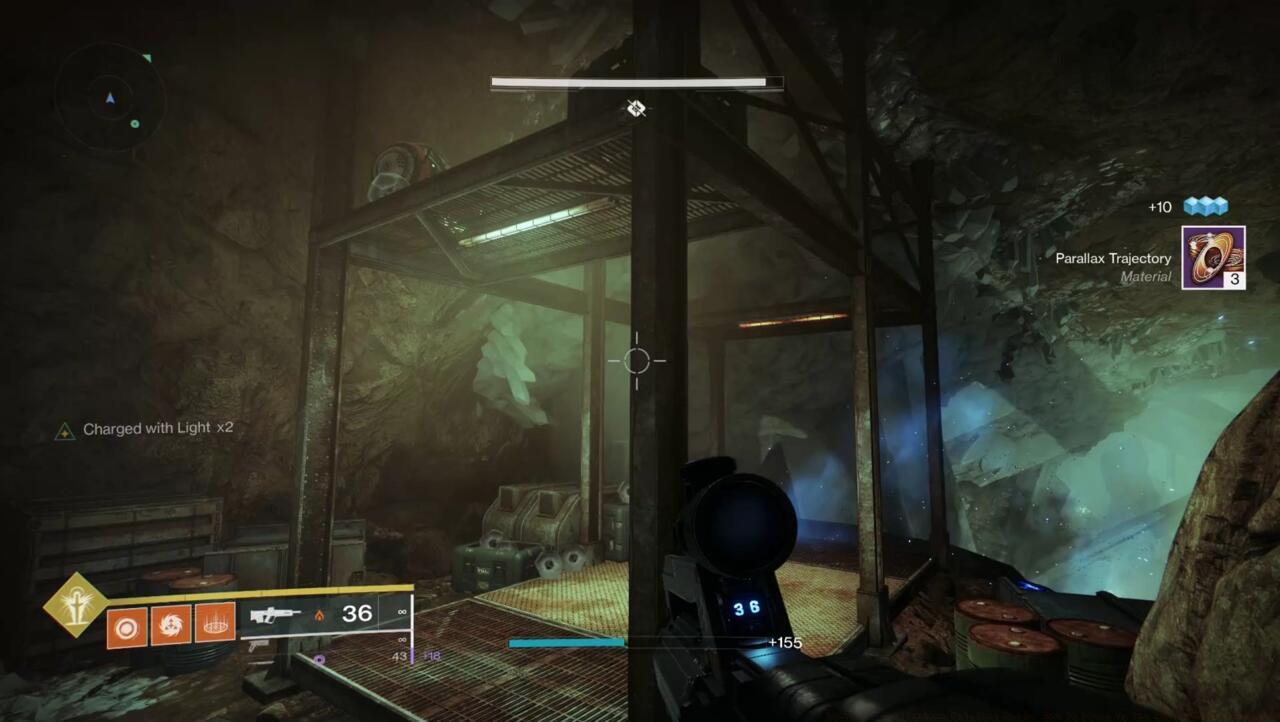
The crystalline chamber houses your initial catalyst chest and its Reaver Vandal protector.
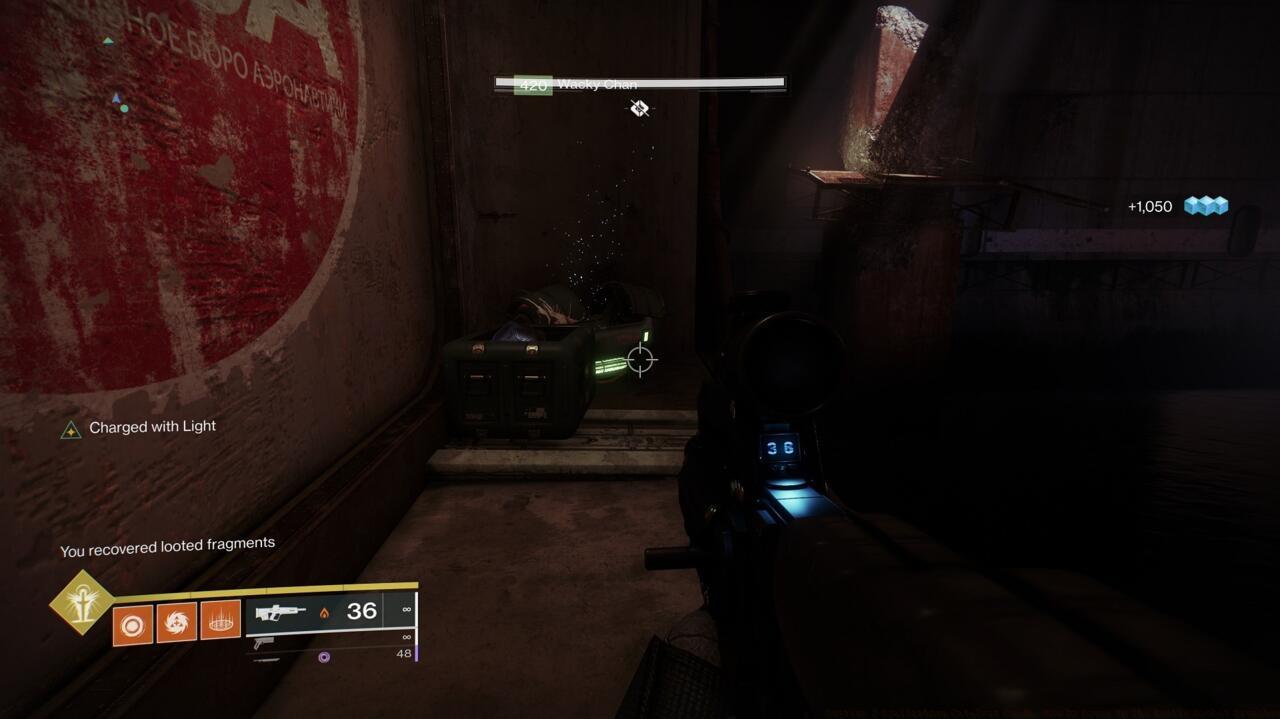
Navigate to the submerged chamber requiring an extended leap, scanning the rear wall for the concealed chest placement.
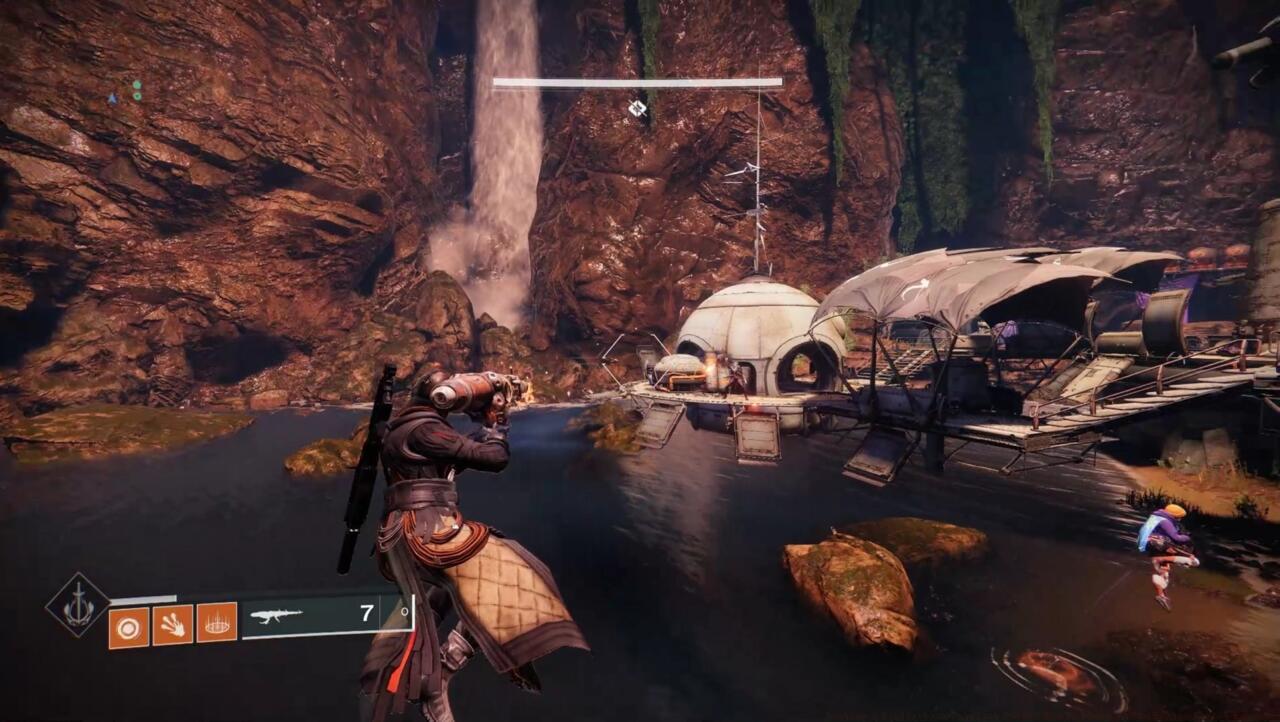
The cascading waterfalls decorating the Sunken Lair’s rear perimeter indicate the position of the final Reaver Vandal encounter.
Optimizing your catalyst acquisition involves several advanced techniques that experienced Guardians have developed through repeated dungeon runs. For solo attempts, prioritize mobility-enhancing subclasses like Hunter’s Stompees or Warlock’s Transversive Steps to maximize your 30-second window efficiency.
Team coordination proves crucial—designate one player as the “trigger” who initiates Reaver Vandal engagement while teammates position themselves near chest locations. This division of labor minimizes travel time and reduces failed attempts due to timer expiration.
Common mistakes include triggering multiple Reaver Vandals simultaneously, which creates overlapping Burdened By Riches debuffs that become nearly impossible to manage. Always complete one chest sequence entirely before approaching the next location.
Upon securing the catalyst, substantial additional gameplay awaits to fully upgrade it through combat usage. The enhancement process requires significant enemy eliminations across various activities, but the resulting weapon performance justifies the investment.
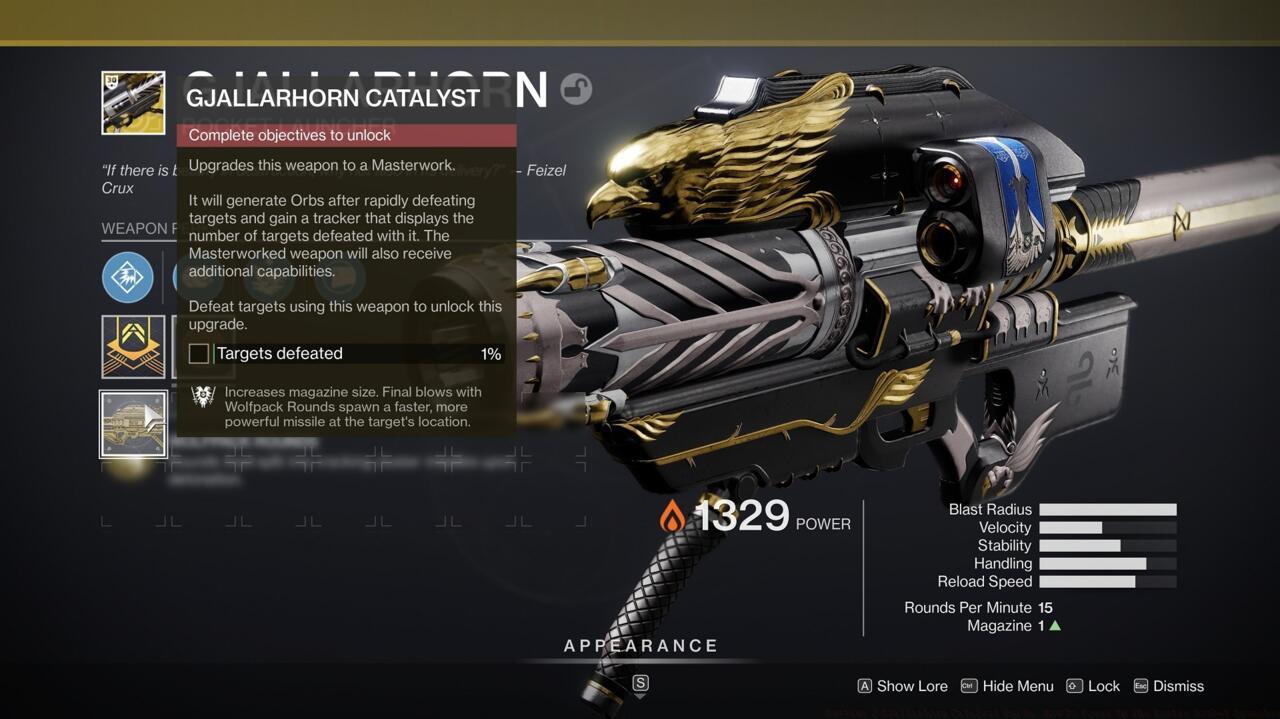
Substantial combat engagement awaits to fully upgrade your newly acquired catalyst enhancement.
For players seeking comprehensive loadout optimization, our BF6 Weapons Unlock Guide provides additional weapon mastery techniques. Similarly, our BF6 Class Selection Guide offers complementary strategic frameworks for character development.
Action Checklist
- Scout all three chest locations before engaging Reaver Vandals
- Damage Reaver Vandals to spawn engrams, then collect immediately
- Navigate to corresponding chest within 30-second timer window
- Ensure all fireteam members individually open each chest
No reproduction without permission:SeeYouSoon Game Club » Destiny 2 Gjallarhorn Catalyst Guide: How To Power Up The Exotic Rocket Launcher Master the Gjallarhorn catalyst hunt with strategic chest locations and time-saving tactics