TL;DR
- Dares of Eternity features six distinct phases with randomized enemy encounters determined by the Wheel of Adversity
- Completing challenges rapidly increases your score multiplier for enhanced bounty progression
- Starhorse’s Favor provides temporary unlimited heavy ammo during critical combat moments
- The Lightning Round offers bonus rewards but requires flawless execution to trigger
- Team coordination and enemy-specific strategies significantly impact completion efficiency
Step into the role of a cosmic contestant in Destiny 2’s most entertaining activity, where Xur’s mysterious demeanor meets Starhorse’s otherworldly presence. This free-to-play six-player mode combines game show excitement with intense combat scenarios, creating a unique PvE experience that tests both individual skill and team coordination.
The Nine have crafted Dares of Eternity as their latest challenge for Guardians, blending Xur’s characteristic dry humor with Starhorse’s energetic vocalizations. At the heart of this activity lies the Wheel of Adversity, which randomly selects your opposition from five distinct enemy factions, ensuring no two runs feel identical.
This structured activity progresses through five primary encounters, beginning with two randomized combat challenges against Hive, Taken, Fallen, Cabal, or Vex forces. Between these engagements, teams must navigate two separate obstacle courses that test mobility and precision. The climax features a dramatic boss confrontation with the potential for an additional Lightning Round that amplifies both difficulty and rewards.
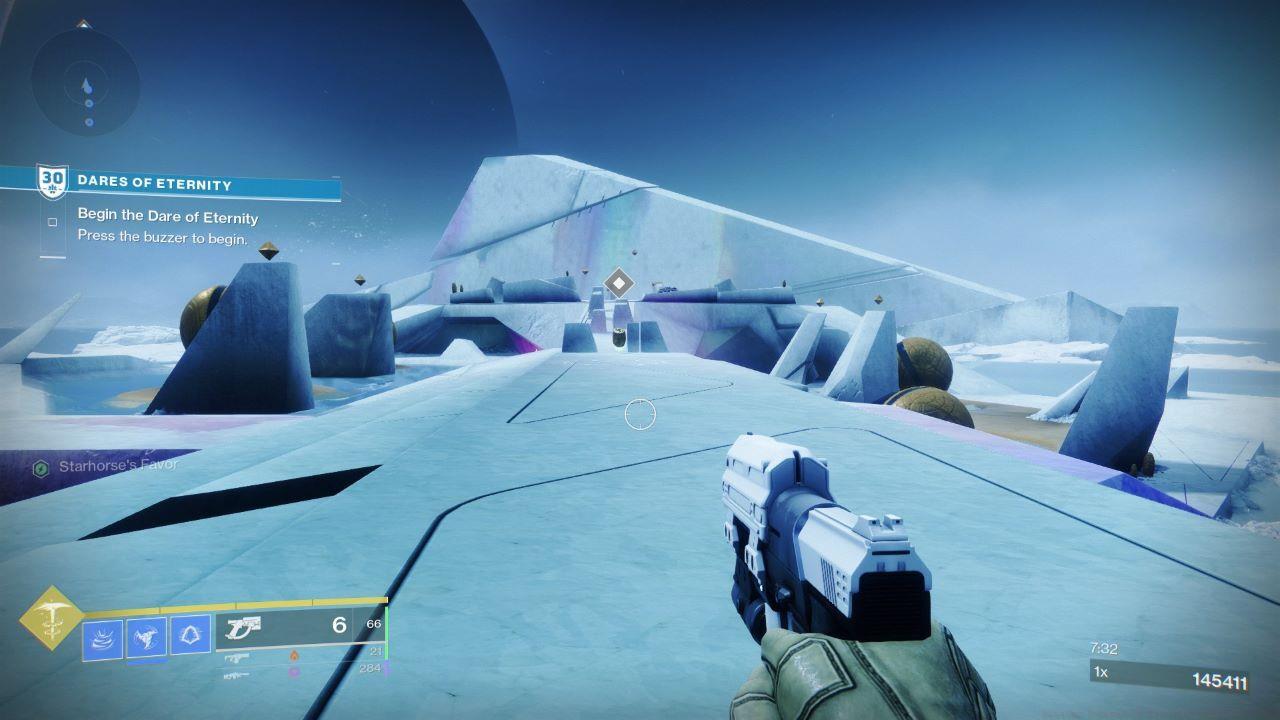
Accessing Dares of Eternity requires traveling to the Eternity location on your Destination map. Your fireteam’s initial objective involves clearing the Valley area of hostiles before interacting with the Wheel of Adversity to commence the main challenge sequence. Speed and efficiency directly influence your final score, which crucially impacts bounty completion rates and reward acquisition.
Maintain peak performance throughout your run, as Starhorse actively monitors participant performance and may grant special favors to exemplary contestants.

The Wheel of Adversity serves as the central randomization mechanic, determining which enemy faction and specific objectives your team will face. Understanding each potential outcome allows for rapid adaptation and efficient execution.
Each spin presents one of five distinct challenge types, each requiring different tactical approaches and loadout considerations. The element of randomness ensures replayability while testing your versatility against Destiny 2’s diverse enemy roster.
- Cabal: Commanders Defeated
- Fallen: Mines Defused
- Vex: Minotaurs Defeated
- Taken: Blight Destroyed
- Hive: Crystals Shattered
Cabal Commanders: These heavily armored units require focused fire and precision weapons. Coordinate with your team to isolate and eliminate commanders quickly, as they often deploy defensive shields and summon reinforcements when threatened.
Fallen Mines: Scattered explosive devices must be disarmed under time pressure. Designate team members specifically for mine disposal while others provide covering fire against spawning enemies.
Vex Minotaurs: These teleporting combatants demand anticipation and area control. Deploying suppression grenades or area-denial supers can limit their mobility, making them easier targets.
Taken Blights: Destructive orbs that spawn enemy waves must be eliminated rapidly. High-damage weapons like fusion rifles or rocket launchers prove most effective against these priority targets.
Hive Crystals: Fragile but protected structures require breaking through defensive barriers. Coordinate supers and heavy weapons to shatter multiple crystals simultaneously for maximum efficiency.
The Valley serves as your initial proving ground, testing your team’s combat fundamentals against concentrated enemy forces. This opening engagement sets the pace for your entire run and establishes your initial score multiplier.

Success in the Valley demands understanding spawn patterns and optimizing your positioning. Enemy waves typically emerge from predictable locations, allowing prepared teams to establish defensive formations and control engagement distances.
Common Valley Mistakes: Many teams spread too thin, failing to concentrate firepower. Others neglect add control while focusing solely on primary objectives, leading to being overwhelmed by accumulating enemies.
Advanced Strategy: Designate specific roles within your fireteam – objective specialists, add clear experts, and major/boss damage dealers. This specialization dramatically improves completion times and survival rates.
Time Optimization: The Valley encounter typically completes in 3-5 minutes for coordinated teams, but inefficient approaches can extend to 8+ minutes, severely impacting your final score and reward potential.
Following your initial Valley engagement, teams transition to the Vault for precision-based obstacle courses that test movement mastery. These segments provide brief respites from combat while rewarding skilled navigation and speed.
The first obstacle course appears after the initial Wheel challenge, while the second follows the subsequent randomized encounter. These courses feature platforming challenges, timing-based obstacles, and occasionally combat elements interspersed with traversal.
Navigation Tips: Utilize movement abilities like Hunter dodge, Titan lift, or Warlock glide to maintain momentum. Certain subclasses offer significant advantages – top-tree Dawnblade’s Icarus Dash or Stasis-based movement techniques can shave valuable seconds off your completion time.
Advanced Techniques: Master sword skating for maximum speed or practice specific jump-cancel techniques to optimize your route through each course.
Team Coordination: While these sections primarily test individual skill, coordinated teams can employ strategies like creating Stasis crystals for platform assistance or using Well of Radiance for safe passage through hazardous areas.
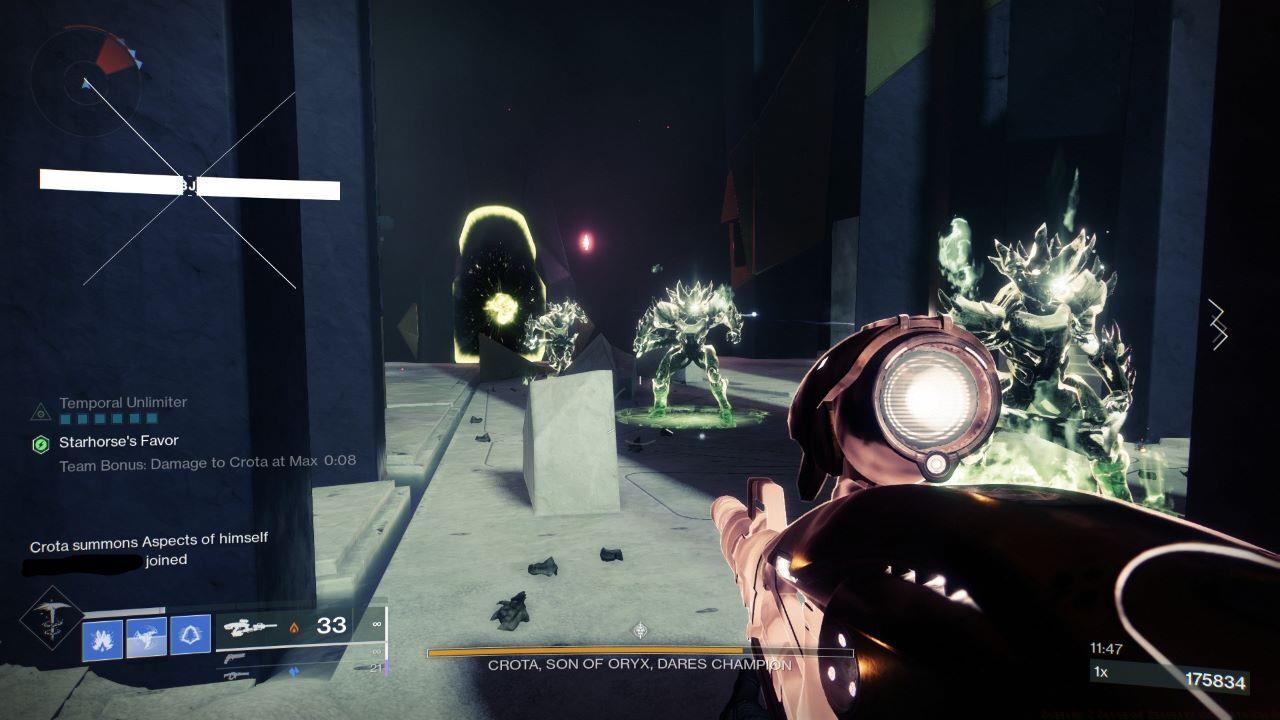
Throughout your Dares of Eternity run, exceptional performance may attract Starhorse’s attention, granting temporary unlimited heavy ammunition. This powerful buff dramatically increases your damage output during critical moments.

Activation Conditions: Starhorse’s Favor typically triggers after rapid objective completion or impressive multi-kills. Maintaining consistent momentum and efficiency increases your chances of receiving this valuable assistance.
Strategic Application: When the buff activates, immediately transition to your heaviest damage weapons. Rocket launchers with cluster bombs or machine guns with sustained fire become devastating tools when ammunition concerns are eliminated.
Common Misuse: Many players waste this limited-time advantage on minor enemies rather than prioritizing high-value targets like champions, bosses, or objective-critical units.
Advanced Timing: Coordinate Starhorse’s Favor with your team’s damage supers for maximum burst potential during boss phases or challenging enemy waves.
The climax of Dares of Eternity pits your fireteam against one of three possible boss adversaries, each requiring distinct approaches and countermeasures.

Boss Rotation Patterns: Each boss employs predictable attack sequences with telltale animations indicating their next move. Learning these patterns enables proactive positioning and damage avoidance.
Damage Phase Optimization: Boss vulnerability windows typically follow specific mechanics – destroying critical weak points, completing objective sequences, or surviving particular attack patterns.
Survival Priority: During complex mechanics, prioritize staying alive over dealing damage. A dead Guardian contributes zero DPS, while a living one can resume damage immediately after mechanics resolve.
Team Composition Advice: Ideal boss-killing teams include at least one Well of Radiance Warlock for safe damage phases, one Tether Hunter for debuff application, and Titans for add control and burst damage.
Common Failure Points: Many teams struggle with proper add management during boss phases, allowing minor enemies to overwhelm them while focusing exclusively on the primary target.
The Lightning Round represents Dares of Eternity’s bonus challenge, offering enhanced rewards for teams demonstrating exceptional speed and efficiency throughout their run.
Activation Requirements: This special round triggers based on your team’s overall performance metrics, including completion speed, objective efficiency, and combat effectiveness.
Execution Strategy: Lightning Rounds typically involve rapid sequential objective completion under extreme time pressure. Designate team members to specific roles beforehand to ensure seamless execution.
Reward Multipliers: Successfully completing the Lightning Round significantly boosts your final score, directly translating to improved loot quality and bounty progression.
Advanced Preparation: Teams aiming for consistent Lightning Round activation should practice specific enemy wave clear techniques and optimize their loadouts for maximum add-clearing potential.
Common Pitfalls: The most frequent failure occurs when teams become disorganized under time pressure, with members working at cross-purposes or failing to communicate objective priorities.
Time Investment vs. Reward: While Lightning Rounds add approximately 2-3 minutes to your run, the reward multiplier typically makes this time investment worthwhile for efficient teams.
Action Checklist
- Assemble a balanced fireteam with complementary subclasses and roles
- Study enemy-specific tactics for all five Wheel of Adversity outcomes
- Practice obstacle course navigation to shave seconds off completion time
- Optimize your loadout for both add clearance and major/boss damage
- Coordinate Starhorse’s Favor activation with team damage phases
- Establish communication protocols for Lightning Round objective prioritization
No reproduction without permission:SeeYouSoon Game Club » Destiny 2 Dares of Eternity Complete Guide Master Destiny 2's Dares of Eternity with expert strategies for all enemy types and boss encounters