TL;DR
- Overkill is now default, freeing up perk slots for more strategic combinations
- Mountaineer provides critical vertical mobility advantages on both Verdansk and Haven’s Hollow
- Bomb Squad counters the explosive meta while Ghost remains essential for stealth play
- Tempered armor plates offer significant survival benefits in late-game scenarios
- Perk selection should adapt to your playstyle and the specific map you’re playing on
Season 1 of Warzone brings transformative changes to the perk ecosystem with Black Ops 7’s full integration. Understanding these modifications is crucial for building competitive loadouts that perform across both Verdansk and the new urban environment of Haven’s Hollow.
The Black Ops 7 update introduces the complete arsenal of BO7 weapons, attachments, and equipment into the battle royale experience. This overhaul extends beyond weaponry to fundamentally reshape how perks function within Warzone’s combat dynamics.
A significant quality-of-life improvement comes with Overkill becoming a baseline feature rather than occupying a precious perk slot. This strategic decision allows players to equip dual primary weapons without sacrificing other essential abilities, opening up new tactical possibilities.
Many previously dominant perks have undergone balancing adjustments. Some fan favorites from previous seasons now offer diminished returns, while previously overlooked options have received substantial buffs to increase their viability in the current meta.
These recommended perk configurations deliver consistent performance whether you’re navigating Verdansk’s varied terrain or engaging in close-quarters combat within Haven’s Hollow’s confined spaces.
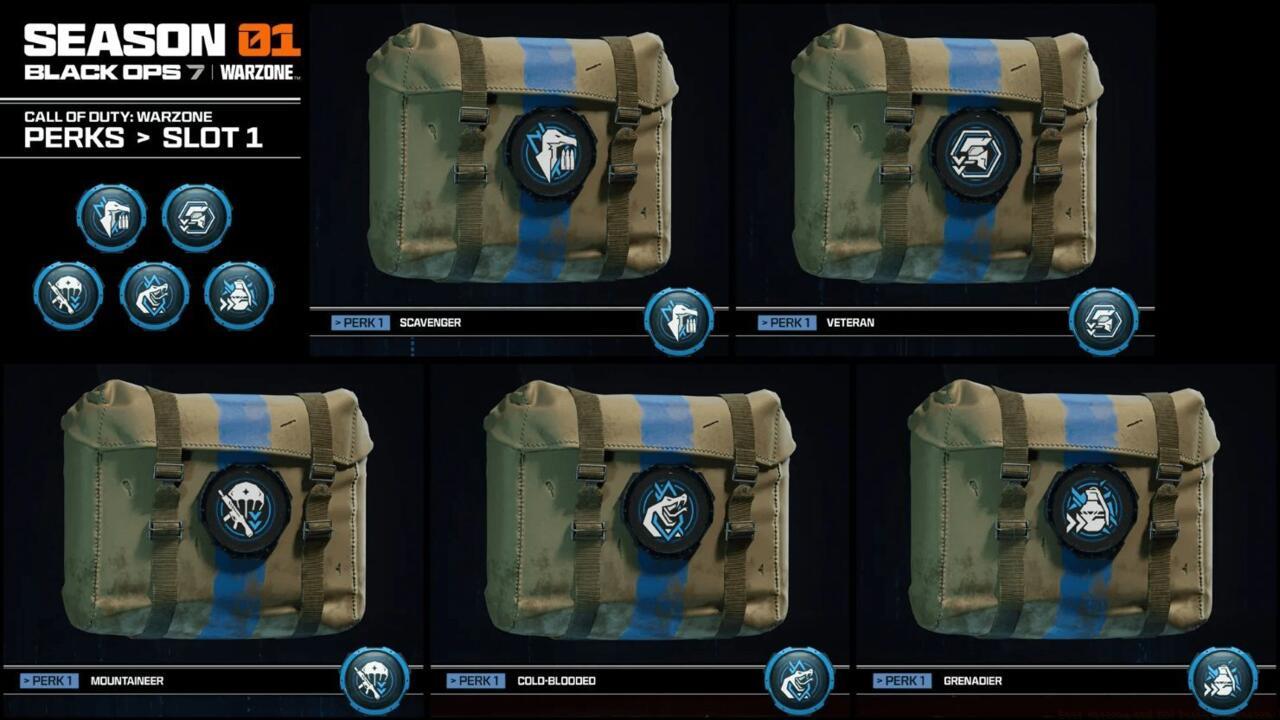
Perk 1 slot
The blue perk slot focuses on tactical advantages that enhance your movement, survivability, and resource management capabilities. Each option serves distinct strategic purposes that can dramatically impact your gameplay effectiveness.
- Mountaineer
- Cold-Blooded
- Grenadier
- Scavenger
- Veteran
Mountaineer transforms your vertical mobility by significantly reducing fall damage thresholds and improving climbing speed. This perk becomes particularly valuable on Haven’s Hollow with its multi-level structures and Verdansk’s elevated positions.
This perk reduces fall damage and improves climbing with the following:
Cold-Blooded provides immunity to thermal optics and AI targeting systems, though its utility has diminished with the reduced prevalence of thermal scopes in the current meta.
Grenadier increases explosive damage resistance by 25% and allows you to carry an additional lethal grenade. This pairs exceptionally well with Bomb Squad for maximum explosive survivability.
Scavenger automatically replenishes ammunition from fallen enemies, crucial for sustained engagements in Resurgence modes where respawns are frequent.
Veteran reduces flinch when taking damage and improves aiming stability, making it ideal for sniper loadouts and long-range engagements.
Pro Tip: Mountaineer’s fall damage reduction creates unexpected rotation opportunities off high ground that catch opponents off-guard.
Red perks concentrate on defensive capabilities and movement enhancements that can determine survival in critical combat situations. The Season 1 changes have elevated previously niche options into mainstream viability.
- Bomb Squad
- Reactive Armor
- Sprinter
- Alertness
- Quick-Fix
Bomb Squad provides 60% explosive damage resistance, making it essential in the current explosive-heavy meta dominated by rocket launchers and grenade spam.
Reactive Armor automatically deploys a protective armor layer when your health drops below 40%, potentially turning losing engagements into surprising reversals.
Sprinter increases tactical sprint duration and reduces its refresh time by 30%, excellent for aggressive players who rely on rapid positioning changes.
Alertness highlights nearby enemies through walls when they sprint or fire weapons within 25 meters, providing crucial intel in close-quarters scenarios.
Quick-Fix immediately begins health regeneration after securing eliminations or completing objectives, perfect for high-kill gameplay and Resurgence modes.
Common Mistake: Many players overlook Reactive Armor’s potential, but it consistently saves players in situations where they would otherwise be eliminated.

Perk slot 2
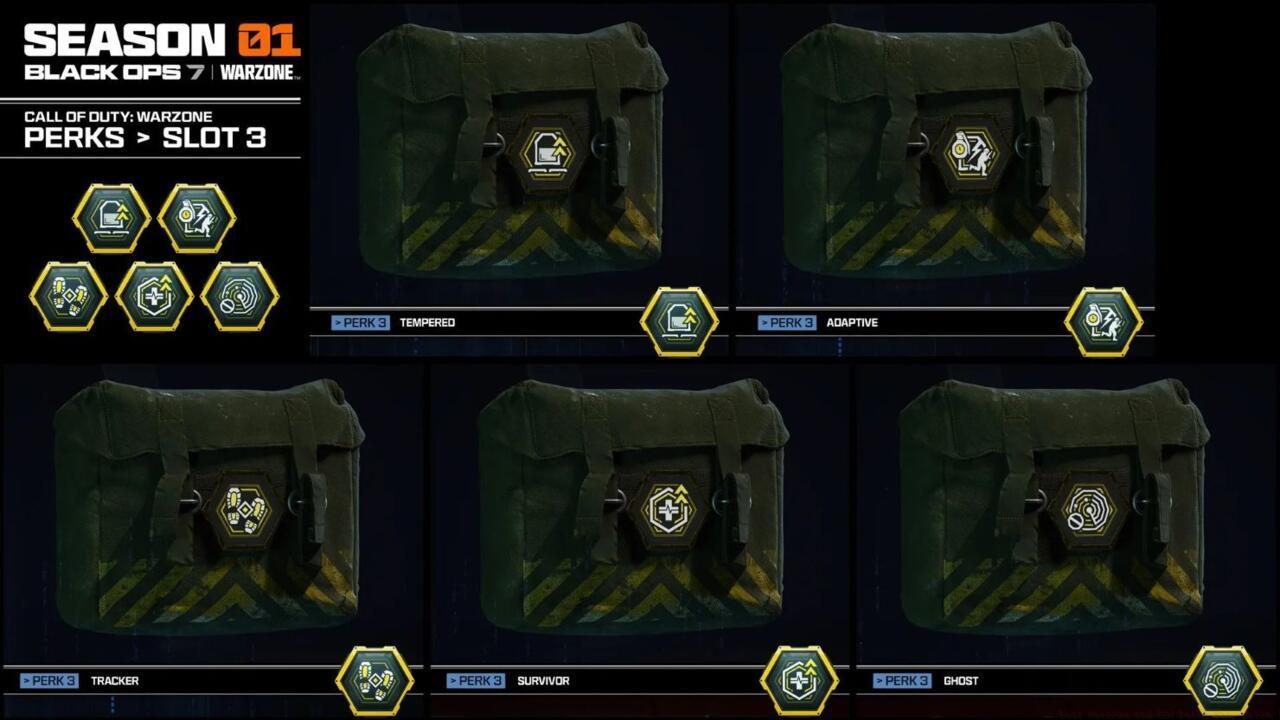
Yellow perks represent the most powerful category, offering abilities that can single-handedly dictate match outcomes. These ultimate perks require careful consideration based on your intended playstyle and team role.
- Adaptive
- Ghost
- Survivor
- Tracker
- Tempered
Adaptive automatically switches between Ghost and Cold-Blooded based on combat situations, providing adaptive countermeasures against multiple threat types.
Ghost remains the premier stealth option, hiding you from UAVs, Heartbeat Sensors, and Radar Drones when moving, though its effectiveness diminishes when stationary.
Survivor allows you to self-revive once per match and marks your killer for revenge, creating dramatic comeback potential.
Tracker reveals enemy footprints and highlights recent enemy movements, invaluable for hunting down opponents in urban environments.
Tempered reduces the armor plate application time by 50% and increases armor protection per plate, significantly boosting survivability during plate breaks.
Advanced Strategy: Combine Tempered with Mountaineer for aggressive high-ground plays that allow rapid re-armoring after taking elevated positions.
Perk slot 3
Building effective perk combinations requires understanding how abilities interact and complement your weapon choices. The removal of Wildcard limitations creates new possibilities for specialized loadouts.
Aggressive Assault Loadout: Combine Mountaineer (Perk 1) with Sprinter (Perk 2) and Tempered (Perk 3) for players who favor high-mobility, close-quarters combat with rapid re-engagement capabilities.
Stealth Sniper Configuration: Use Cold-Blooded (Perk 1), Alertness (Perk 2), and Ghost (Perk 3) for players who prefer long-range engagements and positional superiority.
Resurgence Specialist: Opt for Scavenger (Perk 1), Quick-Fix (Perk 2), and Survivor (Perk 3) for maximum sustainability in modes with frequent respawns.
Counter-Meta Tactics: When facing explosive-heavy teams, combine Grenadier (Perk 1) with Bomb Squad (Perk 2) for 85% combined explosive resistance, dramatically reducing lethality from rocket launchers and grenades.
Time Investment: Mastering these perk combinations requires approximately 5-7 matches of focused practice to understand timing and situational applications.
For comprehensive strategies on weapon selection to complement your perk choices, check out our BF6 Weapons Unlock Guide that details optimal attachments and handling characteristics.
Action Checklist
- Test Mountaineer on Haven’s Hollow to master vertical movement routes
- Experiment with Bomb Squad + Grenadier combination against explosive teams
- Practice Tempered armor plate application during combat breaks
- Create specialized loadouts for Verdansk (long-range) vs Haven’s Hollow (CQC)
No reproduction without permission:SeeYouSoon Game Club » Best Warzone And BO7 Perks For Season 1 Master Warzone's Season 1 perk system with expert loadout strategies for Verdansk and Haven's Hollow